HomePortrait Proportion Practice on Blank Head Outlines Free original lessons
Portrait Proportion Practice on Blank Head Outlines
Learn to place eyes, nose, mouth, and ears on pre-drawn blank head outlines using landmark guides and a simple proportion checklist.
Free lesson
Four exercises
Worked answers
Object Drawing Lessons
This lesson teaches feature placement on blank head outlines, not freehand head construction or shading. You will use faint proportion guide lines and a checklist to position eyes, nose, mouth, and ears at consistent landmarks. All measurements are relative to the printed outline's total height and width; measure your actual outline with a ruler and label any chosen numerical values as hypothetical examples. Work slowly, check each landmark before drawing, and use the rubric to accept valid alternatives rather than a single universal answer.
Practice materials: Printable downloads are not available for this lesson yet. Use the instructions and four exercises below.
Reference illustration
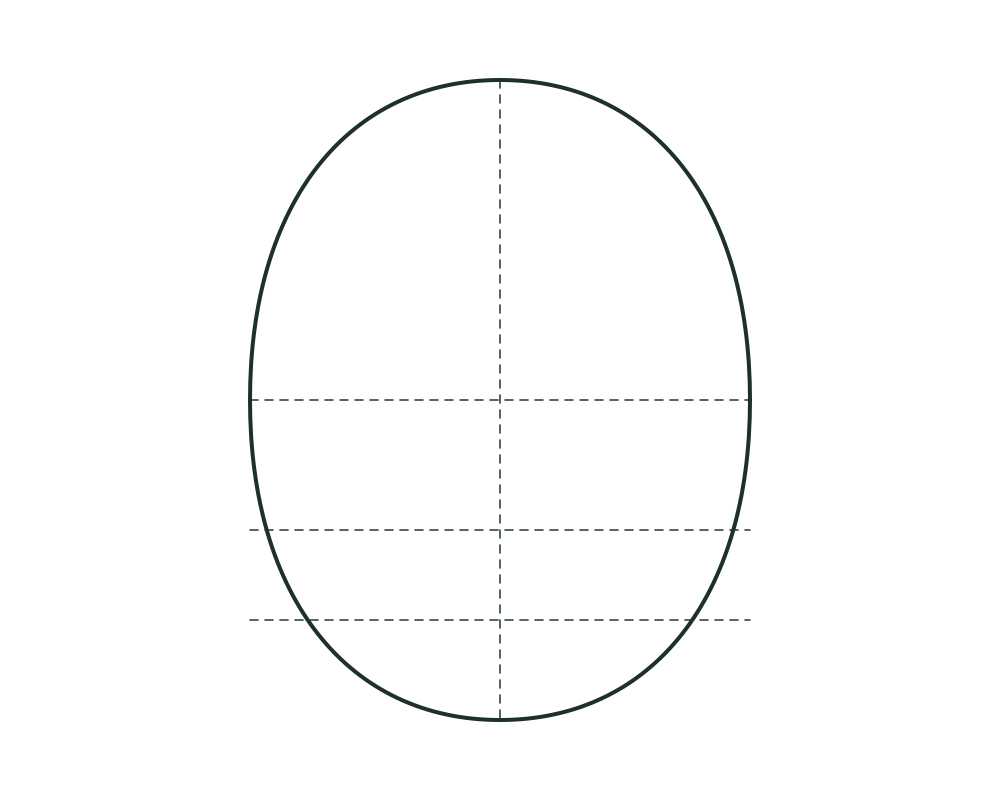
Use the stated measurements and conventions for each exercise.
Reading the blank head outline and its guide lines
A blank head outline is a pre-drawn shape of a head with no facial features. Faint guide lines may show a vertical center line, a horizontal eye line, a nose line, and a mouth line. These lines are landmarks, not strict rules. Your job is to place features so they relate to the outline's width and height in a believable way.
Measure the outline's total height from the top of the head to the chin. Divide that height into equal parts to find the eye line, nose line, and mouth line. For example, if the outline is 120 mm tall, a hypothetical eye line at 60 mm from the top is halfway down. A hypothetical nose line at 80 mm and a mouth line at 95 mm are common starting points, but adjust them to the specific outline you have.
- Place the printed outline on a flat surface and identify the top, chin, left edge, and right edge.
- Measure the total height with a ruler and write it down in millimeters.
- Mark the halfway point for the eye line and check it against any faint guide line already printed.
- Mark the nose line about two-thirds down from the top, then the mouth line about four-fifths down.
- Draw a vertical center line from the top of the head to the chin to guide left-right symmetry.
Placing eyes, nose, mouth, and ears at landmarks
Eyes sit on the eye line. A common starting convention is that each eye is about one-fifth of the head width, with a gap of about one eye width between them, so the eye region spans roughly three-fifths of the head width. Use the center line to keep the eyes level. For a three-quarter outline, the far eye is narrower and closer to the edge, but it still sits on the same eye line. The nose base sits on the nose line, and its width is often taken as about one eye width. The mouth sits on the mouth line, with its width about one-third of the head width. Ears run vertically from about the eye line to the nose line; their front edge sits roughly at the back of the jaw, their top is near the eye line, and their bottom is near the nose line. Check each placement against the checklist before adding detail.
For a three-quarter outline, the nose base still sits on the nose line, but it shifts slightly toward the near side of the face. The mouth stays on the mouth line and keeps its width relationship to the visible face width. The far ear may be partly hidden by the cheek, while the near ear runs from the eye line to the nose line with its front edge near the back of the jaw. Check each placement against the checklist before adding detail.
- Mark the eye line and draw two small dots for the inner corners, spaced about one eye width apart.
- Draw each eye as an oval about one-fifth of the head width, keeping both on the eye line.
- Mark the nose line and draw a small triangle or oval for the nose base, centered on the vertical line.
- Mark the mouth line and draw a shallow curve about one-third of the head width.
- Draw each ear from the eye line down to the nose line, with the front edge near the back of the jaw.
Using the checklist and accepting valid alternatives
The checklist asks four questions: Are the eyes on the eye line and level? Is the nose base on the nose line and centered? Is the mouth on the mouth line and about one-third of the head width? Do the ears run from the eye line to the nose line? If any answer is no, adjust before continuing.
Facial features vary, and so do head outlines. A valid alternative may place the eyes slightly above or below the faint guide line if the outline's shape suggests it, as long as the relationship between features stays consistent. The rubric rewards clear landmark reasoning, not exact copying of one model.
- Read each checklist question aloud and point to the feature it describes.
- Compare the feature's position to the measured landmark, not to a remembered face.
- If a feature is off, erase and redraw it rather than adding shading to hide the error.
- Record one valid alternative you considered and why it still fits the outline.
Worked example
A front-facing blank head outline is 100 mm tall and 70 mm wide at the eye line. The eye line is marked at 50 mm from the top, the nose line at 67 mm, and the mouth line at 80 mm. Place the eyes, nose, mouth, and ears using the landmark rules.
Worked answer
Eyes: two ovals about 14 mm wide (one-fifth of 70 mm) on the 50 mm eye line, spaced about 14 mm apart. Nose: base on the 67 mm nose line, width about 14 mm (about one eye width), centered. Mouth: on the 80 mm mouth line, width about 23 mm (one-third of 70 mm, rounded from 23.3 mm). Ears: each spans vertically from the 50 mm eye line to the 67 mm nose line. Check: eyes level and on the eye line, nose centered on the nose line, mouth on the mouth line, ears between eye and nose lines.
Four practice exercises
Exercise 1
A front-facing blank head outline is 120 mm tall and 80 mm wide at the eye line. The eye line is at 60 mm from the top, the nose line at 80 mm, and the mouth line at 96 mm. State the eye width, nose width, and mouth width using the landmark rules.
Show answer and check
Eye width about 16 mm (one-fifth of 80 mm), nose width about 16 mm (about one eye width), mouth width about 27 mm (one-third of 80 mm, rounded from 26.7 mm).
Why: Divide the head width by five for each eye and the nose, and by three for the mouth. These are hypothetical example values based on the given outline.
Check: Measure the head width, divide by five for each eye and the nose, and divide by three for the mouth. Compare your stated widths to those numbers; small rounding differences such as 26.7 mm to 27 mm are acceptable.
Exercise 2
A three-quarter blank head outline is 90 mm tall. The eye line is at 45 mm, the nose line at 60 mm, and the mouth line at 72 mm. Describe where the far eye should sit relative to the near eye and the center line.
Show answer and check
The far eye sits on the same 45 mm eye line, is narrower than the near eye, and is closer to the outline's edge than to the center line.
Why: In a three-quarter view, the far side of the face compresses, so the far eye is narrower and nearer the edge, but it stays on the eye line.
Check: Confirm the far eye is on the 45 mm line and that its distance to the edge is smaller than its distance to the center line.
Exercise 3
A front-facing outline is 110 mm tall and 75 mm wide. The eye line is at 55 mm, the nose line at 73 mm, and the mouth line at 88 mm. A student draws ears from 55 mm to 88 mm. Identify the mistake and give the corrected ear range.
Show answer and check
The mistake is ending the ears at the mouth line. The corrected range is from the eye line at 55 mm to the nose line at 73 mm.
Why: Ears run from the eye line to the nose line, not to the mouth line. The mouth line is lower and is not an ear landmark.
Check: Compare the drawn ear range to the marked eye and nose lines; the lower end should match the nose line.
Exercise 4
A front-facing outline is 100 mm tall and 60 mm wide. The eye line is at 50 mm, the nose line at 67 mm, and the mouth line at 80 mm. A student places the eyes at 45 mm and the nose at 70 mm. State whether each placement is on its landmark and give one adjustment.
Show answer and check
The eyes are 5 mm above the eye line and the nose is 3 mm below the nose line. Adjust the eyes down to 50 mm and the nose up to 67 mm, or record a valid alternative with a clear reason.
Why: Landmark placement requires matching the measured line. Small deviations can be valid alternatives only if the outline's shape justifies them and the reason is recorded.
Check: Measure each feature's vertical position against the marked lines and confirm the adjustment brings them to the landmarks or that a written reason supports the alternative.
Common mistakes
- Placing the eyes too high or too low because the outline's forehead looks large. Measure the total height and mark the halfway point before drawing; trust the measurement over the first impression.
- Making the nose much wider or narrower than about one eye width (roughly one-fifth of the head width). Measure the head width at the eye line, divide by five, and compare the nose width to that number; adjust if it is far off.
- Drawing ears that stop at the mouth line instead of the nose line. Mark the eye line and nose line first, then draw each ear between those two landmarks.
- Treating the faint guide lines as exact rules and ignoring the outline's shape. Use the guide lines as starting points, then adjust by a few millimeters if the outline clearly calls for it, and note the reason.
Self-check rubric
- Eyes are placed on the eye line and are level with each other.
- Nose base sits on the nose line and is centered on the vertical center line.
- Mouth sits on the mouth line and is about one-third of the head width.
- Ears run from the eye line to the nose line with the front edge near the back of the jaw.
- Measurements are recorded in consistent units and any chosen numbers are labeled as hypothetical examples.
- Valid alternatives are accepted when the landmark reasoning is clear and consistent.
Questions and answers
Do I need to draw the head outline myself?
No. This lesson uses pre-drawn blank head outlines. Freehand head construction is outside this boundary.
How do I measure the outline if I have no ruler?
Use the outline's own total height as one unit. For example, if the eye line is halfway down, mark the midpoint by folding a strip of paper to match the head height and using the fold as a guide. Any consistent unit works as long as you record it and label chosen numbers as hypothetical examples.
Can I use different numerical values?
Yes. Measure your actual printed outline and label any chosen numbers as hypothetical examples. The relationships matter more than the exact millimeters.
How do I know if my placement is valid?
Use the checklist and rubric. A placement is valid if it sits on the correct landmark and keeps consistent spacing, even if it differs slightly from another student's answer.