Free original lessons
Contour Drawing a Deer: Slow-Line Outline Study
Learn contour drawing by tracing a deer outline as one continuous line. Practice blind and slow contour with clear checks and a simple rubric.
Free lesson
Four exercises
Worked answers
Object Drawing Lessons
Contour drawing asks you to describe an edge with a single, deliberate line rather than shading or fur texture. This lesson focuses on the deer's outer silhouette: body, legs, and antler edges as continuous contours. You will use a defined convention for x-height and letter-style variation so that valid alternatives are accepted. All measurements are hypothetical examples; measure your own paper and pencil before starting.
Practice materials: Printable downloads are not available for this lesson yet. Use the instructions and four exercises below.
Reference illustration
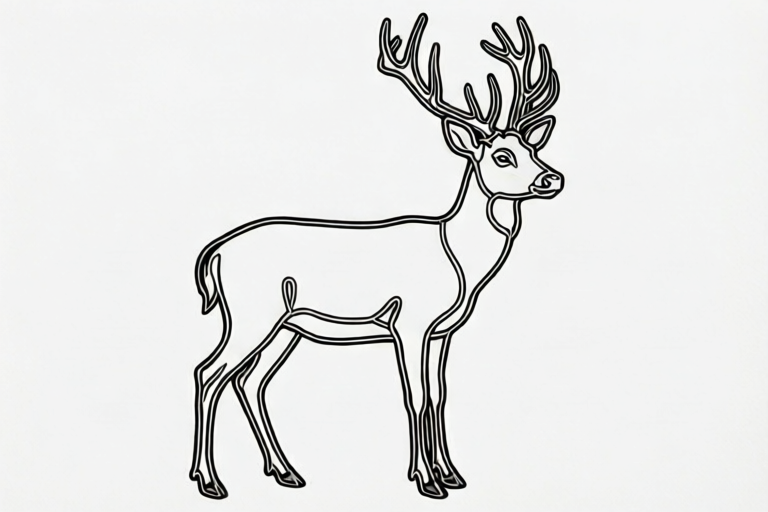
Use the stated measurements and conventions for each exercise.
Set up the contour convention
Define the drawing area with a light pencil border. For this study, x-height means the distance from the baseline to the midline of your lowercase letters when you label the page; it is a reference for consistent spacing, not a rule for the deer. Letter styles vary, so choose one style for labels and keep it consistent.
Use a single continuous line for the deer outline. Lift the pencil only to reposition the paper or to start a new contour segment that is clearly separated, such as an antler edge that does not touch the body. Do not render fur or shading; the boundary excludes antler branching construction, fur rendering, and shading.
- Measure your paper width and height in centimetres; record the values.
- Draw a light border 2 cm from each edge (hypothetical example; adjust to your paper).
- Mark a baseline and a midline for your labels using your chosen letter style.
- Place the deer reference so the body fills about two-thirds of the drawing area.
Blind contour: body and leg edges
Blind contour means you look at the reference, not the paper, while your pencil follows the edge. Start at the nose, move along the head, neck, back, and tail, then return along the belly to the chest. Keep the line continuous and slow.
For the legs, trace each leg as a separate continuous contour from hip to hoof, then back up the other side. If a leg overlaps another, choose one edge and follow it without crossing into the other leg. The goal is observed edge, not perfect proportion.
- Cover your paper with a blank sheet so you cannot see the drawing.
- Place your pencil at the nose and begin the blind contour.
- Say the edge name quietly as you move: head, neck, back, tail, belly.
- After one full body pass, uncover the paper and note where the line drifted.
Slow contour: antler edges and final outline
Slow contour allows you to glance at the paper while keeping the line deliberate. Trace the antler edges as continuous lines without constructing branching. Treat each visible antler edge as a separate contour segment if it does not connect to the body.
Compare your outline to the reference by checking three points: the nose-to-eye distance, the back-to-belly height, and the front-leg-to-back-leg spacing. Use simple arithmetic: if your drawing is 20 cm wide and the reference body is 12 cm wide, the body should occupy about 60 percent of the width. These numbers are hypothetical examples.
- Glance at the paper every 3 to 5 seconds, not continuously.
- Trace the antler edge from base to tip as one line; do not add branches.
- Check the three comparison points and adjust only the line, not the shading.
- Label the contour segments with your chosen letter style.
Worked example
A deer reference is 15 cm wide and 10 cm tall. Your drawing area is 25 cm wide and 20 cm tall. You draw the body contour as one continuous line and the antler edge as one separate line. What percentage of the drawing width does the body occupy, and how many pencil lifts are allowed for these two contours?
Worked answer
The body occupies 15 divided by 25 equals 0.60, or 60 percent of the drawing width. The body contour allows zero lifts; the separate antler edge allows one lift, so two contours allow one lift total.
Four practice exercises
Exercise 1
A deer body contour is drawn as one continuous line from nose to tail and back to chest. The antler edge is drawn as one separate line. Count the pencil lifts for these two contours.
Show answer and check
One lift total.
Why: The body contour is continuous, so zero lifts. The antler edge is a separate contour, so one lift to start it. Total equals one.
Check: Count each time the pencil leaves the paper. Confirm the body line has no breaks and the antler line starts once.
Exercise 2
Your drawing area is 30 cm wide. The deer body is 18 cm wide. What percentage of the drawing width does the body occupy?
Show answer and check
60 percent.
Why: 18 divided by 30 equals 0.60. Multiply by 100 to get 60 percent.
Check: Reverse the arithmetic: 0.60 times 30 cm equals 18 cm.
Exercise 3
You measure a baseline-to-midline distance of 1.5 cm for your labels. You write five labels with the same letter style. What total vertical space do the labels occupy if each label uses one x-height unit?
Show answer and check
7.5 cm.
Why: Five labels times 1.5 cm per label equals 7.5 cm. The values are hypothetical examples.
Check: Add 1.5 five times: 1.5 plus 1.5 plus 1.5 plus 1.5 plus 1.5 equals 7.5.
Exercise 4
A blind contour pass takes 4 minutes for the body and 2 minutes for each of two legs. A slow contour pass takes 3 minutes for the antler edge. What is the total time for one blind pass and one slow pass?
Show answer and check
11 minutes.
Why: Blind pass: 4 plus 2 plus 2 equals 8 minutes. Slow pass: 3 minutes. Total equals 8 plus 3 equals 11 minutes.
Check: Re-add the parts: 4 plus 2 plus 2 plus 3 equals 11.
Common mistakes
- Adding fur texture or shading inside the outline. Erase or ignore interior marks; keep only the outer contour line.
- Constructing antler branches instead of tracing visible edges. Follow each visible antler edge as a continuous line and stop at the tip.
- Lifting the pencil repeatedly during the body contour. Use one continuous line for the body and separate lines only for disconnected edges.
- Using inconsistent label spacing that confuses the x-height reference. Choose one letter style and keep the baseline-to-midline distance consistent.
Self-check rubric
- Contour line is continuous for the body; separate lines only for disconnected edges.
- No fur rendering or shading inside the outline.
- Antler edges are traced as visible contours without branch construction.
- Labels use one consistent letter style with a defined baseline-to-midline x-height.
- Three comparison points are checked and recorded with simple arithmetic.
- Valid alternatives are accepted: different line order, separate antler segments, and varied letter styles.
Questions and answers
Do I need to draw every antler branch?
No. The boundary excludes antler branching construction. Trace only the visible antler edges as continuous lines.
Can I use a ruler for the border?
Yes. Measure your actual paper and label the border distance as a hypothetical example if you choose a number.
What if my blind contour looks distorted?
That is expected. The check is whether you followed the edge slowly, not whether the proportion is perfect.
How do I know my line is continuous?
Count the pencil lifts. For the body contour, aim for zero lifts; for separate antler edges, one lift per disconnected segment is acceptable.