Free original lessons
Peace Sign Contour Drawing: A Continuous-Line Study
Learn to draw a peace-sign hand in contour line using blind and slow contour exercises. Focus on finger and palm edges as continuous lines.
Free lesson
Four exercises
Worked answers
Object Drawing Lessons
Contour drawing asks you to trace the visible edges of a subject with a single, unbroken line, without shading or proportion construction. In this lesson you will apply that method to a peace-sign hand: the index and middle fingers extended upward, the ring and little fingers folded toward the palm, and the thumb resting across them. The goal is not a perfect hand but a careful record of edges. You will use two timed exercises, blind contour and slow contour, and a simple convention for judging line quality. All measurements and timings below are hypothetical examples; adjust them to your own paper and pace.
Practice materials: Printable downloads are not available for this lesson yet. Use the instructions and four exercises below.
Reference illustration
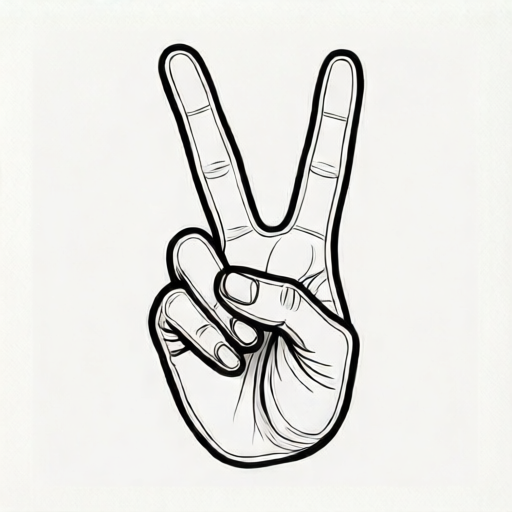
Use the stated measurements and conventions for each exercise.
What contour line means for a hand
A contour line is a line that describes a boundary or a change of direction on a form. For a peace-sign hand, the important contours are the outer silhouette of the palm and wrist, the long edges of the two raised fingers, the folded edges of the ring and little fingers, and the thumb crossing the palm. You are not drawing fingernails, knuckle wrinkles, or skin texture unless they create a clear edge.
Work on plain paper with a pencil or fine pen. Choose one starting point, such as the wrist edge, and keep the drawing tool moving until you have returned to that point or reached the end of the outline. If the line lifts, note where and why; a lifted line is not a failure, but it breaks the contour study.
- Place your hand in the peace-sign position and hold it still against a plain background.
- Choose a starting edge, for example the outer wrist line.
- Move the drawing tool slowly along that edge without lifting it.
- Follow each change of direction: wrist to palm, palm to index finger, index tip, back down, then the middle finger, then the folded fingers and thumb.
- Stop when you return to the starting point or complete the visible outline.
Blind contour: training the eye to lead the hand
In blind contour drawing you look only at the subject, not at the paper, while the tool moves. The purpose is to slow down and record what you actually see rather than what you think a hand should look like. The result will often look distorted; that is expected and useful.
Set a short timer, for example two minutes, as a hypothetical practice duration. Keep your hand in the peace-sign position and let your eye travel along the edges while the pencil follows. Do not correct the drawing afterward. The value is in the attention, not the accuracy.
- Fix your eyes on one edge of the hand.
- Begin moving the pencil as your eye moves.
- Do not look at the paper until the timer stops.
- Follow the outline continuously, including the gap between the raised fingers and the folded fingers.
- When time is up, look at the paper and note where your line changed direction or paused.
Slow contour: refining the continuous line
Slow contour drawing allows you to glance at the paper occasionally, but the line should still be continuous and deliberate. The aim is to make the drawn edge match the observed edge more closely while keeping the same unhurried pace. Use a longer timer, for example five minutes, as a hypothetical example.
Pay attention to the junctions: where the index finger meets the palm, where the middle finger separates from the index, and where the thumb crosses the folded fingers. These junctions are not separate objects; they are places where the contour changes direction. Keep the line moving through them.
- Start at the wrist and move upward along the outer palm edge.
- At the base of the index finger, follow the finger edge to its tip and back down the inner edge.
- Cross the gap to the middle finger and trace its edges in the same way.
- Continue to the folded ring and little fingers, then the thumb.
- Return along the inner wrist edge to close the outline.
A convention for judging contour lines
Because hand shapes vary, there is no single correct outline. Use this convention instead: a contour line is valid if it is continuous, if it follows a visible edge without inventing edges, and if it records changes of direction at junctions. Line weight may vary, and small breaks are acceptable if they are noted. X-height is not relevant here; the convention concerns line continuity and edge fidelity, not letter proportions.
Compare your drawing to the observed hand by tracing the same path with your finger. If your finger can follow the drawn line and arrive at the same junctions in the same order, the contour is coherent.
- Check that the line is continuous from start to finish or that breaks are marked.
- Check that each drawn edge corresponds to a visible edge on the hand.
- Check that junctions appear in the same order as on the hand.
- Check that no shading or proportion construction has been added.
Worked example
Describe a continuous contour path for a peace-sign hand starting at the outer wrist, using the convention above. State where the line changes direction and how you would check it.
Worked answer
Start at the outer wrist edge and move upward along the palm. At the base of the index finger, turn and follow the outer edge to the tip, then return down the inner edge to the gap. Cross the gap to the middle finger, trace its outer and inner edges, and return to the palm. Continue to the folded ring and little fingers, following their visible folded edges, then to the thumb crossing the palm. Return along the inner wrist edge to the starting point. Check by tracing the same path with your finger: the junctions should appear in the same order, and the line should be continuous or have marked breaks.
Four practice exercises
Exercise 1
A student draws a peace-sign hand but lifts the pencil at every knuckle. Using the convention, explain whether this is a valid contour study and what to change.
Show answer and check
It is not a continuous contour study because the line is broken at each knuckle. The student should keep the tool moving through the knuckles and note any uncertainty instead of lifting.
Why: The convention requires continuity or marked breaks. Lifting at every knuckle breaks the contour repeatedly and interrupts the record of edges.
Check: Trace the drawn path with a finger and count the lifts. If lifts occur at every knuckle without being marked, the study does not meet the continuity check.
Exercise 2
Describe the order of edges you would follow for a slow contour starting at the inner wrist and ending at the thumb. Include the two raised fingers and the folded fingers.
Show answer and check
Start at the inner wrist, move to the base of the index finger, trace the inner edge to the tip and back down the outer edge, cross to the middle finger and trace its inner and outer edges, continue to the folded ring and little fingers along their visible folded edges, then follow the thumb across the palm and return to the inner wrist.
Why: The order follows adjacent edges so the line remains continuous and passes through each junction once.
Check: Compare the described order to the hand: each step should share a junction with the next, and the final edge should return to the starting wrist edge.
Exercise 3
A drawing shows the thumb crossing the palm but the line stops at the thumb and restarts at the wrist. Is this acceptable under the convention? Explain.
Show answer and check
It is acceptable only if the break is marked and explained. Otherwise the contour is incomplete because the line does not return to the wrist continuously.
Why: The convention allows marked breaks but requires the contour to be coherent. An unmarked stop and restart leaves a gap in the recorded edge.
Check: Look for a mark or note at the break. If none is present, the drawing fails the continuity check.
Exercise 4
You have two minutes for a blind contour of a peace-sign hand. List three edges you will follow and state one thing you will not do.
Show answer and check
Follow the outer wrist edge, the outer edge of the index finger, and the folded edge of the ring finger. Do not look at the paper until the timer stops.
Why: Blind contour requires looking only at the subject; choosing specific edges keeps the line purposeful within the short time.
Check: After the timer, confirm that the three chosen edges appear in the drawing in the order you followed them, and that you did not glance at the paper during the exercise.
Common mistakes
- Lifting the pencil repeatedly to fix small errors. Keep the line moving and note the error instead of correcting it; continuity is the point of the exercise.
- Drawing a generic hand shape instead of the observed edges. Return your eyes to the actual hand and follow one edge at a time, especially at the folded fingers.
- Adding shading or knuckle wrinkles that are not contour edges. Limit the line to boundaries and clear changes of direction; leave texture out.
- Rushing through the junctions between fingers and palm. Slow down at each junction and trace the change of direction deliberately.
Self-check rubric
- The line is continuous from start to finish, or breaks are marked and explained.
- Each drawn edge corresponds to a visible edge on the observed hand.
- Junctions between fingers, palm, and thumb appear in the same order as on the hand.
- No shading, proportion construction, or invented texture is added.
- The drawing records changes of direction at the folded fingers and thumb.
Questions and answers
Do I need to draw the hand from a photograph?
No. Use your own hand in the peace-sign position or a simple outline you can observe directly. The lesson describes the edges so you can work from life.
How long should each contour drawing take?
The timings given are hypothetical examples. Use a short blind-contour period and a longer slow-contour period that suits your pace.
Is a distorted blind contour drawing wrong?
No. Blind contour is a training exercise; distortion is expected. Judge it by continuity and attention to edges, not by likeness.
Can I use a pen instead of a pencil?
Yes. A pen makes lifting the line more obvious, which can help you keep the contour continuous.