Free original lessons
Contour Face Drawing from a Photograph: A Guided Tracing and Redraw Exercise
Learn to extract a clean contour line from a photo face by tracing jaw, brow, and lip edges, then redrawing the contour freehand with a simple accuracy check.
Free lesson
Four exercises
Worked answers
Object Drawing Lessons
Contour drawing from a photograph means drawing only the visible edges that define a face's shape, without shading or proportion construction. This lesson gives you a repeatable method: choose a clear photo, trace the jaw, brow, and lip edges inside a tracing box, then redraw the same contour in a blank box and compare the two. You will use a simple convention for x-height and letter styles so that valid stylistic alternatives are accepted. All measurements are checkable with a ruler, and any numerical values are hypothetical examples to be replaced by your own equipment measurements.
Practice materials: Printable downloads are not available for this lesson yet. Use the instructions and four exercises below.
Reference illustration
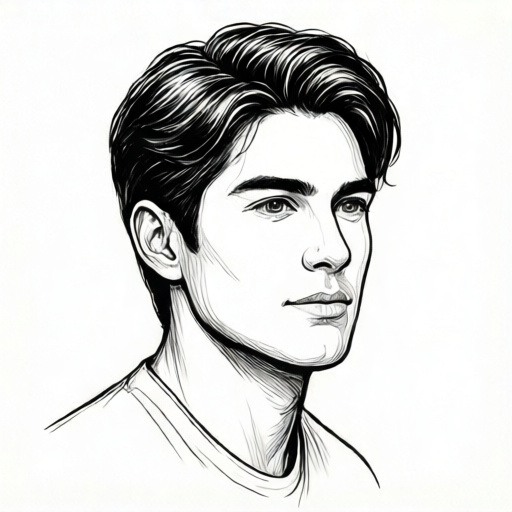
Use the stated measurements and conventions for each exercise.
Choose and prepare the photo reference
Pick a photo where the face is evenly lit and the jawline, brow ridge, and lip edges are visible without heavy shadow. Avoid extreme angles or hair covering the jaw. Print the photo at a size that fits inside your tracing box, or place it under a clear sheet if tracing directly is allowed by your setup.
Define the tracing box as a rectangle around the face from the top of the brow to the bottom of the chin, with a small margin. Measure the box width and height with a ruler and write those numbers beside the box. These are your actual measurements; any example numbers in this lesson are hypothetical and must be replaced by your own.
- Place the photo so the face fills the tracing box with at least one finger-width margin on each side.
- Measure the box width and height in millimetres and record them.
- Mark the midline of the face lightly with a pencil if it helps you locate the brow and lip edges.
Trace the contour edges in the tracing box
Trace only the edges that separate the face from the background or from a major feature: the jaw from ear to chin, the brow ridge above the eyes, and the outer edges of the lips. Do not trace eyelashes, nostrils, or shading gradients. Keep the line continuous where possible and lift the pencil only when the edge disappears.
Use a single line weight. If an edge is ambiguous, choose the most stable visible boundary and note it with a small tick mark outside the box. The goal is a contour that another person could follow without seeing the photo.
- Start at the jaw near one ear and follow the edge to the chin, then continue to the other ear.
- Trace the brow ridge from the outer corner of one eye to the outer corner of the other, following the visible upper edge.
- Trace the outer lip edge from one corner to the other, keeping the line on the boundary between lip and skin.
- Check that every traced line stays inside the tracing box and does not cross itself.
Redraw the contour in the blank box
Place the blank redraw box beside the tracing box. Without tracing, redraw the same jaw, brow, and lip contour freehand. Use the same box dimensions so the two drawings can be compared directly. Work slowly and keep the line continuous.
Apply the x-height convention: for any letter-like mark or label you add, x-height is measured from the baseline to the midline of the letter body. Letter styles vary, so accept any legible style as long as the baseline and midline are marked consistently. This convention applies to labels, not to the face contour itself.
- Draw the jaw contour first, then the brow, then the lips, matching the order used in tracing.
- Keep the redraw inside the same box dimensions as the tracing box.
- Label the box with a small letter using the x-height convention if a label is required.
- Compare the redraw to the tracing by placing them side by side and checking three landmark points: chin tip, brow centre, and one lip corner.
Check accuracy with simple arithmetic
Measure the distance between the chin tip and the brow centre in both the tracing and the redraw. Subtract the smaller value from the larger to get the difference. If the difference is within a tolerance you set, for example 3 mm as a hypothetical example, the redraw is consistent. Repeat for the lip corner to chin tip distance.
Record each measurement in a small table. Use the same units throughout, such as millimetres. If a measurement differs by more than your tolerance, adjust the redraw at that landmark and measure again. This check is arithmetic and does not require any special equipment beyond a ruler.
- Measure chin tip to brow centre in the tracing and in the redraw.
- Subtract the smaller from the larger and record the difference.
- Repeat for lip corner to chin tip.
- If any difference exceeds your chosen tolerance, revise the redraw and remeasure.
Worked example
A tracing box measures 80 mm wide and 100 mm tall. In the tracing, chin tip to brow centre is 62 mm and lip corner to chin tip is 28 mm. In the redraw, the same distances are 59 mm and 30 mm. Using a hypothetical tolerance of 3 mm, is the redraw consistent?
Worked answer
Chin-to-brow difference is 62 minus 59 equals 3 mm, which equals the tolerance. Lip-to-chin difference is 30 minus 28 equals 2 mm, which is within tolerance. The redraw is consistent at both landmarks.
Four practice exercises
Exercise 1
A tracing box is 70 mm wide and 90 mm tall. In the tracing, chin tip to brow centre is 55 mm. In the redraw it is 52 mm. What is the difference, and is it within a hypothetical tolerance of 3 mm?
Show answer and check
The difference is 55 minus 52 equals 3 mm, which is within the hypothetical 3 mm tolerance.
Why: Subtract the smaller measurement from the larger to get the absolute difference, then compare to the stated tolerance.
Check: Re-measure both distances with a ruler and confirm the subtraction: 55 minus 52 equals 3.
Exercise 2
A tracing box is 60 mm wide and 80 mm tall. Lip corner to chin tip is 24 mm in the tracing and 28 mm in the redraw. What is the difference, and does it exceed a hypothetical tolerance of 3 mm?
Show answer and check
The difference is 28 minus 24 equals 4 mm, which exceeds the hypothetical 3 mm tolerance.
Why: Use absolute difference and compare to tolerance; 4 is greater than 3, so the redraw needs adjustment at that landmark.
Check: Measure both lip-to-chin distances again and confirm 28 minus 24 equals 4.
Exercise 3
You trace a jaw edge that is partly hidden by hair. Describe what you should draw and what you should not draw, using the contour-only boundary.
Show answer and check
Draw only the visible jaw edge up to where the hair begins, and stop. Do not invent the hidden portion or trace the hair as if it were the jaw.
Why: The boundary excludes invented edges; contour extraction uses only visible boundaries between face and background or between lip and skin.
Check: Compare your traced line to the photo: every part of the line should sit on a visible edge, with no segment crossing hair or shadow.
Exercise 4
A redraw uses a label letter with a baseline at 0 mm and a midline at 4 mm. A second label uses a baseline at 10 mm and a midline at 14 mm. Are both labels consistent with the x-height convention, and what is the x-height in each?
Show answer and check
Yes, both are consistent. The x-height is 4 mm in each label because the midline minus baseline equals 4 mm in both cases.
Why: The convention defines x-height as baseline to midline; letter style may vary, but the measured distance must be consistent for each label.
Check: Subtract baseline from midline for each label: 4 minus 0 equals 4, and 14 minus 10 equals 4.
Common mistakes
- Tracing shading gradients instead of contour edges. Trace only the boundary between face and background or between lip and skin; ignore soft shadows.
- Using different box sizes for tracing and redraw. Measure both boxes with a ruler and make them identical before drawing.
- Adding letter labels without a consistent baseline and midline. Apply the x-height convention: mark baseline and midline for every label, and accept any legible letter style.
- Comparing drawings by eye only. Measure chin-to-brow and lip-to-chin distances in both drawings and subtract to get a checkable difference.
Self-check rubric
- Contour includes jaw, brow, and lip edges only, with no shading or extra features.
- Tracing box and redraw box have identical measured dimensions recorded beside them.
- Redraw is freehand and placed in the blank box without tracing.
- Two landmark distances are measured in both drawings and differences are calculated.
- Labels, if used, follow the x-height convention with baseline and midline marked; letter style may vary.
- All numerical values are labelled as hypothetical examples or replaced by actual measurements.
Questions and answers
Do I need to draw the whole face?
No. This lesson covers only the jaw, brow, and lip contour edges. Eyes, nose details, and shading are outside the boundary.
What if my photo has hair over the jaw?
Choose a different photo or move the tracing box so the jaw edge is visible. Do not invent edges that are hidden.
How do I know if my redraw is accurate enough?
Measure two landmark distances in both drawings, subtract the smaller from the larger, and compare the difference to a tolerance you set, such as 3 mm as a hypothetical example.
Can I use any letter style for labels?
Yes. The x-height convention requires a marked baseline and midline, but letter styles vary and any legible style is acceptable.