Free original lessons
Cupcake Contour Drawing: Blind and Slow Line Practice
Learn blind and slow contour line drawing with a cupcake. Focus on wrapper ridges and frosting swirls, then reflect on which edges were hardest to follow.
Free lesson
Four exercises
Worked answers
Object Drawing Lessons
Contour drawing trains your eye to follow an edge while your hand records that path. This lesson uses a cupcake because it combines two contrasting edge types: the regular, repeating ridges of a paper wrapper and the irregular, overlapping swirls of frosting. You will first draw blind contour, looking only at the cupcake and not at your paper, then slow contour, glancing occasionally but prioritizing careful observation. The goal is not a polished illustration but a truthful record of observed edges. Work on plain paper with a pencil or fine-tipped pen. Keep the cupcake at eye level and at a comfortable distance so you can see both wrapper and frosting clearly. Before starting, decide on a simple convention: treat every visible change in direction as a separate edge, and draw each edge as one continuous line without lifting the tool unless the edge truly breaks. This convention is yours to define; valid alternatives include lifting the tool at sharp corners or using a slightly wavy line to represent soft frosting. The rubric below accepts any consistent, observable convention.
Practice materials: Printable downloads are not available for this lesson yet. Use the instructions and four exercises below.
Reference illustration
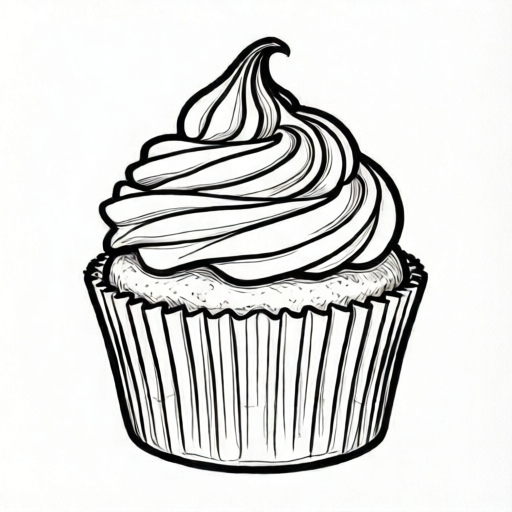
Use the stated measurements and conventions for each exercise.
Set up and define your edge convention
Place the cupcake on a plain surface with a simple background. Sit so your drawing hand can move freely and your eyes can see the cupcake without turning your head far. Choose a tool that makes a clear, consistent line. Before drawing, state your convention aloud or in a note: for example, one continuous line per visible edge, no lifting except at true breaks, and no shading or cross-contour marks. This lesson excludes cross-contour, symmetry completion, and shading, so keep the drawing to outline edges only.
Measure your actual paper and tool if you plan to compare line lengths or spacing. Any numerical values in this lesson are hypothetical examples, not standards. For instance, a hypothetical practice frame might be 12 cm by 12 cm, but you should measure your own paper and label your chosen size as your own working value.
- Place the cupcake at eye level and choose a starting edge, such as the top rim of the wrapper.
- Write your edge convention in one sentence before drawing.
- Measure your paper and note the size you will use as a working value.
- Keep the tool lightly touching the paper and avoid shading or cross-contour marks.
Blind contour: follow without looking
Blind contour means you look only at the cupcake while drawing. Do not glance at the paper until the drawing is finished. Move your eye slowly along the edge and let your hand follow at the same pace. If your eye stops, your hand stops. This exercise is about observation, not accuracy. Expect proportions to be distorted; that is normal and useful because it shows where your attention drifted.
Start at the wrapper rim and follow the ridges downward. Each ridge is a short edge that meets the next at a fold. Treat each fold as a change in direction and keep the line continuous. When you reach the bottom of the wrapper, move to the frosting edge. Frosting swirls overlap, so decide whether you will follow the nearest visible edge or the outer silhouette. Either choice is valid if you state it in your convention and apply it consistently.
- Begin at the wrapper rim and follow one ridge to the base without looking at the paper.
- At each fold, change direction but keep the line continuous.
- Move to the frosting edge and follow the nearest visible swirl or the outer silhouette, according to your convention.
- Finish the drawing without glancing at the paper, then compare the result to the cupcake.
Slow contour: observe, then record
Slow contour allows brief glances at the paper, but the priority is still observation. Work at roughly half your normal drawing speed. Before each segment, look at the cupcake for several seconds, then draw that segment while mostly looking back at the cupcake. Glance at the paper only to place the next starting point. Keep the same edge convention you used for blind contour so the two drawings can be compared fairly.
Pay special attention to the transition between wrapper and frosting. The wrapper edge is regular and repeating; the frosting edge is irregular and overlapping. Notice where the frosting overhangs the wrapper and where the wrapper rim is visible behind it. Record those overlaps as separate edges rather than merging them into one outline. This is the core of a food contour study: the boundary between materials is often the most informative edge.
- Look at the cupcake for several seconds before drawing each segment.
- Draw the segment while mostly looking at the cupcake, glancing at the paper only to reposition.
- Record overlaps between frosting and wrapper as separate edges.
- Keep the same convention as the blind contour drawing and label both drawings with the date and your convention note.
Reflect on which edges were hardest
After both drawings, compare them side by side. Identify two or three specific edges that were hardest to follow. Common candidates are the tight folds at the wrapper base and the inner curves where frosting swirls meet. Write a short reflection that names the edge, describes what made it hard, and states what you would observe more carefully next time. This reflection is part of the exercise, not an afterthought.
Use the rubric to evaluate your process rather than a single correct appearance. Because letter styles and hand pressure vary, the rubric rewards consistent observation, a stated convention, and specific reflection. Valid alternatives include drawing the frosting silhouette instead of individual swirls, or lifting the tool at sharp wrapper folds, provided the choice is stated and applied consistently.
- Place the blind and slow drawings side by side.
- Name two or three specific edges that were hardest to follow.
- Write one sentence for each edge explaining what made it hard.
- State one observation change you will try in a future contour study.
Worked example
A student draws a cupcake in blind contour, starting at the wrapper rim and following ridges downward. At the frosting, the student follows the outer silhouette instead of individual swirls. The drawing is distorted, but the wrapper ridges are continuous and the frosting silhouette is unbroken. The student then draws a slow contour using the same convention and records two overlaps where frosting overhangs the wrapper. In reflection, the student names the wrapper base folds as hardest to follow.
Worked answer
This is a valid submission. The student stated a convention, applied it consistently, recorded overlaps as separate edges, and reflected on specific hard edges. The distortion in the blind drawing is acceptable because the exercise prioritizes observation. The rubric would award full credit for convention, consistency, overlap recording, and specific reflection.
Four practice exercises
Exercise 1
Blind contour of a cupcake wrapper only. Start at the top rim and follow each visible ridge to the base without looking at the paper. Use one continuous line per ridge and change direction at each fold. Do not draw frosting.
Show answer and check
A single-line record of visible wrapper ridges with direction changes at folds, drawn without looking at the paper. Distortion is acceptable.
Why: The exercise isolates the regular, repeating edge type so you can practice continuous observation without the distraction of frosting overlaps.
Check: Confirm the drawing was made without looking at the paper, that each visible ridge is represented by a continuous line, and that folds show direction changes. Check that no frosting or shading appears.
Exercise 2
Slow contour of the frosting only. Follow the nearest visible swirl edge, glancing at the paper only to reposition. Record at least one place where two frosting swirls overlap as two separate edges.
Show answer and check
A slow contour drawing of frosting swirls with at least one overlap recorded as two separate edges, using brief glances at the paper.
Why: Frosting edges are irregular and overlapping, so this exercise trains you to separate nearby edges rather than merging them into one silhouette.
Check: Look for at least one overlap drawn as two distinct edges. Confirm the drawing includes only frosting edges and that glances at the paper were brief and used only for repositioning.
Exercise 3
Combined slow contour of wrapper and frosting. State your convention in one sentence, then draw the full cupcake. Record the boundary where frosting overhangs the wrapper as separate edges. Do not add shading.
Show answer and check
A full cupcake contour with a stated convention, separate edges at the frosting-wrapper boundary, and no shading.
Why: The boundary between materials is the most informative edge in a food contour study, so this exercise practices recording that transition explicitly.
Check: Read the convention sentence and confirm it matches the drawing. Check that the frosting-wrapper boundary is drawn as separate edges and that no shading or cross-contour marks appear.
Exercise 4
Reflection task. Compare your blind and slow contour drawings. Name two specific edges that were hardest to follow, one from the wrapper and one from the frosting. For each, write one sentence explaining what made it hard and one sentence stating what you would observe more carefully next time.
Show answer and check
A short reflection naming one wrapper edge and one frosting edge, with an explanation and a next-step observation for each.
Why: Naming specific edges and explaining difficulty turns the drawing experience into transferable observation skill.
Check: Confirm two edges are named, one wrapper and one frosting. Check that each has an explanation of difficulty and a specific next-step observation. Accept any valid edge choice.
Common mistakes
- Looking at the paper during blind contour. Cover the paper with a blank sheet or turn it face down until the drawing is finished, then reveal it.
- Merging frosting and wrapper into one outline. Treat the overlap as two separate edges and record the visible boundary between materials.
- Drawing too fast and skipping folds. Slow your eye to the pace of your hand and stop when your eye stops.
- Adding shading or cross-contour marks. Keep only outline edges and state in your convention that shading and cross-contour are excluded.
Self-check rubric
- States an edge convention in one sentence before drawing.
- Applies the same convention to both blind and slow contour drawings.
- Keeps blind contour free of paper-looking until the drawing is finished.
- Records at least one overlap between frosting and wrapper as separate edges.
- Excludes shading and cross-contour marks.
- Names two or three specific hard edges in the reflection.
- Explains what made each named edge hard to follow.
- Accepts valid alternatives such as silhouette versus swirl following, or lifting at folds, if stated and consistent.
Questions and answers
Do I have to draw every wrapper ridge?
No. Follow the ridges that are clearly visible from your viewpoint. If a ridge is hidden, do not invent it. State in your convention whether you draw only visible edges or also implied edges.
Can I lift my tool during slow contour?
Yes, if your convention allows it. Many people lift at sharp wrapper folds. The key is to state the rule and apply it consistently across both drawings.
How long should each drawing take?
There is no fixed time. Blind contour often takes 3 to 5 minutes; slow contour may take 8 to 12 minutes. These are hypothetical examples, not standards. Adjust to your pace and note your actual time if you compare sessions.
What if my blind contour looks nothing like a cupcake?
That is expected. Blind contour is an observation exercise, not an accuracy test. Evaluate whether your eye followed edges carefully, not whether the result resembles a cupcake.