Free original lessons
Blind-Contour Drawing of a Lamp: A Focused Line Exercise
Learn blind-contour line drawing using a table lamp. Practice slow looking, continuous line, and honest comparison without shading or proportion pressure.
Free lesson
Four exercises
Worked answers
Object Drawing Lessons
Blind-contour drawing trains your hand to follow your eyes without looking at the paper. In this lesson you will draw a table lamp as a single continuous line while looking only at the lamp. The goal is not a polished picture but a record of sustained attention. You will use a simple convention for judging line quality and compare your drawing to the lamp afterward. No shading, wiring detail, or proportion accuracy is required. Work at a comfortable pace and keep your pencil moving.
Practice materials: Printable downloads are not available for this lesson yet. Use the instructions and four exercises below.
Reference illustration
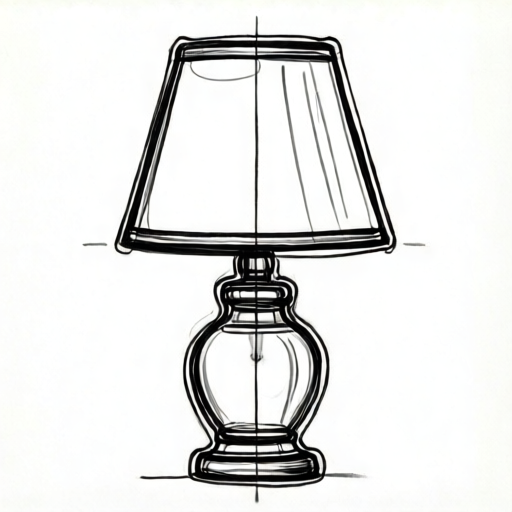
Use the stated measurements and conventions for each exercise.
Set up and define the convention
Place a table lamp where you can see it clearly without moving your head much. Tape one sheet of paper to the table so it cannot slide. Use a pencil or pen that moves smoothly. Decide a start point on the lamp, such as the top edge of the shade, and a finish point, such as the base edge. Keep your eyes on the lamp for the whole drawing; do not glance at the paper until you finish.
For this lesson, a blind contour is one continuous line that never lifts from the paper. If your hand stops, pause the line but keep the pencil touching the paper. The line may cross itself. The convention for judging the result is simple: a line is faithful when its direction changes match changes you observed on the lamp, not when the overall shape looks correct. Letter styles and handwriting vary, so line speed and pressure are personal; the rubric rewards observed direction changes, not neatness.
- Tape the paper and choose a start point on the lamp.
- Rest your pencil on the paper and fix your eyes on the start point.
- Move the pencil only as fast as your eyes move along the lamp edge.
- Follow each visible edge, including the shade rim, stem, and base, without looking down.
- When you reach the finish point, stop and only then look at the paper.
Draw the lamp as one continuous line
Begin at the top of the shade. Let your eyes crawl along the rim, then down the side of the shade. When your eyes reach the stem, let the pencil change direction. Continue around the base and back up if you wish. There is no required order after the first edge, but the line must stay continuous. If you lose track, pause with the pencil touching the paper and find the same point on the lamp again.
Keep your hand relaxed. A common error is speeding up when the edge is simple, which creates long straight lines that ignore small curves. Slow down at corners and where the shade meets the stem. You may draw the lamp from any angle. The drawing will look strange; that is expected. The value is in the looking, not the likeness.
- Start at the shade rim and move slowly along its top edge.
- Follow the shade side downward to the stem.
- Trace the stem to the base, then around the base edge.
- If you return to a previous point, cross the line and continue.
- Finish at the base edge, then look at the paper for the first time.
Compare and annotate without correcting
After you look at the paper, place your drawing beside the lamp or beside a reference image of the same lamp. Do not erase or redraw. Instead, mark three places where your line changed direction and compare each to the lamp. Use a second color or a light check mark. The comparison box in the planned printable will hold the drawing and the reference side by side, but you can do this on any two sheets.
Write one sentence for each marked place: what you saw on the lamp and what your line did. For example, you might note that the shade rim curved downward but your line went straight. This annotation is the learning record. Keep the drawing; repeating the exercise later with the same lamp shows changes in attention, not necessarily in skill.
- Place the drawing next to the lamp or reference.
- Mark three direction changes on your drawing.
- Compare each mark to the corresponding lamp edge.
- Write one sentence per mark describing the match or mismatch.
- Keep the annotated drawing for a later repeat.
Worked example
A learner sets a lamp with a conical shade, a straight stem, and a round base. They start at the top rim, follow the shade side down, trace the stem, and go around the base. They finish at the base edge and then look at the paper. The line is wobbly and the shade looks too wide. They mark three direction changes: the rim curve, the shade-to-stem corner, and the base curve. They write that the rim curve was followed but the shade-to-stem corner was rounded off.
Worked answer
The drawing is a valid blind contour because the line stayed continuous and the learner looked only at the lamp until the finish point. The annotation identifies one match and one mismatch. No correction is needed; the record is the point.
Four practice exercises
Exercise 1
Draw a lamp with a rectangular shade and a square base as one continuous blind contour. Start at the top-left corner of the shade and finish at the bottom-right corner of the base. Do not look at the paper until you finish. Then mark two direction changes and annotate them.
Show answer and check
A continuous line that follows the shade edges, the stem, and the base edges without lifting. The line may cross itself. Two marked direction changes, such as the shade corner and the base corner, each with a short annotation.
Why: The rectangular shade and square base provide clear corners that are easy to compare. Starting and finishing at named corners makes the continuous line checkable.
Check: Confirm the line never lifts by tracing it with a finger from start to finish. Confirm two marks and two annotations. Confirm no shading or wiring detail.
Exercise 2
Draw the same lamp twice on one sheet: first a blind contour starting at the shade rim, then a second blind contour starting at the base edge. Keep both lines continuous and do not look between them. After both, mark one place where the two lines differ in direction and write one sentence explaining which matched the lamp better.
Show answer and check
Two separate continuous lines on one sheet, each with a different start point. One marked difference and one sentence comparing the two lines to the lamp.
Why: Changing the start point tests whether attention is on the lamp rather than on a remembered shape. The comparison sentence practices honest annotation.
Check: Check that each line is continuous and that the start points differ. Check the marked difference and the sentence. No erasing is required or allowed.
Exercise 3
Set a lamp with a curved shade and a thin stem. Draw a blind contour that includes the shade curve, the stem, and the base. Use a pencil and keep it touching the paper for the whole drawing. After looking, mark the place where your line changed direction most sharply and state whether that change matched a corner or a curve on the lamp.
Show answer and check
A continuous line covering shade, stem, and base. One marked sharp direction change with a statement identifying it as a corner or curve match or mismatch.
Why: A curved shade and thin stem create both smooth and sharp changes, which tests whether the learner is following observed edges rather than assuming shapes.
Check: Trace the line for continuity. Check the marked change and the corner-or-curve statement. Confirm the pencil stayed on the paper by the absence of separate line starts.
Exercise 4
Draw a blind contour of a lamp from a side view where the shade hides part of the stem. Start at the visible top of the shade and finish at the visible base edge. Do not draw the hidden part of the stem. After looking, mark one place where you had to pause because the edge disappeared and write what you did.
Show answer and check
A continuous line that follows only visible edges and does not invent the hidden stem. One marked pause with a sentence describing the pause and the continuation.
Why: Occlusion forces the learner to decide what is visible. The exercise tests honest observation and continuous line control at a gap.
Check: Check that no hidden stem is drawn. Check the marked pause and sentence. Trace the line to confirm it remains continuous across the gap.
Common mistakes
- Looking at the paper during the drawing. Tape the paper and turn your head slightly away from it. Keep your eyes on the lamp and pause the pencil if you feel lost.
- Lifting the pencil to start a new part of the lamp. Keep the pencil touching the paper. If you need to move to another edge, pause and then continue the same line, even if it crosses itself.
- Rushing along straight edges and ignoring small curves. Match pencil speed to eye speed. Slow down at corners and where the shade meets the stem.
- Erasing or redrawing after the first look. Do not correct the drawing. Mark three direction changes and annotate them instead.
Self-check rubric
- Line is continuous from start point to finish point, with no lifting.
- Eyes stayed on the lamp until the finish point; this is self-reported and checked by the absence of corrective redrawing.
- At least three direction changes are marked and compared to the lamp.
- Each marked change has a one-sentence annotation describing what was seen and what the line did.
- No shading, wiring detail, or proportion correction is added.
- Valid alternatives: any start point, any order after the first edge, any line speed, and any handwriting style are accepted if the continuous-line and no-looking rules are met.
Questions and answers
May I look at the paper at all?
Not during the drawing. Look only after you reach your chosen finish point. The exercise depends on that restriction.
Does the drawing need to look like the lamp?
No. The lesson excludes proportion accuracy. You are judged on observed direction changes and continuous attention, not likeness.
Can I draw the lamp from a photo instead of a real lamp?
Yes, if the photo shows clear edges. A real lamp is preferred because you can move your head slightly to see edges, but a printed reference works.
How long should one drawing take?
There is no fixed time. A slow pass that follows the shade, stem, and base often takes several minutes. Stop when you reach your finish point.