Free original lessons
Contour Bottle Drawing: Neck, Shoulder, and Base Edges
Learn contour-line drawing of bottles by tracing neck, shoulder, and base edge transitions with single-line and interior-edge studies.
Free lesson
Four exercises
Worked answers
Object Drawing Lessons
Contour drawing records the visible edges of a form with a continuous line, without shading. For bottles, the key transitions are the neck-to-shoulder curve and the shoulder-to-base edge. This lesson defines a simple convention: x-height is measured from baseline to midline of lowercase letters, and letter styles vary, so line placement is judged by edge logic rather than a single universal shape. You will compare silhouette references, label transition zones, and draw both a single outer contour and interior-edge contours. All measurements use the same unit, and any numerical values are hypothetical examples to be checked against your actual equipment.
Practice materials: Printable downloads are not available for this lesson yet. Use the instructions and four exercises below.
Reference illustration
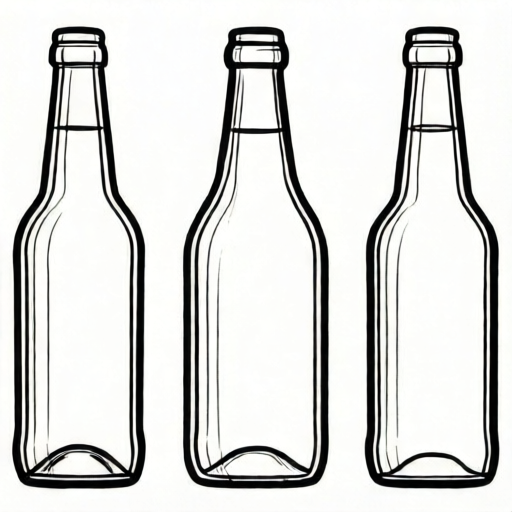
Use the stated measurements and conventions for each exercise.
Reading Bottle Edges as Contour Lines
A contour line follows the boundary where the bottle surface turns away from view. The neck is the narrow upper cylinder; the shoulder is the curved transition from neck to body; the base edge is the bottom boundary where the body meets the base surface. Draw one continuous line for the outer silhouette, then add interior edges only where a real change of surface direction is visible, such as a molded ridge or the far side of the neck opening.
Use a consistent unit for all checks. For example, if the bottle body width is 60 units, the neck width might be 24 units and the shoulder height 18 units; these are hypothetical examples, not standards. Measure your actual bottle or reference with a ruler and record the values before drawing. The horizontal inset per side is (60-24)/2 = 18 units. The horizontal inset is independent of the shoulder height; in this example both happen to be 18 units, but they are separate measurements. For a smooth shoulder, the curve should meet the neck and body lines tangentially rather than as a straight diagonal; a hard shoulder is drawn as a justified sharp step instead.
- Place the bottle upright and mark a baseline and a midline on your paper; use the x-height convention only as a height reference for placing contour lines.
- Lightly mark the neck width, shoulder start, body width, and base edge height in the same unit.
- Draw the outer contour as one continuous line from base edge to neck opening and back down.
- Add interior-edge contours only at visible transitions: neck-to-shoulder, shoulder-to-base, and any molded ridge.
- Check that each transition curve changes direction smoothly and that no contour line crosses another without a real edge.
Neck-to-Shoulder Transition
The neck-to-shoulder transition is usually a convex curve that widens from the neck into the body. Draw it as a single line that starts at the neck edge, curves outward, and meets the body edge. Avoid making a sharp corner unless the bottle actually has a hard shoulder. The far-side neck edge should appear as an interior contour only if the opening is visible.
A checkable rule: the shoulder curve should be tangent to the neck line at its start and tangent to the body line at its end. Tangency means the curve meets the straight edge without a sudden angle. You can test this by placing a straight edge along the neck and body lines and confirming the curve does not jump.
- Mark the neck edge and body edge with two short guide lines.
- Draw the shoulder curve from the neck guide to the body guide in one stroke.
- Check tangency at both ends by sliding a straight edge along each guide.
- Repeat for the far side, keeping the curve mirrored but not necessarily identical if the bottle is asymmetric.
Shoulder-to-Base Edge and Interior Contours
The shoulder-to-base edge is the lower transition where the curved shoulder meets the straighter body, and the base edge is the bottom boundary where the body meets the base surface. Draw the body sides as near-vertical contour lines, then close the base with a slight curve or straight line depending on the bottle. Interior contours may include the bottom rim, a label ridge, or the far-side base edge if visible.
Use the same unit to check proportions: if the body width is 60 units and the base edge height is 8 units, the base curve should span the full body width and rise no more than the measured height. These numbers are hypothetical examples; replace them with your measured values.
- Draw the two body side contours from shoulder to base.
- Close the base edge with a line that matches the measured base height.
- Add interior contours for the bottom rim and any visible far-side edge.
- Check that interior contours stop where the surface turns away and do not outline invisible edges.
Worked example
A bottle has a body width of 60 units, neck width of 24 units, shoulder height of 18 units, and base edge height of 8 units. Describe the contour lines you would draw for the near side, including the neck-to-shoulder and shoulder-to-base transitions.
Worked answer
Draw the baseline and midline. Mark the body width as 60 units and neck width as 24 units, centered on the midline. The neck edges are two near-vertical lines 24 units apart. The shoulder rises 18 units vertically from the body top to the neck and moves inward horizontally by (60-24)/2 = 18 units on each side to meet the neck edge. Draw the shoulder as a smooth convex curve that leaves the neck line tangentially and joins the body line tangentially; do not draw a straight 45-degree diagonal, because a diagonal would meet the vertical lines at an angle. The body sides run from the shoulder to the base edge, which is 8 units high and spans 60 units. Add an interior contour for the far-side neck edge only if the opening is visible. Check that the shoulder curve does not form a sharp corner and that all measurements use the same unit.
Four practice exercises
Exercise 1
A bottle has body width 50 units, neck width 20 units, and shoulder height 12 units. Describe the near-side outer contour from base to neck, including the neck-to-shoulder curve.
Show answer and check
The body sides are 50 units apart; the neck sides are 20 units apart and centered. The horizontal inset per side is (50-20)/2 = 15 units, and the shoulder rises 12 units vertically. These are separate measurements: the inset is horizontal and the shoulder height is vertical, so they need not be equal. Draw the shoulder as a smooth convex curve that leaves the neck line tangentially and joins the body line tangentially; a straight 45-degree diagonal would not be tangent to the vertical lines. The outer contour runs up one body side, curves through the shoulder, up the neck, across the opening, and back down the far side.
Why: The widths and shoulder height define the transition points. Tangency prevents a sharp corner, and centering keeps the neck aligned with the body.
Check: Measure the drawn body width and neck width in the same unit; confirm they match 50 and 20. Confirm the shoulder rises 12 units vertically and the inset is 15 units horizontally, treating them as independent measurements. Slide a straight edge along the neck and body lines to check the shoulder curve meets without an angle.
Exercise 2
A bottle has a base edge height of 6 units and a body width of 40 units. Describe how to draw the base edge and one interior contour for the bottom rim.
Show answer and check
Draw the body sides 40 units apart down to the base. Close the base with a line that rises 6 units at the center or follows the measured base curve. Add an interior contour for the bottom rim only if the rim is visible, keeping it inside the base edge and stopping where the surface turns away.
Why: The base edge height and body width set the bottom boundary. The interior rim contour records a visible surface change without outlining hidden geometry.
Check: Confirm the base edge spans 40 units and its height is 6 units in the same unit. Check that the interior rim line stays inside the outer contour and does not cross it.
Exercise 3
A bottle has a neck width of 18 units and a body width of 54 units. The shoulder is a hard shoulder with a short horizontal step. Describe the near-side contour through the neck-to-shoulder transition.
Show answer and check
Draw the neck sides 18 units apart and the body sides 54 units apart. Choose a vertical position for the hard shoulder and mark it on both sides. At that height, draw a horizontal step from the neck edge outward to the body edge; the step extends horizontally by (54-18)/2 = 18 units on each side. Then continue down the body side from the outer end of the step. The step is a justified hard shoulder, not a smooth curve, so the contour turns sharply at the step rather than blending tangentially.
Why: The measured widths define the step length. A hard shoulder is valid when the reference shows a sharp transition; the contour still follows visible edges.
Check: Measure the neck and body widths in one unit and confirm 18 and 54. Check that each horizontal step measures (54-18)/2 = 18 units and connects the neck edge to the body edge without gaps, and that no curve is added where the reference shows a hard shoulder.
Exercise 4
A bottle is asymmetric: near-side body width is 44 units, far-side body width is 48 units, and neck width is 20 units. Describe how to draw both outer contours and one interior contour for the far-side neck edge.
Show answer and check
Mark the midline and draw the near-side body edge 44 units from it and the far-side body edge 48 units from it. Draw the neck edges 20 units apart, centered on the midline. The near and far shoulder curves connect their own body edges to the neck edges. Add an interior contour for the far-side neck edge only if the opening is visible, stopping where the neck turns away.
Why: Asymmetric widths require separate measurements for each side. The interior neck contour records a visible far-side edge without mirroring the near side.
Check: Measure each body width from the midline in the same unit and confirm 44 and 48. Check that the neck width is 20 units and that the interior neck contour does not cross the outer contour.
Common mistakes
- Drawing the neck-to-shoulder transition as a sharp corner. Replace the corner with a convex curve that is tangent to both the neck and body lines.
- Adding interior contours for edges that are not visible. Only draw interior lines where a real surface change or far-side edge is visible; remove lines that outline hidden geometry.
- Using different units for width and height checks. Record all measurements in one unit, such as centimeters or arbitrary units, and convert before comparing.
- Treating the x-height convention as a fixed letter shape. Use baseline-to-midline only as a height reference; letter styles vary, so judge contour placement by edge logic.
Self-check rubric
- Outer contour is a continuous line that follows the visible silhouette from base edge to neck opening and back.
- Neck-to-shoulder transition is drawn as a curve tangent to both the neck and body lines, or as a justified hard shoulder if the reference shows one.
- Shoulder-to-base edge and base edge match the measured proportions in one consistent unit.
- Interior contours appear only at visible transitions and do not outline hidden edges.
- Valid alternatives are accepted when edge logic and measured proportions are consistent, even if letter styles or curve shapes differ.
Questions and answers
What is the x-height convention in this lesson?
X-height is the distance from the baseline to the midline of lowercase letters. It is used only as a height reference for placing contour lines; letter styles vary, so it does not define a single universal bottle shape.
Can I use a ruler to measure my bottle?
Yes. Measure the actual bottle or reference and label all values with one unit. Any numbers in the lesson are hypothetical examples, not standards.
How many contour lines should a bottle have?
Start with one outer contour and add interior contours only at visible transitions such as the neck-to-shoulder curve, shoulder-to-base edge, and base rim.
What if my bottle is asymmetric?
Draw each side from its own measured edges. The far side may differ from the near side; contour drawing records what is visible, not a mirrored ideal.