Free original lessons
Live Contour Portrait Drawing: Timed Observation Practice
Learn to draw a live contour portrait using timed observation boxes and a checklist for head, neck, and shoulder edges, with self-review for line continuity.
Free lesson
Four exercises
Worked answers
Object Drawing Lessons
Live contour portrait drawing trains you to capture the visible edges of a person in real time, without relying on memory or guesswork. This lesson uses timed observation boxes of 30 seconds, 60 seconds, and 2 minutes to build speed and accuracy. You will focus on the head, neck, and shoulder edges, using a consistent baseline-to-midline comparison for proportions (for example, chin bottom to mid-neck). The practice is self-contained: you can use any paper and pencil, and the exercises describe needed diagrams in text.
Practice materials: Printable downloads are not available for this lesson yet. Use the instructions and four exercises below.
Reference illustration
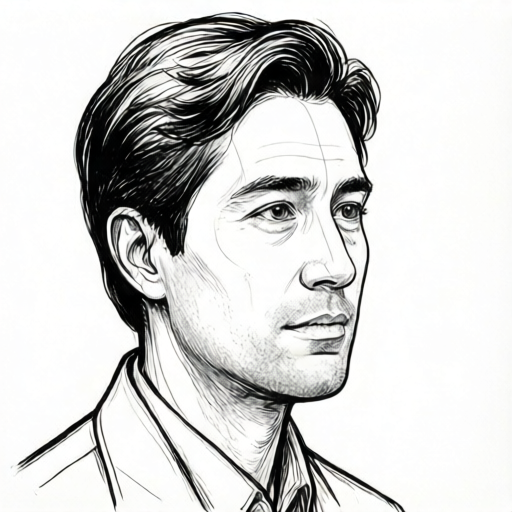
Use the stated measurements and conventions for each exercise.
Setting Up Timed Observation Boxes
Before drawing, create three rectangular boxes on your paper, labeled 30s, 60s, and 2min. These are your timed observation boxes. In each box, you will draw the same live portrait from observation, but with different time limits. The goal is not perfection but continuous line and accurate edge placement.
Choose a live person who can hold a relaxed pose for up to two minutes. Sit at a comfortable distance where you can see the head, neck, and shoulders clearly. Use a pencil or pen that makes a consistent line. No erasing is needed; work with the lines you make.
- Draw three boxes on your paper and label them 30s, 60s, and 2min.
- Position your live model so you can see the head, neck, and shoulder edges.
- Set a timer for 30 seconds and draw only the most important contour edges in the first box.
- Repeat for 60 seconds in the second box, adding more detail.
- Repeat for 2 minutes in the third box, refining line continuity and edge accuracy.
Portrait Contour Checklist for Head, Neck, and Shoulders
Use this checklist to guide your observation. For the head, look for the outer edge of the skull, the hairline if visible, the ear outline, the jawline, and the chin. For the neck, trace the edges where the neck meets the jaw and shoulders, including the throat contour. For the shoulders, follow the top edge from neck to shoulder tip, and the outer arm edge if visible.
Use a consistent baseline-to-midline comparison to note proportions: pick a baseline (for example, the bottom of the chin) and a midline (for example, mid-neck), then compare distances by eye or with a pencil mark. The checklist is a guide, not a rigid rule; valid alternatives exist for how you simplify edges.
- Identify the head outline: skull top, sides, jaw, chin.
- Locate the neck edges: front throat line and back neck line.
- Trace the shoulder top edge from neck to shoulder tip.
- Check that each edge connects continuously to the next.
- Note any gaps or jumps in your line and decide if they are intentional.
Self-Review Rubric for Line Continuity
After each timed drawing, review your line continuity. A continuous line follows an edge without unnecessary breaks. Some breaks are valid if they represent a change in edge direction or an occlusion. Use the rubric below to score each drawing from 1 to 3 on continuity, edge accuracy, and proportion consistency.
Score 1 means many unintended breaks or misplaced edges. Score 2 means some breaks but overall readable. Score 3 means mostly continuous lines with accurate edges. Compare your 30s, 60s, and 2min drawings to see improvement. Valid alternatives include using dotted lines for soft edges or varying line weight; the rubric accepts these if intentional.
- Place your three drawings side by side.
- For each, count unintended line breaks.
- Check each checklist edge for placement accuracy.
- Assign a score of 1, 2, or 3 for continuity, accuracy, and proportion.
- Write one specific improvement for the next session.
Worked example
A live model sits facing slightly left. In a 60-second box, draw the contour of the head, neck, and shoulders. Use the checklist. After drawing, self-review line continuity.
Worked answer
The drawing shows a continuous line from the top of the skull down the left side of the face, around the chin, up the jaw to the ear, then down the neck edge to the shoulder. The right shoulder edge is a separate continuous line from neck to shoulder tip. Two intentional breaks occur where hair occludes the ear. Self-review: continuity score 2 (two intentional breaks), edge accuracy score 2 (jaw slightly high), proportion score 3 (head-to-neck ratio consistent). Improvement: check jaw placement against midline next time.
Four practice exercises
Exercise 1
In a 30-second box, draw only the head outline of a live model. Use the checklist for skull top, sides, jaw, and chin. Do not draw neck or shoulders. After drawing, count unintended line breaks.
Show answer and check
A single continuous line around the head outline, with at most one unintended break. The line starts at skull top, goes down one side, around chin, up jaw, and back to start.
Why: The 30-second limit forces you to capture only the most important edges. The checklist ensures you include skull, jaw, and chin. Counting breaks gives a simple continuity measure.
Check: Compare your line to the checklist: does it include skull top, sides, jaw, and chin? Count breaks; a score of 0-1 unintended breaks is good for 30 seconds.
Exercise 2
In a 60-second box, draw the neck edges of a live model. Focus on the front throat line and back neck line. Use a baseline-to-midline comparison: mark baseline at chin bottom and midline at mid-neck. Note the distance. After drawing, check if the two neck lines connect to the head and shoulders.
Show answer and check
Two lines representing front and back neck edges, each connecting to the head outline and shoulder top. The baseline-to-midline distance is noted as a simple mark (e.g., one pencil width).
Why: The neck is often neglected. This exercise isolates neck edges and uses a consistent measurement convention. Connecting to head and shoulders tests continuity.
Check: Verify both neck lines touch the head and shoulder edges. Check that the baseline-to-midline mark is consistent with your notation. Valid alternatives include dotted lines for soft edges.
Exercise 3
In a 2-minute box, draw the full contour of head, neck, and shoulders of a live model. Use the checklist. After drawing, self-review using the rubric: score continuity, edge accuracy, and proportion consistency from 1 to 3. Write one improvement.
Show answer and check
A complete contour drawing with continuous lines for head, neck, and shoulders. Self-review scores: continuity 2, edge accuracy 2, proportion 3. Improvement: check shoulder tip placement against neck edge.
Why: The 2-minute limit allows more detail but still requires timed observation. The rubric provides structured self-review. Writing an improvement makes the practice actionable.
Check: Use the rubric descriptions to assign scores. Check that all checklist edges are present. Confirm the improvement is specific and checkable.
Exercise 4
Compare your 30-second and 2-minute drawings from previous exercises. Identify one edge that improved in continuity and one that did not. Describe a needed diagram in text: a simple head-and-shoulders outline with labeled edges (skull top, jaw, chin, neck front, neck back, shoulder top). Use this description to check your drawings.
Show answer and check
A written comparison noting, for example, that the jaw edge improved from broken to continuous, while the shoulder top edge remained broken. The described diagram lists six labeled edges.
Why: Comparison across time limits reveals learning. Describing a diagram in text makes the check self-contained without an image. Labeled edges provide a reference.
Check: Read your description and verify it includes all six edges. Check your drawings against the described labels. Confirm the improvement and non-improvement are specific.
Common mistakes
- Drawing from memory instead of observing the live model. Keep your eyes on the model for most of the time; glance at paper only to place the pencil.
- Ignoring the neck and shoulder edges. Use the checklist to explicitly trace neck and shoulder contours in every timed box.
- Erasing lines and losing continuity. Work without erasing; if a line is wrong, draw a corrected line beside it and note the change.
- Spending too long on the 30-second box. Set a timer and stop when it rings; capture only the most important edges.
Self-check rubric
- Line continuity: 1 = many unintended breaks; 2 = some breaks but readable; 3 = mostly continuous with intentional breaks only.
- Edge accuracy: 1 = several checklist edges misplaced; 2 = most edges close; 3 = all checklist edges accurately placed.
- Proportion consistency: 1 = inconsistent baseline-to-midline comparisons; 2 = mostly consistent; 3 = consistent baseline-to-midline comparisons.
- Valid alternatives: dotted lines, varied line weight, and simplified edges are accepted if intentional and explained in self-review.
Questions and answers
What if my model moves during the timed drawing?
Accept small movements as part of live observation. Draw the edge as you see it at that moment; do not try to correct to a previous position.
Can I use a photograph instead of a live person?
The brief specifies live observation. A photograph is not live, so use a person who can pose. If no person is available, the exercises describe needed diagrams in text.
How do I compare proportions without a ruler?
Use a baseline-to-midline comparison: pick a baseline (e.g., bottom of chin) and a midline (e.g., middle of neck). Compare distances by eye or with a pencil mark. Any consistent notation is valid.
What counts as a valid alternative in the rubric?
Intentional dotted lines, varied line weight, or simplified edges are valid if they help convey the contour. The rubric scores continuity and accuracy, not a single style.