Free original lessons
Draw Ocean Fish Scale Rows with Shading: A Step-by-Step Guide
Learn to sketch overlapping fish-scale rows with size gradients and shading for depth. Includes a worked example, four practice tasks, and a clear rubric for self-checking.
Free lesson
Four exercises
Worked answers
Object Drawing Lessons
Fish scales are a stylized ocean texture: rows of overlapping arcs that can shrink toward the tail and catch light along their edges. This guide uses scale height, row pitch, and a size gradient so each overlap can be measured. Scale height is the full top-to-bottom dimension; row pitch is the vertical distance between successive row guides. All values are hypothetical, and the planned worksheets are not yet built.
Practice materials: Printable downloads are not available for this lesson yet. Use the instructions and four exercises below.
Reference illustration
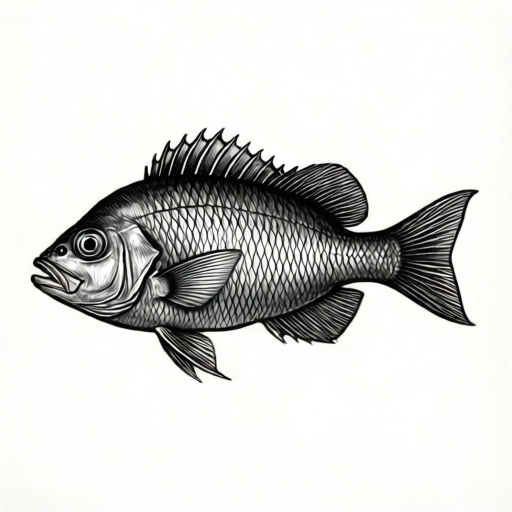
Use the stated measurements and conventions for each exercise.
Set up your scale-row convention
Choose one scale shape and one overlap direction. In this guide, each rounded arc starts on its row's top guide and extends downward; a later row is drawn below it and covers part of the earlier row's lower arcs. Use a light pencil for construction and a darker pencil for the final overlap edge.
Choose a width, full scale height, and row pitch. For example, 20 mm-wide scales can be 12 mm high with a 10 mm row pitch, giving 2 mm of overlap. Mark top guides at equal intervals and measure scale height separately from row pitch.
- Draw a top guide for row one and mark scale centers 20 mm apart.
- Draw each arc 12 mm from its top guide to its lowest point.
- Place row two's top guide 10 mm below row one's guide so the 12 mm shapes overlap by 2 mm.
- Offset alternate rows by half the scale width and repeat for three to five rows.
- Reduce scale width gradually toward the tail.
Build overlapping rows with a size gradient
Overlap makes the pattern read as scales rather than tiles. Draw the head row first, then place each next row below it so its arcs cover the previous row's lower edges. Keep the scale height and row pitch consistent within a row; vary width gradually toward the tail.
For a simple gradient, use a head row 20 mm wide by 12 mm high with a 10 mm row pitch; a middle row 18 mm wide by 11 mm high with a 9 mm pitch; and a tail row 16 mm wide by 10 mm high with an 8 mm pitch. Each new row overlaps the previous one by 2 mm. State the values you choose and keep the half-width offset consistent.
- Draw the head row with 20 mm-wide, 12 mm-high scales.
- Draw the middle row 10 mm below the first row guide, using 18 mm-wide, 11 mm-high scales.
- Draw the tail row 9 mm below the middle row guide, using 16 mm-wide, 10 mm-high scales.
- Offset the middle and tail rows by half their scale widths.
- Darken the edge where each later row overlaps the earlier row.
Add shading for edge highlights and depth
Shading gives scales a wet, dimensional look. Use a simple two-value system: a light edge highlight along the top arc and a darker crescent along the bottom overlap. Keep the highlight on the same side for all scales to suggest a single light source, for example from the upper left.
Apply shading with short, curved strokes that follow each scale's arc. Avoid smudging; work from light to dark. A hypothetical example: use a 2B pencil for the dark crescent and leave the paper white for the highlight. Measure your own pencil grades and adjust.
- Lightly shade the lower third of each scale with curved strokes.
- Leave a thin unshaded band along the top arc as the highlight.
- Darken the overlap line where one scale meets the next.
- Add a soft shadow under the last row to suggest depth.
- Check that highlights are consistent in direction across all rows.
Check your work with the rubric
Use the rubric to self-check. Valid alternatives include different scale widths and light directions as long as the height, row-pitch, overlap, and shading convention is stated and followed. The goal is a readable stylized scale pattern, not a single biological template.
If a row looks flat, check that the overlap line is dark enough and that the highlight band is present. If scales look like tiles, increase the overlap so each scale's bottom edge clearly covers the top edge of the scale in the row below.
- Confirm at least three rows with the chosen scale heights and row pitches.
- Confirm each row is offset by about half a scale width.
- Confirm highlights run in one direction.
- Confirm the size gradient reduces scale width toward the tail.
- Confirm construction lines are erased or faint.
Worked example
Draw three rows on a 100 mm-wide strip. Head row: 20 mm-wide, 12 mm-high scales. Middle row: 18 mm-wide, 11 mm-high scales, with its top guide 10 mm below the first guide. Tail row: 16 mm-wide, 10 mm-high scales, with its top guide 9 mm below the middle guide. Offset each new row by half its width and shade the overlap edge.
Worked answer
Use widths of 20 mm, 18 mm, and 16 mm from head to tail, with heights of 12 mm, 11 mm, and 10 mm. Put the row guides at 0, 10, and 19 mm. The overlaps are 12−10=2 mm and 11−9=2 mm; the third row ends 29 mm below the first guide. Stagger the middle and tail rows by half their own widths and use partial edge scales where needed. Put a light highlight on the upper-left arc and a darker crescent on the lower-right overlap edge.
Why: The width sequence gives a decreasing scale size. Row pitch sets each guide position, and scale height minus pitch gives the overlap. Because the rows are staggered, the exact number of full scales depends on edge alignment, so this example checks the stated guide and overlap arithmetic.
Check: Verify guides 0, 10, and 19 mm; calculate overlaps 12−10=2 and 11−9=2; and calculate the tail-row bottom as 19+10=29 mm. Measure the three widths and confirm they decrease toward the tail.
Four practice exercises
Exercise 1
On a 60 mm-wide strip, draw two rows. Row one uses 15 mm-wide, 10 mm-high scales. Row two uses 13 mm-wide, 8 mm-high scales, is offset by 6.5 mm, and begins 8 mm below row one's top guide. How many full scales fit in each row?
Show answer and check
Row one: 60 divided by 15 = 4 full scales. Row two: 60 divided by 13 is about 4.6, so 4 full scales and one partial.
Why: Divide the strip width by the scale width. For row two, 13 mm scales leave a remainder, so a partial scale is expected.
Check: Confirm 60/15=4 and 60/13≈4.62. Check that the second-row offset is half of 13 mm and that the 8 mm guide pitch creates overlap with the 10 mm first-row height.
Exercise 2
A scale row has 8 scales of 12 mm width. What is the total width covered by full scales? If the strip is 100 mm wide, how much width remains for a partial scale?
Show answer and check
Total width = 8 times 12 mm = 96 mm. Remaining width = 100 minus 96 = 4 mm.
Why: Multiply the number of scales by the scale width, then subtract from the strip width.
Check: Measure the drawn row: eight 12 mm arcs should span 96 mm, leaving a 4 mm gap at the end.
Exercise 3
Draw three rows with scale heights of 12 mm, 11 mm, and 10 mm. Put the first top guide at 0 mm, the second 10 mm below it, and the third 9 mm below the second. What is the distance from the first top guide to the bottom of the third row?
Show answer and check
The guide positions are 0, 10, and 19 mm. The third row is 10 mm high, so its bottom is 29 mm from the first guide.
Why: Add the row pitches to locate the third guide: 10+9=19 mm. Add the third scale height: 19+10=29 mm.
Check: Recalculate 10+9+10=29 mm and measure from the first guide to the bottom of row three.
Exercise 4
A student shades every scale with a dark crescent on the lower left and a highlight on the upper right. Is this valid? Explain using the convention.
Show answer and check
Yes. A dark crescent on the lower left with a highlight on the upper right is valid if the student states that the light comes from the upper right and applies it to every scale.
Why: The rubric checks consistent shading, not one required light direction.
Check: Check that every scale has the same upper-right highlight and lower-left dark crescent.
Common mistakes
- Drawing scales as separate tiles with no overlap. Offset each new row by half a scale width and place its top guide below the previous one so the new arcs overlap the previous row's lower edges; darken the overlap.
- Changing scale height or row pitch within a row without a stated reason. Keep scale height and guide spacing consistent within a row; vary width gradually toward the tail if using a gradient.
- Shading every scale the same way with no light direction. Choose one light direction and keep highlights on the same side of every scale.
- Making all rows the same scale size. Reduce scale width by about 10 percent per row toward the tail to create a size gradient.
Self-check rubric
- At least three rows use stated scale heights and row pitches.
- Each row is offset by about half a scale width, and each new row's top edge is placed over the previous row's bottom edge, with the overlap line darkened.
- Scale width decreases toward the tail (size gradient).
- Highlights are consistent in direction across all scales.
- Overlap lines are darkened to show depth.
- Construction lines are faint or erased.
- Valid alternatives in scale width and light direction pass if the convention is stated and followed.
Questions and answers
Do I need special paper or tools?
No. Any paper and a pencil work. Measure your own paper and pencil grades; the 20 mm and 12 mm values are hypothetical examples.
Can I use different scale shapes?
Yes. Rounded arcs can vary in width, but state their scale height and row pitch, and keep the overlap direction consistent.
How many rows should I draw?
Three to five rows are enough to show the pattern and gradient. Fit them to your paper size.
What if my shading looks muddy?
Use lighter strokes, keep a clean highlight band, and darken only the overlap line. Work from light to dark.