Free original lessons
Practice Realistic Comic Book Faces: Proportions, Features, and Shading
Learn to draw realistic comic faces using eye, nose, and mouth lines, feature placement, and plane-based shading with checkable practice tasks.
Free lesson
Four exercises
Worked answers
Object Drawing Lessons
Realistic comic book faces depend on consistent proportions and readable shading planes rather than exaggerated shapes. This lesson defines a simple construction convention: the face oval is divided by an eye line, a nose line, and a mouth line, and shading follows cheek, jaw, and brow planes. Letter styles and feature shapes vary, so the rubric rewards valid alternatives that keep the stated proportions and plane logic. All measurements are hypothetical examples; measure your own paper and tools before drawing.
Practice materials: Printable downloads are not available for this lesson yet. Use the instructions and four exercises below.
Reference illustration
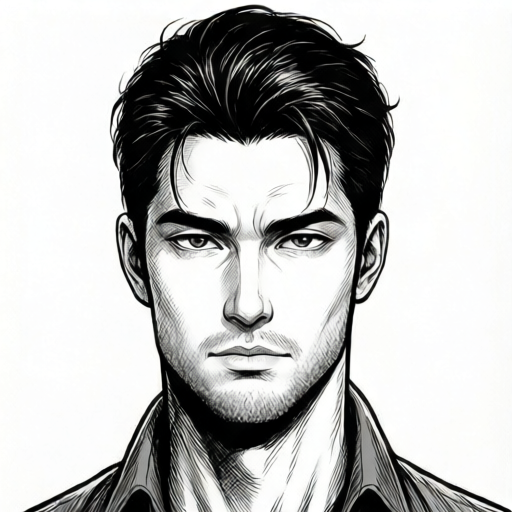
Use the stated measurements and conventions for each exercise.
Set the proportion guide
Draw a face oval about 10 cm tall and 7 cm wide on your paper. Mark the top and bottom of the oval. Place the eye line halfway between them. Place the nose line halfway between the eye line and the bottom. Place the mouth line halfway between the nose line and the bottom. These are hypothetical example measurements; adjust to your paper size but keep the halfway relationships.
Check the guide by measuring with a ruler: eye line to top equals eye line to bottom; nose line to eye line equals nose line to bottom; mouth line to nose line equals mouth line to bottom. If the distances differ by more than 5 mm, redraw the lines.
- Draw the oval and mark top and bottom.
- Measure and mark the eye line at the midpoint.
- Measure and mark the nose line between eye line and bottom.
- Measure and mark the mouth line between nose line and bottom.
- Verify each halfway relationship with a ruler.
Place features on the lines
Eyes sit on the eye line. A common convention is to fit about five eye-widths across the face at the eye line, with one eye-width between the eyes. This is a convention, not a universal rule; letter styles and feature shapes vary. Nose base sits on the nose line, and the mouth sits on the mouth line. Ears span roughly from the eye line to the nose line.
Use light pencil marks first. Define the nose base as about one eye-width wide and the mouth as about two eye-widths wide, centered on the face. Check that the inner eye corners align with the nose edges and that the mouth spans roughly two eye-widths. If a feature crosses its line by more than 3 mm, adjust it.
- Mark five equal eye-widths across the eye line.
- Place the eyes in the second and fourth widths.
- Mark the nose base on the nose line.
- Mark the mouth on the mouth line.
- Check ear span from eye line to nose line.
Shade cheek, jaw, and brow planes
Shading should describe planes, not just darken outlines. The brow plane sits above the eyes and catches light; shade under the brow ridge. The cheek plane runs from the eye line down to the jaw; shade along its outer edge. The jaw plane runs from the ear to the chin; shade under the jaw line. Use a consistent light direction, for example from the upper left, and label this as a hypothetical choice.
Build shading in three steps: light tone on the shadow side, medium tone under the brow and jaw, dark accent at the deepest creases. Check by squinting: the face should still read as a solid form with a clear light side and shadow side.
- Choose and mark a light direction.
- Apply light tone on the shadow side of the cheek.
- Add medium tone under the brow ridge and jaw line.
- Add dark accents at creases and under the chin.
- Squint-check that planes read clearly.
Refine and self-check
Refine feature edges without erasing the proportion guide until the end. Compare the drawn face to the guide: eye line, nose line, and mouth line should still match. Check that shading follows the three named planes and that the light direction is consistent. Valid alternatives include different eye shapes, nose widths, and letter styles, provided the halfway proportions and plane logic remain.
Record your measurements on the page margin so the check is repeatable. If a measurement is off, adjust the feature rather than the guide.
- Compare features to the guide lines.
- Check shading against the three planes.
- Confirm one consistent light direction.
- Record measurements for repeatability.
Worked example
A face oval is 10 cm tall. The eye line is at 5 cm from the top. Where should the nose line and mouth line go using the halfway convention?
Worked answer
Nose line at 7.5 cm from the top; mouth line at 8.75 cm from the top.
Four practice exercises
Exercise 1
An oval is 12 cm tall. Using the halfway convention, calculate the eye line, nose line, and mouth line distances from the top.
Show answer and check
Eye line 6 cm; nose line 9 cm; mouth line 10.5 cm.
Why: Eye line is half of 12. Nose line is halfway between 6 and 12, which is 9. Mouth line is halfway between 9 and 12, which is 10.5.
Check: Measure each distance with a ruler; each should match the calculated value within 5 mm.
Exercise 2
A face oval is 8 cm wide at the eye line. Using five equal eye-widths, what is one eye-width, and where do the two eyes sit?
Show answer and check
One eye-width is 1.6 cm. Eyes sit in the second and fourth widths, from 1.6 to 3.2 cm and from 4.8 to 6.4 cm.
Why: 8 divided by 5 equals 1.6. The second width spans 1.6 to 3.2; the fourth spans 4.8 to 6.4.
Check: Measure the eye widths and gaps; each should be about 1.6 cm within 3 mm.
Exercise 3
A drawing has the eye line at 4.8 cm from the top of a 10 cm oval. Is this within the 5 mm tolerance? What adjustment is needed?
Show answer and check
Yes, it is within tolerance because the midpoint is 5 cm and the difference is 0.2 cm. No adjustment is needed.
Why: The midpoint of 10 cm is 5 cm. The difference is 5 minus 4.8 equals 0.2 cm, which is less than 0.5 cm.
Check: Subtract the measured eye line from the midpoint; confirm the result is 0.5 cm or less.
Exercise 4
A face is shaded with light from the upper left. Which areas should receive medium tone, and how do you check consistency?
Show answer and check
Medium tone goes under the brow ridge and under the jaw line on the shadow side. Check by squinting to confirm one light side and one shadow side.
Why: The brow and jaw planes face away from an upper-left light, so they receive medium tone. A single light direction keeps shadows on the opposite side.
Check: Squint at the drawing; the light side should stay light and the shadow side should show the three plane tones without contradiction.
Common mistakes
- Placing the eye line above or below the midpoint of the oval. Measure top-to-eye and eye-to-bottom; make them equal within 5 mm.
- Shading outlines instead of planes. Shade the cheek edge, under the brow ridge, and under the jaw line as broad areas.
- Using two light directions. Mark one light direction and keep all shadows on the opposite side.
- Making the mouth wider or narrower than about two eye-widths. Measure the mouth width and compare it to two eye-widths; adjust to the stated convention.
Self-check rubric
- Eye line is within 5 mm of the oval midpoint.
- Nose line is within 5 mm of halfway between eye line and bottom.
- Mouth line is within 5 mm of halfway between nose line and bottom.
- Eyes sit on the eye line with about five eye-widths across the face.
- Nose base sits on the nose line and mouth sits on the mouth line.
- Shading uses cheek, jaw, and brow planes with one light direction.
- Valid alternatives in feature shape and letter style are accepted if proportions and plane logic hold.
Questions and answers
Are the measurements universal?
No. The 10 cm by 7 cm oval and 5 mm tolerance are hypothetical examples. Measure your own paper and keep the halfway relationships.
Can I use different eye shapes?
Yes. The rubric allows valid alternatives if the eye line, five eye-width convention, and plane shading remain consistent.
How do I know shading is correct?
Squint at the drawing. A clear light side and shadow side with three plane tones indicates readable form.
What if my nose line is off by 4 mm?
A 4 mm difference is within the 5 mm tolerance. If it exceeds 5 mm, redraw the line.