Free original lessons
How to Draw Scales on a Dragon Face: Row-by-Row Guide
Learn to draw overlapping dragon face scales using a simple row system, with a muzzle and brow shading step, practice tasks, and a clear rubric.
Free lesson
Four exercises
Worked answers
Object Drawing Lessons
Drawing scales on a dragon face becomes manageable when you build them row by row instead of scattering shapes randomly. This guide defines a simple scale convention, shows how to place rows across the muzzle and brow, and explains how overlap shading makes the face read as three-dimensional. All measurements are hypothetical examples; measure your own paper and tools before drawing. The approach works for any dragon face outline you supply, and the practice tasks are self-contained.
Practice materials: Printable downloads are not available for this lesson yet. Use the instructions and four exercises below.
Reference illustration
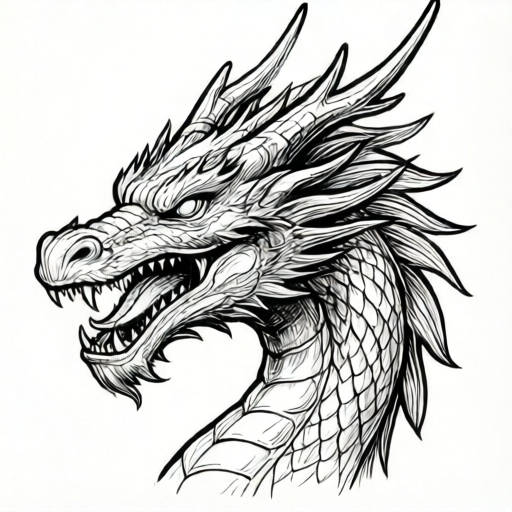
Use the stated measurements and conventions for each exercise.
Set a scale convention and prepare the face
A scale is a rounded, shield-like shape with a flat top edge and a curved lower edge. Define one convention before drawing: each scale is about as wide as it is tall, with a slight point at the bottom. This is a drawing convention, not a natural law; you may choose rounder or more angular scales as long as you keep the same shape throughout the face.
Begin with a dragon face outline that includes the muzzle, brow, cheek, and eye socket. Lightly mark a center line down the muzzle and a brow line above the eye. These guide rows. Keep your pencil light so guide lines can be erased later. Decide a row height, for example 1 cm on a 20 cm face; this is a hypothetical value, so measure your own outline and choose a row height that gives four to six rows across the muzzle.
- Draw or trace a dragon face outline with muzzle, brow, cheek, and eye socket.
- Mark a center line down the muzzle and a brow line above the eye.
- Choose a row height by measuring your outline; record the value you use.
- Define your scale shape on a scrap area and keep it consistent.
Build rows from the brow down the muzzle
Rows follow the form of the face. On the brow, rows curve gently around the eye socket. On the muzzle, rows run across the bridge and curve slightly downward toward the nose. Start at the top of the brow and work downward, because each new row overlaps the row above it. Overlap is what creates the layered look.
Place scales along each row so their side edges touch or slightly overlap. Offset each new row by about half a scale width from the row above, like bricks. This offset prevents vertical seams and looks more natural. Keep row height consistent; if a row crosses a curved area, let the scale shapes compress slightly rather than changing the row height.
- Draw the first row along the brow line, curving around the eye socket.
- Draw the next row below it, offset by half a scale width.
- Continue down the muzzle, letting rows curve with the bridge.
- Check that each row overlaps the row above by a small, consistent amount.
Shade overlap on the muzzle and brow
Overlap shading shows which scale sits on top. Choose a light direction, for example from the upper left; this is a hypothetical choice, so pick any direction and stay consistent. Where a scale overlaps the one below, place a thin shadow along the lower edge of the upper scale. Keep shadows narrow and soft on the brow, slightly wider on the muzzle where forms curve more.
Do not shade every scale equally. Scales near the eye socket and under the brow can receive a little more shadow to suggest depth. Leave the top edges of scales lighter. Use a consistent pencil pressure and check that shadows follow the overlap direction, not random outlines.
- Choose a light direction and mark it lightly outside the face.
- Shade the lower edge of each overlapping scale with a thin shadow.
- Increase shadow slightly under the brow and around the eye socket.
- Keep top edges lighter and check that all shadows agree with the light direction.
Refine edges and check row consistency
Refinement is about consistency, not perfection. Erase guide lines gently and darken only the scale edges that need emphasis. Check that row height stays within your chosen value, that offsets alternate, and that overlap shadows point the same way. If a row looks crowded, remove one scale rather than shrinking all of them.
Compare the muzzle and brow: the brow rows should curve around the eye, while muzzle rows should follow the bridge. Valid alternatives include rounder scales, slightly different row heights, or a different light direction, provided the convention and overlap logic stay consistent. Record your choices so the drawing can be checked.
- Erase guide lines and lightly reinforce key scale edges.
- Check row height against your recorded value.
- Verify offsets alternate and overlap shadows agree.
- Note any deliberate variations for later checking.
Worked example
A face outline is 18 cm tall. The muzzle area is 9 cm tall. You choose a row height of 1.5 cm. How many rows fit on the muzzle, and where do you start?
Worked answer
Nine divided by 1.5 equals 6 rows. Start at the brow line and work downward, offsetting each row by half a scale width.
Four practice exercises
Exercise 1
A muzzle is 12 cm tall. You choose a row height of 2 cm. How many rows fit, and what offset do you use between rows?
Show answer and check
Six rows fit. Offset each new row by about half a scale width from the row above.
Why: Twelve divided by two equals six. The half-width offset prevents vertical seams and follows the row system.
Check: Recount the rows and verify each row is offset by roughly half a scale width.
Exercise 2
You draw a brow row with 8 scales. The next row should be offset by half a scale width. If each scale is 1 cm wide, how far is the offset?
Show answer and check
The offset is 0.5 cm.
Why: Half of a 1 cm scale width is 0.5 cm. This offset shifts the next row so scales sit between the ones above.
Check: Measure the horizontal shift between the first scale of each row; it should be about 0.5 cm.
Exercise 3
A face outline is 20 cm tall. The brow area is 4 cm tall and the muzzle is 10 cm tall. Using a 1 cm row height, how many rows cover the brow and muzzle together?
Show answer and check
Fourteen rows total: 4 on the brow and 10 on the muzzle.
Why: Four divided by one equals four brow rows; ten divided by one equals ten muzzle rows; four plus ten equals fourteen.
Check: Count rows in each area and add them; confirm the total is 14.
Exercise 4
You choose a light direction from the upper right. A scale overlaps the one below it. Where do you place the shadow on the upper scale, and why?
Show answer and check
Place a thin shadow along the lower edge of the upper scale, because the upper scale blocks light from reaching the lower one.
Why: Overlap shadows indicate which scale sits on top. With light from the upper right, the lower edge of the overlapping scale receives less light.
Check: Check that all overlap shadows are on lower edges and agree with the upper-right light direction.
Common mistakes
- Scattering scales randomly instead of building rows. Start at the brow and work downward in rows, offsetting each row by half a scale width.
- Changing scale shape from row to row. Define one scale convention on scrap paper and repeat it, allowing only slight compression on curves.
- Shading every scale with the same shadow width. Use thin shadows on the brow and slightly wider shadows on the muzzle, always following the chosen light direction.
- Letting rows drift in height across the muzzle. Measure and record a row height, then check each row against it before refining.
Self-check rubric
- Rows are built from the brow downward with consistent overlap.
- Scale shape follows one defined convention throughout the face.
- Row height matches the recorded value within a small tolerance.
- Offsets alternate by about half a scale width.
- Overlap shadows agree with the chosen light direction.
- Brow rows curve around the eye socket; muzzle rows follow the bridge.
- Valid alternatives (rounder scales, different row height, different light direction) are accepted if consistency is maintained.
Questions and answers
Do I need a specific dragon face outline?
No. Any outline with a muzzle, brow, cheek, and eye socket works. The row system adapts to the form you draw.
How many rows should the muzzle have?
Choose a row height that gives four to six rows across your muzzle. Measure your own outline; the number is a guide, not a rule.
Can I use round scales instead of pointed ones?
Yes. The convention is yours to define. Keep the same shape throughout and maintain consistent overlap.
What if my light direction changes mid-drawing?
Pick one direction before shading and keep it. If you change it, revise all overlap shadows so they agree.