HomeSlipper Contour Line Drawing: Blind and Observed Practice Free original lessons
Slipper Contour Line Drawing: Blind and Observed Practice
Learn contour line drawing with a slipper: blind contour to train eye-hand coordination, then observed contour with edge tracing. Includes rubric and four exercises.
Free lesson
Four exercises
Worked answers
Object Drawing Lessons
Contour line drawing records the outline and significant edges of an object without shading or surface pattern. This lesson uses a slipper because its silhouette combines a curved upper, a sole edge, and an opening that tests careful looking. You will first draw blind, keeping your eyes on the slipper and letting the pencil follow, then draw observed, glancing between object and paper to correct proportions. The goal is accurate edge description, not decoration. Work on plain paper with a pencil; any size is fine. Define your drawing convention before starting: for this lesson, a contour line is a single continuous or broken line that marks where the slipper's surface turns away from view or where two parts meet, such as the sole rim and the upper opening. Do not add shading, patterns, or design details. Measure your own paper and drawing space rather than assuming standard sizes; any numerical values below are hypothetical examples for arithmetic practice only.
Practice materials: Printable downloads are not available for this lesson yet. Use the instructions and four exercises below.
Reference illustration
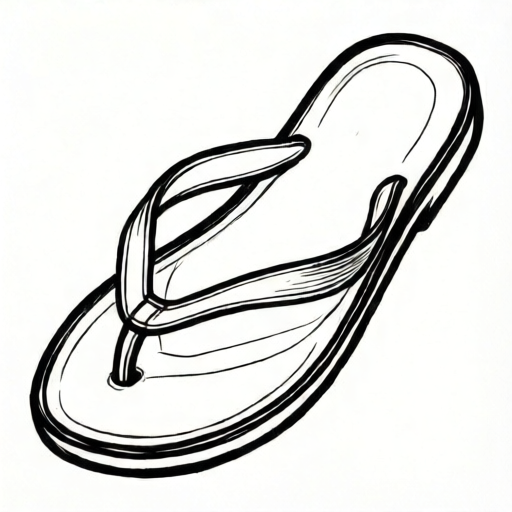
Use the stated measurements and conventions for each exercise.
Blind contour: looking without checking
Blind contour means you do not look at your paper while drawing. Place the slipper where you can see it clearly, choose a starting point on its outline, and move the pencil as if it were touching the edge. Your hand may move slowly; that is expected. The purpose is to force attention onto the object's actual turns rather than on a remembered idea of a slipper.
Keep the line continuous where possible. If you lose your place, stop, relocate the edge visually, and continue without erasing. A blind contour often looks distorted; judge it by whether the line records changes in direction, not by resemblance alone.
- Place the slipper on a plain surface and sit so you see its side or three-quarter view.
- Choose a start point, such as the toe tip, and rest the pencil on paper without looking down.
- Trace the outline slowly, naming each turn silently: toe curve, side edge, heel curve, sole rim.
- Include the opening edge where the upper meets the footbed, but do not draw the inside of the slipper.
- Stop after one complete outline; then look at the paper and note where your hand hesitated.
Observed contour: checking proportions
Observed contour allows you to glance between slipper and paper. Work lightly first, then strengthen lines you trust. Compare distances: the length from toe to heel, the height of the upper at the instep, and the width of the sole at the ball of the foot. Use your pencil as a sighting tool only if you keep it at arm's length and compare like with like.
Edge-tracing prompts help you decide what counts as a contour: follow the sole rim until it disappears behind the upper, then follow the upper's opening edge. Where an edge is ambiguous, draw the clearer boundary and leave the uncertain area open rather than inventing detail.
- Draw a light bounding box that matches the slipper's overall length and height as you see them.
- Mark the toe tip, heel end, and the highest point of the upper on the box edges.
- Draw the sole rim from toe to heel, noting where it curves under the upper.
- Draw the upper's outer edge and the opening edge, connecting them only where they actually meet.
- Check the drawing against the slipper by comparing three distances: overall length, upper height, and sole width at the widest point.
Convention and valid alternatives
Because letter styles and drawing habits vary, this lesson defines a convention rather than a single correct appearance. A valid contour line may be continuous or broken, thin or slightly varied in weight, and may include the opening edge or leave it partially open if the boundary is genuinely unclear. What matters is that each line corresponds to an observed edge and that no shading or pattern is added.
X-height is not relevant to this object study; if you label your drawing, write in your normal handwriting. The rubric below accepts different line qualities and small proportion errors, provided the major edges are recorded and the blind and observed attempts are distinguishable.
- Label each drawing as blind or observed before you begin.
- Use one pencil weight unless you choose to strengthen trusted lines; either is acceptable.
- Leave the interior of the slipper empty except for the opening edge.
- Compare your two drawings and circle one place where the observed version corrected the blind version.
Worked example
A slipper measures 26 cm from toe to heel and 9 cm high at the upper. On a drawing, the bounding box is 24 cm long and 8 cm high. By how much does the drawn length differ from the actual length, and is the height difference smaller or larger?
Worked answer
Length difference: 26 minus 24 equals 2 cm. Height difference: 9 minus 8 equals 1 cm. The height difference is smaller than the length difference.
Four practice exercises
Exercise 1
A slipper is 30 cm long and 10 cm high. Your observed drawing uses a bounding box 27 cm long and 9 cm high. State the length difference and height difference in centimeters.
Show answer and check
Length difference is 3 cm; height difference is 1 cm.
Why: Subtract the drawing measurement from the actual measurement for each dimension: 30 minus 27 equals 3; 10 minus 9 equals 1.
Check: Re-add each difference to the drawing value: 27 plus 3 equals 30; 9 plus 1 equals 10.
Exercise 2
You draw a blind contour of a slipper seen from the side. Describe where the sole rim line should stop and what line should begin there, using the convention in this lesson.
Show answer and check
The sole rim stops where the upper hides it from view; the upper's outer edge begins at that visible boundary.
Why: A contour marks where a surface turns away or two parts meet. When the upper overlaps the sole, the sole rim is no longer visible, so the next visible edge is the upper.
Check: Look at the slipper: confirm that the sole rim disappears behind the upper at the same place your drawing changes lines.
Exercise 3
A student's observed contour includes a dotted pattern across the upper. Using the boundary of this task, explain whether the drawing meets the brief and what to remove.
Show answer and check
It does not meet the brief because the boundary excludes scale patterns and design detail. Remove the dotted pattern and keep only the outline and opening edge.
Why: The task is a contour-line study of the slipper's outline only; interior surface marks are outside the defined boundary.
Check: Scan the drawing for any mark that is not an edge line; if it describes surface pattern, it should be absent.
Exercise 4
Your slipper is 24 cm long. In a blind contour the drawn outline is 20 cm long; in an observed contour it is 23 cm long. Which drawing is closer to the actual length, and by how many centimeters?
Show answer and check
The observed contour is closer; it differs by 1 cm, while the blind contour differs by 4 cm.
Why: Compare absolute differences: 24 minus 20 equals 4; 24 minus 23 equals 1. The smaller difference is closer.
Check: Add each difference back to its drawing length: 20 plus 4 equals 24; 23 plus 1 equals 24.
Common mistakes
- Looking at the paper during blind contour. Cover the paper with a second sheet or turn it face down until the outline is finished; the distortion is part of the exercise.
- Adding shading or pattern to suggest the slipper's surface. Remove or omit all interior marks except the opening edge; contour study records edges only.
- Drawing a generic slipper shape from memory. Return your eyes to the actual slipper and trace one edge at a time, naming each turn aloud.
- Treating the sole rim and upper edge as one continuous line where they overlap. Stop the sole rim where the upper hides it, then begin the upper edge at the visible boundary.
Self-check rubric
- Blind contour is labeled and shows a continuous or near-continuous outline without looking at the paper.
- Observed contour records the sole rim, upper outer edge, and opening edge where visible.
- No shading, pattern, or footwear design detail is added.
- Three check distances are compared and at least one correction is noted.
- Line quality may vary; continuous, broken, thin, or strengthened lines are all acceptable if they mark observed edges.
Questions and answers
How long should each drawing take?
There is no fixed time. A blind contour often takes two to five minutes; an observed contour may take five to ten. Use a timer only if it helps you slow down, and treat any numbers as your own choice.
May I erase?
For blind contour, no; keep the record. For observed contour, you may erase light construction lines, but keep at least one corrected line visible so you can compare.
What if my slipper has a pattern?
Ignore the pattern. The boundary excludes scale patterns and design detail; draw only the outline and the opening edge.
How do I know if my contour is accurate?
Compare three distances on the drawing with the same three on the slipper: overall length, upper height, and sole width. Small differences are acceptable; large differences mean recheck the bounding box.