Free original lessons
Stained-Glass Window Contour Drawing: Lead-Line Structure
Learn to draw a stained-glass window outline using lead-line structure. Practice contour, panel division, and independent design with clear checks.
Free lesson
Four exercises
Worked answers
Object Drawing Lessons
A stained-glass window contour is the outline that separates glass pieces and holds the lead lines. This lesson teaches you to draw that structure clearly: the outer frame, the main panel divisions, and the smaller lead lines that create the design. You will use a simple convention: every lead line is a single continuous stroke of even width, and every glass piece is a closed shape. The goal is not color or glass cutting, but a readable contour map that another person could follow. You will measure your own paper and pencil to set a consistent line width, and you will check your work with simple arithmetic and visual tests. All practice tasks are self-contained; where a diagram is needed, it is described in words so you can draw it yourself.
Practice materials: Printable downloads are not available for this lesson yet. Use the instructions and four exercises below.
Reference illustration
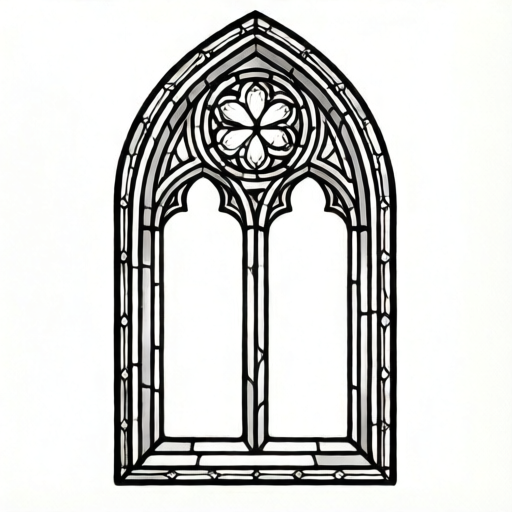
Use the stated measurements and conventions for each exercise.
Setting Up Your Contour Convention
Before drawing, define your lead-line convention. Measure your pencil tip and paper with a ruler. For this lesson, choose a lead-line width that is easy to see and repeat, such as 2 mm. This is a hypothetical example; measure your own tools and pick a width you can draw consistently. Draw a short test line and measure it. If it varies by more than 1 mm (a hypothetical example), adjust your pressure or use a guide.
Your convention has three rules. First, every lead line is a single stroke, not a sketchy double line. Second, every glass piece is a closed shape with no gaps. Third, the outer frame is the thickest line, and internal lead lines are thinner. For example, use 3 mm for the frame and 2 mm for internal lines. These numbers are hypothetical; measure and choose your own. Write your chosen widths at the top of your paper so your checks are consistent.
- Measure your paper width and height in millimeters and record them.
- Draw three test lines of your chosen internal width and measure each with a ruler.
- Choose a frame width that is at least 1 mm wider than your internal width.
- Write your two widths on the paper margin as a reference.
Building the Outer Frame and Main Panels
Start with the outer frame. Draw a rectangle or arch that fits your paper with a margin of at least 20 mm on all sides. This margin is a hypothetical example; adjust to your paper size. The frame must be a closed shape. Next, divide the interior into main panels using straight or gently curved lead lines. Each division must start and end on an existing lead line, never floating in space.
A common structure is a central vertical line and two horizontal lines, creating six panels. Draw these main lines first, then add smaller lead lines inside each panel. Keep the number of panels countable. For a practice window, aim for 8 to 12 glass pieces total. This range is a hypothetical example; choose a number you can count and check. Label each piece with a small number in pencil so you can verify closure later.
- Draw the outer frame as a closed shape with your frame width.
- Draw one central vertical lead line from top frame to bottom frame.
- Draw two horizontal lead lines from left frame to right frame, crossing the vertical line.
- Count the main panels and write the count in the margin.
- Add smaller lead lines inside panels, ensuring each new line touches an existing line at both ends.
Checking Closure and Line Consistency
After drawing, check every glass piece for closure. Trace each piece with your finger; if your finger can leave the piece without crossing a lead line, there is a gap. Mark gaps with a small dot and redraw that segment as a single stroke. Next, check line width consistency. Measure five random internal lead lines with a ruler. If any line differs from your chosen width by more than 1 mm, redraw it. This tolerance is a hypothetical example; set your own based on your tools.
Finally, check that no lead line ends in the middle of a glass piece. Every internal line must connect two other lines or the frame. If a line ends freely, extend it to the nearest lead line or erase it. Count your glass pieces again and compare with your earlier count. A correct contour has the same number of closed pieces as your labeled count, and every label sits inside exactly one piece.
- Trace each glass piece and mark any gap with a dot.
- Redraw each gap segment as a single continuous stroke.
- Measure five internal lead lines and compare with your chosen width.
- Check that every internal line touches existing lines at both ends.
- Recount glass pieces and compare with your labeled count.
Independent Panel Practice
Use a blank panel of at least 100 mm by 100 mm. This size is a hypothetical example; use your available paper. Draw a new outer frame and divide it into 6 to 10 pieces using the same convention. Do not copy the previous design; create a new arrangement of straight and curved lead lines. Keep the frame width and internal width the same as before so your checks remain valid.
When finished, perform the closure check and the line-width check. Then write a short note describing your design: the number of pieces, the number of curved lines, and the number of straight lines. This note helps you verify that your drawing matches your intention. If a piece is not closed, fix it before counting. A valid contour is readable without color: the lead lines alone show every glass piece.
- Draw a new outer frame on the blank panel.
- Add main divisions, then smaller lead lines, keeping every line connected at both ends.
- Perform the closure check and mark gaps.
- Measure five internal lines and compare with your chosen width.
- Write a note with piece count, curved line count, and straight line count.
Worked example
Draw a simple stained-glass window contour on a 120 mm by 160 mm paper. Use a 3 mm frame width and 2 mm internal width (hypothetical examples). Create exactly 6 glass pieces: one central vertical line and two horizontal lines. Check closure and line width.
Worked answer
On 120 mm by 160 mm paper, leave a 20 mm margin on all sides; this gives an interior frame of 80 mm by 120 mm. Draw that 80 mm by 120 mm outer frame with 3 mm width. Draw one vertical line from top frame to bottom frame at the center (40 mm from the left frame). Draw two horizontal lines from left frame to right frame at 40 mm and 80 mm from the top frame. This creates 6 closed pieces. Measure five internal lines; each should be about 2 mm. Trace each piece to confirm closure. Label pieces 1 to 6. The final count is 6, matching the labels.
Four practice exercises
Exercise 1
On a 100 mm by 100 mm square, draw an outer frame with a 3 mm width and internal lines with a 2 mm width (hypothetical examples). Create exactly 4 glass pieces using one vertical line and one horizontal line. Check closure and measure three internal lines.
Show answer and check
A square frame with one vertical line at 50 mm from the left and one horizontal line at 50 mm from the top creates 4 closed pieces. Internal lines measure about 2 mm. All pieces are closed.
Why: One vertical and one horizontal line crossing inside a closed frame divide the interior into four regions. Each region is bounded by frame or internal lines, so each is closed. The line widths follow the stated convention.
Check: Trace each of the 4 pieces with your finger; no gap should allow escape. Measure three internal line segments with a ruler; each should be within 1 mm of 2 mm. Count labels: 4.
Exercise 2
Draw a rectangular frame 80 mm wide and 120 mm tall with a 3 mm frame width and 2 mm internal width (hypothetical examples). Add one vertical line and two horizontal lines to create 6 pieces. Then add one short internal line inside the top-left piece that connects two existing lines, creating 7 pieces total. Check closure and count.
Show answer and check
The frame plus one vertical and two horizontal lines gives 6 pieces. The short line inside the top-left piece splits it into 2, giving 7 pieces. All lines connect at both ends. Final count is 7.
Why: Each new internal line that connects two existing lines and does not cross another line adds one new closed piece. The short line splits one piece into two, increasing the count by one.
Check: Trace all 7 pieces and mark any gap. Measure five internal lines for width. Count labels and compare with 7. Verify the short line touches existing lines at both ends.
Exercise 3
Create a contour with exactly 8 glass pieces on a 120 mm by 120 mm square. Use a 3 mm frame and 2 mm internal lines (hypothetical examples). Include at least one curved lead line. Check closure, measure four internal lines, and write a design note with piece count, curved line count, and straight line count.
Show answer and check
One valid design: a square frame, one central vertical line, one central horizontal line (4 pieces), then one diagonal line in each of the four pieces, each connecting two existing lines (8 pieces total). One diagonal is curved. Design note: 8 pieces, 1 curved internal line, 5 straight internal lines (the frame is not counted as an internal line).
Why: The central cross creates 4 pieces. Adding one line inside each piece that connects two existing lines splits each piece into 2, giving 8. The curved line is a single continuous stroke connecting at both ends.
Check: Trace 8 pieces for closure. Measure four internal lines for width. Count curved internal lines (1) and straight internal lines (5) and compare with the note. Count labels: 8.
Exercise 4
Draw a contour with 10 glass pieces on a 140 mm by 100 mm rectangle. Use a 3 mm frame and 2 mm internal lines (hypothetical examples). Include two curved lines. After drawing, intentionally leave one gap in a lead line, then find and fix it. Check closure and recount.
Show answer and check
A valid design uses a frame, one vertical line, two horizontal lines (6 pieces), and four short lines that each split one piece (10 pieces). Two of the short lines are curved. The intentional gap is marked with a dot, then redrawn as a single stroke. Final count is 10.
Why: The main divisions create 6 pieces. Four additional lines that each connect two existing lines add 4 pieces, giving 10. Fixing a gap restores closure without changing the count if the gap was within an existing line.
Check: Trace all 10 pieces after fixing the gap. Measure five internal lines for width. Count curved lines (2) and compare with the design note. Count labels: 10.
Common mistakes
- Drawing lead lines as sketchy double lines. Redraw each lead line as one continuous stroke of your chosen width. Measure the line to confirm consistency.
- Leaving a lead line ending in the middle of a glass piece. Extend the line to the nearest lead line or frame, or erase it entirely. Every internal line must connect at both ends.
- Making the outer frame thinner than internal lines. Redraw the frame with a width at least 1 mm wider than your internal width, or adjust your convention and relabel.
- Counting pieces without checking closure. Trace each piece with your finger and mark gaps before counting. Fix gaps, then recount.
Self-check rubric
- Outer frame is a closed shape with a consistent width at least 1 mm wider than internal lines.
- Every internal lead line is a single continuous stroke that connects to existing lines at both ends.
- Every glass piece is a closed shape with no gaps, verified by finger tracing.
- Five measured internal lines are within 1 mm of the chosen internal width.
- The number of labeled glass pieces matches the final count after fixes.
- The design note lists piece count, curved line count, and straight line count accurately.
Questions and answers
Do I need color to show a stained-glass window contour?
No. The contour is the lead-line structure. Color is excluded from this task. A correct contour shows every glass piece as a closed shape using lines only.
How wide should my lead lines be?
Measure your pencil and paper, then choose a width you can repeat. For example, 2 mm internal and 3 mm frame are hypothetical values. Write your chosen widths on the paper and check five lines with a ruler.
Can I use curved lead lines?
Yes. Curved lines are valid as long as each curve is a single continuous stroke and connects to existing lines at both ends. Count curved and straight lines separately in your design note.
What if my glass piece count changes after fixing gaps?
Recount after every fix. The final count must match the number of labeled pieces. If a fix creates a new piece, add a label and update your note.