Free original lessons
Street-Art Lettering and Stencil Shapes: A Drawing and Layout Guide
Learn to draw block and rounded street-art letters, design cuttable stencil shapes, and plan a wall layout using simple measured conventions and practice tasks.
Free lesson
Four exercises
Worked answers
Object Drawing Lessons
Street-art lettering rewards clear shapes, consistent spacing, and a stencil that can actually be cut and painted. This guide defines a simple drawing convention: x-height runs from the baseline to the midline, while cap height and ascenders rise above the midline. Letter styles vary, so the rubric accepts any legible, internally consistent alphabet. You will draw sample letters, convert one word into a stencil shape, and plan a wall layout in a measured box. All measurements are hypothetical examples; measure your own paper, wall, and tools before cutting or painting.
Practice materials: Printable downloads are not available for this lesson yet. Use the instructions and four exercises below.
Reference illustration
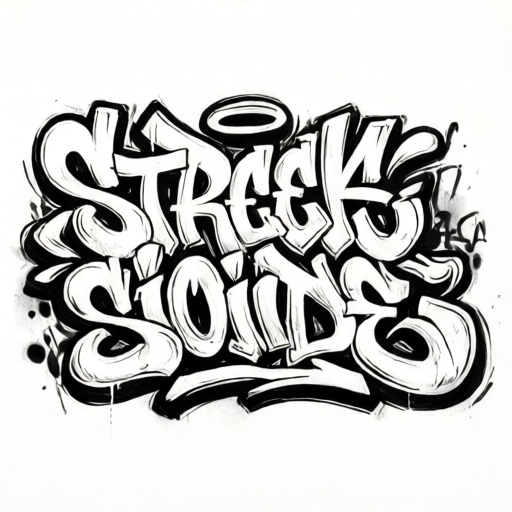
Use the stated measurements and conventions for each exercise.
Set up a lettering convention
Draw three horizontal guide lines: baseline, midline, and cap line. X-height is baseline to midline. Cap height is baseline to cap line. Ascenders may reach the cap line; descenders drop below the baseline. Keep stroke width consistent within a word unless you deliberately vary it.
Choose a style family: block (straight sides, square corners), rounded (curved corners, circular counters), or slab (thick strokes with small rectangular serifs). Write the full alphabet in lowercase and uppercase before composing a word. Check that letters share the same x-height and stroke weight.
- Mark baseline, midline, and cap line on practice paper.
- Draw lowercase a, e, o, and s at x-height; compare their widths.
- Draw uppercase A, E, O, and S at cap height.
- Circle any letter whose stroke weight differs from the others and redraw it.
Design a stencil shape from a word
A stencil needs bridges: narrow uncut strips that hold inner shapes such as the hole in O or the center of A. Plan bridges before cutting. Use a simple word of three to five letters. Draw the word in block style, then mark bridges on each enclosed counter. Bridges should be wide enough for your cutting tool; measure your tool and record the width you choose as a hypothetical example.
Test the stencil logic on paper by shading the areas that would be cut away. If a letter falls apart or an inner shape is isolated, add or move a bridge. Keep bridges aligned where possible so the stencil remains strong.
- Draw a three-to-five-letter word in block style at cap height.
- Mark every enclosed counter (O, A, D, R, P, B).
- Draw one bridge per enclosed counter, connecting the inner shape to the outer stencil.
- Shade cut-away areas and check that every piece remains connected.
- Measure your cutting tool and label your bridge width as a hypothetical example.
Plan a wall layout in a measured box
Use a planning box scaled to your wall. Measure the actual wall width and height, then choose a simple scale such as one centimeter on paper equals ten centimeters on the wall; label this as a hypothetical example. Place the word, stencil shapes, and any border inside the box. Leave margins so the design does not crowd edges.
Mark the center line and align the word to it. Note the baseline height above the ground and the cap height. Check that the planned letter height fits within the box and that bridges remain visible at the chosen scale.
- Measure wall width and height; record units.
- Draw a planning box at a stated scale.
- Mark center line, baseline, and cap line inside the box.
- Place the word and stencil shapes; check margins and bridge visibility.
- Label all numerical values as hypothetical examples.
Practice with feedback
Practice in short rounds: draw the alphabet, compose one word, convert it to a stencil, and plan it in a box. After each round, use the rubric to check consistency, legibility, bridge logic, and layout fit. Redraw only the weakest item, then compare before and after.
Keep a simple log of what changed: stroke weight, letter width, bridge position, or margin. This makes improvement visible without relying on a single correct style.
- Complete one round of alphabet, word, stencil, and layout.
- Score each item against the rubric.
- Redraw the lowest-scoring item once.
- Record the change and repeat with a new word.
Worked example
Draw the word OAK in block style at cap height, mark bridges, and plan it in a box 20 cm wide and 10 cm high at a scale of 1 cm on paper to 10 cm on the wall. Use a hypothetical bridge width of 1 cm on the wall.
Worked answer
The planning box is 2 cm by 1 cm on paper. Mark center line at 1 cm. Set baseline 0.2 cm above the bottom and cap line 0.8 cm above the baseline, giving a hypothetical letter height of 8 cm on the wall. Draw O, A, and K with equal stroke weight. O has one bridge at the top; A has one bridge across the counter. Shade cut-away areas and confirm all pieces connect. Check that the word fits within margins and that bridges are visible at the chosen scale.
Four practice exercises
Exercise 1
Draw lowercase a, e, o, and s on baseline and midline guides. Use block style with equal stroke weight. Describe your result in words.
Show answer and check
All four letters sit between baseline and midline, share the same stroke weight, and have clear counters. The o and e counters are enclosed; the a has one enclosed counter; the s has open curves.
Why: X-height is baseline to midline, so all four letters must touch both guides. Equal stroke weight keeps the set consistent.
Check: Measure each letter's height from baseline to midline; they should match. Compare stroke widths side by side and redraw any outlier.
Exercise 2
Convert the word BAD to a stencil. Mark one bridge per enclosed counter and shade cut-away areas. State how many bridges you used.
Show answer and check
B has two enclosed counters, A has one, and D has one, so four bridges are used. Each bridge connects an inner shape to the outer stencil, and shading shows all pieces remain connected.
Why: Each enclosed counter isolates an inner shape unless a bridge connects it. Counting counters first prevents missed bridges.
Check: Trace each inner shape to the outer stencil with a finger; if any path is broken, add or move a bridge.
Exercise 3
Plan the word ZAP in a box 30 cm wide and 15 cm high at a scale of 1 cm on paper to 10 cm on the wall. State the paper box size and a hypothetical baseline height.
Show answer and check
The paper box is 3 cm by 1.5 cm. A hypothetical baseline height is 0.3 cm above the bottom of the box, and cap height is 0.9 cm above baseline, giving a hypothetical letter height of 9 cm on the wall. Center line is at 1.5 cm.
Why: Scale converts wall measurements to paper: 30 cm becomes 3 cm and 15 cm becomes 1.5 cm. Baseline and cap line must fit inside the box.
Check: Multiply paper measurements by 10 to confirm wall values; check that baseline plus cap height is less than box height.
Exercise 4
Draw uppercase M and W in rounded style at cap height. Mark any bridges needed for a stencil and explain why.
Show answer and check
M and W have no fully enclosed counters, so no bridges are required for the outer shape. If inner gaps are drawn as enclosed shapes, add one bridge per enclosed gap. The letters remain connected without bridges in the simple rounded style.
Why: Bridges are needed only when an inner shape would be isolated. Simple M and W strokes connect to the outer stencil.
Check: Shade cut-away areas and trace every remaining piece; if a piece is isolated, add a bridge.
Common mistakes
- Mixing x-height and cap height within one word. Redraw the word on three guide lines and align all lowercase letters to the midline.
- Forgetting bridges so inner counters fall out. Mark every enclosed counter and add one bridge per counter before shading cut-away areas.
- Planning a wall layout without measuring the wall. Measure width and height, choose a stated scale, and label numerical values as hypothetical examples.
- Using inconsistent stroke weight across letters. Compare stroke widths side by side and redraw outliers to match the majority.
Self-check rubric
- Letters share a consistent x-height or cap height as appropriate.
- Stroke weight is consistent within the word unless variation is deliberate and explained.
- Every enclosed counter has a bridge and the stencil remains connected.
- Wall layout box states scale, center line, baseline, and cap line.
- Numerical values are labeled as hypothetical examples and units are consistent.
- Valid alternative styles are accepted if legible and internally consistent.
Questions and answers
What does x-height mean here?
X-height is the distance from the baseline to the midline. Lowercase letters such as a, e, o, and s sit at x-height. Cap height is baseline to cap line.
Do I need a single correct letter style?
No. Block, rounded, and slab styles are all valid if the alphabet is legible and internally consistent. The rubric checks consistency, not one universal shape.
How wide should a stencil bridge be?
Measure your cutting tool and choose a width that keeps the stencil connected. Any numerical width you write down is a hypothetical example, not a standard.
Can I plan a wall layout without a printer?
Yes. Draw a planning box on paper, state the scale, and mark center line, baseline, and cap line. Measure the actual wall first.