Free original lessons
Underwater Contour Drawing: Fish and Coral Outlines
Learn contour line drawing of fish and coral using blind and observed contour exercises. Build observation skills with clear steps, checks, and practice tasks.
Free lesson
Four exercises
Worked answers
Object Drawing Lessons
Contour drawing captures the outline and edges of a subject without shading or color. This lesson focuses on underwater fish and coral, using a defined convention: draw only visible edges as single continuous lines, with no tonal fill. You will practice blind contour (looking only at the subject) and observed contour (looking mostly at the subject with brief glances at the paper). The goal is accurate edge observation, not polished rendering. All exercises are self-contained; where a diagram is needed, it is described in text. Numerical values are hypothetical examples for measurement practice.
Practice materials: Printable downloads are not available for this lesson yet. Use the instructions and four exercises below.
Reference illustration
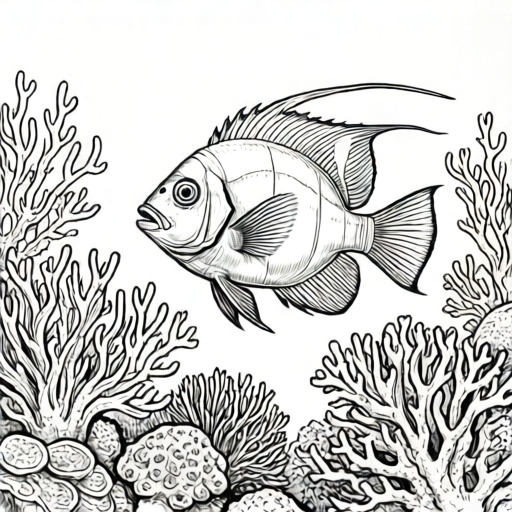
Use the stated measurements and conventions for each exercise.
Defining Contour and the Drawing Convention
A contour line marks a boundary or a change in direction on a surface. For this study, use one continuous line per edge, no shading, no color, and no filling. Overlapping edges may be drawn as separate lines that cross. If an edge is hidden, do not draw it. The convention is explicit so that checks are consistent: every line must correspond to a visible edge or a deliberate construction line that is later removed or ignored.
X-height is defined as the distance from baseline to midline for lettering, but this lesson does not require lettering. Letter styles vary and are not assessed. For fish and coral, focus on outline shape, proportion, and edge continuity. Valid alternatives exist: a fish fin may be drawn with a smooth curve or with slight scallops if those scallops are visible. The rubric rewards correspondence to observed edges, not a single universal shape.
- State the convention: single continuous lines for visible edges, no shading, no color.
- Choose one fish or coral reference described in text or from direct observation.
- Identify three to five major edges (e.g., body outline, fin edge, coral branch edge).
- Draw each edge as one line, lifting the pencil only when the edge ends or is hidden.
- Label any construction line lightly and remove or ignore it in the final check.
Blind Contour Box
A blind contour box is a rectangle on your paper where you draw without looking at the paper. Keep your eyes on the subject. The box size is a hypothetical example: 12 cm by 8 cm. Measure your actual paper and adjust. The purpose is to train eye-hand coordination and edge observation, not to produce an accurate outline. Mistakes are expected and are part of the learning process.
Use a timer if available. A hypothetical duration is 60 seconds per blind contour. This is an example, not a standard. The check is simple: did you keep your eyes on the subject for the full duration? Did you draw at least three distinct edges? The box should contain one continuous line per edge, even if proportions are distorted.
- Draw a rectangle on your paper; a hypothetical size is 12 cm by 8 cm.
- Place your pencil at a starting edge of the fish or coral.
- Look only at the subject; do not look at the paper.
- Draw one continuous line per visible edge for a hypothetical 60 seconds.
- Stop, then compare the number of edges drawn to the number identified.
Observed Contour Box with Edge Prompts
An observed contour box is a second rectangle where you may glance at the paper to check placement. Use edge prompts to guide observation: body outline, fin attachment, coral branch junction, and base contact. Draw each prompt as a separate line. Keep the same convention: no shading, no color. A hypothetical box size is 15 cm by 10 cm; measure your actual paper.
Edge prompts are questions, not answers. For a fish, prompt: where does the body outline change direction at the tail? For coral, prompt: where does a branch split? Draw the visible edge at that location. If the edge is hidden, leave a gap. The check is correspondence: does each drawn line match a visible edge in direction and relative length? Valid alternatives include slightly different curve shapes if they match the observed edge.
- Draw a second rectangle; a hypothetical size is 15 cm by 10 cm.
- Write four edge prompts at the top of the box: body outline, fin edge, branch junction, base contact.
- Draw each prompted edge as one continuous line, glancing at the paper only to check placement.
- Leave gaps where edges are hidden.
- Compare each line to the subject and note one correspondence and one difference.
Checking and Improving Contour Accuracy
Accuracy in contour drawing means correspondence between drawn lines and visible edges. Use a simple check: for each drawn line, name the edge it represents. If you cannot name the edge, the line is likely a construction line or an error. Count the number of named edges and compare to the number of prompts. A hypothetical target is four named edges in the observed box.
Improvement comes from repeated observation, not from erasing. If a line is misplaced, draw a second line nearby that better matches the edge, then compare. Do not shade to hide errors. Keep units consistent: measure box sizes in centimeters and record them. The rubric allows valid alternatives: a fin edge may be drawn as a single curve or as two curves meeting at a point if that point is visible.
- Name the edge for each drawn line.
- Count named edges and compare to prompts.
- Identify one line that matches well and one that does not.
- Redraw the mismatched edge as a new line nearby.
- Record box sizes in centimeters for consistency.
Worked example
A text description of a simple fish: body is an oval about 6 cm long and 3 cm high; tail is a triangle attached at the right; one dorsal fin is a curved line on top; one pectoral fin is a short curve on the left side. Draw an observed contour with four edge prompts: body outline, tail edge, dorsal fin edge, pectoral fin edge. Use a hypothetical box 15 cm by 10 cm.
Worked answer
In the box, draw the oval body outline as one continuous line. Draw the tail triangle as three lines meeting at visible corners, or as one continuous line if the corners are rounded. Draw the dorsal fin as a single curve from the body top. Draw the pectoral fin as a short curve on the left. Leave gaps where fins attach if the attachment edge is hidden. Name each line: body outline, tail edge, dorsal fin edge, pectoral fin edge. Count four named edges. Check that each line matches the described direction and relative length. A valid alternative is drawing the tail as a single curve if the corners are not visible.
Four practice exercises
Exercise 1
Text description: a coral branch with a main stem 5 cm tall and two side branches splitting at 2 cm and 4 cm from the base. Draw a blind contour in a hypothetical 12 cm by 8 cm box for 60 seconds. Identify three edges: main stem outline, first branch edge, second branch edge.
Show answer and check
A blind contour with one continuous line per identified edge, drawn without looking at the paper. The lines may be distorted; the answer is the completed box with three distinct edges and a note of the duration.
Why: The exercise trains edge observation under blind conditions. The check is procedural: eyes on subject, three edges drawn, duration recorded.
Check: Count the distinct edges in the box; confirm the duration note; confirm no shading or color.
Exercise 2
Text description: a fish with an oval body 8 cm long and 4 cm high, a forked tail on the right, and a dorsal fin curve on top. Draw an observed contour in a hypothetical 15 cm by 10 cm box. Use three edge prompts: body outline, tail edge, dorsal fin edge. Name each line.
Show answer and check
An observed contour with three named lines corresponding to the body outline, tail edge, and dorsal fin edge. Gaps are left where the fin attaches if hidden. A valid alternative is drawing the forked tail as two curves meeting at a visible point.
Why: The exercise practices correspondence between drawn lines and described edges. Naming each line makes the check explicit.
Check: Verify three named edges; check that each line matches the described direction and relative length; confirm no shading.
Exercise 3
Text description: a coral with a base contact edge 3 cm wide and three branches rising from it. Draw an observed contour in a hypothetical 15 cm by 10 cm box. Use four edge prompts: base contact, left branch, middle branch, right branch. Leave gaps where branches overlap.
Show answer and check
An observed contour with four named lines for the base contact and three branches. Overlapping branch edges are drawn as separate lines that cross, or gaps are left where one branch hides another. The answer includes a count of four named edges.
Why: The exercise tests handling of overlaps and hidden edges, which are common in coral. The check is the count of named edges and the presence of gaps or crossing lines.
Check: Count four named edges; confirm gaps or crossing lines at overlaps; confirm box size recorded in centimeters.
Exercise 4
Text description: a fish with a round body 5 cm diameter, a small tail triangle on the right, and two pectoral fins on the left. Draw a blind contour for 45 seconds in a hypothetical 12 cm by 8 cm box, then an observed contour in a hypothetical 15 cm by 10 cm box with four edge prompts: body outline, tail edge, upper pectoral fin, lower pectoral fin. Compare the two boxes by naming one correspondence and one difference.
Show answer and check
Two boxes: a blind contour with at least three edges and a duration note, and an observed contour with four named edges. The comparison names one correspondence (e.g., both include a body outline) and one difference (e.g., the observed box has a clearer tail edge).
Why: The exercise combines blind and observed practice and requires a simple comparison, reinforcing the check method.
Check: Verify the blind box has at least three edges and a duration note; verify the observed box has four named edges; confirm the comparison names one correspondence and one difference.
Common mistakes
- Shading or filling areas to suggest form. Remove shading; use only single continuous lines for visible edges.
- Drawing hidden edges as if they were visible. Leave gaps where edges are hidden; draw only visible boundaries.
- Looking at the paper during blind contour. Keep eyes on the subject; accept distorted proportions as part of the exercise.
- Using inconsistent units for box sizes. Measure and record all box dimensions in centimeters.
Self-check rubric
- Convention followed: only single continuous lines for visible edges; no shading or color.
- Blind contour box completed with eyes on subject and at least three distinct edges drawn.
- Observed contour box includes four edge prompts and four named edges.
- Gaps left where edges are hidden; no hidden edges drawn as visible.
- Box sizes measured and recorded in centimeters.
- Valid alternatives accepted when drawn lines correspond to visible edges.
Questions and answers
Do I need color or shading for this study?
No. The boundary excludes shading and color. Use contour lines only.
What if my blind contour looks distorted?
That is expected. The check is whether you kept your eyes on the subject and drew distinct edges, not whether proportions are accurate.
Can I use a different fish or coral shape?
Yes. Valid alternatives are allowed if the drawn lines correspond to visible edges. The rubric rewards correspondence, not a single universal shape.
How long should each exercise take?
Durations are hypothetical examples. Use a timer if available and adjust to your pace; the check is completion of the stated steps.