HomeCarnotaurus Scale Drawing for a Cutout Free original lessons
Carnotaurus Scale Drawing for a Cutout
Plan a scaled Carnotaurus outline, verify proportions with simple arithmetic, and prepare a cutout using a defined drawing convention.
Free lesson
Four exercises
Worked answers
Object Drawing Lessons
This lesson teaches how to draw a Carnotaurus to scale as a cutout. You will choose a scale, convert a hypothetical body length into a drawing length, build the outline from measured landmarks, and check the result before cutting. The convention is explicit: x-height is measured from the baseline to the midline of lowercase letters, and letter styles may vary, so the rubric accepts any legible style that meets the stated measurements. All numerical values are hypothetical examples; measure your own paper and equipment rather than assuming standard tolerances.
Practice materials: Printable downloads are not available for this lesson yet. Use the instructions and four exercises below.
Reference illustration
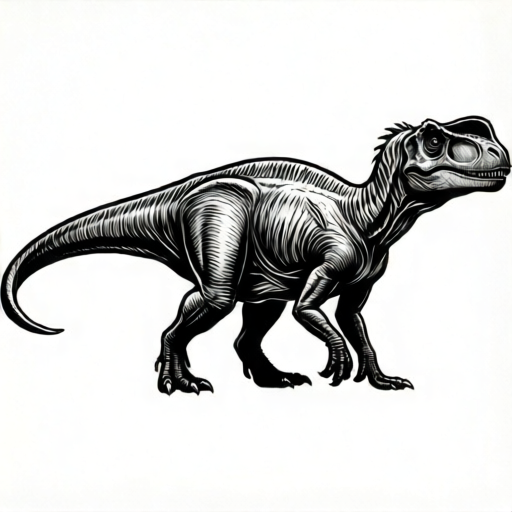
Use the stated measurements and conventions for each exercise.
Choose a scale and convert the body length
Start with a hypothetical body length for the Carnotaurus, for example 8 metres from snout tip to tail tip. Choose a scale that fits your paper. A scale of 1:40 means 1 centimetre on the drawing represents 40 centimetres in life. Convert the body length to centimetres first: 8 metres equals 800 centimetres. Then divide by 40 to get 20 centimetres on the drawing. Write the scale as a ratio and keep units consistent throughout.
Measure the usable width and height of your paper with a ruler. If the drawing length is 20 centimetres and your paper has at least 22 centimetres of usable width, the outline can fit with a small margin. Do not rely on printer tolerances; measure the actual sheet after any printing or trimming.
- Record the hypothetical body length in centimetres.
- Choose a scale ratio and write it clearly.
- Divide the body length by the scale denominator to get the drawing length.
- Measure your paper and confirm the drawing length plus margins fits.
Build the outline from landmarks
Mark a baseline and a midline on the paper. The baseline is the lower reference line; the midline is the horizontal centre line used for the x-height convention. Place the snout tip and tail tip on the baseline at the converted drawing length. Mark the hip point roughly one third of the body length from the tail tip, and the shoulder point roughly one third from the snout tip. These fractions are hypothetical planning aids, not measurements of a real animal.
Draw the body as a tapered oval between shoulder and hip, then add the neck, head, tail, and two legs. Keep the tail tip and snout tip on the baseline so the total length is easy to check. Use light pencil lines first, then darken the final outline. The cut line should follow the outer outline with a small margin; measure that margin on your own paper rather than assuming a standard.
- Draw the baseline and midline.
- Mark snout tip and tail tip at the converted length.
- Mark shoulder and hip points using the chosen fractions.
- Sketch the body, head, tail, and legs lightly.
- Darken the outline and add a cut line with a measured margin.
Add a scale bar and a blank panel
Draw a scale bar that represents 1 metre in life. At 1:40, 1 metre equals 100 centimetres divided by 40, which is 2.5 centimetres on the drawing. Label the bar clearly with the ratio and the represented length. Place a blank panel beside the outline for an independent scaled drawing; the panel should be large enough for a second outline at the same scale.
Check the scale bar against the body length: if the body is 20 centimetres and the bar is 2.5 centimetres, then eight bars should equal the body length. Measure this with a ruler. If the bars do not match, adjust the bar or the outline before cutting.
- Calculate the scale bar length from the chosen ratio.
- Draw and label the scale bar.
- Measure eight bar lengths against the body length.
- Reserve a blank panel for an independent drawing.
Check proportions and prepare the cutout
Use simple arithmetic to check proportions. If the head is planned as one eighth of the body length, then at 20 centimetres the head should be 2.5 centimetres. If the leg length is planned as one quarter of the body length, it should be 5 centimetres. These fractions are hypothetical examples; choose your own and record them. Compare each measured part with its planned value and note any difference.
Before cutting, confirm the outline is closed, the scale bar is labelled, and the blank panel is clear. Cut along the cut line, not the outline, and keep the margin consistent. After cutting, measure the cutout length and compare it with the planned drawing length. Record the difference in centimetres.
- Measure head, leg, and tail lengths against planned fractions.
- Confirm the outline is closed and the scale bar is labelled.
- Cut along the cut line with a measured margin.
- Measure the finished cutout and record the difference.
Worked example
A hypothetical Carnotaurus body length is 6 metres. Use a scale of 1:30. Calculate the drawing length and the length of a 1-metre scale bar.
Worked answer
6 metres equals 600 centimetres. 600 divided by 30 equals 20 centimetres drawing length. A 1-metre scale bar is 100 centimetres divided by 30, which equals about 3.33 centimetres. Check: six bars of 3.33 centimetres is about 20 centimetres, matching the body length.
Four practice exercises
Exercise 1
A hypothetical Carnotaurus body length is 7 metres. Use a scale of 1:35. Calculate the drawing length in centimetres.
Show answer and check
20 centimetres.
Why: 7 metres equals 700 centimetres. 700 divided by 35 equals 20 centimetres.
Check: Multiply 20 centimetres by 35 to get 700 centimetres, which equals 7 metres.
Exercise 2
At a scale of 1:50, a 1-metre scale bar is drawn. Calculate its length in centimetres, then check how many bars equal a 10-centimetre drawing length.
Show answer and check
The bar is 2 centimetres. Five bars equal 10 centimetres.
Why: 100 centimetres divided by 50 equals 2 centimetres. 10 divided by 2 equals 5.
Check: Multiply 2 centimetres by 5 to get 10 centimetres, matching the drawing length.
Exercise 3
A drawing length is 24 centimetres at a scale of 1:25. Calculate the hypothetical real body length in metres.
Show answer and check
6 metres.
Why: 24 centimetres times 25 equals 600 centimetres. 600 centimetres equals 6 metres.
Check: Divide 600 centimetres by 25 to get 24 centimetres, matching the drawing length.
Exercise 4
A planned head length is one eighth of a 16-centimetre drawing length. Calculate the head length, then state one measurement you would record to check it.
Show answer and check
2 centimetres. Record the measured head length in centimetres and compare it with 2 centimetres.
Why: 16 divided by 8 equals 2 centimetres. The check is a direct measurement of the drawn head.
Check: Measure the head on the drawing with a ruler and subtract 2 centimetres to find the difference.
Common mistakes
- Mixing metres and centimetres in the scale conversion. Convert the body length to centimetres before dividing by the scale denominator, and write the unit at every step.
- Assuming a standard printer margin instead of measuring the paper. Measure the actual usable width and height of your sheet with a ruler and subtract your chosen margin.
- Cutting on the outline instead of the cut line. Draw a separate cut line with a measured margin and cut along that line.
- Treating the x-height convention as a single required letter style. Measure x-height from baseline to midline and accept any legible style that meets the stated measurements.
Self-check rubric
- Scale ratio is written clearly and units are consistent.
- Drawing length is calculated correctly from the chosen body length and scale.
- Outline includes snout, tail, body, head, and two legs, with a closed cut line.
- Scale bar is labelled and matches the chosen ratio.
- Blank panel is reserved for an independent scaled drawing.
- X-height convention is applied from baseline to midline, and any legible letter style is accepted.
- Measurements are recorded with units and checked against planned values.
Questions and answers
What does x-height mean in this lesson?
X-height is the distance from the baseline to the midline of lowercase letters. Letter styles vary, so the rubric checks the measured height and legibility rather than one fixed style.
Can I use a different scale?
Yes. Choose any ratio that fits your paper, then recalculate the drawing length and scale bar with the same arithmetic.
Are the body fractions real Carnotaurus measurements?
No. The fractions and the 8-metre body length are hypothetical examples for planning and checking. Measure your own drawing and record your chosen values.
How do I check the scale bar?
Multiply the bar length by the number of bars that should equal the body length. For example, eight bars of 2.5 centimetres should equal 20 centimetres.