Free original lessons
Rainbow Scale Dragon: Row Coloring and Wing Shape Drawing
Learn to draw a dragon with orderly rainbow scale rows and clear wing shapes using a simple convention, checkable steps, and practice tasks.
Free lesson
Four exercises
Worked answers
Object Drawing Lessons
This lesson teaches a repeatable way to draw a dragon with rainbow scale rows and constructed wing shapes. You will use a simple convention: each scale row is a band between two horizontal guide lines, and wing shapes are built from three measured points. The focus is on orderly color progression and clear wing silhouettes, not realistic scale texture or anatomical detail. All measurements are hypothetical examples; measure your own paper and tools. Work in pencil first, then add color. Keep units consistent, use a ruler for guides, and check each stage before moving on.
Practice materials: Printable downloads are not available for this lesson yet. Use the instructions and four exercises below.
Reference illustration
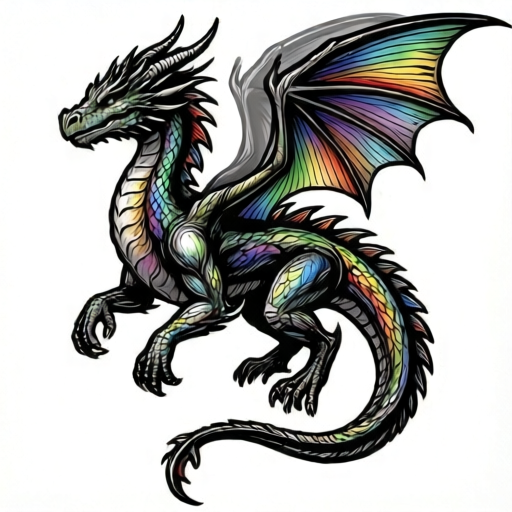
Use the stated measurements and conventions for each exercise.
Setting Up Guides and the Scale-Row Convention
Place your paper in landscape orientation. Draw a light horizontal midline across the page; this is the dragon's body axis. Mark a baseline 3 cm below the midline and a top guide 3 cm above it, using a ruler. These two lines define the body band. Divide the band into five equal horizontal rows with light pencil lines. Each row is a scale row. The convention is: a scale row is the space between two adjacent horizontal guides, and scales within a row are drawn as overlapping arcs that touch the row boundaries. This keeps rows orderly and makes color progression easy to check.
Label the rows 1 to 5 from bottom to top. Row 1 is the lowest row, row 5 the highest. Choose a rainbow order that moves smoothly, for example red, orange, yellow, green, blue. Write the color name at the left end of each row before coloring. This plan prevents accidental color jumps and lets you verify the sequence at a glance.
- Draw a light horizontal midline across the paper.
- Mark a baseline 3 cm below the midline and a top guide 3 cm above it.
- Divide the band into five equal rows with light horizontal lines.
- Label rows 1 to 5 from bottom to top.
- Write the intended color name at the left end of each row.
Drawing Scales in Rows
Work one row at a time. In row 1, draw a series of overlapping arcs from left to right. Each arc should start and end on the row boundaries, and each new arc should overlap the previous one by about one third of its width. Keep arc width consistent within a row; a width of 1.5 cm is a hypothetical example. Repeat for rows 2 to 5, offsetting the starting point by half an arc width in alternating rows so the pattern looks staggered but still orderly.
Check each row before coloring: all arcs touch both boundaries, overlaps are similar, and no arc crosses into a neighboring row. If an arc crosses a boundary, erase and redraw it. This check keeps the rainbow rows readable and prevents color bleeding between rows.
- Start at the left end of row 1 and draw overlapping arcs to the right.
- Keep each arc within the row boundaries and overlap by about one third.
- Repeat for rows 2 to 5, offsetting alternate rows by half an arc width.
- Check that every arc touches both boundaries and stays in its row.
- Erase and redraw any arc that crosses a boundary.
Constructing Wing Shapes from Three Points
Draw the wing on one side of the body first. Mark three points: a shoulder point on the top guide near the body, a tip point 6 cm outward and 2 cm upward from the shoulder, and a lower point 4 cm outward and 3 cm downward from the shoulder. These numbers are hypothetical examples; measure your own space. Connect shoulder to tip with a straight line, tip to lower point with a curved line, and lower point back to shoulder with a slightly curved line. This creates a simple triangular wing silhouette with a curved trailing edge.
Repeat on the other side, mirroring the three points. Check that both wings have the same number of points and similar proportions. The wing shape is a construction, not an anatomical claim; valid alternatives include a more curved trailing edge or a slightly different tip angle, as long as the three-point structure is clear and the silhouette reads as a wing.
- Mark a shoulder point on the top guide near the body.
- Mark a tip point outward and upward from the shoulder.
- Mark a lower point outward and downward from the shoulder.
- Connect shoulder to tip, tip to lower point, and lower point to shoulder.
- Mirror the three points on the other side and check proportions.
Coloring Rainbow Rows and Final Checks
Color each row with its planned color, keeping color inside the row boundaries. Use light pressure first, then build intensity. Check the rainbow order from row 1 to row 5: the sequence should progress smoothly without repeats or jumps. If a color is misplaced, correct it before continuing. Finally, check the wing silhouettes: each wing should show three clear points and a readable outline. Compare the two wings for similar size and angle.
A complete drawing shows five labeled scale rows in a smooth rainbow order, orderly overlapping arcs within each row, and two constructed wing shapes with three points each. Valid alternatives include different rainbow orders that still progress smoothly, different arc widths, and slightly different wing curves, provided the conventions and checks are met.
- Color row 1, then proceed upward to row 5.
- Keep color inside each row boundary.
- Check the rainbow sequence for smooth progression.
- Check each wing for three clear points and a readable outline.
- Compare wings for similar size and angle.
Worked example
A student draws a body band 6 cm tall, divides it into five rows, and plans colors red, orange, yellow, green, blue from bottom to top. They draw arcs in row 1 that stay within the boundaries, then color row 1 red. What should they check before moving to row 2?
Worked answer
Check that every arc in row 1 touches both row boundaries, overlaps are similar, and no arc crosses into row 2. Then confirm the planned color for row 2 is orange and that the sequence red to orange is smooth. If any arc crosses a boundary, erase and redraw it before coloring row 2.
Four practice exercises
Exercise 1
A body band is 5 cm tall and divided into five equal rows. What is the height of each row in centimeters?
Show answer and check
1 cm
Why: Divide the total band height by the number of rows: 5 cm divided by 5 equals 1 cm per row.
Check: Multiply 1 cm by 5 rows to confirm the total is 5 cm.
Exercise 2
A student plans four colors for five rows: red, orange, yellow, green. What is the problem and how can it be fixed?
Show answer and check
There are five rows but only four colors, so one row would repeat or lack a planned color. Add a fifth color, such as blue, to complete a smooth five-color sequence.
Why: The convention requires one planned color per row and a smooth progression. Counting rows and colors shows a mismatch.
Check: Count the rows and the color names; they should match, and the sequence should have no repeats or jumps.
Exercise 3
A wing has a shoulder point, a tip point 6 cm outward and 2 cm upward, and a lower point 4 cm outward and 3 cm downward. How many straight or curved connections are needed to close the wing shape?
Show answer and check
Three connections
Why: Connect shoulder to tip, tip to lower point, and lower point back to shoulder. Three points form a closed shape with three connections.
Check: Trace the outline and count the connections between the three points; there should be three.
Exercise 4
A student colors row 1 red, row 2 yellow, row 3 orange, row 4 green, row 5 blue. Is the rainbow order smooth? Explain.
Show answer and check
No. Yellow and orange are out of order. A smooth order would place orange before yellow, for example red, orange, yellow, green, blue.
Why: Compare adjacent colors: red to yellow skips orange, and yellow to orange reverses the expected progression.
Check: List the colors in row order and check that each step moves smoothly without repeats or reversals.
Common mistakes
- Scales cross row boundaries, making rows unclear. Redraw arcs so each starts and ends on the row boundaries; check before coloring.
- Rainbow colors are placed out of order or repeated. Write the color plan at the left end of each row and verify the sequence before coloring.
- Wing shapes have unclear points or unequal sides. Mark the three points first, connect them in order, and mirror the points on the other side.
- Color bleeds into neighboring rows. Use lighter pressure and keep the pencil tip inside the row; correct any bleed immediately.
Self-check rubric
- Five scale rows are clearly labeled and separated by horizontal guides.
- Scales within each row are overlapping arcs that touch both row boundaries.
- Rainbow colors progress smoothly from row 1 to row 5 without repeats or jumps.
- Two wing shapes are constructed from three clear points each.
- Wings are similar in size and angle, with readable silhouettes.
- Valid alternatives are accepted if conventions and checks are met.
Questions and answers
Do I have to use red, orange, yellow, green, blue?
No. Any smooth rainbow progression is valid. The check is that colors move in order without repeats or jumps.
How wide should each scale arc be?
Choose a consistent width that fits your row. A 1.5 cm width is a hypothetical example; measure your own paper.
Can the wing shape be more curved?
Yes. Valid alternatives include a more curved trailing edge, as long as the three-point structure and readable silhouette remain.
What if my rows are not perfectly equal?
Measure and adjust the guides before drawing scales. Equal rows make the rainbow order easier to check.