Free original lessons
Blind Contour Face Drawing with Color Notes
Learn blind contour face drawing, then annotate color choices in a margin. Includes steps, mistakes, FAQ, worked example, rubric, and four practice tasks.
Free lesson
Four exercises
Worked answers
Object Drawing Lessons
Blind contour drawing asks you to draw a face while looking only at the subject, not at your paper. The goal is sustained observation, not likeness. After the blind drawing is complete, you add color notes in a margin: short labels that name which colors you would apply to each contour region. This exercise separates seeing from rendering and builds a habit of translating observed edges into planned color decisions. You will need a printed plate with a face reference, a large drawing area, and a color-note margin, or you can recreate that layout on blank paper. Use any pencil or pen. Color notes are written words, not painted color, so no paints are required. The convention for judging line placement is explicit: x-height is measured from baseline to midline, and letter styles vary, so valid alternatives exist. All numerical examples below are hypothetical and should be replaced by measurements of your actual equipment.
Practice materials: Printable downloads are not available for this lesson yet. Use the instructions and four exercises below.
Reference illustration
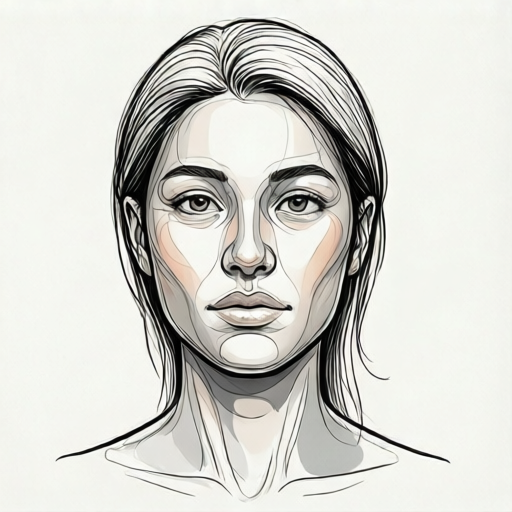
Use the stated measurements and conventions for each exercise.
Set up the plate and define the convention
Place the face reference at eye level so you can look at it without turning your head far. Tape your paper so it cannot shift. Draw a light rectangle for the blind-contour area and a narrow column at one side for color notes. The column is used only after the blind drawing is finished.
Define the x-height convention before drawing: x-height is the distance from the baseline to the midline of lowercase letters in your color notes. Because letter styles vary, do not force one handwriting style. Instead, state your own baseline and midline with two faint guide lines in the margin. Any legible letter style that respects those guides is valid.
- Measure your paper and note the actual dimensions in centimeters; label any chosen values as hypothetical examples.
- Draw the blind-contour area and a color-note margin at least 4 cm wide (hypothetical example; measure your own paper).
- Write two faint guide lines in the margin for baseline and midline, then label the x-height convention.
- Place the face reference where you can see it without looking at your paper.
Draw the blind contour
Choose one starting point on the face, such as the outer edge of an eyebrow. Put your pen on the paper and begin. Move your pen slowly while your eyes trace the edge on the reference. Do not look at the paper until the drawing is finished. If your pen drifts, keep going; the record of drift is part of the exercise.
Work around the face in one continuous line where possible. Include the jaw, hairline, eye shapes, nose edge, and mouth edge. You may lift the pen if needed, but do not correct the line by looking. Stop when you have traced the main contours you intended to observe.
- Pick a starting contour and place the pen without looking down.
- Trace the edge slowly with your eyes while your pen follows.
- Keep the line continuous; accept drift rather than correcting it.
- Finish after tracing the planned contours, then look at the paper for the first time.
Add color notes in the margin
Now look at your blind drawing and the reference together. In the color-note margin, write short labels that connect contour regions to color choices. For example, write cheek edge: warm peach, or hairline: deep brown. Each note should name a region and a color. Keep notes brief so the margin stays readable.
Use the x-height convention you defined. Write each note between the baseline and midline guides, or state clearly if a note extends above midline. Because letter styles vary, a note is valid if it is legible, names a region, and names a color. Do not rewrite the blind drawing to make it look realistic; the notes are the color plan, not a rendering.
- Compare the blind drawing to the reference and list the contour regions you traced.
- Write one color note per region in the margin.
- Check that each note names both a region and a color.
- Confirm notes respect your baseline and midline guides or are labeled otherwise.
Review with the rubric
Review the blind drawing for sustained looking, continuous line, and completeness of traced contours. Review the margin for legible notes, region-color pairing, and respect for the x-height convention. Valid alternatives are expected: different letter styles, different color names, and different region labels are acceptable if they are clear and consistent.
Use the check method in each exercise to verify arithmetic and units. Keep all measurements in centimeters and label hypothetical values as such. Do not claim that any printed plate, worksheet, or answer file currently exists; these resources are planned only.
- Score the blind drawing on looking discipline and line continuity.
- Score the color notes on legibility and region-color pairing.
- Verify the x-height convention was stated and followed or labeled.
- Record any measurement in centimeters and mark hypothetical values.
Worked example
A student tapes a 21 cm by 30 cm sheet (hypothetical example) and draws a blind contour of a face for two minutes without looking at the paper. The student then writes three color notes in a 5 cm margin: cheek edge: warm peach; hairline: deep brown; lip edge: muted rose. The baseline-to-midline guides are 0.8 cm apart. Check the margin width and note count.
Worked answer
The margin is 5 cm wide, which is at least the hypothetical 4 cm minimum. Three notes each name a region and a color. The x-height guide distance is 0.8 cm, stated as a hypothetical example. The blind drawing is not corrected. The review passes the margin-width check and the region-color pairing check.
Four practice exercises
Exercise 1
A student draws a blind contour for 90 seconds and writes four color notes in a margin 6 cm wide. The paper is 20 cm by 25 cm (hypothetical example). The baseline-to-midline distance is 1 cm. Check whether the margin meets a hypothetical 4 cm minimum and whether four notes are present.
Show answer and check
Margin width 6 cm is at least 4 cm. Four notes are present. The 1 cm x-height guide is stated as hypothetical. The check passes.
Why: Compare the measured margin to the stated minimum and count the notes. Keep units in centimeters and label hypothetical values.
Check: Subtract 4 cm from 6 cm to get 2 cm of extra margin; count notes one by one.
Exercise 2
A blind drawing traces the jaw, hairline, and mouth edge. The student writes: jaw: soft brown; hairline: dark gray; mouth: muted rose. One note extends above midline and is labeled above midline. Check region-color pairing and convention labeling.
Show answer and check
Three notes pair a region with a color. The exception is labeled above midline. The convention is respected. The check passes.
Why: Each note must name a region and a color. Exceptions to the x-height guides must be labeled, not hidden.
Check: Read each note and confirm two parts: region and color; then confirm the exception label.
Exercise 3
A student looks at the paper twice during a blind contour and then erases one line. The margin has two notes: cheek: peach; nose: tan. Check the blind-drawing discipline and note count.
Show answer and check
Looking at the paper and erasing break the blind-contour discipline. Two notes are present but the drawing check fails. The student should repeat without looking or erasing.
Why: The exercise records observation; corrections after looking down defeat the purpose. Note count alone does not pass the drawing check.
Check: Count glances and erasures; count notes separately; require zero deliberate corrections for a pass.
Exercise 4
A student measures a margin of 3.5 cm and writes five notes. The stated minimum is 4 cm (hypothetical example). The x-height guides are 0.7 cm apart. Check margin width and note count.
Show answer and check
Margin width 3.5 cm is below the 4 cm minimum, so the margin check fails. Five notes are present. The student should widen the margin or restate the minimum as a measured choice.
Why: Compare measured width to the stated minimum. Note count is separate from width. Label the 4 cm value as hypothetical.
Check: Subtract 3.5 cm from 4 cm to find a 0.5 cm shortfall; count five notes.
Common mistakes
- Looking at the paper during the blind drawing. Rest your eyes on the reference and move the pen slowly; if you glance down, note it and continue without correcting.
- Erasing or correcting lines after the blind drawing. Leave the blind line as drawn; the exercise records observation, not likeness.
- Writing color notes without naming a region. Pair every color with a contour region, such as jaw edge: soft brown.
- Ignoring the x-height convention in the margin. Draw baseline and midline guides first, then write notes between them or label exceptions.
- Treating color notes as a realistic rendering task. Keep notes as short written labels; do not shade or paint the blind drawing.
Self-check rubric
- Blind drawing shows sustained looking with no deliberate correction after looking down.
- Line is continuous or clearly records intentional pen lifts.
- Main facial contours are traced and identifiable as regions.
- Color notes are legible and each names a region and a color.
- X-height convention is stated and followed, or exceptions are labeled.
- Measurements are in centimeters and hypothetical values are labeled.
Questions and answers
Do I need paints or colored pencils?
No. Color notes are written words in the margin. You only need a pen or pencil and paper.
Can I lift my pen during the blind contour?
Yes, if needed. Keep looking only at the reference while the pen is on the paper.
What if my blind drawing looks nothing like a face?
That is expected. The exercise trains observation, not likeness. Judge looking discipline and line continuity.
How do I judge handwriting in the margin?
Use the stated x-height convention: baseline to midline. Letter styles vary, so any legible style that respects the guides or labels exceptions is valid.
Are the numerical examples real standards?
No. Values such as a 4 cm margin are hypothetical examples. Measure your actual paper and equipment.