Free original lessons
Contour Line Drawing of a Soda Can: A Focused Study
Learn to draw a soda can using contour lines only. Practice blind and slow contour, trace rim, body, and tab edges, and check proportions with simple measurements.
Free lesson
Four exercises
Worked answers
Object Drawing Lessons
Contour drawing captures the outline and edges of an object without shading or perspective ellipses. This lesson focuses on a soda can as a clear, familiar form. You will use a defined convention: x-height is measured from baseline to midline of lowercase letters, and letter styles vary, so proportions are checked against the actual can rather than a universal template. All resources are planned and free; none are built yet. Work through the sections, avoid common mistakes, and complete the four practice tasks. Each task is self-contained and solvable from the text.
Practice materials: Printable downloads are not available for this lesson yet. Use the instructions and four exercises below.
Reference illustration
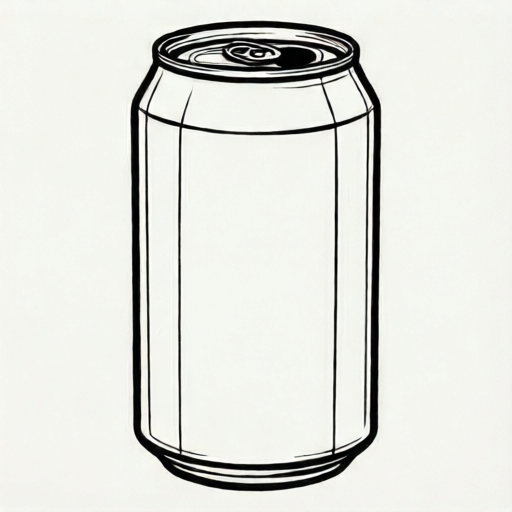
Use the stated measurements and conventions for each exercise.
Setting Up and Defining the Contour Convention
Place a clean, empty soda can upright on a flat surface. Use a pencil and paper. Define your drawing area with a light border. The contour convention for this study: draw only visible edges—rim, body sides, base curve, and tab—without shading, label design, or ellipse perspective. Treat the can as a flat silhouette with internal edge lines where surfaces meet. Measure the actual can with a ruler; record height and width in millimeters. Any numerical values in this lesson are hypothetical examples, not standards.
X-height is baseline to midline of lowercase letters. Letter styles vary, so do not assume a fixed x-height for all text. For proportion checks, use the can’s actual height and width. A simple ratio helps: height divided by width. For example, if a hypothetical can is 120 mm tall and 65 mm wide, the ratio is about 1.85. Your can may differ; measure it.
- Measure the can’s height and width with a ruler; write both in millimeters.
- Draw a light rectangular frame on paper slightly larger than the can’s silhouette.
- Mark the top rim line and the base line using the measured height.
- Mark the left and right body edges using the measured width.
- Label the tab area with a small box; do not draw the label design.
Blind Contour: Training the Eye and Hand
Blind contour means you look only at the can while drawing, not at the paper. This trains observation of edges. Start at the top rim and move slowly along the outline. Keep the pencil moving at a steady pace. Do not lift the pencil unless the edge breaks. The result may look distorted; that is expected. The goal is to notice rim curvature, body taper, and tab edges.
Use a timer for a short period, such as two minutes. After finishing, compare your blind contour to the can’s actual proportions using the height-to-width ratio. If your drawing’s height is much shorter than the measured ratio suggests, note where your hand sped up. Repeat once with the same can.
- Place the can where you can see it clearly without turning your head.
- Put pencil on paper at the top rim; do not look at the paper.
- Trace the rim edge slowly, then the left body edge, base curve, right body edge, and tab edges.
- Keep the pencil moving; do not erase.
- After the timer, look at the paper and compare the overall height and width to your measurements.
Slow Contour: Tracing Rim, Body, and Tab Edges
Slow contour allows glancing at the paper while prioritizing the can’s edges. Draw the rim as a single curved line that follows the visible top edge. The body sides are nearly straight but may taper slightly; follow the actual can. The base curve mirrors the rim’s curvature but is often less pronounced. The tab has small, angular edges; draw them as separate short lines where they meet the can top.
Use the measured height and width to place key points: top rim center, base center, left and right body edges at mid-height. Connect these points with slow, deliberate lines. Check that the tab edges sit within the top rim area. Do not add ellipses or shading. If a line looks wrong, redraw it lightly beside the first rather than erasing heavily.
- Mark the top rim center and base center using the measured height.
- Mark left and right body edges at mid-height using the measured width.
- Draw the rim curve from left to right through the top center mark.
- Draw the left body edge down to the base, then the base curve, then the right body edge up.
- Draw the tab edges as short lines inside the top rim area.
- Compare the finished contour to the can’s height-to-width ratio.
Checking Proportions and Valid Alternatives
Because letter styles vary and x-height is baseline to midline, do not use text on the can as a fixed scale. Instead, use the can’s measured height and width. A valid contour may show the rim as a shallow curve or a deeper curve, depending on the viewing angle. Both can be correct if they match what you see. The rubric allows alternatives: the tab may be drawn with rounded or angular edges if those edges are visible.
Check your drawing by measuring its height and width on paper. Divide height by width. Compare to the can’s ratio. A difference of about 0.1 is acceptable for a freehand study. Also check that the tab edges do not extend beyond the top rim. If they do, adjust the tab lines inward.
- Measure your drawing’s height and width in millimeters.
- Compute the drawing’s height-to-width ratio.
- Compare to the can’s measured ratio; note the difference.
- Check that the tab edges stay within the top rim area.
- If needed, redraw one edge lightly to improve the ratio.
Worked example
A hypothetical can measures 120 mm tall and 65 mm wide. Draw a slow contour of its outline, including rim, body, base, and tab edges. Then check the height-to-width ratio.
Worked answer
The can’s ratio is 120 ÷ 65 ≈ 1.85. On paper, the drawing measures 118 mm tall and 64 mm wide. The drawing’s ratio is 118 ÷ 64 ≈ 1.84. The difference is about 0.01, which is within the acceptable 0.1. The tab edges are drawn as short lines inside the top rim area. No shading or label design is added. This is a valid contour study.
Four practice exercises
Exercise 1
A hypothetical can is 110 mm tall and 55 mm wide. Draw a slow contour of its outline. Measure your drawing: it is 108 mm tall and 54 mm wide. Compute both ratios and state whether the drawing passes the ratio check.
Show answer and check
Can ratio: 110 ÷ 55 = 2.0. Drawing ratio: 108 ÷ 54 = 2.0. Difference is 0.0, so it passes.
Why: Divide height by width for both the can and the drawing. Compare the two ratios. A difference of about 0.1 or less is acceptable.
Check: Re-measure height and width with a ruler. Recalculate both ratios. Confirm the difference is ≤ 0.1.
Exercise 2
A hypothetical can is 130 mm tall and 60 mm wide. A drawing measures 125 mm tall and 58 mm wide. Compute the ratios and the difference. Does it pass? If not, suggest one adjustment.
Show answer and check
Can ratio: 130 ÷ 60 ≈ 2.17. Drawing ratio: 125 ÷ 58 ≈ 2.16. Difference ≈ 0.01, so it passes. No adjustment needed.
Why: Use height divided by width for each. Subtract the smaller ratio from the larger. If the difference is ≤ 0.1, the drawing passes.
Check: Recalculate with a calculator or long division. Confirm the difference is ≤ 0.1. If it were larger, adjust the drawing’s height or width slightly.
Exercise 3
During a blind contour of a can, you notice your drawing’s height is much shorter than the can’s measured height. State one likely cause and one fix for the next attempt.
Show answer and check
Likely cause: your hand moved too fast along the body edges, compressing the height. Fix: slow down and keep the pencil moving at a steady pace while tracing the full height from rim to base.
Why: Blind contour prioritizes looking at the can. Speeding up often shortens vertical edges. A steady, slower pace helps maintain the full height.
Check: After the next blind contour, compare the drawing’s height to the can’s measured height. Note whether the height is closer.
Exercise 4
A slow contour drawing shows tab edges extending beyond the top rim. The can’s measured height is 115 mm and width is 62 mm. The drawing measures 114 mm tall and 61 mm wide. Compute the ratio difference and state one fix for the tab edges.
Show answer and check
Can ratio: 115 ÷ 62 ≈ 1.85. Drawing ratio: 114 ÷ 61 ≈ 1.87. Difference ≈ 0.02, so the ratio passes. Fix: redraw the tab edges as shorter lines that stay inside the top rim area.
Why: The ratio check uses overall height and width, not the tab. The tab error is separate. Redrawing the tab lines inward corrects the contour without changing the overall proportions.
Check: Re-measure the drawing’s height and width to confirm the ratio difference is ≤ 0.1. Visually check that all tab lines are inside the top rim.
Common mistakes
- Adding shading or label design. Erase or ignore non-contour marks; redraw only visible edges. Keep the label area blank.
- Drawing ellipse perspective on the rim or base. Follow the visible top and bottom edges as curves; do not construct ellipses. Match the can’s actual silhouette.
- Using text x-height as a fixed scale. Measure the can’s height and width with a ruler. Use the height-to-width ratio for checks; letter styles vary.
- Looking at the paper too often during blind contour. Set a short timer and keep your eyes on the can. Accept distortion; the goal is observation, not accuracy.
Self-check rubric
- Contour only: no shading, label design, or ellipse perspective.
- Rim, body sides, base curve, and tab edges are present and follow visible edges.
- Height-to-width ratio of the drawing is within about 0.1 of the can’s measured ratio.
- Tab edges stay within the top rim area.
- Valid alternatives are accepted: rim curve depth and tab edge shape may vary if they match observation.
- Blind contour task shows sustained looking at the can, even if distorted.
Questions and answers
Do I need to draw the can’s label?
No. This study excludes label design. Draw only the rim, body sides, base curve, and tab edges.
Can I use an eraser?
Yes, but use it lightly. For slow contour, redraw a line beside the first rather than erasing heavily. For blind contour, do not erase during the timed draw.
How do I know if my contour is correct?
Measure your drawing’s height and width, compute the ratio, and compare to the can’s measured ratio. A difference of about 0.1 is acceptable. Also check that tab edges stay within the top rim.
What if my can is a different size?
Measure your actual can. All numerical examples here are hypothetical. Use your measurements for the ratio check.