Free original lessons
Blind Contour Coffee Cup and Saucer: Timed Edge Study
Practice blind contour drawing of a cup, saucer, and handle in 30, 60, and 120 seconds. Compare edge accuracy without looking at your paper.
Free lesson
Four exercises
Worked answers
Object Drawing Lessons
Blind contour drawing trains your hand to follow the edges your eyes observe without checking the paper. In this timed study you draw a coffee cup, saucer, and handle three times: 30 seconds, 60 seconds, and 120 seconds. Keep your eyes on the object, not the page. The goal is continuous edge tracking, not a polished picture. After each attempt, note where the line drifted from the observed edge. Use the same cup and saucer for all three attempts so the comparison is fair. Work on plain paper with a pencil or pen. A simple convention is defined below so you can judge edge accuracy consistently, and valid alternative line styles are allowed.
Practice materials: Printable downloads are not available for this lesson yet. Use the instructions and four exercises below.
Reference illustration
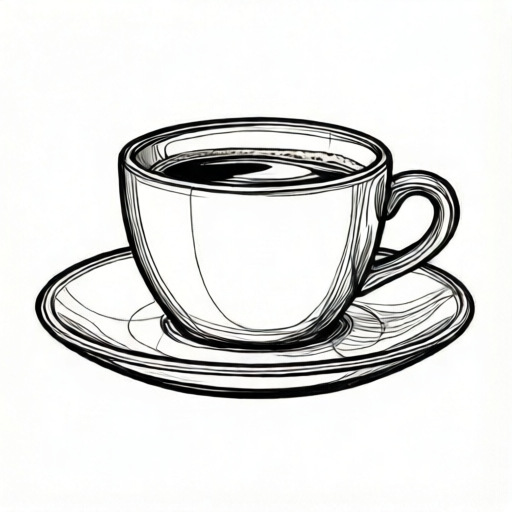
Use the stated measurements and conventions for each exercise.
Set up and define the edge convention
Place a cup on a saucer in front of you at eye level. Choose one viewpoint and keep it fixed for all three timed attempts. Define the visible edges you will track: the rim of the cup, the outer wall where it meets the saucer, the saucer's outer edge, and the handle's outer and inner curves. Treat each as a single continuous line where possible.
Use a simple convention for judging accuracy: compare the drawn line to the observed edge at four checkpoints: the cup rim's left and right extremes, the handle's outermost point, and the saucer's widest point. A line is accurate if it reaches the same relative position at each checkpoint without lifting or doubling back. Letter styles and line weight may vary; the convention judges position and continuity, not neatness.
- Fix your viewpoint and mark four checkpoints on the object with your eyes only.
- Place your pencil on the paper and start at the cup rim's left extreme.
- Move your eyes slowly along the edge and let your hand follow without looking down.
- At each checkpoint, pause and note the relative position before continuing.
- Stop when the timer ends; do not correct the drawing afterward.
Run the three timed attempts
Use a timer for 30, 60, and 120 seconds. Start each attempt at the same checkpoint and follow the same edge order: cup rim, cup wall, saucer edge, handle outer, handle inner. Do not look at the paper during the attempt. Between attempts, glance at the paper only to note where the line ended relative to the checkpoints.
The 30-second attempt tests fast edge tracking. The 60-second attempt allows more checkpoints. The 120-second attempt allows slower eye movement and more continuous lines. Keep the same order so differences reflect timing, not changed strategy.
- Set a timer for 30 seconds and draw the full edge sequence without looking down.
- Record the endpoint position relative to the four checkpoints.
- Repeat for 60 seconds and then 120 seconds using the same viewpoint and order.
- Compare endpoint positions and line continuity across the three attempts.
Reflect and compare edge accuracy
After the three attempts, compare each drawing at the four checkpoints. Note whether the line reached the checkpoint, overshot it, or stopped short. Also note whether the line was continuous or broken. Use the reflection prompt: which timed attempt best matched the observed edge positions, and where did speed cause the largest drift?
Valid alternatives include different line weights, slight curvature differences, and varied starting points, provided the checkpoint positions and continuity are judged consistently. Do not redraw or erase; the study records observation, not correction.
- Place the three drawings side by side and mark the four checkpoints on each.
- Score each checkpoint as reached, overshot, or short.
- Note the longest continuous line in each attempt.
- Write one sentence comparing the 30-second and 120-second attempts.
Worked example
A cup and saucer are viewed from the front. The cup rim's left extreme is 3 cm left of center, the right extreme is 3 cm right of center, the handle's outermost point is 5 cm right of center, and the saucer's widest point is 6 cm left of center. In a 60-second blind contour, the drawn line reaches 2 cm left at the rim's left extreme, 4 cm right at the rim's right extreme, 5 cm right at the handle, and 5 cm left at the saucer. Judge each checkpoint as reached, overshot, or short using a 1 cm tolerance.
Worked answer
Rim left: 2 cm vs 3 cm is 1 cm short, within tolerance, so reached. Rim right: 4 cm vs 3 cm is 1 cm overshot, within tolerance, so reached. Handle: 5 cm vs 5 cm is reached. Saucer: 5 cm vs 6 cm is 1 cm short, within tolerance, so reached. All four checkpoints are reached within the 1 cm tolerance.
Four practice exercises
Exercise 1
A cup rim's left extreme is 4 cm left of center and its right extreme is 4 cm right of center. In a 30-second attempt, the drawn line reaches 3 cm left and 5 cm right. Using a 1 cm tolerance, judge each checkpoint.
Show answer and check
Left: 3 cm vs 4 cm is 1 cm short, within tolerance, so reached. Right: 5 cm vs 4 cm is 1 cm overshot, within tolerance, so reached.
Why: Compare the drawn distance to the observed distance at each checkpoint. A difference of 1 cm or less is within the stated tolerance.
Check: Subtract the smaller distance from the larger at each checkpoint and confirm the result is 1 cm or less.
Exercise 2
A saucer's widest point is 7 cm left of center. In a 120-second attempt, the drawn line reaches 5 cm left. Using a 1 cm tolerance, is the checkpoint reached, overshot, or short?
Show answer and check
Short, because 7 cm minus 5 cm equals 2 cm, which exceeds the 1 cm tolerance.
Why: The drawn line stops 2 cm before the observed checkpoint, so it is short beyond tolerance.
Check: Subtract 5 cm from 7 cm and compare the 2 cm difference to the 1 cm tolerance.
Exercise 3
A handle's outermost point is 6 cm right of center. In a 60-second attempt, the drawn line reaches 6 cm right but is broken into two segments. Using the convention, is the checkpoint reached, and what else must be noted?
Show answer and check
The checkpoint is reached because the position matches exactly. Continuity must also be noted as broken.
Why: Position accuracy and continuity are judged separately. A broken line can still reach the checkpoint.
Check: Confirm the distances match, then record whether the line was continuous or broken.
Exercise 4
Three attempts use the same viewpoint. The 30-second attempt reaches all four checkpoints within 1 cm. The 60-second attempt overshoots the handle by 2 cm. The 120-second attempt reaches all four checkpoints within 1 cm. Which attempt has the largest checkpoint error, and by how much?
Show answer and check
The 60-second attempt has the largest error: 2 cm at the handle.
Why: Compare the absolute differences at each checkpoint across attempts. The 2 cm overshoot exceeds the 1 cm differences in the other attempts.
Check: List the absolute difference at each checkpoint for each attempt and select the largest value.
Common mistakes
- Looking at the paper during the timed attempt. Keep your eyes on the object and cover the paper with a blank sheet if needed; check only after the timer ends.
- Changing viewpoint between attempts. Mark your standing or sitting position and keep the cup and saucer in the same place for all three attempts.
- Judging neatness instead of edge position. Use the four checkpoints and continuity convention; allow varied line styles and weights.
- Starting at a different edge each time. Use the same edge order: cup rim, cup wall, saucer edge, handle outer, handle inner.
Self-check rubric
- Eyes remain on the object during each timed attempt; no looking at the paper until the timer ends.
- Same viewpoint and edge order used for all three attempts.
- Four checkpoints identified and compared after each attempt.
- Each checkpoint scored as reached, overshot, or short using a stated tolerance.
- Line continuity noted without erasing or correcting.
- Reflection compares the 30-second and 120-second attempts in one sentence.
- Valid alternatives in line weight, curvature, and starting point are accepted if checkpoint positions and continuity are judged consistently.
Questions and answers
Can I use a pen instead of a pencil?
Yes. Any drawing tool works if it makes a visible line. The convention judges position and continuity, not tool type.
What if my handle is not visible from my viewpoint?
Rotate the cup slightly before starting, then keep that viewpoint fixed for all three attempts. If the handle is hidden, draw only the visible edges and note the omission.
How do I know if my line is accurate without looking?
You judge after the attempt using the four checkpoints. During the attempt, track the edge slowly and pause at each checkpoint.
Is a broken line acceptable?
Yes, but note it. Continuity is one part of the convention; a broken line can still reach the checkpoints.