Free original lessons
Cookies and Milk Still Life: A Guided Drawing Lesson
Learn to draw a cookies-and-milk still life using simple shapes, an ellipse for the glass rim, and a clear composition layout with checkable steps.
Free lesson
Four exercises
Worked answers
Object Drawing Lessons
This lesson teaches a cookies-and-milk still life from observation and construction, not from a single template. You will build the plate, cookies, and glass from simple shapes, place them with a layout guide, and refine edges and shading using a defined convention. All measurements are hypothetical examples; measure your own paper and objects. The goal is a believable arrangement with clear overlaps and a readable glass rim, not photorealism.
Practice materials: Printable downloads are not available for this lesson yet. Use the instructions and four exercises below.
Reference illustration
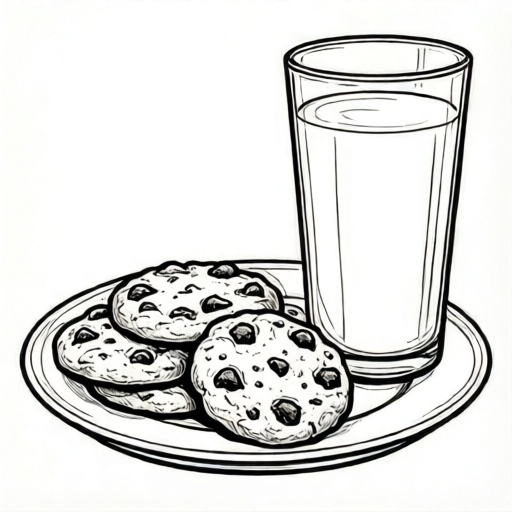
Use the stated measurements and conventions for each exercise.
Set up the composition and layout guides
Choose a viewing height so you see the plate as a wide ellipse and the glass rim as a narrower ellipse. A slightly elevated view keeps both readable. On your paper, mark a frame and divide it into thirds lightly; place the plate center near the lower third line and the glass to one side so the two shapes overlap slightly.
Use a layout guide: a light rectangle around the whole group, a horizontal line for the plate's widest point, and a vertical line through the glass center. These guides are erased later. Keep the group inside the frame with breathing room on all sides.
- Draw a light frame and mark thirds with a soft pencil.
- Place a horizontal guide for the plate's widest ellipse.
- Mark the glass center with a vertical guide offset from the plate center.
- Check that the group sits within the frame with margin on every side.
Build the plate and cookies from simple shapes
Draw the plate as a large ellipse, then a smaller inner ellipse for the well. Cookies are flattened circles or ovals; overlap them slightly so the stack reads as one group. Vary cookie sizes and tilt a few so the arrangement looks natural rather than stamped.
For each cookie, draw the outer shape first, then a thin edge line to suggest thickness. Where cookies overlap, erase the hidden lines so the front cookie reads clearly. Keep the plate ellipse consistent: the back edge curves up and the front edge curves down.
- Draw the plate outer ellipse and inner well ellipse.
- Place three to five cookie shapes, overlapping at least two.
- Add a thin thickness edge to each cookie.
- Erase hidden lines where cookies overlap.
Draw the glass ellipse and rim
The glass is a cylinder with an elliptical rim. Draw the rim ellipse first, then drop two vertical sides to a lower ellipse for the base. The rim ellipse should be narrower than the plate ellipse if the glass is tall and viewed from a similar height.
Add a milk line as a second ellipse inside the glass, slightly below the rim. Keep the rim and milk-line ellipses parallel in curvature. A small highlight shape on one side suggests glass without drawing every reflection.
- Draw the rim ellipse at the chosen height.
- Drop vertical sides to a base ellipse.
- Add a milk-line ellipse below the rim.
- Place one highlight shape on the glass side.
Refine edges and shade with a defined convention
Use this shading convention: light falls from the upper left. Shade the lower right of the plate, the lower right of each cookie, and the right side of the glass. Leave the upper left mostly light. This is a convention, not a universal truth; you may choose another light direction if you state it and keep it consistent.
For handwriting-style labels or notes, use x-height measured from baseline to midline; letter styles vary, so accept any legible style that keeps consistent x-height. Shade with light pressure and build tone in layers. Keep the milk area light with a soft edge.
- State your light direction and keep it consistent.
- Shade lower right of plate and cookies.
- Shade right side of glass and keep milk light.
- Check x-height on any labels from baseline to midline.
Worked example
A plate ellipse is 12 cm wide and 6 cm tall. A glass rim ellipse is 4 cm wide and 1.5 cm tall. Is the glass rim narrower than the plate, and by how much in width?
Worked answer
Yes. The glass rim is 8 cm narrower than the plate (12 minus 4 equals 8 cm).
Four practice exercises
Exercise 1
A plate ellipse is 10 cm wide and 5 cm tall. A cookie is drawn as a 3 cm wide oval centered inside the plate well. How much plate width remains on each side if the cookie is centered?
Show answer and check
3.5 cm on each side.
Why: Plate width 10 cm minus cookie width 3 cm equals 7 cm total margin; half is 3.5 cm per side.
Check: Add 3.5 plus 3 plus 3.5 to confirm 10 cm.
Exercise 2
A glass rim ellipse is 5 cm wide and 2 cm tall. The milk line is drawn 1 cm below the rim. If the milk-line ellipse is 4 cm wide, is it narrower than the rim, and by how much?
Show answer and check
Yes, 1 cm narrower.
Why: Rim width 5 cm minus milk-line width 4 cm equals 1 cm.
Check: Compare widths directly and confirm the milk line sits below the rim.
Exercise 3
You draw four cookies with widths 3 cm, 4 cm, 3 cm, and 5 cm. Two overlap by 1 cm each. What is the total visible width if they are placed in a row without other overlaps?
Show answer and check
13 cm.
Why: Sum widths is 15 cm; subtract two 1 cm overlaps to get 13 cm visible width.
Check: Add 3 plus 4 plus 3 plus 5 equals 15, then subtract 2.
Exercise 4
A frame is 20 cm wide. The plate group is 12 cm wide and centered. How much margin remains on each side?
Show answer and check
4 cm on each side.
Why: 20 minus 12 equals 8 cm total margin; half is 4 cm per side.
Check: Add 4 plus 12 plus 4 to confirm 20 cm.
Common mistakes
- Drawing the glass rim as a circle instead of an ellipse. Flatten the rim ellipse and keep its curvature parallel to the milk line.
- Letting cookies float off the plate edge. Check each cookie center sits inside the plate well ellipse.
- Shading from two light directions. State one light direction and shade only the opposite sides.
- Making the plate and glass the same ellipse width. Compare widths; a tall glass rim is usually narrower than the plate.
Self-check rubric
- Plate drawn as an ellipse with a visible inner well.
- Three to five cookies with at least one clear overlap and hidden lines erased.
- Glass rim drawn as an ellipse narrower than the plate, with a parallel milk line.
- One stated light direction with shading on opposite sides.
- Composition sits inside the frame with margin on all sides.
- Any labels use consistent x-height from baseline to midline; alternative letter styles accepted if legible.
Questions and answers
Do I need a real glass and cookies to draw this?
No. You can use the described shapes, but measuring real objects helps you choose believable ellipse widths.
How many cookies should I draw?
Three to five is enough to show overlap and variety without crowding the plate.
Can I use a different light direction?
Yes, if you state it and keep shading consistent with that choice.
How do I check the glass rim?
Compare its width to the plate ellipse and confirm the milk line curves similarly.