Free original lessons
Little Bat Drawing: Body, Wing and Ear Construction
Learn to draw a little bat by building body, wing membrane and ears with clear steps, a worked example, practice tasks and a fair rubric.
Free lesson
Four exercises
Worked answers
Object Drawing Lessons
This lesson teaches a repeatable way to draw a little bat by constructing the body first, then the wing membrane and struts, then the ears. You will use simple shapes, consistent units and a stated drawing convention so your result can be checked fairly. The focus is construction, not scene composition. All measurements are hypothetical examples; measure your own paper and tools if you adapt them.
Practice materials: Printable downloads are not available for this lesson yet. Use the instructions and four exercises below.
Reference illustration
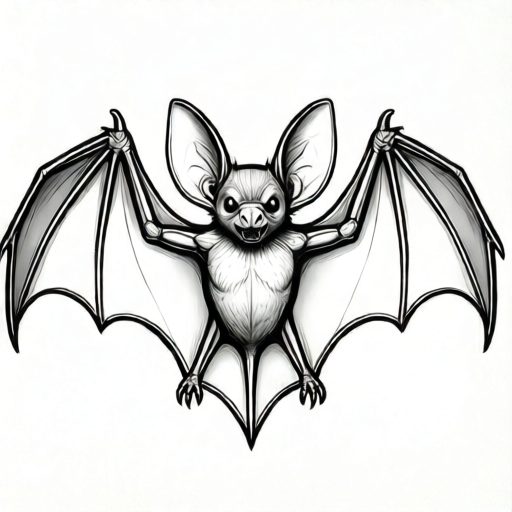
Use the stated measurements and conventions for each exercise.
Body construction
Start with a soft oval for the torso. A useful hypothetical example is an oval 6 cm tall and 4 cm wide on A4 paper. Mark a vertical midline and a horizontal midline; these are construction lines, not final marks.
Place the head as a smaller circle overlapping the top of the oval. Keep the head width about two-thirds of the body width. Add a short neck gap only if your style needs it; many little bat styles merge head and body smoothly.
- Draw the torso oval and mark both midlines lightly.
- Add the head circle centered on the vertical midline.
- Sketch two small feet at the bottom of the oval.
- Check symmetry by folding the paper gently or holding it to a window; adjust before darkening lines.
Wing membrane and struts
Treat each wing as a membrane supported by struts. Draw the leading edge from shoulder to wrist, then the wrist to the first finger tip. Add two more finger struts fanning toward the trailing edge. The membrane is the area between struts.
Use a convention: draw struts as single clean lines and membrane edges as slightly curved lines. Label hypothetical strut lengths, for example 5 cm, 4 cm and 3 cm, only as practice values. Keep units consistent.
- Mark shoulder, wrist and three finger tips on each side.
- Connect shoulder to wrist, then wrist to finger tips.
- Draw the trailing membrane edge with gentle curves between finger tips.
- Compare left and right wing spans; they should be close but need not be identical.
Ear shape variants
Ears can be rounded, pointed or slightly folded. Choose one variant and keep it consistent on both sides. Draw the ear base at the top of the head, then the outer edge, then the inner ridge.
A fair rubric allows valid alternatives: rounded ears are acceptable if the base is attached and the inner ridge is shown. Pointed ears are acceptable if the tip is not detached from the head.
- Choose rounded, pointed or folded ear style.
- Draw the ear base and outer edge on one side.
- Add the inner ridge as a lighter line.
- Repeat on the other side and check attachment points.
Pose practice: flight and folded wings
For a flight pose, raise the wrist above the shoulder and spread finger struts wider. For a folded-wing pose, bring the wrist close to the body and overlap the membrane along the torso. Keep the body oval the same size in both poses so the comparison is fair.
Use the same convention: struts as single lines, membrane edges curved. Check that every strut connects to a joint and that no membrane floats free.
- Draw the body oval and head for each pose.
- Place shoulder and wrist points according to the pose.
- Add finger struts and membrane edges.
- Compare poses side by side for consistent body size.
Worked example
Construct a little bat in a folded-wing pose using a 6 cm by 4 cm torso oval, a head circle two-thirds the body width, rounded ears, and three finger struts per wing. Label hypothetical strut lengths in centimetres.
Worked answer
Draw the oval and midlines. Add the head circle centered on the vertical midline. Attach rounded ears at the top of the head with inner ridges. Mark shoulder and wrist points close to the body. Draw three finger struts per wing, for example 4 cm, 3 cm and 2 cm, all in centimetres. Connect struts with gently curved membrane edges. Add two small feet. Check that every strut meets a joint and both ear bases touch the head.
Four practice exercises
Exercise 1
Draw a little bat in flight with a 6 cm by 4 cm torso oval, a head circle two-thirds the body width, pointed ears, and three finger struts per wing. Label hypothetical strut lengths in centimetres.
Show answer and check
A flight pose with raised wrists, spread struts, pointed ears attached to the head, and consistent centimetre labels.
Why: The body oval sets scale, the head circle follows the width rule, pointed ears are a valid variant, and raised wrists create the flight pose.
Check: Verify the head width is about two-thirds of 4 cm, every strut meets a joint, ear bases touch the head, and all labels use centimetres.
Exercise 2
Draw the same bat in a folded-wing pose using rounded ears and the same body oval size. Keep three struts per wing and label hypothetical lengths in centimetres.
Show answer and check
A folded-wing pose with wrists close to the body, overlapping membrane, rounded ears attached, and consistent centimetre labels.
Why: Keeping the body oval the same makes the pose comparison fair; folded wings bring wrist points near the torso.
Check: Compare body oval size with the flight pose, confirm struts connect to joints, and check ear attachment and unit consistency.
Exercise 3
A learner draws wings as solid triangles with no struts and ears floating above the head. Describe two specific fixes using the construction steps.
Show answer and check
Add shoulder, wrist and finger joints before drawing struts; attach each ear base to the head outline and add an inner ridge.
Why: The fixes address the two construction failures directly: missing joints and detached ear bases.
Check: Look for joint marks at shoulder, wrist and finger tips, and confirm both ear bases touch the head outline.
Exercise 4
Using hypothetical values, a wing has struts of 5 cm, 4 cm and 3 cm. State the total strut length per wing and for two wings, keeping units consistent.
Show answer and check
One wing totals 12 cm; two wings total 24 cm.
Why: Add 5 + 4 + 3 = 12 cm for one wing, then double for two wings: 12 × 2 = 24 cm.
Check: Re-add the three values and multiply by two; confirm every number is in centimetres.
Common mistakes
- Drawing wings as solid triangles with no struts. Add shoulder, wrist and finger joints first, then connect them with struts before shading the membrane.
- Making ears float above the head. Attach each ear base to the head outline and check the attachment point before darkening.
- Using inconsistent units when labeling practice lengths. Choose centimetres or millimetres and use the same unit for every label.
- Copying one wing exactly onto the other and losing natural variation. Aim for close span and joint placement, not identical curves; valid alternatives are allowed.
Self-check rubric
- Body oval and head circle are present and centered on the vertical midline.
- Wing struts connect shoulder, wrist and finger joints without floating lines.
- Membrane edges are drawn between struts using the stated convention.
- Ear bases attach to the head and one ear variant is used consistently.
- Labels, if used, keep one unit system and are marked as hypothetical examples.
- Valid alternatives such as rounded or pointed ears are accepted if construction rules are met.
Questions and answers
Do I need special paper?
No. Any paper works. If you label hypothetical lengths, measure your actual paper first and keep units consistent.
Must both wings match exactly?
No. The rubric checks joint placement and membrane connection, not identical curves. Slight variation is acceptable.
Can I use pointed ears instead of rounded ears?
Yes. Choose one variant and keep it consistent. The ear base must attach to the head and the inner ridge should be shown.
How do I check symmetry without erasing?
Hold the paper to a window or fold gently along the midline. Adjust lightly before final lines.