Free original lessons
Draw a Bean Sprout: Three Growth Stages from Seed to Young Plant
Learn to draw a bean sprout in three clear stages: germinating seed with root, sprout with cotyledons, and young plant with tapered stem. Includes practice and checks.
Free downloads
Letter & A4
PDF & SVG
Object Drawing Lessons
This lesson teaches a reliable way to draw a bean sprout across three growth stages: a germinating seed with an emerging root, a sprout with cotyledons, and a young plant with a tapered stem. You will use simple shapes, consistent proportions, and a defined line convention so your drawing can be checked and improved. The focus is growth-stage construction, not full plant or flower drawing, and not detailed leaf-vein study. All measurements below are hypothetical examples; measure your own paper and tools if you need exact values.
Practice materials: Download the free reference pages, practice sheets and separate answer keys below, in A4 and US Letter PDF and SVG formats.
Set a drawing convention and stage layout
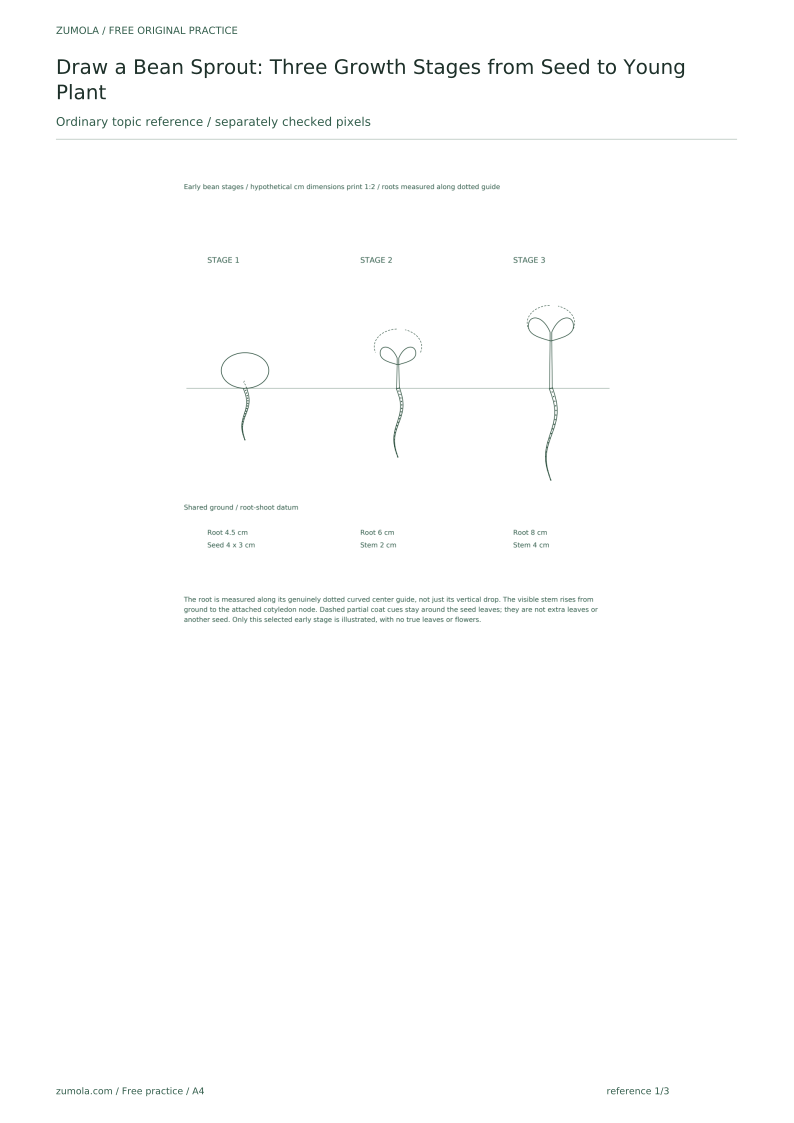
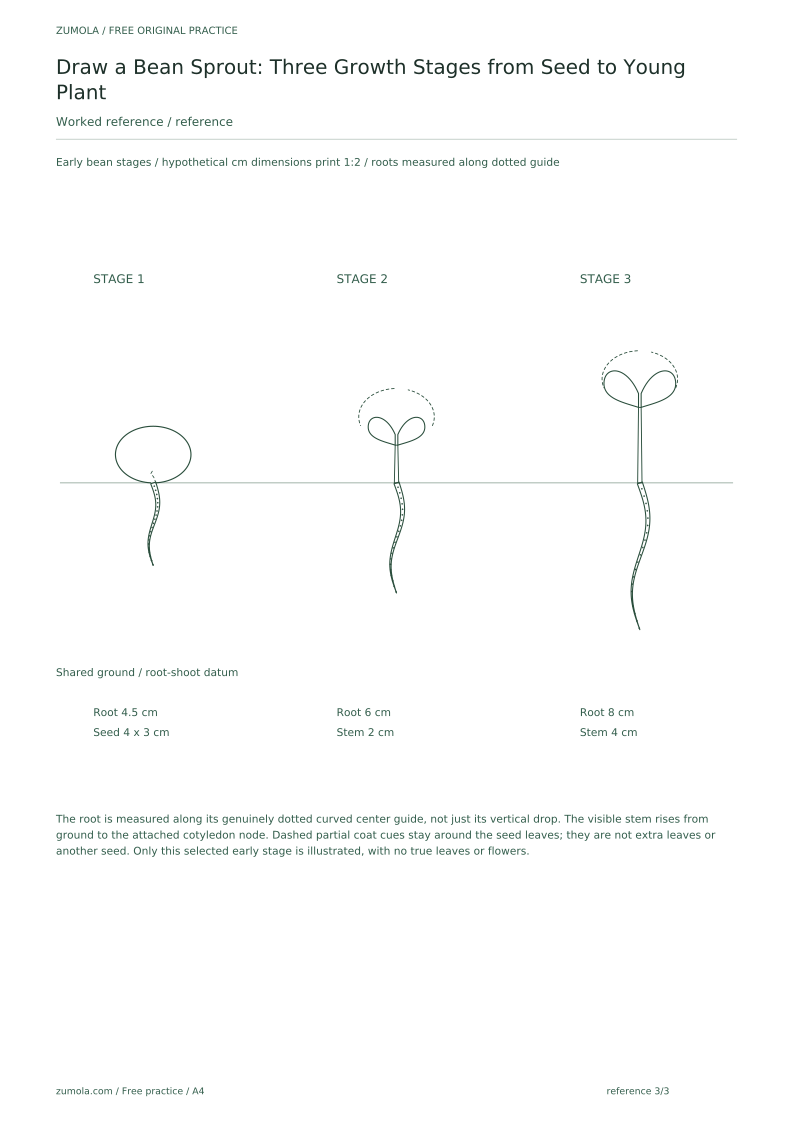
Choose a line convention before drawing: use a solid outline for the outer edge of each part, a dashed line for hidden or internal boundaries such as the seed coat opening, and a dotted line for the root's center guide. This convention lets you and a reviewer distinguish structure from decoration. Letter styles vary, so write labels in your normal handwriting; x-height is measured from baseline to midline, and any height values here are hypothetical examples.
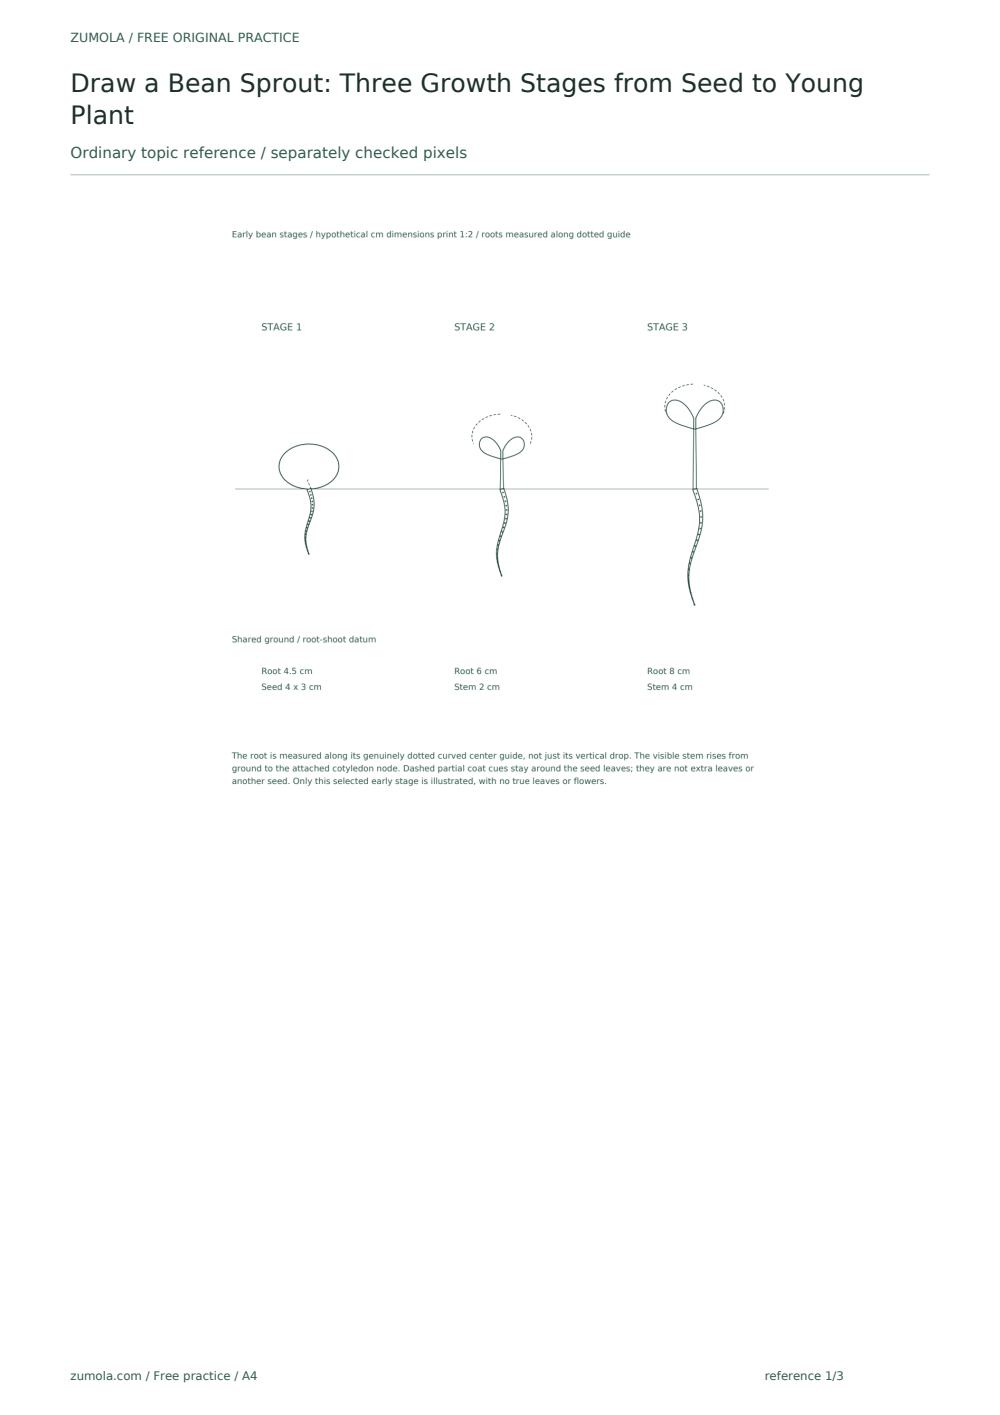
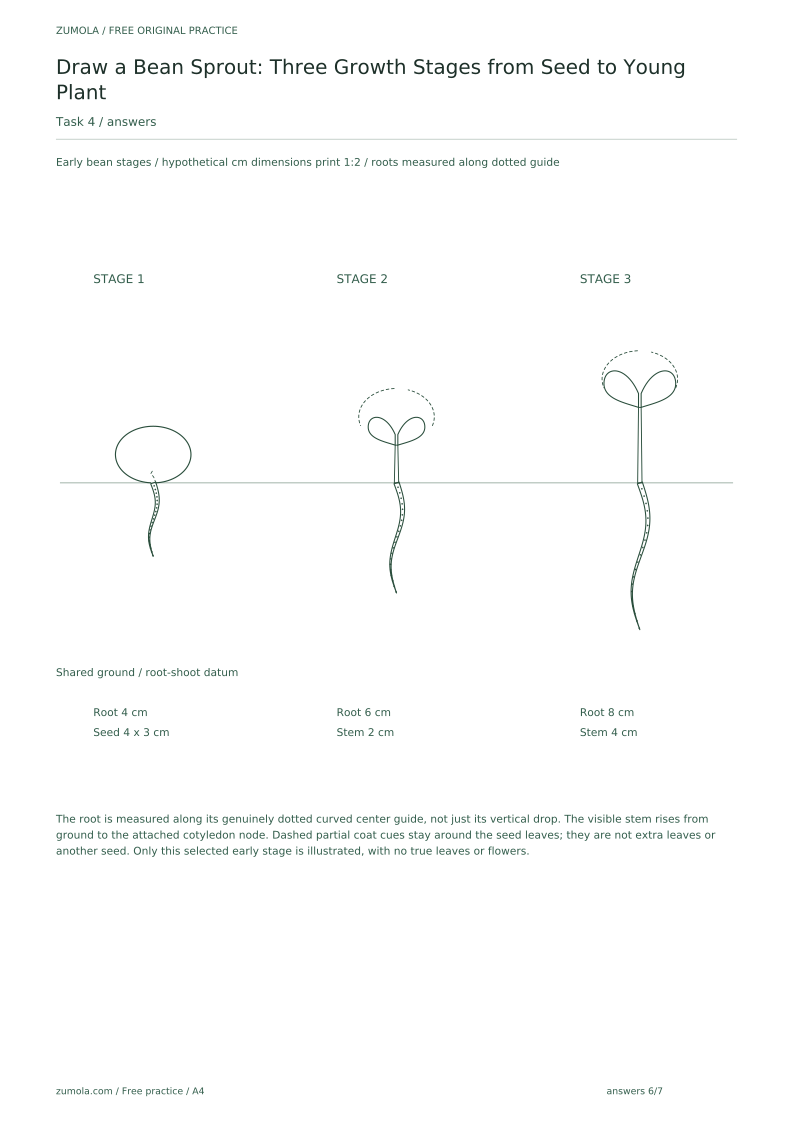
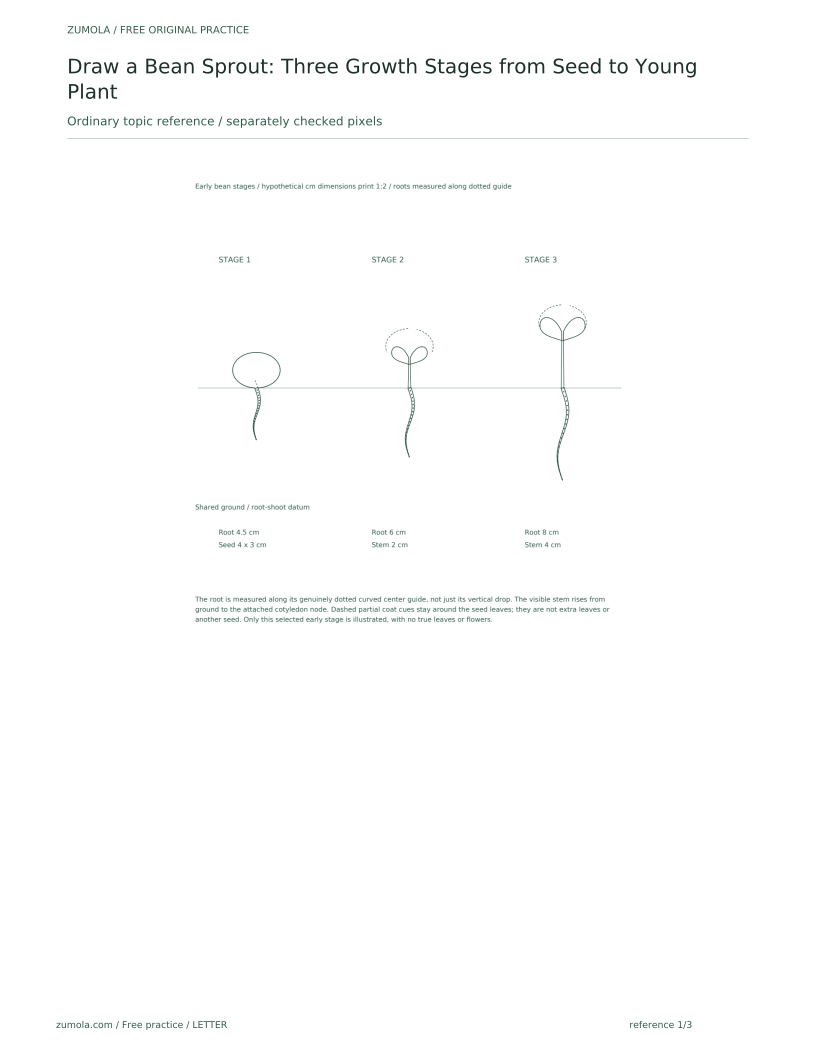
Plan three equal panels left to right with one shared ground line marking the chosen root/shoot boundary. In panel one, put the lower seed opening at that line and leave room below for the emerging root. In panels two and three, draw a stem from the ground line up to the attachment node of two raised cotyledons; any retained split seed-coat cue belongs around those cotyledons, not as a second intact seed at the stem base. This is a simplified early bean-germination study, not a growth timetable or a biological size standard. Stem height is the vertical ground-to-cotyledon-node distance; root length is measured along its curved center guide from ground to tip.
- Draw three panels of equal size and a shared horizontal ground line.
- Mark a center guide in each panel with a dotted vertical line.
- Label the panels Stage 1, Stage 2, and Stage 3 in your normal handwriting.
- Decide your line convention and note it at the top of the page.
Stage 1: seed with emerging root
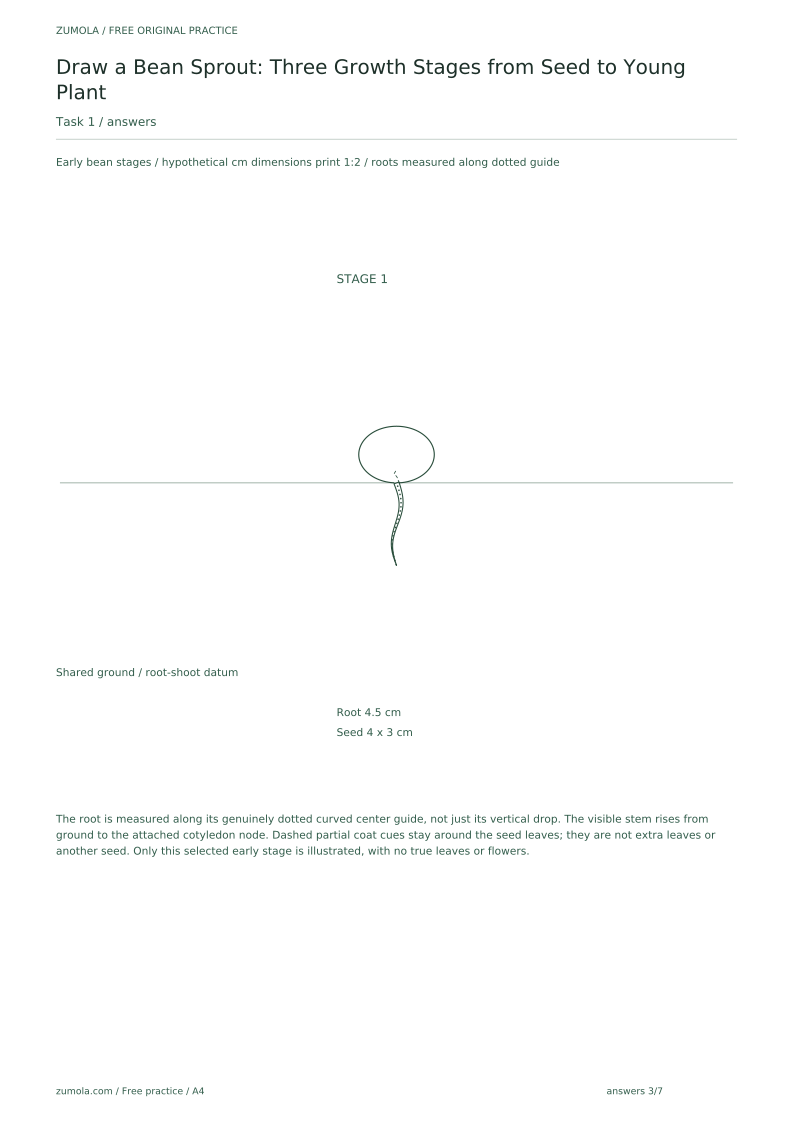
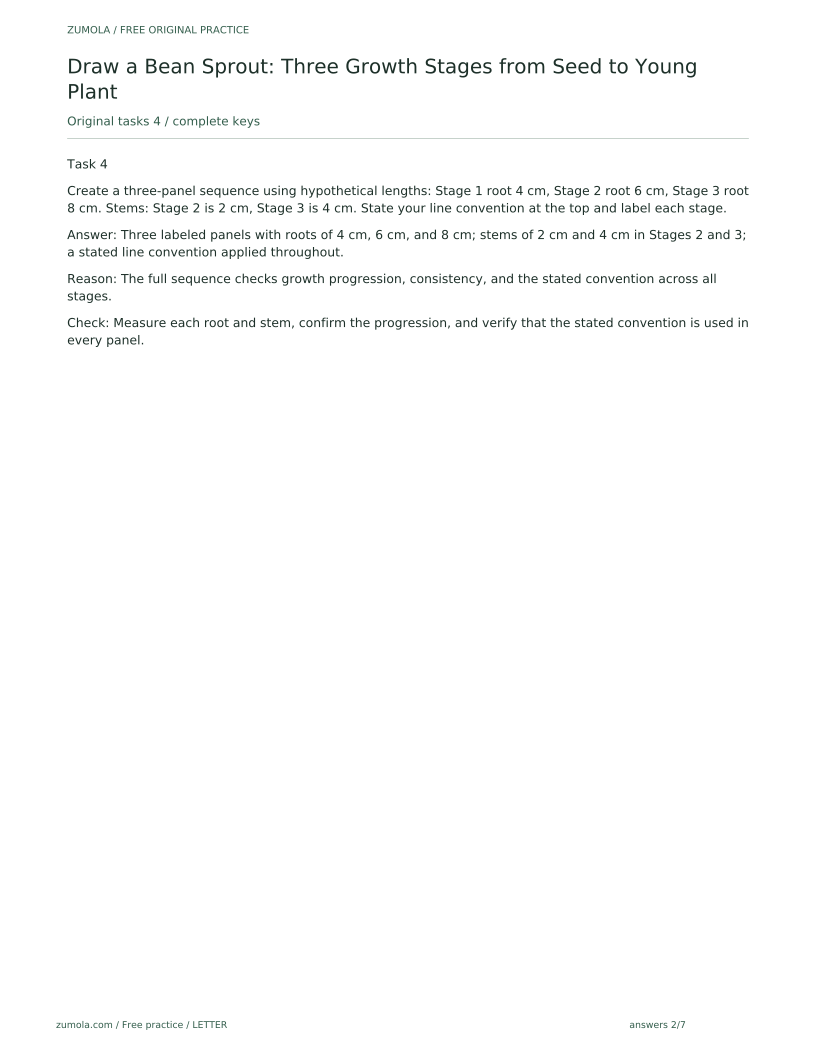
Draw the bean seed as a rounded oval, slightly wider than tall. Add a small notch where the seed coat opens. From the notch, draw the root as a tapering curve downward, using the dotted center guide. The root should be thinner at the tip than at the seed. Use a dashed line to show the split in the seed coat.
Keep the root length about one and a half times the seed height in this stage. This is a hypothetical proportion for practice; adjust only if your panel space requires it, and note the change. The root curve should be gentle, not a sharp zigzag.
- Draw a rounded oval for the seed, wider than tall.
- Add a small notch at the lower edge for the seed coat opening.
- Draw a dashed line from the notch to show the split coat.
- Draw a tapering root downward along the dotted center guide.
- Check that the root tip is thinner than the root base.
Stage 2: sprout with cotyledons
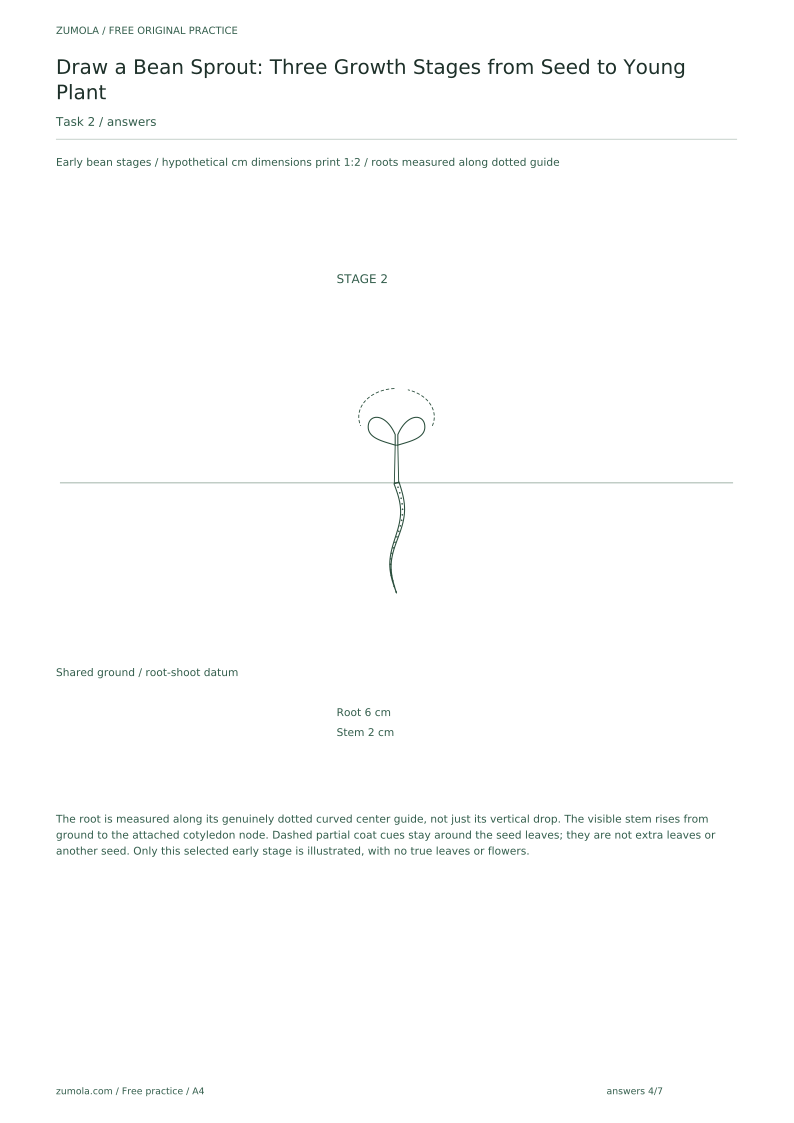
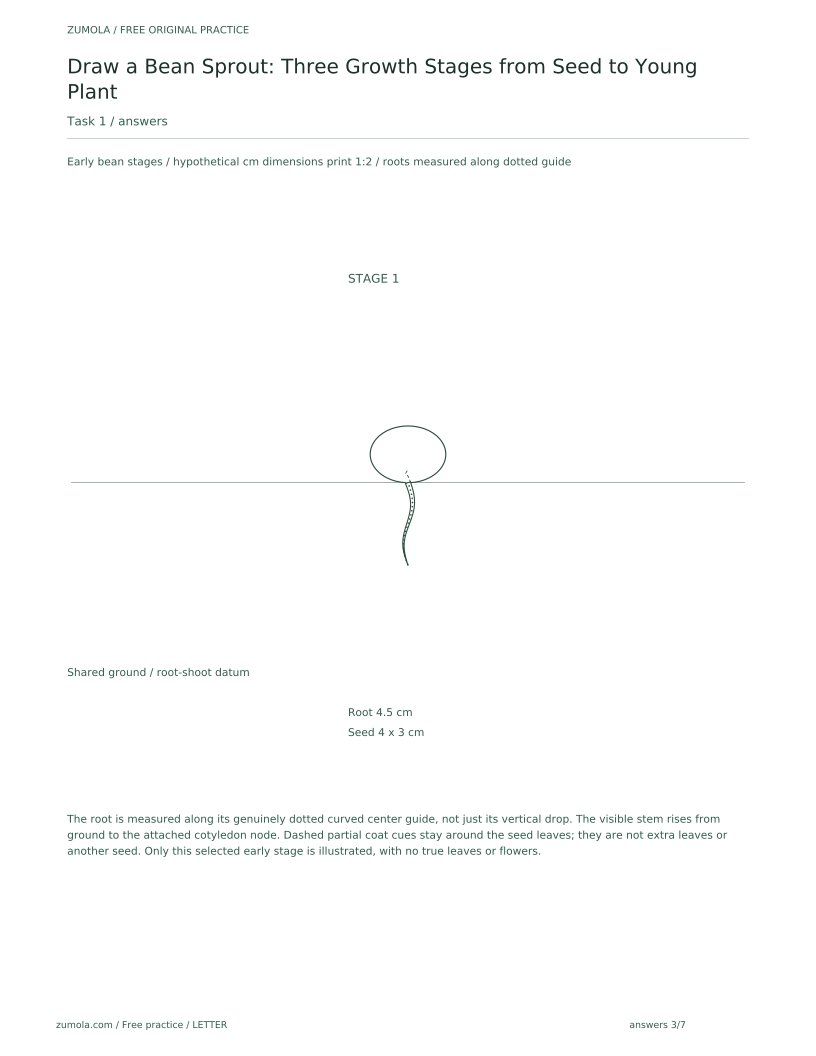
In panel two, place the retained split seed-coat shape higher, around the two raised cotyledons. Draw a short stem upward from the ground line to their shared attachment node at the lower coat opening. The cotyledons are the two seed leaves themselves, not an extra pair above another intact seed. Use simple rounded forms without detailed veins; draw the stem wider at the ground line and narrower near that node as this lesson's selected outline convention.
Continue the root below the shared ground line, longer than in Stage 1. Solid lines show visible part outlines, dashed marks show the split or remaining seed coat, and separated round dots mark the curved root center guide. The two cotyledons attach to the same stem node; small differences in their outlines are acceptable.
- Draw the split seed-coat cue higher, around the two cotyledons rather than as an extra seed at ground level.
- Draw the stem upward from the shared ground line to the lower opening and cotyledon attachment node.
- Attach two rounded cotyledons at that node, one left and one right.
- Extend the root downward from the shared ground line, longer than Stage 1.
- Check that the stem tapers from base to top.
Stage 3: young plant with tapered stem
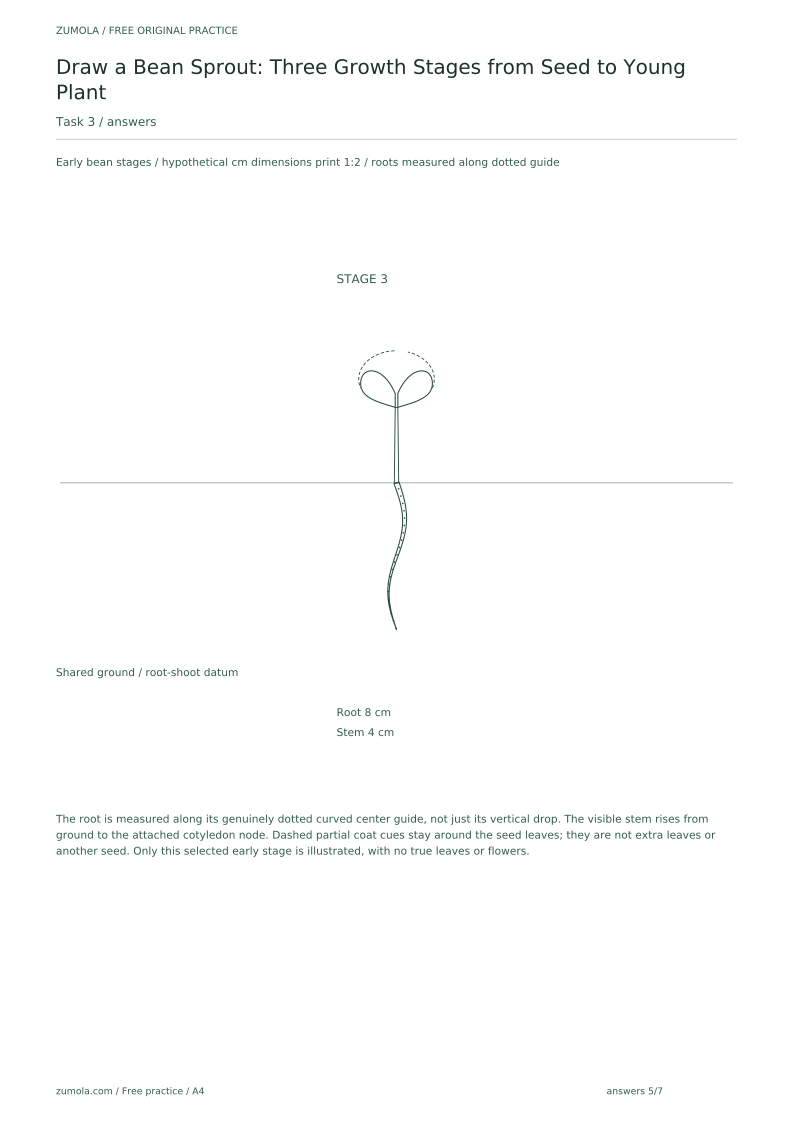
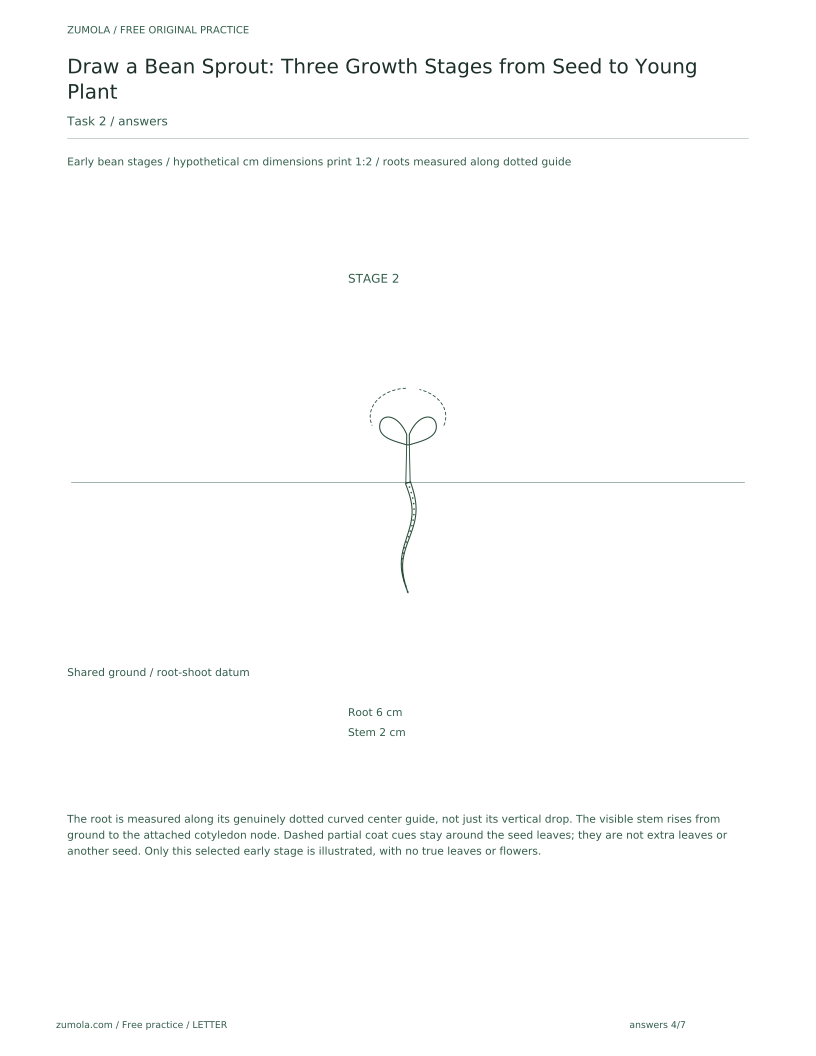
In panel three, draw a taller tapered stem from the shared ground line to the raised cotyledon attachment node. Add two cotyledons at that node, slightly larger than in Stage 2, and a longer root below the ground line. A split coat may remain as a partial dashed cue around the seed leaves; it is not a separate intact seed below them. Stop the drawing at these early cotyledons without adding true leaves or flowers. This is a selected simplified stage, not a claim that true leaves can never begin within a bean seed.
Use the ground line to compare heights across panels. The stem in Stage 3 should be about twice the height of the stem in Stage 2, as a hypothetical example. Keep the root proportional to the stem and check that all three panels share the same line convention.
- Draw a taller stem from the shared ground line up to the cotyledon node, tapering upward.
- Add two cotyledons near the top, slightly larger than Stage 2.
- Draw the longer root below the shared ground line and measure along its center guide.
- Compare stem heights across panels using the ground line.
- Confirm no full leaves or flowers are added.
Worked example
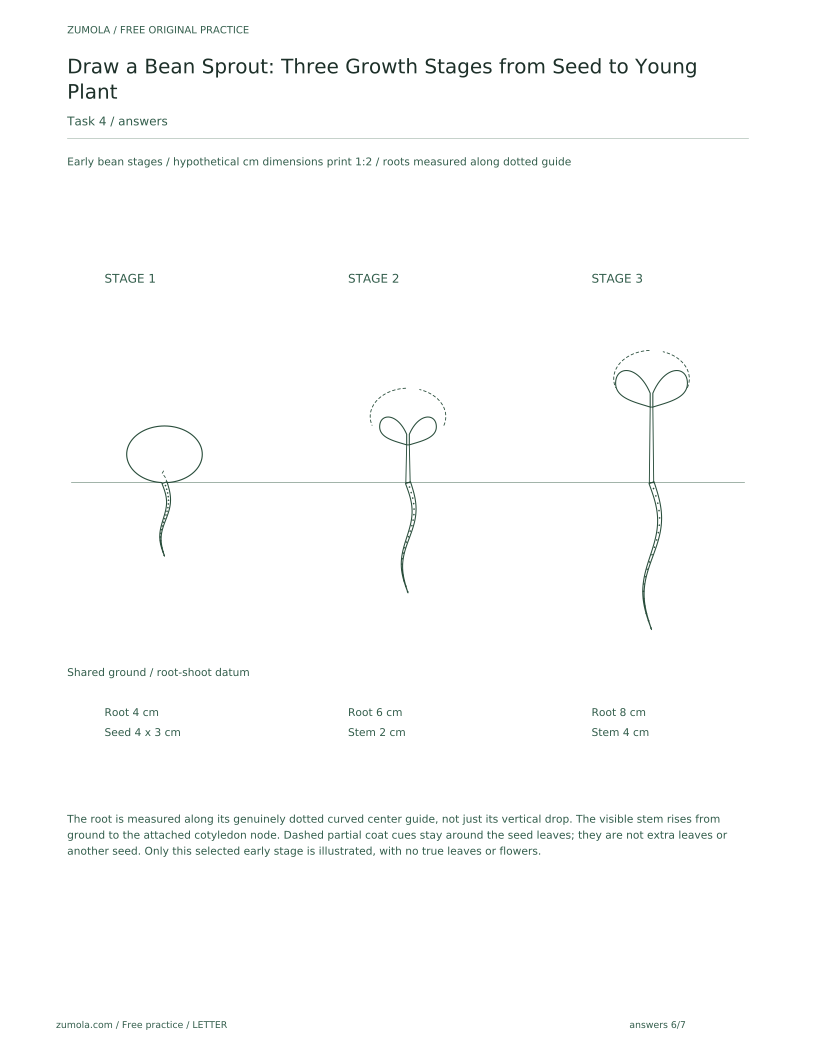
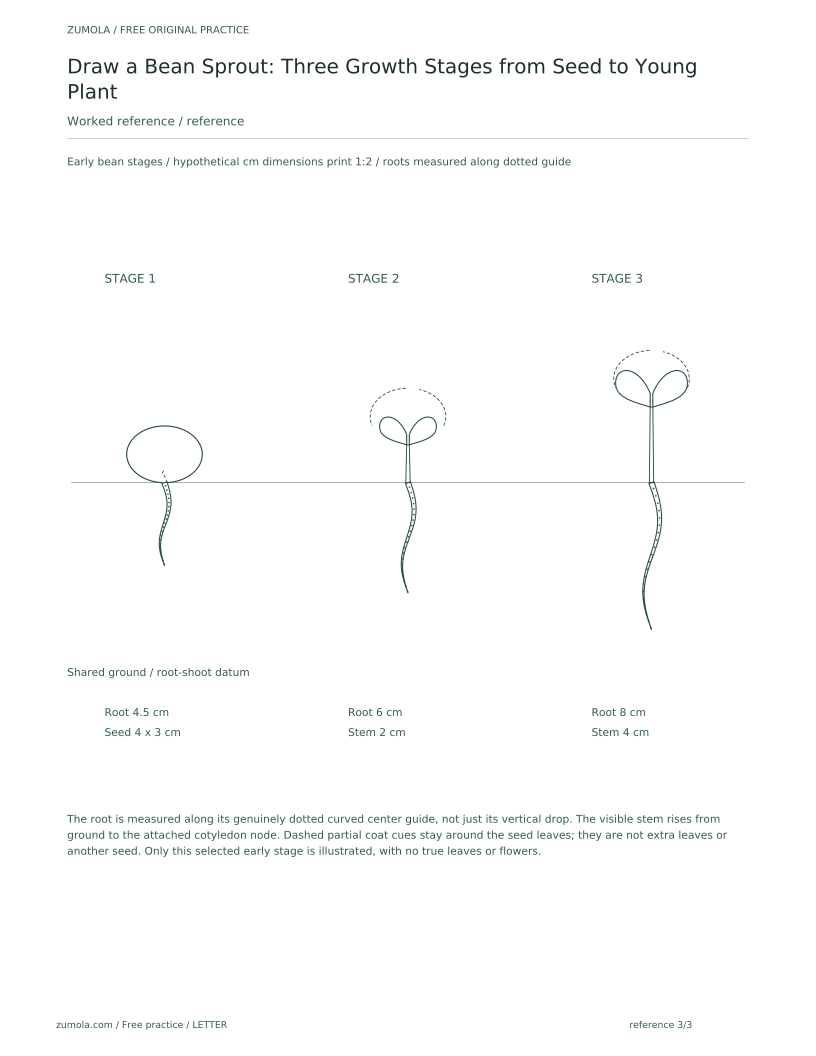
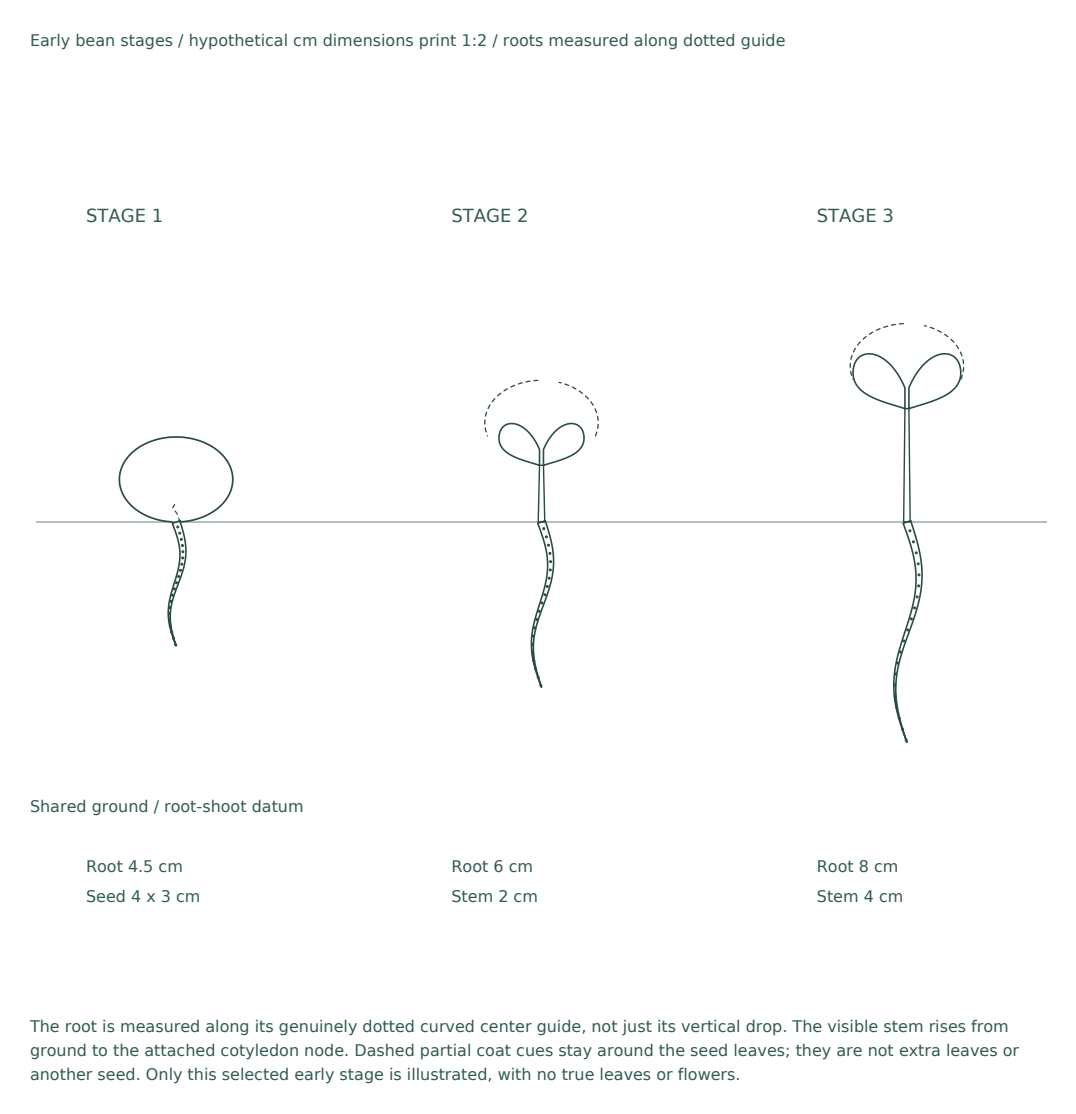
Draw a three-panel bean sprout sequence using the convention: solid outline, dashed seed-coat split, dotted center guide. In Stage 1, the seed is a rounded oval 3 cm tall and 4 cm wide, with a root 4.5 cm long. In Stage 2, the stem is 2 cm tall and the root is 6 cm long. In Stage 3, the stem is 4 cm tall and the root is 8 cm long. Label each stage.
Worked answer
Panel 1: draw a 4 cm by 3 cm seed-coat oval, its lower opening at the shared ground line, a dashed split and a tapering root with a 4.5 cm center-guide length below that line. Panel 2: raise the two cotyledons in the split coat, connect their common node to the ground line with a 2 cm stem, and continue a 6 cm root below the line. Panel 3: use a 4 cm tapered stem to the node, two slightly larger attached cotyledons and an 8 cm root. Any remaining split coat stays around the cotyledons. Label the three stages and retain solid outlines, dashed coat cues and genuinely dotted root guides.
Why: The stem and root increase in the chosen hypothetical sequence. The shared ground line fixes the root/shoot datum, cotyledons stay connected at a stem node, and the raised split coat is not duplicated as an extra seed. Stem heights are vertical distances to the cotyledon node; root lengths follow their center guides. These selected proportions and taper are drawing choices, not biological growth measurements.
Check: Measure each stem and root against the stated lengths, confirm the stem tapers from base to top, and verify that solid, dashed, and dotted lines are used consistently across all three panels.
Four practice exercises
Exercise 1
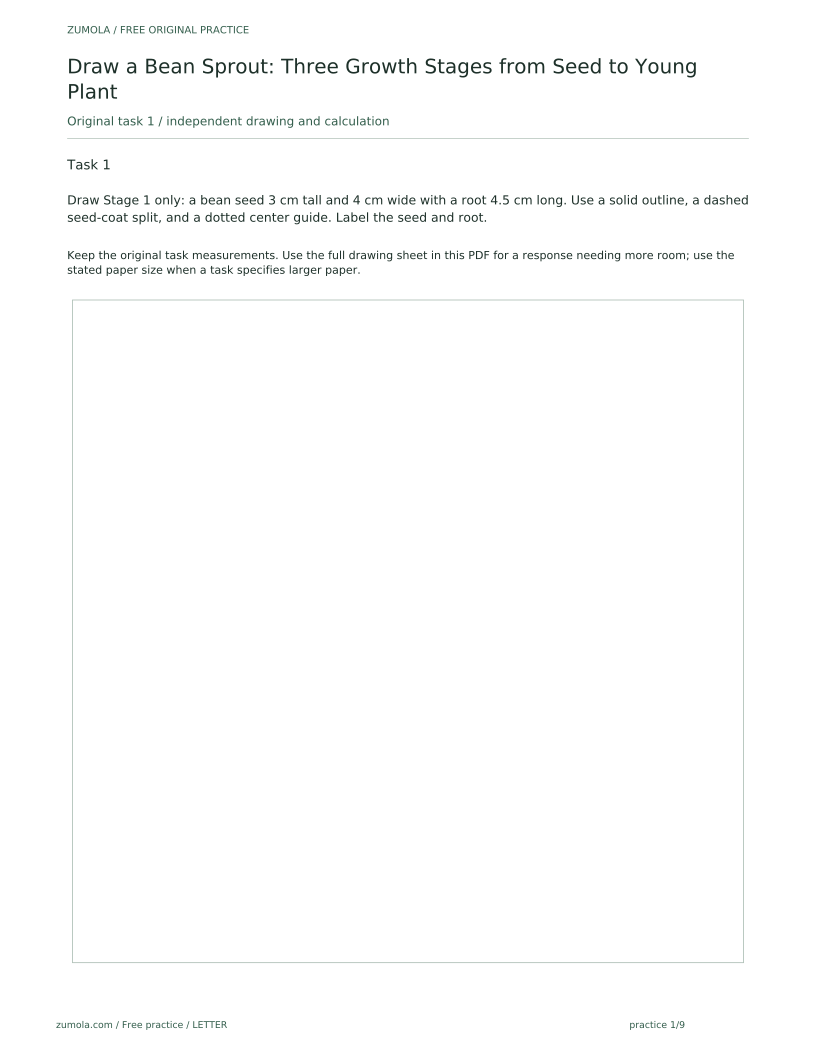
Draw Stage 1 only: a bean seed 3 cm tall and 4 cm wide with a root 4.5 cm long. Use a solid outline, a dashed seed-coat split, and a dotted center guide. Label the seed and root.
Show answer and check
A rounded oval 4 cm wide and 3 cm tall, a notch at the lower edge, a dashed split line, and a tapering root 4.5 cm long along the dotted guide, with labels.
Why: The exercise isolates the first stage so the seed shape, split, and root taper can be checked before adding later stages.
Check: Measure the oval and root, confirm the root tip is thinner than the base, and verify the three line types are used as defined.
Exercise 2
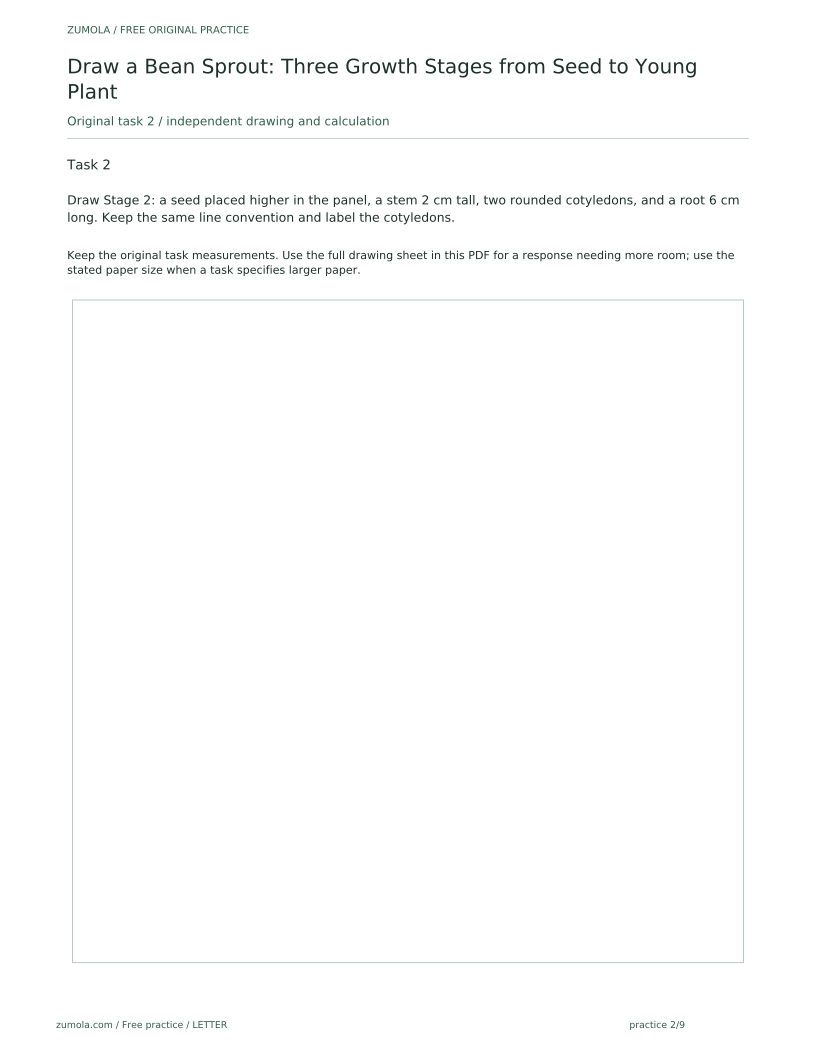
Draw Stage 2: a seed placed higher in the panel, a stem 2 cm tall, two rounded cotyledons, and a root 6 cm long. Keep the same line convention and label the cotyledons.
Show answer and check
A seed oval with a short 2 cm stem, two rounded cotyledons left and right, and a 6 cm tapering root, with labels and consistent line types.
Why: This stage adds the stem and cotyledons while keeping the root proportional and the convention consistent.
Check: Measure the stem and root, check that the stem tapers from base to top, and confirm the cotyledons are simple rounded forms without detailed veins.
Exercise 3
Draw Stage 3: a tapered stem 4 cm tall, two cotyledons slightly larger than in Stage 2, and a root 8 cm long. Use a shared ground line and label the stem and root.
Show answer and check
A 4 cm tapered stem with two larger cotyledons and an 8 cm root, aligned to the ground line, with labels and the same line convention.
Why: The exercise tests taper, proportion, and the exclusion of full leaves or flowers.
Check: Measure the stem and root, verify the taper, and confirm no full leaves or flowers are present.
Exercise 4
Create a three-panel sequence using hypothetical lengths: Stage 1 root 4 cm, Stage 2 root 6 cm, Stage 3 root 8 cm. Stems: Stage 2 is 2 cm, Stage 3 is 4 cm. State your line convention at the top and label each stage.
Show answer and check
Three labeled panels with roots of 4 cm, 6 cm, and 8 cm; stems of 2 cm and 4 cm in Stages 2 and 3; a stated line convention applied throughout.
Why: The full sequence checks growth progression, consistency, and the stated convention across all stages.
Check: Measure each root and stem, confirm the progression, and verify that the stated convention is used in every panel.
Common mistakes
- Drawing the root as a straight line with constant thickness. Taper the root from base to tip and give it a gentle curve along the center guide.
- Making the stem thicker at the top than at the base. Check the taper: the base should be wider, and the top narrower, in every stage.
- Adding detailed leaf veins to the cotyledons. Keep cotyledons as simple rounded forms; vein study is outside this lesson.
- Using different line conventions in each panel. Apply the same solid, dashed, and dotted line meanings across all three stages.
Self-check rubric
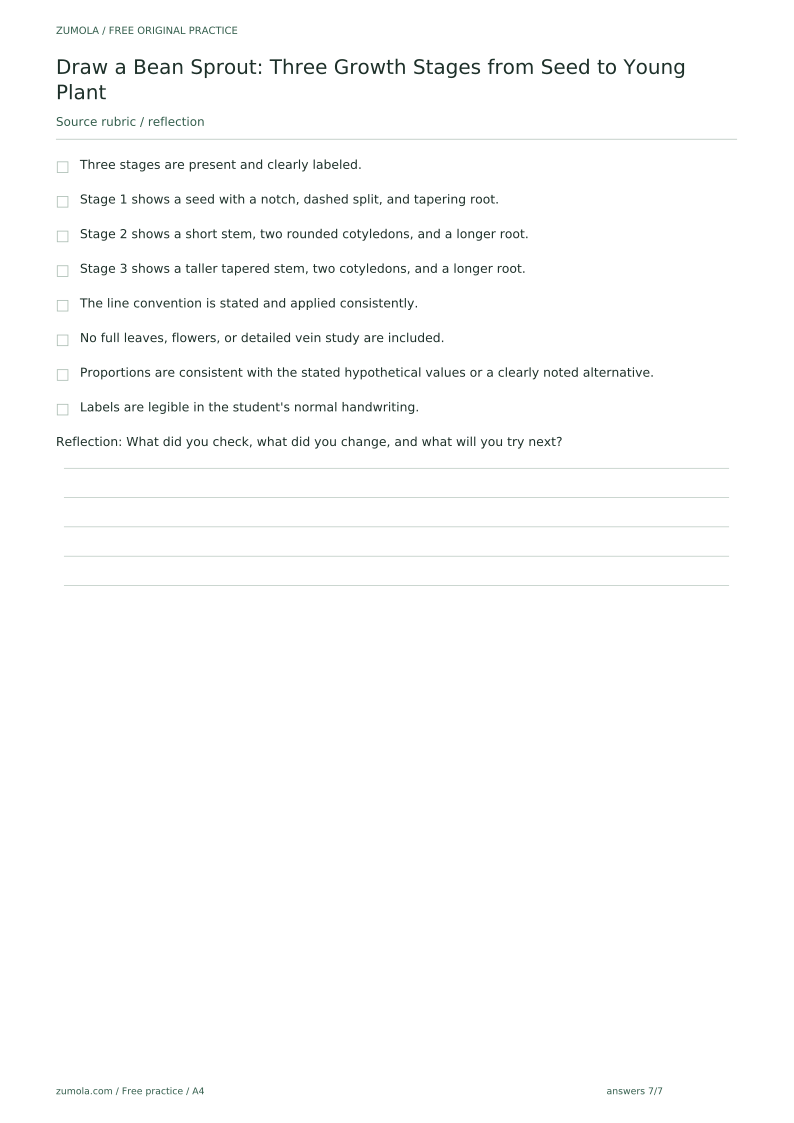
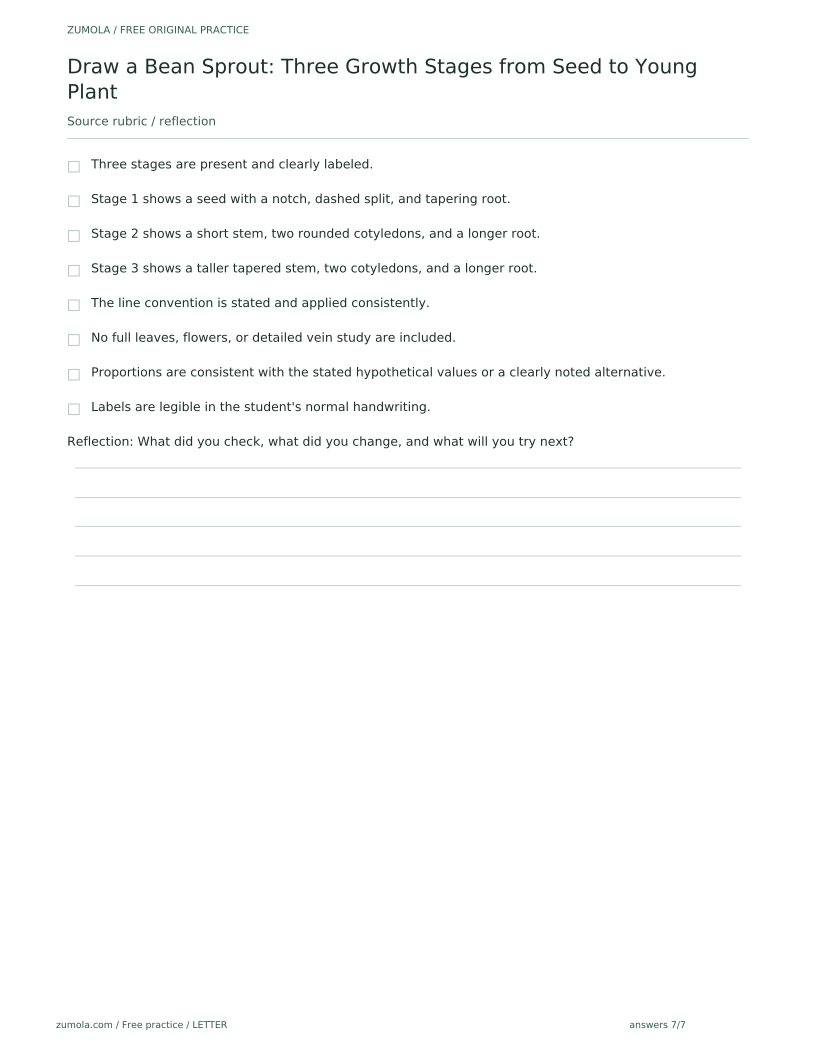
- Three stages are present and clearly labeled.
- Stage 1 shows a seed with a notch, dashed split, and tapering root.
- Stage 2 shows a short stem, two rounded cotyledons, and a longer root.
- Stage 3 shows a taller tapered stem, two cotyledons, and a longer root.
- The line convention is stated and applied consistently.
- No full leaves, flowers, or detailed vein study are included.
- Proportions are consistent with the stated hypothetical values or a clearly noted alternative.
- Labels are legible in the student's normal handwriting.
Questions and answers
Do I need to draw the seed coat in every stage?
Show the seed coat split in Stages 1 and 2. In Stage 3, you may simplify it, but keep the same line convention for any remaining seed structure.
How large should the cotyledons be?
Use a hypothetical size about half the seed width in Stage 2 and slightly larger in Stage 3. Measure your own panel and adjust consistently.
Can I use a different line convention?
Yes, if you define it clearly and apply it consistently. The rubric accepts valid alternatives as long as the convention is stated and followed.
What counts as a complete growth sequence?
Three stages: seed with emerging root, sprout with cotyledons, and young plant with tapered stem. Each stage must show the root and the stem or cotyledons as described.
Reference illustration
Free printable downloads
Choose a paper size. Practice sheets and answer keys are separate. Download every file free, without registration.
This standard pack covers the four original exercises, blank work areas, complete keys and necessary figures. Additional extension sets described in the lesson are outside this download.
PDF bundles
Individual SVG pages
Reference-page preview