Free original lessons
Draw a Cylindrical Can with Pull-Tab and Label
Learn to sketch a generic cylindrical can with a top-rim ellipse, pull-tab detail, and wrapped label using a clear convention and checkable steps.
Free lesson
Four exercises
Worked answers
Object Drawing Lessons
This lesson teaches a reliable method for drawing a generic cylindrical can from front and angled views. You will construct the body with vertical sides and curved top and bottom edges, place the top-rim ellipse correctly, add a pull-tab, and wrap a label around the form. The convention is simple: the can's height is measured in the same units as its width, and all curves are drawn as smooth arcs that meet the vertical sides without corners. Lettering on the label follows a baseline-to-midline x-height convention, but letter styles may vary. Use a pencil and paper; measure your own equipment if you choose numerical examples, and treat any numbers here as hypothetical.
Practice materials: Printable downloads are not available for this lesson yet. Use the instructions and four exercises below.
Reference illustration
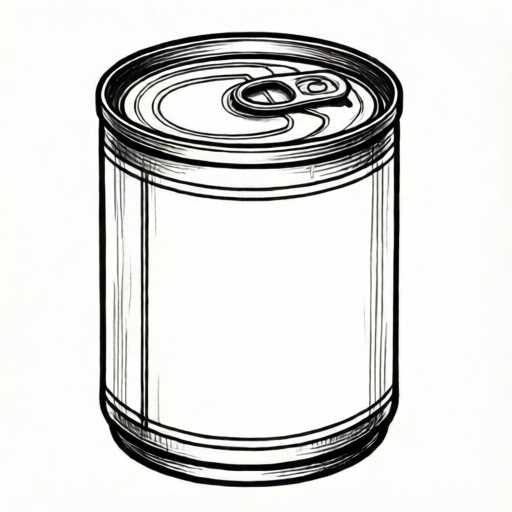
Use the stated measurements and conventions for each exercise.
Constructing the Cylinder Body
Begin with a light rectangle for the can's front view. The width is the can's diameter; the height is the can's full height. Mark the vertical centerline. The top and bottom edges are not straight lines but shallow arcs that curve upward at the top and downward at the bottom, because the can is a cylinder seen slightly from above or below. Keep the left and right sides perfectly vertical and parallel.
For an angled view, shift the top and bottom arcs so they become fuller ellipses. The sides remain vertical, but the ellipse's major axis is horizontal and its minor axis is vertical. The ellipse's height should be about one-third of its width for a gentle tilt; adjust only after measuring your own reference can.
- Draw a light rectangle with vertical sides and horizontal top and bottom guides.
- Replace the top guide with a smooth upward arc; replace the bottom guide with a smooth downward arc.
- Mark the centerline and check that both arcs are symmetric about it.
- For an angled view, redraw the top and bottom as fuller ellipses while keeping the sides vertical.
Placing the Top Rim and Pull-Tab
The top rim is an ellipse that sits inside the top arc. Draw it slightly smaller than the can's outer width so a thin rim shows. The pull-tab is a small rounded rectangle or oval attached to the rim, with a ring shape at one end. Place the tab off-center toward the front edge so it reads clearly. The tab's ring should be drawn as a smaller ellipse or circle, and the tab's body should overlap the rim line slightly to show it sits on top.
Use a consistent line weight: darker for the can's outline and the tab, lighter for the rim ellipse and label curves. This helps the tab stand out without shading.
- Draw the top-rim ellipse inside the top arc, leaving a thin rim margin.
- Sketch the pull-tab as a rounded rectangle with a ring at one end.
- Position the tab toward the front edge and let it overlap the rim line.
- Darken the tab outline and keep the rim ellipse light.
Wrapping the Label
The label wraps around the cylinder, so its top and bottom edges are arcs that follow the can's curvature. On the front view, draw two horizontal arcs across the body, one near the top and one near the bottom, each curving in the same direction as the can's top and bottom arcs. The label's side edges are vertical lines that stop at the arcs. For an angled view, the label arcs become fuller ellipses, and the side edges remain vertical but may be partially hidden by the can's curve.
Lettering on the label uses a baseline-to-midline x-height convention: lowercase letters sit between the baseline and the midline, and capitals may extend above the midline. Letter styles vary, so any clear, consistent style is acceptable. Keep lettering simple and aligned to the label's arcs.
- Draw two arcs across the body for the label's top and bottom edges.
- Add vertical side edges that stop at the arcs.
- For an angled view, make the arcs fuller and keep side edges vertical.
- Add simple lettering between baseline and midline, using a consistent style.
Checking Proportions and Consistency
Check that the can's width and height use the same units and that the top and bottom arcs are symmetric. The top-rim ellipse should be centered and slightly smaller than the outer width. The pull-tab should sit on the rim without floating. The label arcs should curve in the same direction as the can's top and bottom arcs. If you used numerical examples, label them as hypothetical and measure your own can to confirm.
A quick arithmetic check: if the can's width is 6 units and height is 12 units, the height-to-width ratio is 2:1. The top-rim ellipse's width might be 5 units, leaving a 0.5-unit rim on each side. These numbers are hypothetical examples, not standards.
- Measure width and height in the same units and record the ratio.
- Check symmetry of top and bottom arcs about the centerline.
- Confirm the rim ellipse is centered and smaller than the outer width.
- Verify label arcs curve in the same direction as the can's arcs.
Worked example
Draw a front view of a generic can with width 6 units and height 12 units. Add a top-rim ellipse with width 5 units, a pull-tab toward the front edge, and a label with top and bottom arcs. Use hypothetical numbers and state them as examples.
Worked answer
A front-view can with vertical sides 12 units tall and 6 units wide. The top arc curves upward and the bottom arc curves downward, both symmetric about the centerline. The top-rim ellipse is 5 units wide, centered, leaving a 0.5-unit rim on each side. The pull-tab is a rounded rectangle with a ring, placed toward the front edge and overlapping the rim line. The label has two arcs across the body and vertical side edges, with simple lettering between baseline and midline. All numbers are hypothetical examples.
Four practice exercises
Exercise 1
Draw a front view of a can with width 4 units and height 8 units. Add a top-rim ellipse 3.5 units wide and a pull-tab toward the front edge. State that the numbers are hypothetical.
Show answer and check
A front-view can with vertical sides 8 units tall and 4 units wide. Top arc curves upward, bottom arc curves downward, both symmetric. Rim ellipse 3.5 units wide, centered, leaving a 0.25-unit rim on each side. Pull-tab overlaps the rim line toward the front edge. Numbers are hypothetical examples.
Why: The height-to-width ratio is 2:1, matching the worked example's proportion. The rim ellipse is smaller than the outer width by 0.5 units total, so 0.25 units per side. The tab overlaps the rim to show attachment.
Check: Measure the drawn width and height in the same units; confirm the ratio is 2:1. Check that the rim ellipse is centered and that the tab overlaps the rim line.
Exercise 2
Draw an angled view of a can with width 6 units and height 12 units. Make the top and bottom arcs fuller ellipses and keep the sides vertical. Add a label with curved top and bottom edges and vertical side edges.
Show answer and check
An angled-view can with vertical sides 12 units tall and 6 units wide. Top and bottom are fuller ellipses, symmetric about the centerline. Label has curved top and bottom edges and vertical side edges. Numbers are hypothetical examples.
Why: In an angled view, the ellipse's minor axis is vertical and its height is about one-third of its width for a gentle tilt. The sides stay vertical, and the label edges follow the can's curvature.
Check: Confirm the sides are vertical and the top and bottom ellipses are symmetric. Check that the label's side edges are vertical and its top and bottom edges curve in the same direction as the can's arcs.
Exercise 3
Draw a front view of a can with width 5 units and height 10 units. Add a top-rim ellipse 4 units wide and a pull-tab with a ring. Add a label with simple lettering between baseline and midline. State that the numbers are hypothetical.
Show answer and check
A front-view can with vertical sides 10 units tall and 5 units wide. Top and bottom arcs symmetric. Rim ellipse 4 units wide, centered, leaving a 0.5-unit rim on each side. Pull-tab with ring overlaps the rim. Label has arcs and vertical side edges, with lettering between baseline and midline. Numbers are hypothetical examples.
Why: The ratio is 2:1. The rim ellipse is 1 unit smaller than the outer width, so 0.5 units per side. The lettering convention keeps lowercase letters between baseline and midline.
Check: Measure width and height in the same units and check the 2:1 ratio. Confirm the rim ellipse is centered and the lettering stays between baseline and midline.
Exercise 4
Draw a front view of a can with width 3 units and height 6 units. Add a top-rim ellipse 2.5 units wide and a pull-tab toward the front edge. Add a label whose top and bottom arcs curve in the same direction as the can's arcs. State that the numbers are hypothetical.
Show answer and check
A front-view can with vertical sides 6 units tall and 3 units wide. Top and bottom arcs symmetric. Rim ellipse 2.5 units wide, centered, leaving a 0.25-unit rim on each side. Pull-tab overlaps the rim toward the front edge. Label arcs curve in the same direction as the can's arcs. Numbers are hypothetical examples.
Why: The ratio is 2:1. The rim ellipse is 0.5 units smaller than the outer width, so 0.25 units per side. The label arcs follow the can's curvature.
Check: Measure width and height in the same units and check the 2:1 ratio. Confirm the rim ellipse is centered and the label arcs curve in the same direction as the can's top and bottom arcs.
Common mistakes
- Drawing the top and bottom as straight horizontal lines. Replace them with smooth arcs that curve upward at the top and downward at the bottom, symmetric about the centerline.
- Making the pull-tab float above the rim. Let the tab overlap the rim line slightly so it appears attached to the top surface.
- Drawing label edges as curved lines instead of vertical. Keep the label's side edges vertical and let only the top and bottom edges curve.
- Using different units for width and height. Measure both in the same unit and state any numerical values as hypothetical examples.
Self-check rubric
- Vertical sides are parallel and the can's width and height use the same units.
- Top and bottom arcs are smooth and symmetric about the centerline.
- Top-rim ellipse is centered and slightly smaller than the outer width.
- Pull-tab overlaps the rim line and reads as attached.
- Label top and bottom edges curve with the can; side edges are vertical.
- Lettering uses a baseline-to-midline x-height convention and a consistent style.
- Any numerical values are labeled as hypothetical examples.
Questions and answers
Do I need to draw a perfect ellipse?
No. A smooth, symmetric arc is enough. The convention allows any clean curve that reads as a cylinder top.
Can I use my own lettering style on the label?
Yes. Use a baseline-to-midline x-height convention and keep the style consistent; many styles are valid.
How do I know the can's proportions are correct?
Measure width and height in the same units and check the ratio. Any numbers you choose are hypothetical examples, not standards.
What if my angled view looks wrong?
Keep the sides vertical and make the top and bottom arcs fuller. Check symmetry about the centerline.