Free original lessons
Draw a Cartoon Character from Simple Shapes
Learn to build an original cartoon character by combining circles, ovals, rectangles, and triangles, then add expression and pose using a clear shape-to-line method.
Free lesson
Four exercises
Worked answers
Object Drawing Lessons
Cartoon characters look lively because they are built from simple, readable shapes before any detail is added. This lesson teaches a repeatable construction sequence: choose a head shape, attach a body, add limbs, then refine expression and pose. You will work with a defined convention for proportions and a rubric that accepts valid stylistic alternatives. All measurements are hypothetical examples; measure your own paper and tools when you practice.
Practice materials: Printable downloads are not available for this lesson yet. Use the instructions and four exercises below.
Reference illustration
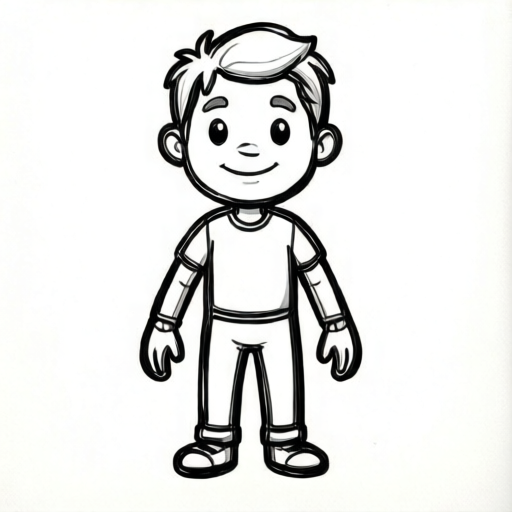
Use the stated measurements and conventions for each exercise.
Start with a shape skeleton
Every cartoon character begins as a set of large shapes. Use a light pencil so you can adjust proportions without erasing hard. A circle or oval makes a friendly head; a rectangle or trapezoid gives a sturdy body; tapered rectangles or ovals become arms and legs. Keep shapes large and simple at this stage.
Define a head-to-body ratio before drawing. A common cartoon convention is a head that is one-third to one-half the total figure height, which makes the character read as expressive rather than realistic. This is a convention, not a rule: choose a ratio and keep it consistent within one drawing.
- Draw a light vertical line for the figure's central axis.
- Place a circle or oval for the head on the axis.
- Attach a rectangle or trapezoid for the torso below the head.
- Add two tapered rectangles for arms and two for legs, keeping them symmetrical unless the pose is asymmetric.
- Check that the largest shapes read clearly before adding features.
Convert shapes into cartoon lines
Once the skeleton is balanced, trace over the outer edges with a darker line. Let the shapes merge: the neck can be a short curve connecting head and torso, and limbs can taper toward hands and feet. Avoid drawing every internal shape edge; cartoon lines usually describe the silhouette and a few key overlaps.
Use a consistent line weight convention: a medium outline for the body and a slightly heavier line for the outer silhouette. This is a stylistic choice, not a universal standard. If you prefer uniform lines, state that convention on your worksheet so the rubric can judge consistency rather than a single correct weight.
- Trace the head outline, leaving a gap where the neck will connect.
- Trace the torso, merging the shoulder and hip curves.
- Trace arms and legs, tapering the ends for hands and feet.
- Add simple hands as mittens or rounded rectangles and feet as ovals.
- Erase or lighten the construction shapes only after the final lines are stable.
Add expression and pose
Expression comes from a few movable features: eyebrows, eyes, and mouth. Draw a neutral face first, then vary one feature at a time. Raised eyebrows and a wide mouth suggest surprise; angled eyebrows and a small mouth suggest determination. Keep the eyes at or slightly below the vertical midline of the head for a friendly cartoon look.
Pose is controlled by the limb shapes. Bend an arm by replacing one straight tapered rectangle with two shorter ones joined at an elbow point. Keep the joint angle readable and check that the hand still reaches its intended target. A simple rule is to draw the pose with the non-drawing hand first as a quick gesture, then build shapes over it.
- Draw a neutral face with two dot eyes and a short curved mouth.
- Change only the eyebrows to create a second expression.
- Change only the mouth to create a third expression.
- Bend one arm at a clear elbow angle and check hand placement.
- Compare the three expressions side by side for consistency of head shape.
Refine and self-check
A finished cartoon should read at a glance. Step back and ask whether the head, torso, and limbs are distinguishable as separate masses. Check that the character stands on a consistent ground line and that the head-to-body ratio matches your chosen convention. Small details such as hair tufts or clothing lines should support the silhouette, not clutter it.
Use the rubric to judge clarity, proportion consistency, expression readability, and line control. Because cartoon style varies, the rubric rewards a stated convention followed consistently rather than a single correct appearance.
- Confirm the head-to-body ratio matches your stated convention.
- Check that each limb connects to the torso without floating.
- Verify that the expression is readable from arm's length.
- Confirm line weight is consistent with your stated convention.
- Label the drawing with the chosen ratio and expression type for review.
Worked example
A student draws a cartoon character with a circular head, a rectangular torso, and two tapered rectangle legs. The total figure height is 12 cm and the head diameter is 4 cm. The student claims the head is one-third of total height. Check the claim and describe one improvement.
Worked answer
The head is 4 cm and the total height is 12 cm, so the ratio is 4 divided by 12, which equals one-third. The claim is correct. One improvement is to taper the legs slightly toward the ankles so they read as cartoon limbs rather than uniform rectangles, while keeping the same overall height.
Four practice exercises
Exercise 1
A character has a head 5 cm tall and a total height of 15 cm. State the head-to-body ratio as a fraction and explain whether it matches a one-third convention.
Show answer and check
The ratio is 5 divided by 15, which equals one-third. It matches the one-third convention.
Why: Divide head height by total height to get the ratio, then compare to the stated convention.
Check: Recompute 5 divided by 15 and confirm it simplifies to one-third.
Exercise 2
A student draws a neutral face, then a surprised face by raising both eyebrows and opening the mouth. The head outline is identical in both drawings. Explain why this is a valid expression variation.
Show answer and check
It is valid because only the eyebrows and mouth changed while the head shape stayed consistent, making the expression difference readable and controlled.
Why: Expression variation should change movable features, not the underlying head shape, so the comparison is fair.
Check: Compare the two drawings and confirm the head outline matches while at least one feature differs.
Exercise 3
A cartoon arm is drawn as two tapered rectangles joined at a 90-degree elbow. The upper segment is 3 cm and the lower segment is 3 cm. The hand is meant to reach a point 5 cm from the shoulder. Does the arm reach? Use a simple straight-line estimate.
Show answer and check
No. A 90-degree bend means the straight-line distance from shoulder to hand is about 3 times the square root of 2, roughly 4.2 cm, which is less than 5 cm.
Why: For a right-angle bend with equal segments, the straight-line distance is the hypotenuse of a 3 cm by 3 cm right triangle.
Check: Calculate 3 squared plus 3 squared equals 18, and the square root of 18 is about 4.2 cm, which is below 5 cm.
Exercise 4
A character is drawn with a head diameter of 6 cm and a total height of 18 cm. The student says the head is one-quarter of total height. Identify the error and give the correct fraction.
Show answer and check
The error is that 6 divided by 18 equals one-third, not one-quarter. The correct fraction is one-third.
Why: Divide head diameter by total height and simplify the fraction.
Check: Confirm that 6 times 3 equals 18, so the ratio is one-third.
Common mistakes
- Drawing details before the large shapes are balanced. Complete and check the shape skeleton first, then add features and clothing.
- Changing head size between expression variations. Trace the same head outline for each variation so only features change.
- Making limbs too thin to read as shapes. Keep arms and legs at least as wide as a pencil line at the wrist and ankle, and taper gradually.
- Using inconsistent line weight without stating a convention. Choose either uniform or silhouette-weighted lines and apply that choice throughout.
Self-check rubric
- Shape skeleton is visible and balanced before detail is added.
- Head-to-body ratio is stated and applied consistently.
- Limbs connect to the torso and taper clearly.
- Expression is readable from arm's length and varies by controlled feature changes.
- Line weight follows a stated convention throughout.
- Valid stylistic alternatives are accepted if the convention is consistent.
Questions and answers
Do I need special paper or tools?
No. Ordinary paper and a pencil work. A light pencil for construction and a darker pencil for final lines is helpful but not required.
What head-to-body ratio should I use?
Any consistent ratio works. A hypothetical example is a head one-third of total height. State your chosen ratio on the drawing so it can be checked.
Can I use triangles instead of rectangles for the body?
Yes. Triangles or trapezoids are valid body shapes. The rubric checks clarity and consistency, not a specific shape.
How many expressions should I practice?
Three is enough to show variation: neutral, surprised, and determined. More is fine if each is readable.