Free original lessons
Construction Cone Drawing: Taper, Bands, and Square Base
Learn to draw a construction cone with a tapered body, reflective bands, and a square base in front and angled views using clear proportions and checks.
Free lesson
Four exercises
Worked answers
Object Drawing Lessons
This lesson teaches a reliable method for drawing a construction cone: a tapered body, two reflective bands, and a square base shown in perspective. You will use a simple convention for height and width, place bands by measured fractions, and check your drawing with arithmetic rather than guesswork. The same steps work for front and angled views, and for cones at different sizes. All measurements are hypothetical examples; measure your own paper and tools. The focus is the cone itself, not road scenes or other safety equipment.
Practice materials: Printable downloads are not available for this lesson yet. Use the instructions and four exercises below.
Reference illustration
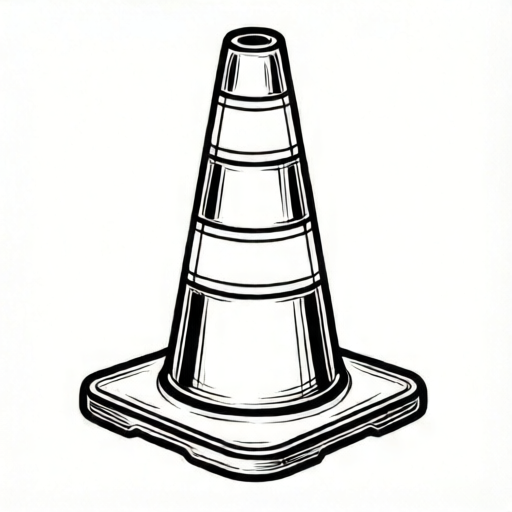
Use the stated measurements and conventions for each exercise.
Set a convention and measure the cone
Choose a drawing convention before you start. For this lesson, cone height is measured from the baseline (bottom of the base) to the midline of the top opening. Width is measured across the widest part of the base. Use the same units throughout, such as centimeters or grid squares. Letter styles and handwriting vary, so the convention defines what counts, not a single perfect look.
Decide a hypothetical example size: height 12 units, base width 8 units, top width 2 units. These numbers are examples only. Measure your actual paper and pencil; if your paper is smaller, scale all numbers by the same factor so the proportions stay consistent.
- Mark the baseline and a vertical center line.
- Mark the total height from baseline to top midline.
- Mark the base width centered on the center line.
- Mark the top width centered at the top midline.
- Label the four key points: base left, base right, top left, top right.
Draw the tapered body and square base
The body is a trapezoid in front view: the base is wider than the top, and the sides slope inward evenly. Connect base left to top left and base right to top right with straight lines. For the square base in front view, draw a shallow horizontal rectangle under the baseline; its width equals the base width and its depth is a hypothetical 2 units. In angled view, the base becomes a parallelogram: keep opposite sides parallel and equal, and shift the back edge slightly up and to one side.
Check the taper by comparing the horizontal distance from the center line to each side at the base and at the top. At the base, each side should be half the base width from the center. At the top, each side should be half the top width from the center. If the two side distances are not equal, adjust the points before drawing final lines.
- Draw the front trapezoid body using the four labeled points.
- Add the square base as a shallow rectangle under the baseline.
- For angled view, redraw the base as a parallelogram with parallel opposite sides.
- Keep the top opening as a short horizontal line or a small ellipse, depending on view.
- Erase construction marks only after the outline is consistent.
Place reflective bands by fractions
Reflective bands are horizontal strips across the tapered body. Place them by fractions of the cone height so they stay consistent at any size. Use two bands: the lower band centered at 40 percent of the height above the baseline, and the upper band centered at 70 percent. Each band has a hypothetical thickness of 1 unit. Because the body tapers, the band width at each height is between the base width and top width; estimate by the same fraction along the taper.
For a front view, draw each band as a horizontal strip whose left and right edges touch the sloping sides. For an angled view, curve the band slightly to follow the visible surface, but keep the band edges parallel to the base edges. Check band placement by measuring from the baseline to the band center and dividing by total height; the result should match the chosen fraction within a small tolerance you set, such as one grid square.
- Measure 40 percent of the height from the baseline and mark the lower band center.
- Measure 70 percent of the height and mark the upper band center.
- Draw band edges 0.5 units above and below each center.
- Trim band ends to the sloping body sides.
- In angled view, curve bands gently and keep edges parallel to the base.
Check proportions and finish
Finish by checking three relationships: height to base width, taper symmetry, and band fractions. For the example, height divided by base width is 12 divided by 8, or 1.5. The top width divided by base width is 2 divided by 8, or 0.25. Band centers should sit at 0.4 and 0.7 of the height. If your drawing uses different numbers, recompute these ratios and compare.
Use a simple rubric: correct taper (sides slope inward evenly), square base in perspective (opposite sides parallel), two bands at the stated fractions, and consistent units. Valid alternatives include a slightly different band thickness or a small ellipse at the top, as long as the fractions and taper remain checkable. Do not add road scenes or other equipment; keep the drawing to the cone, bands, and base.
- Re-measure height and base width; compute the ratio.
- Check that left and right side distances from the center line match at base and top.
- Verify band centers by fraction of height.
- Confirm base opposite sides are parallel in angled view.
- Label your units and chosen fractions beside the drawing for review.
Worked example
Draw a front-view construction cone with height 10 units, base width 6 units, top width 2 units, and two bands centered at 30 percent and 60 percent of the height. Use band thickness 1 unit.
Worked answer
Mark baseline and center line. Mark height 10. Mark base width 6 centered, so each side is 3 units from center. Mark top width 2 centered, so each side is 1 unit from center. Connect sides to form the trapezoid. Add a shallow base rectangle of width 6 and depth 2. Lower band center is 3 units above baseline; upper band center is 6 units above baseline. Draw band edges 0.5 units above and below each center and trim to the sloping sides. Check: height divided by base width is 10 divided by 6, about 1.67; top divided by base is 2 divided by 6, about 0.33; band fractions are 0.3 and 0.6.
Four practice exercises
Exercise 1
Front view: height 8 units, base width 4 units, top width 1 unit, bands at 25 percent and 75 percent, thickness 0.5 unit. Describe the drawing and give the band center heights.
Show answer and check
Trapezoid with base half-width 2 and top half-width 0.5. Base rectangle width 4, depth 1. Band centers at 2 units and 6 units above baseline.
Why: Height times fraction gives band centers: 8 times 0.25 equals 2; 8 times 0.75 equals 6. Half-widths come from dividing base and top widths by 2.
Check: Measure band centers from baseline and divide by 8; results should be 0.25 and 0.75 within one grid square.
Exercise 2
Angled view: height 12 units, base width 6 units, top width 2 units, bands at 40 percent and 70 percent. Describe the base shape and band center heights.
Show answer and check
Base is a parallelogram with opposite sides parallel; width 6 and depth 2. Band centers at 4.8 units and 8.4 units above baseline.
Why: 12 times 0.4 equals 4.8; 12 times 0.7 equals 8.4. The angled base keeps parallel opposite sides rather than a rectangle.
Check: Confirm opposite base sides are parallel and band centers divided by height give 0.4 and 0.7.
Exercise 3
Scale check: a cone has height 9 units and base width 3 units. What is height divided by base width? If top width is 1 unit, what is top divided by base?
Show answer and check
Height divided by base width is 3. Top divided by base is about 0.33.
Why: 9 divided by 3 equals 3; 1 divided by 3 is approximately 0.33. These ratios help compare drawings at different sizes.
Check: Recompute with a calculator or by hand and compare to the drawn proportions using the same units.
Exercise 4
Band placement: height 10 units, bands at 20 percent and 80 percent, thickness 1 unit. Give the lower and upper edges of each band.
Show answer and check
Lower band edges at 1.5 and 2.5 units; upper band edges at 7.5 and 8.5 units above baseline.
Why: Centers are 2 and 8 units. Subtract and add half the thickness, 0.5, to get edges.
Check: Measure each edge from baseline; center of each pair should equal height times the fraction.
Common mistakes
- Drawing the body as a rectangle instead of a taper. Mark top width smaller than base width and connect the four labeled points with straight sloping sides.
- Placing bands by eye without fractions. Measure band centers at 40 percent and 70 percent of the height from the baseline, using the same units.
- Making the angled base a rectangle rather than a parallelogram. Keep opposite sides parallel and equal; shift the back edge up and to one side.
- Using different units for height and width. Choose one unit, such as centimeters or grid squares, and convert all measurements before drawing.
Self-check rubric
- Taper is even: left and right side distances from center match at base and top.
- Base is square in perspective: opposite sides parallel and equal in angled view.
- Two bands are placed at the stated fractions of height within the chosen tolerance.
- Units are consistent and labeled.
- Drawing includes only the cone, bands, and base, with no extra road scene or equipment.
Questions and answers
Do I need exact numbers to draw a cone?
No. The numbers are hypothetical examples. Choose a height and base width, keep one unit, and use the same fractions for bands.
How do I know the taper is even?
Measure from the center line to each side at the base and at the top. The left and right distances should match at each height.
Can the top be a point instead of a small opening?
Yes, if your convention defines the top as a point. Then the top width is zero, and the taper check uses zero distance at the top.
What if my band thickness differs from the example?
That is a valid alternative. Keep the band centers at the chosen fractions and state the thickness you used.