Free original lessons
Fir Tree Drawing Step by Step: Conical Tiers and Needle Texture
Learn to draw a fir tree with narrow conical tiers, layered boughs, needle clusters, and a top spire using a clear step sequence and practice drills.
Free lesson
Four exercises
Worked answers
Object Drawing Lessons
This lesson teaches a reliable method for drawing a fir tree with a narrow conical crown, stacked tiers of boughs, visible needle texture, and a pointed top spire. You will build the tree from a central axis and tier guides, then add bough shapes and needle clusters. The method works at small and large sizes because it uses proportional relationships rather than fixed measurements. A convention is defined for judging needle texture so that many valid styles can succeed. All practice resources are planned and free; they are not yet produced, so use the text steps and your own paper for now.
Practice materials: Printable downloads are not available for this lesson yet. Use the instructions and four exercises below.
Reference illustration
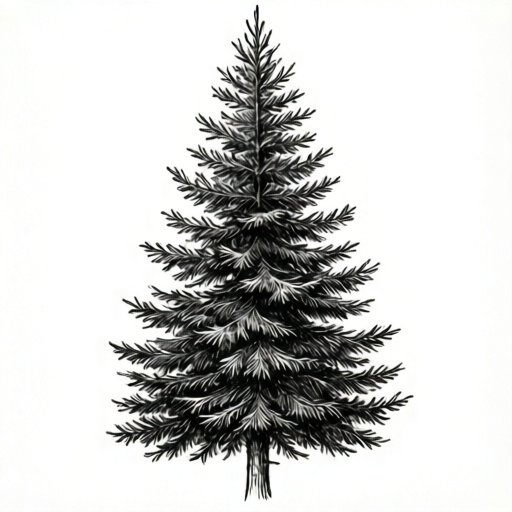
Use the stated measurements and conventions for each exercise.
Set the axis and tier guides
Begin with a light vertical axis for the trunk. Mark the ground line and the top spire point. Divide the height into four or five tier bands, making the lower bands taller than the upper bands. This gives the narrow conical silhouette that distinguishes a fir from a rounded evergreen.
Draw a shallow curve across each band to mark where that tier's boughs will spread. Keep the curves nearly horizontal but slightly drooping at the ends. The widest tier is the lowest one; each higher tier is narrower, and the top band ends in a spire.
- Draw a light vertical axis and mark ground and spire points.
- Divide the height into four or five tier bands, lower bands taller.
- Add a shallow drooping curve at each tier boundary.
- Check that each higher tier is narrower than the one below.
Build tiered boughs
For each tier, draw a central bough mass that tapers outward from the trunk. The outer edge should form a narrow cone segment, not a wide fan. Overlap the tiers slightly so the tree reads as layered rather than as separate shelves.
Vary the outer edge with small notches and short branch tips. Keep the overall cone shape intact: notches should be shallow, and no single branch should break the silhouette dramatically. The trunk is mostly hidden; show short segments between tiers.
- Draw a tapering bough mass for each tier from the trunk outward.
- Shape the outer edge as a narrow cone segment.
- Overlap adjacent tiers slightly.
- Add shallow notches and short branch tips without breaking the cone.
Add needle texture and spire
Needle texture is drawn as short clustered strokes along the bough edges and across the bough surface. Use a consistent stroke direction within each cluster, fanning outward from the branch line. Vary cluster density: denser near the trunk, looser at the tips.
Finish the top as a narrow spire made of a few short, upward-pointing needle clusters. The spire should continue the cone, not sit as a separate ball. Check that the needle strokes remain short relative to the tier height so the texture reads as needles rather than leaves.
- Draw short clustered strokes along bough edges and surfaces.
- Fan strokes outward from each branch line.
- Increase density near the trunk and loosen at tips.
- Finish with a narrow spire of upward needle clusters.
Worked example
Draw a fir tree 12 cm tall with four tiers. The lowest tier is 6 cm wide, each higher tier is 1 cm narrower, and the top spire is 2 cm tall. Describe the tier widths and check the cone.
Worked answer
Tier widths from bottom: 6 cm, 5 cm, 4 cm, 3 cm. The spire occupies the top 2 cm. The cone check: each higher tier is narrower by 1 cm, and the top tapers to a point, so the silhouette is conical.
Why: Subtracting 1 cm per tier gives a steady narrowing that reads as a fir cone. The spire continues the taper rather than adding a separate shape.
Check: Measure each tier width with a ruler and confirm the differences are equal and positive; confirm the spire is narrower than the top tier.
Four practice exercises
Exercise 1
Draw a fir tree 10 cm tall with four tiers. Make the lowest tier 5 cm wide and reduce each higher tier by 1 cm. Add a 1.5 cm spire. State the tier widths.
Show answer and check
Tier widths: 5 cm, 4 cm, 3 cm, 2 cm; spire 1.5 cm.
Why: Equal reduction per tier creates a steady cone; the spire continues the taper.
Check: Measure widths and confirm each is 1 cm narrower; confirm spire is narrower than the top tier.
Exercise 2
A drawing has tiers 7 cm, 6 cm, 6 cm, and 4 cm wide from bottom to top. Identify the proportion error and give corrected widths using a 1 cm reduction.
Show answer and check
The third tier should be 5 cm, not 6 cm. Corrected: 7 cm, 6 cm, 5 cm, 4 cm.
Why: A repeated width breaks the conical taper; equal reduction restores it.
Check: Subtract consecutive widths; all differences should be 1 cm.
Exercise 3
Describe and then draw a needle-texture drill: three clusters of five short strokes each along a drooping branch line, with denser strokes near the trunk. State the stroke length relative to a 3 cm tier.
Show answer and check
Strokes about 0.5 cm long, clustered in fives, denser near the trunk and looser at tips.
Why: Short strokes relative to tier height read as needles; clustering follows branch lines.
Check: Measure a sample stroke and confirm it is about one-sixth of tier height; count five strokes per cluster.
Exercise 4
Draw a fir tree 15 cm tall with five tiers. The lowest tier is 7 cm wide, each higher tier is 1.2 cm narrower, and the spire is 2 cm. State widths and check the cone.
Show answer and check
Widths: 7 cm, 5.8 cm, 4.6 cm, 3.4 cm, 2.2 cm; spire 2 cm.
Why: Subtracting 1.2 cm per tier gives a consistent narrowing; the spire is narrower than the top tier.
Check: Measure each width and confirm differences are 1.2 cm; confirm spire width is less than 2.2 cm.
Common mistakes
- Making tiers too wide and rounded, producing a broad evergreen silhouette. Narrow each tier and keep the outer edge as a cone segment; the lowest tier should still be the widest but not bulbous.
- Drawing needle strokes as long lines or leaf shapes. Keep strokes short relative to tier height and cluster them along branch lines.
- Separating tiers into flat shelves with gaps. Overlap tiers slightly and let bough masses merge at the trunk.
- Adding a rounded top instead of a spire. End the top band with a narrow upward taper and a few short needle clusters.
Self-check rubric
- Conical silhouette: tiers narrow upward and the top ends in a spire.
- Tier structure: four or five overlapping tiers with lower tiers taller.
- Needle texture: short clustered strokes along branch lines, density varied.
- Proportion: tier widths decrease consistently; no tier wider than the one below.
- Valid alternatives: any needle style that meets the short-stroke cluster convention is accepted.
Questions and answers
How many tiers should a fir tree have?
Four or five tiers work well for a clear conical shape. Use fewer for a small drawing and more for a tall one, keeping lower tiers taller.
Can I use different needle styles?
Yes. The convention allows short single strokes, small V clusters, or tiny fan clusters, provided strokes stay short and cluster along branch lines.
Do I need to show the trunk?
Only short segments between tiers. A fir's trunk is mostly hidden by boughs, so avoid a long exposed trunk.
How do I keep the cone narrow?
Check each tier's width against the one below; each higher tier should be visibly narrower, and the outer edge should taper rather than bulge.