Reference diagram
LETTER · Download PDF (3 pages)
Free original resources
Learn to draw a moth outline with balanced wings and correctly placed antennae using a simple symmetry guide and checkable steps.
Original reference diagrams, four practice exercises and separate worked answers. All files are free. No signup required.
LETTER · Download PDF (3 pages)
LETTER · Download PDF (4 pages)
LETTER · Download PDF (4 pages)
Choose A4 or US Letter for your printer. The reference and answer illustrations are not physical rulers; follow the scale instruction printed on the practice worksheet.
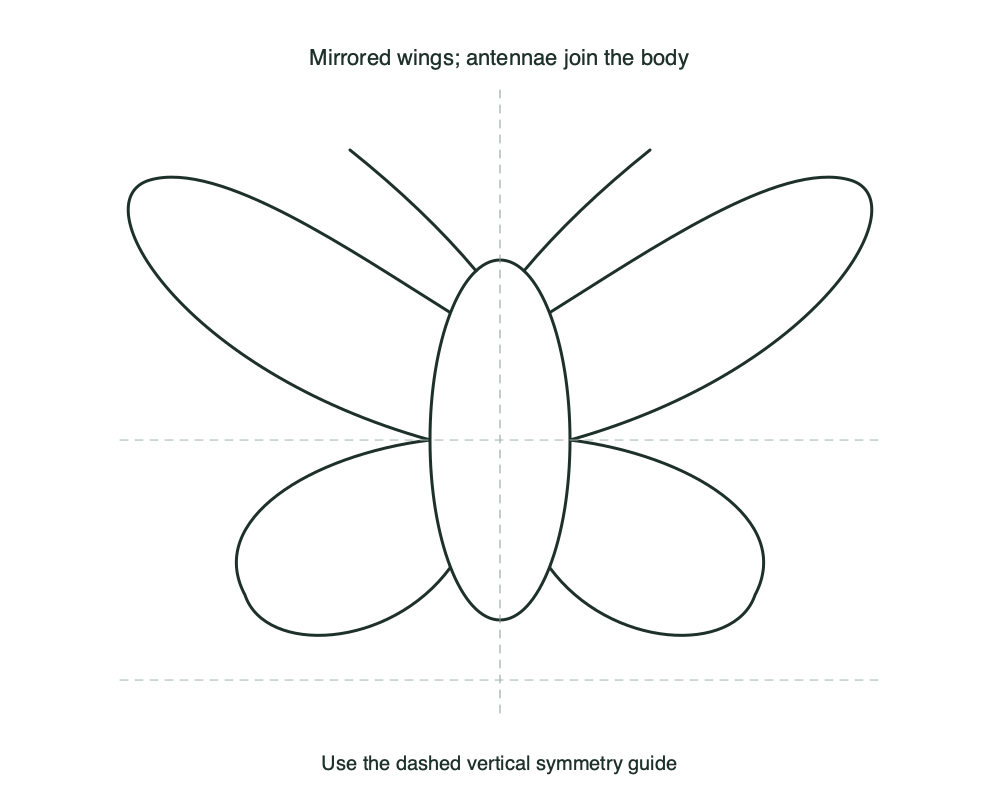
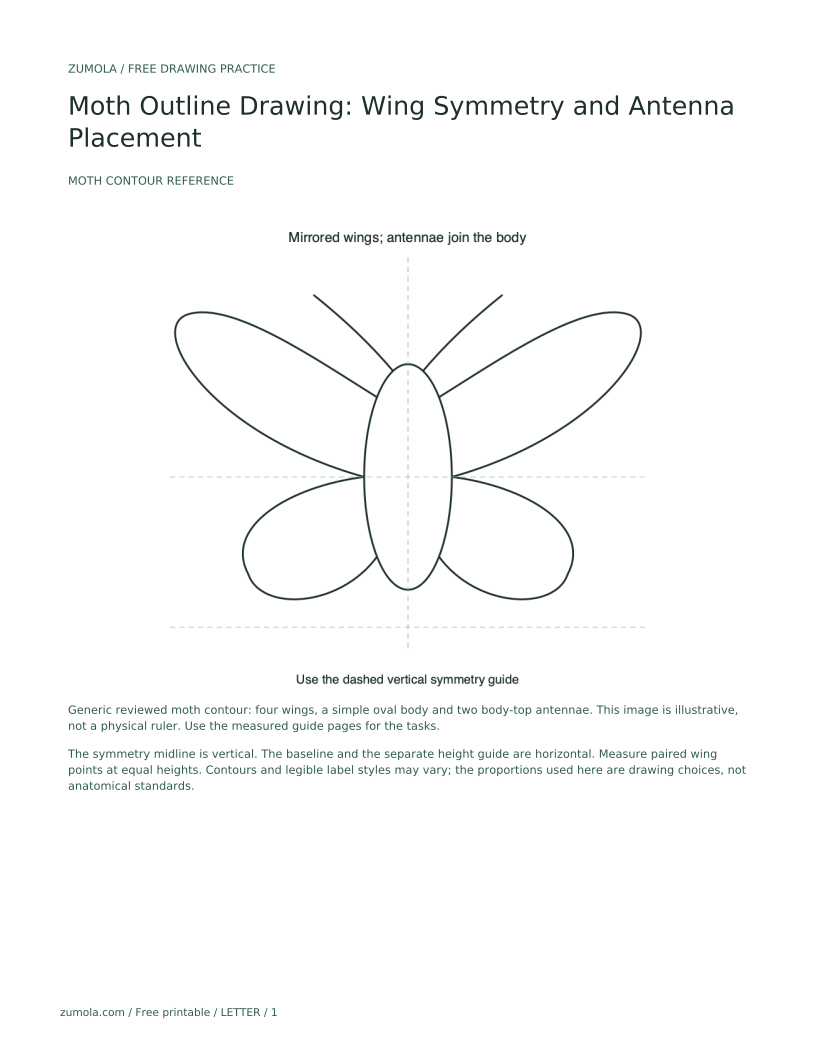
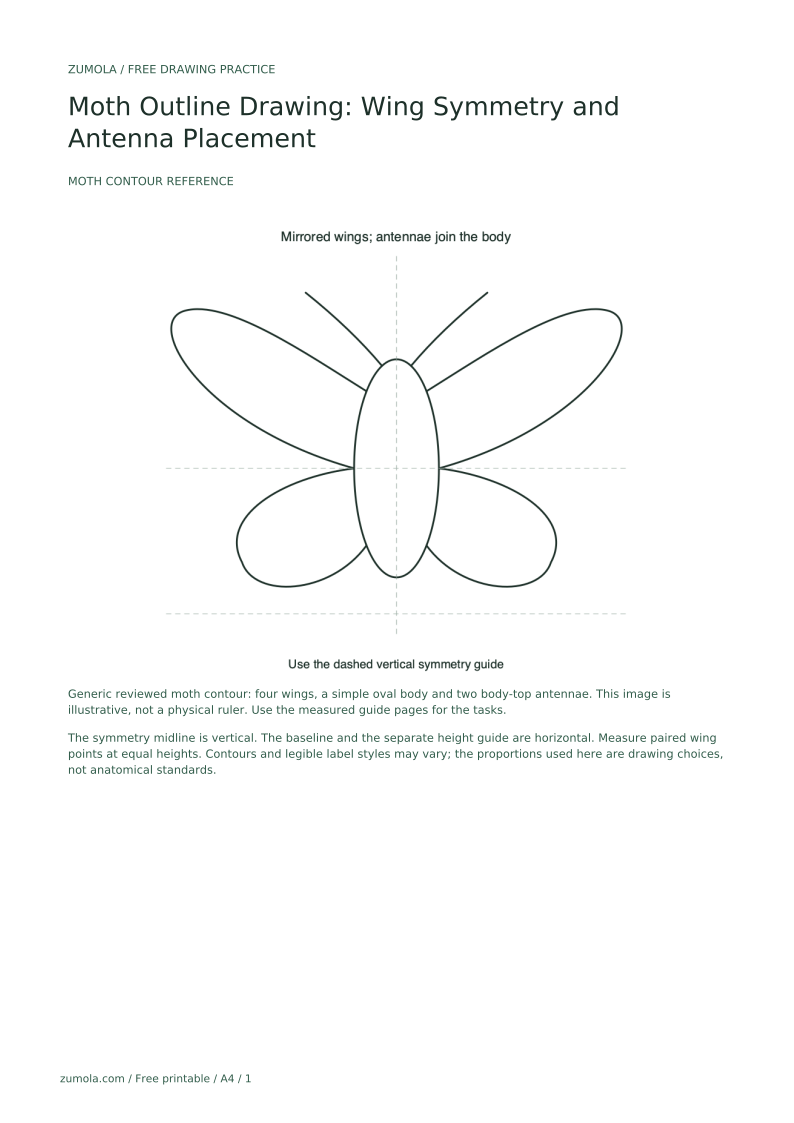
This lesson teaches a moth outline study focused on wing symmetry and antenna placement. Use a vertical centerline for left-right symmetry, a horizontal baseline for zero height, and a separate horizontal height guide for checking wing points at the same height. Wing contours may vary; the rubric checks measured balance and clear antenna placement rather than one universal shape. Labels may use any legible style. All measurements and proportions below are hypothetical drawing examples, not anatomical standards; measure your own paper and tools before drawing.
Place your paper in portrait orientation. Draw a light vertical centerline from top to bottom; this is the symmetry midline. Mark a horizontal baseline near the lower third and label it zero height. Add a separate horizontal height guide at a wing checkpoint you choose, recording its height above the baseline. The horizontal height guide is not the vertical midline. These guides keep the moth centered and let you compare left and right points at equal heights.
Draw the body as a simple narrow vertical oval centered on the symmetry midline. For a general block-in example, you may choose a body width about one-fifth of the wingspan; this is an optional drawing proportion, not a universal fact about moths. Follow any explicit task measurements instead when they are given. Keep construction lines light so they can be adjusted.
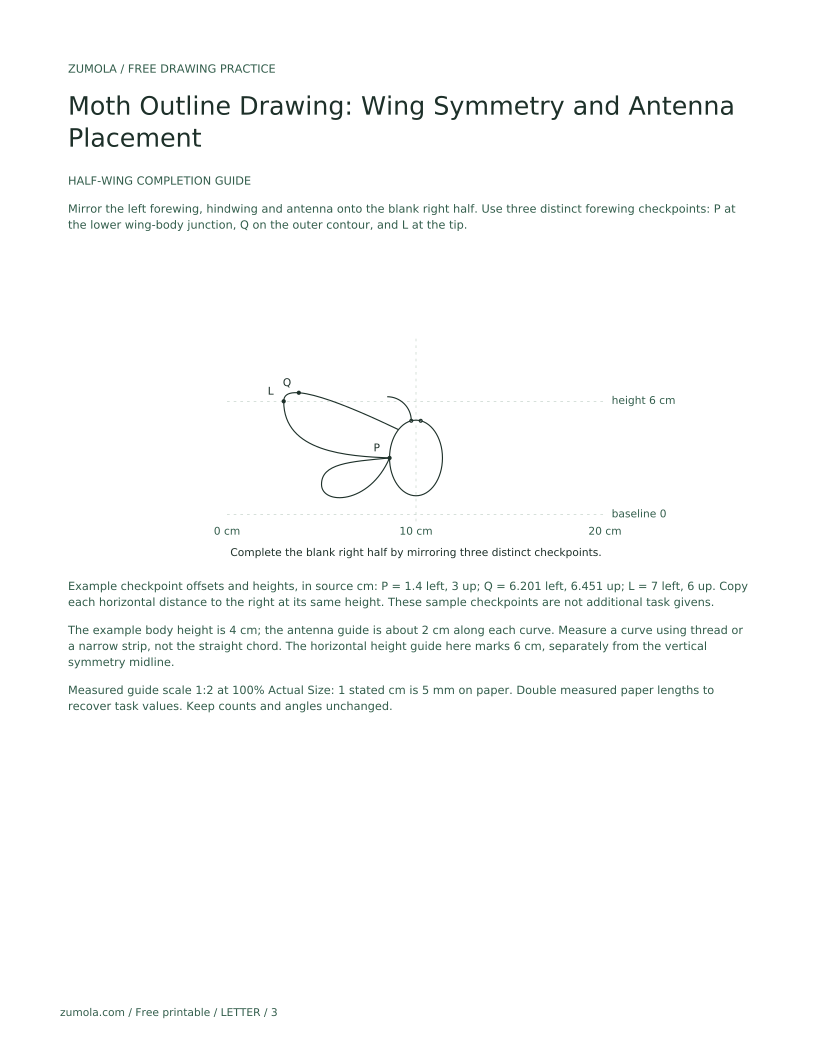
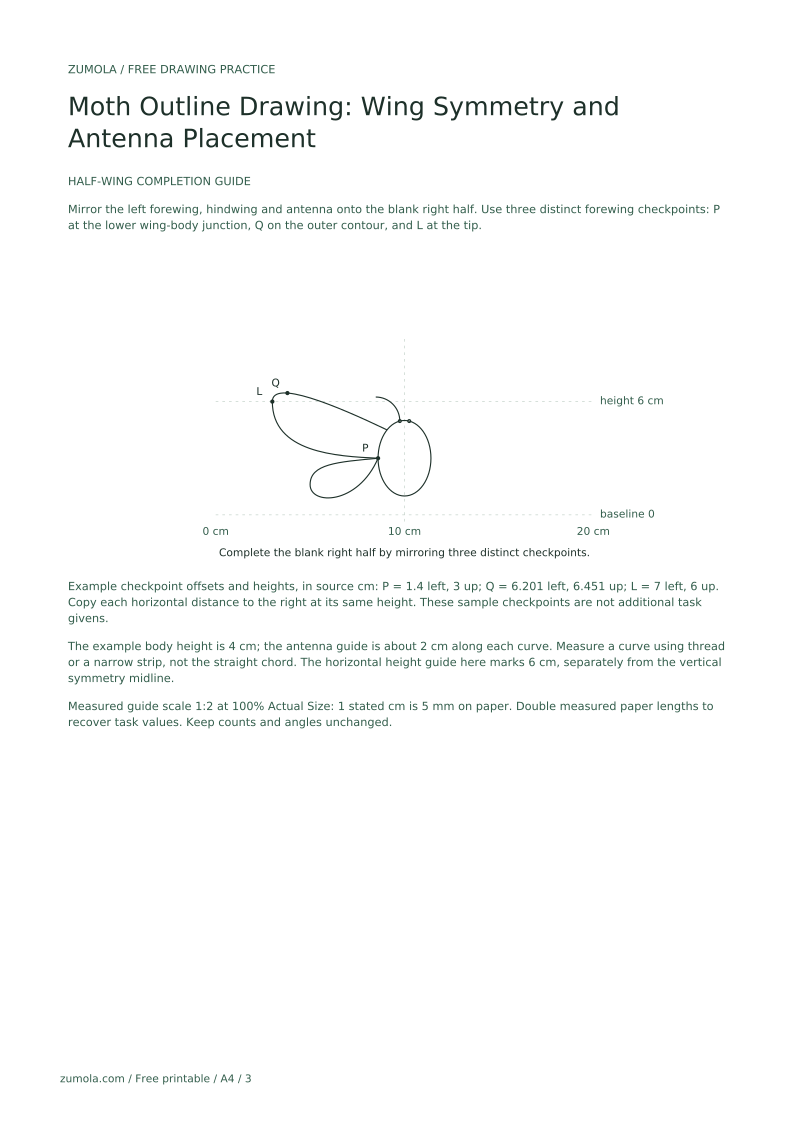
Draw the left forewing from its root, curve outward and upward to a rounded tip, then return to the body. Keep the leading edge slightly straighter than the trailing edge. Mirror the shape by copying horizontal distances from the vertical midline at equal heights. Use at least three distinct checkpoints, including the root, tip and another point on the outer contour. The tip may also be the widest point, so do not count the same point twice as two checkpoints.
Add hindwings below the forewings. They should be shorter and rounder. Mirror them the same way. Check symmetry by folding the paper gently along the midline or by measuring distances with a ruler; do not rely on sight alone.
Antennae attach near the top of the body, one on each side of the midline. Draw two gentle curves sweeping outward. Use similar curve lengths and angles; a small difference is acceptable if the outline remains balanced. When a task gives an antenna length, measure along the curve with a thread or narrow paper strip, rather than measuring the straight chord from attachment to tip.
Refine the outline by darkening the final contour and erasing construction lines. Keep the body simple: no full segmentation. The goal is a clean moth outline with mirrored wings and clearly placed antennae.
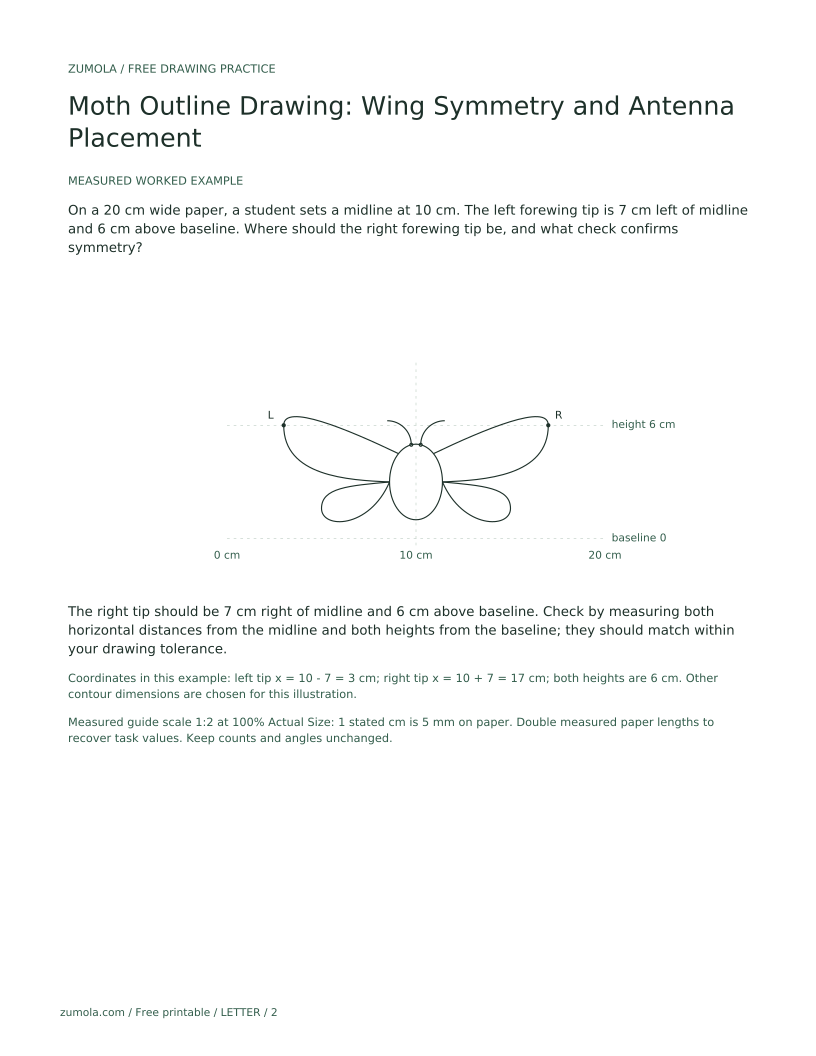
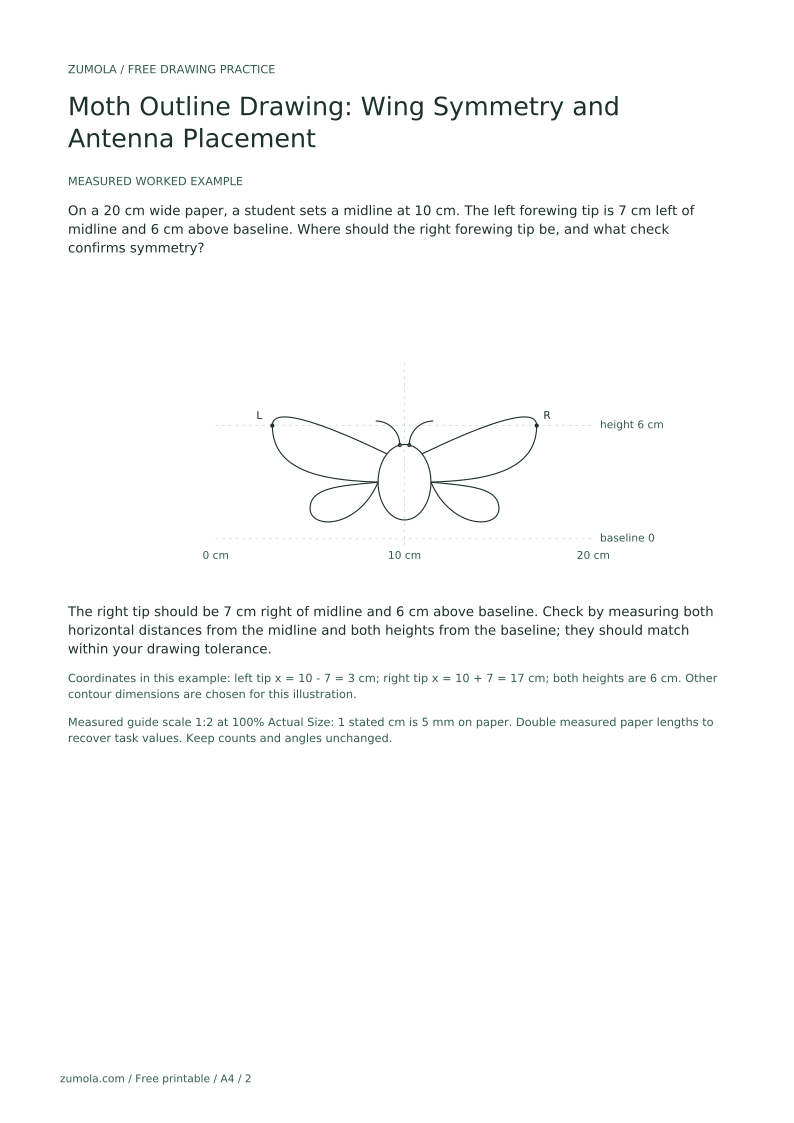
On a 20 cm wide paper, a student sets a midline at 10 cm. The left forewing tip is 7 cm left of midline and 6 cm above baseline. Where should the right forewing tip be, and what check confirms symmetry?
The right tip should be 7 cm right of midline and 6 cm above baseline. Check by measuring both horizontal distances from the midline and both heights from the baseline; they should match within your drawing tolerance.
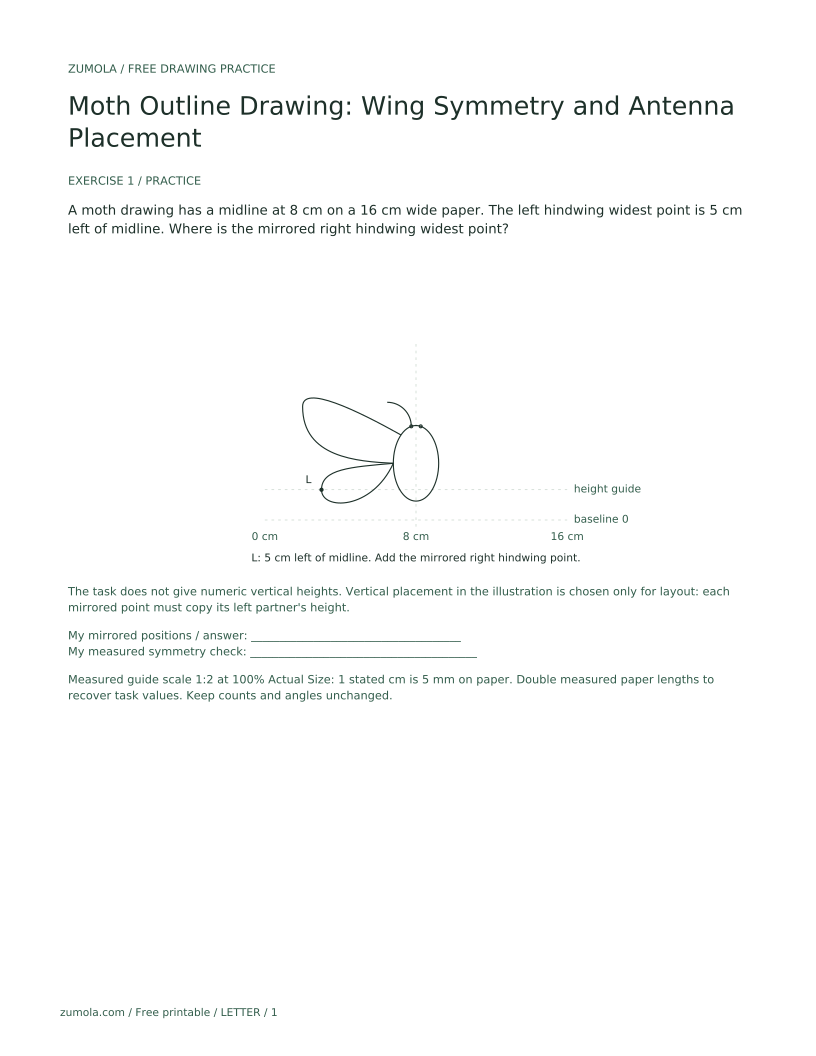
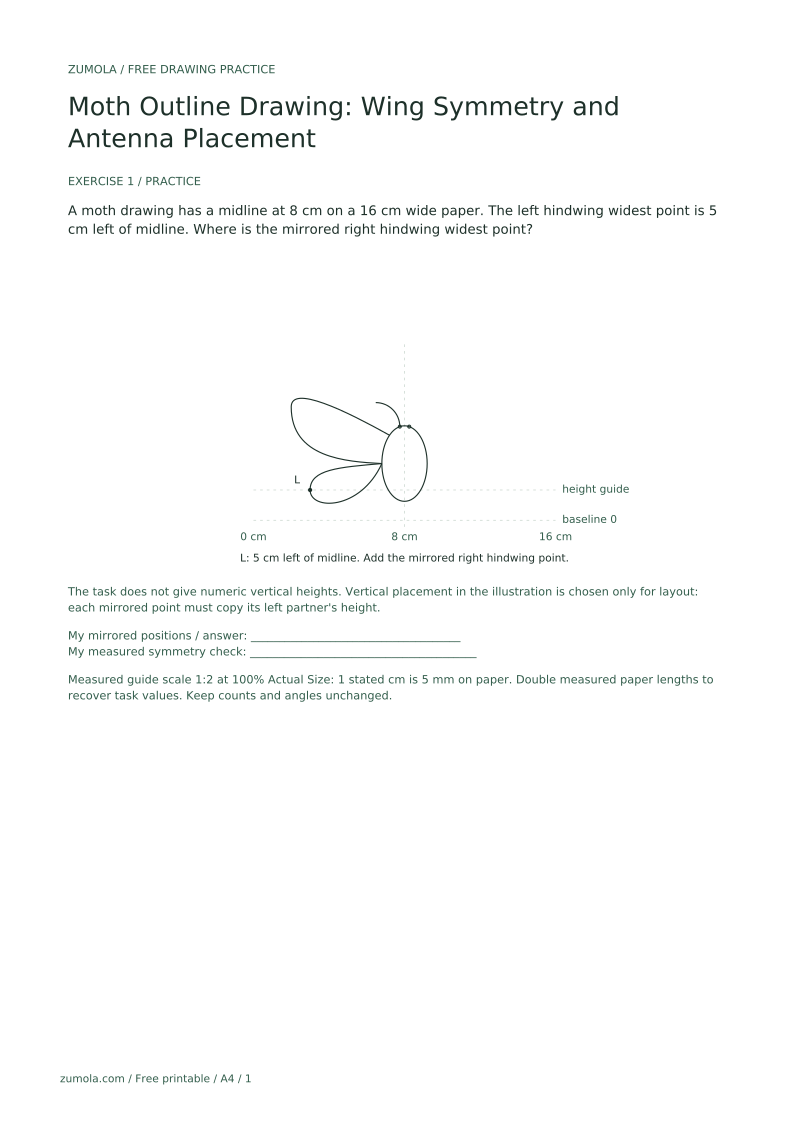
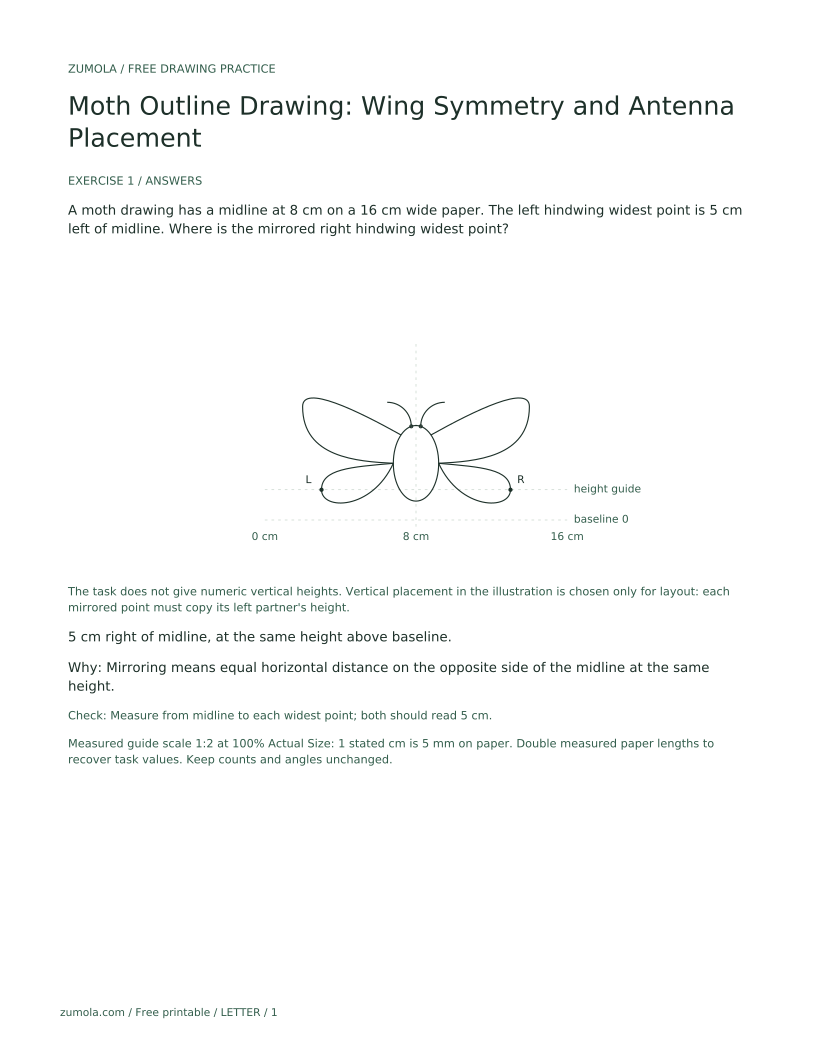
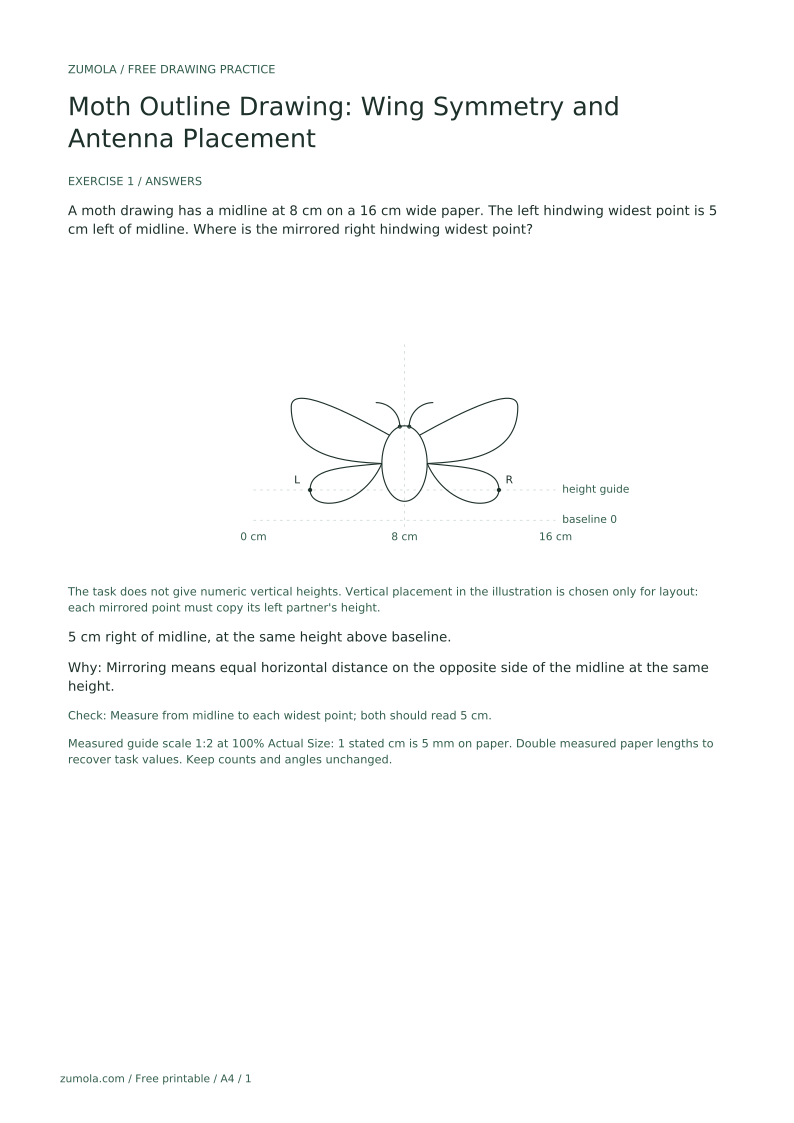
A moth drawing has a midline at 8 cm on a 16 cm wide paper. The left hindwing widest point is 5 cm left of midline. Where is the mirrored right hindwing widest point?
5 cm right of midline, at the same height above baseline.
Mirroring means equal horizontal distance on the opposite side of the midline at the same height.
Check: Measure from midline to each widest point; both should read 5 cm.
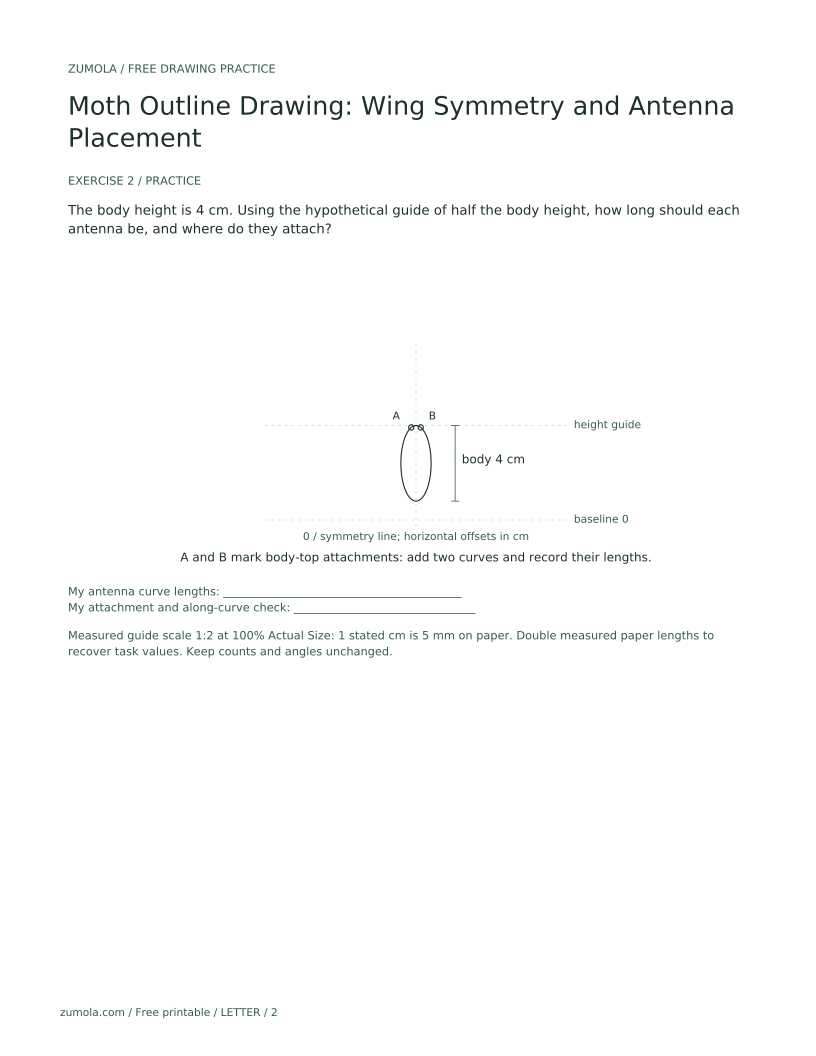
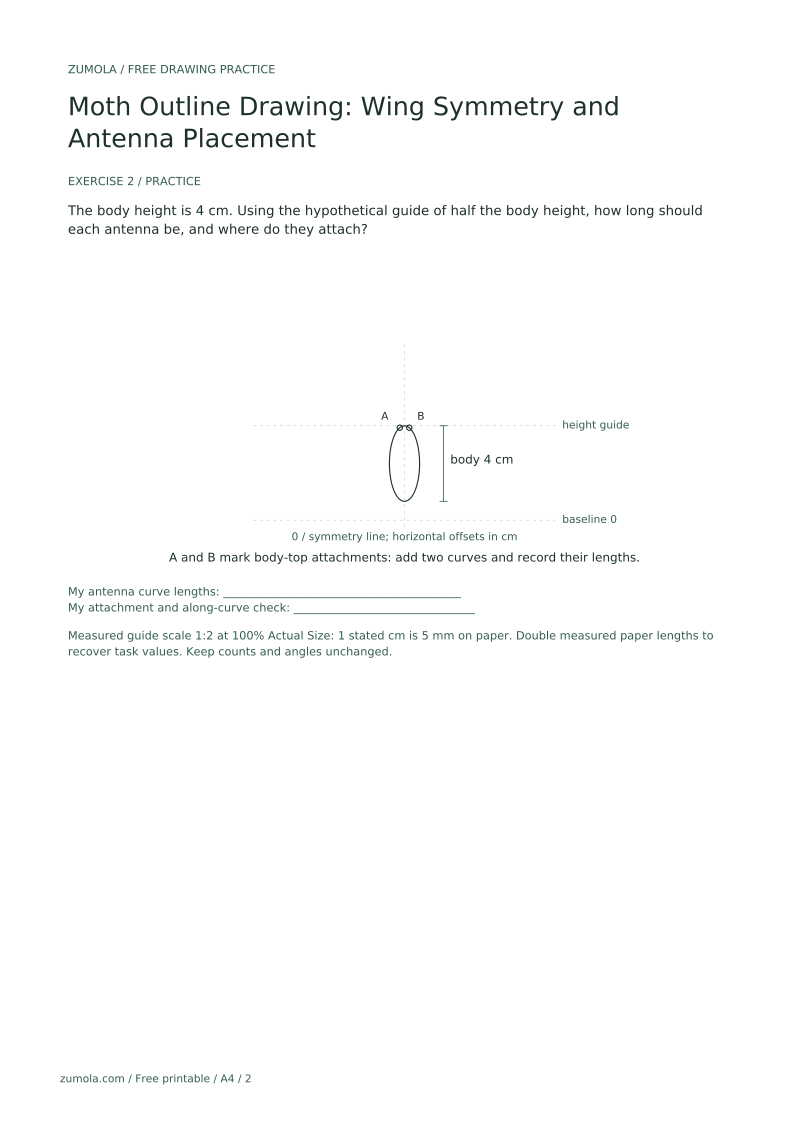
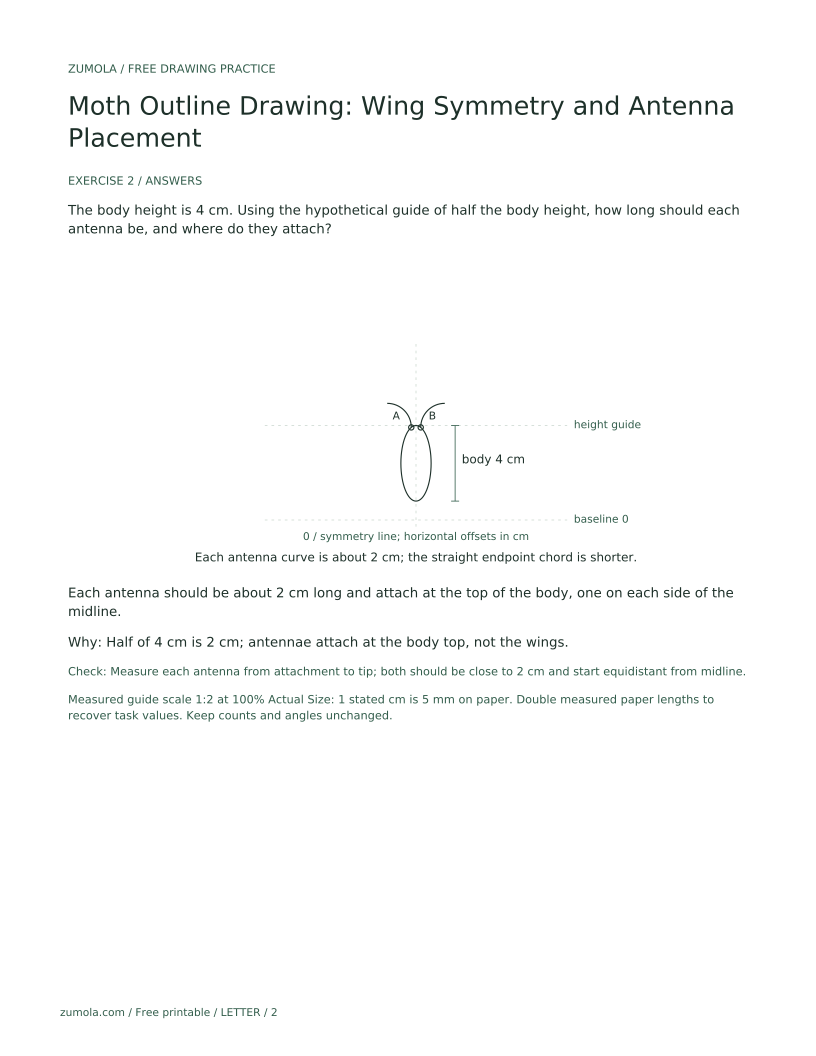
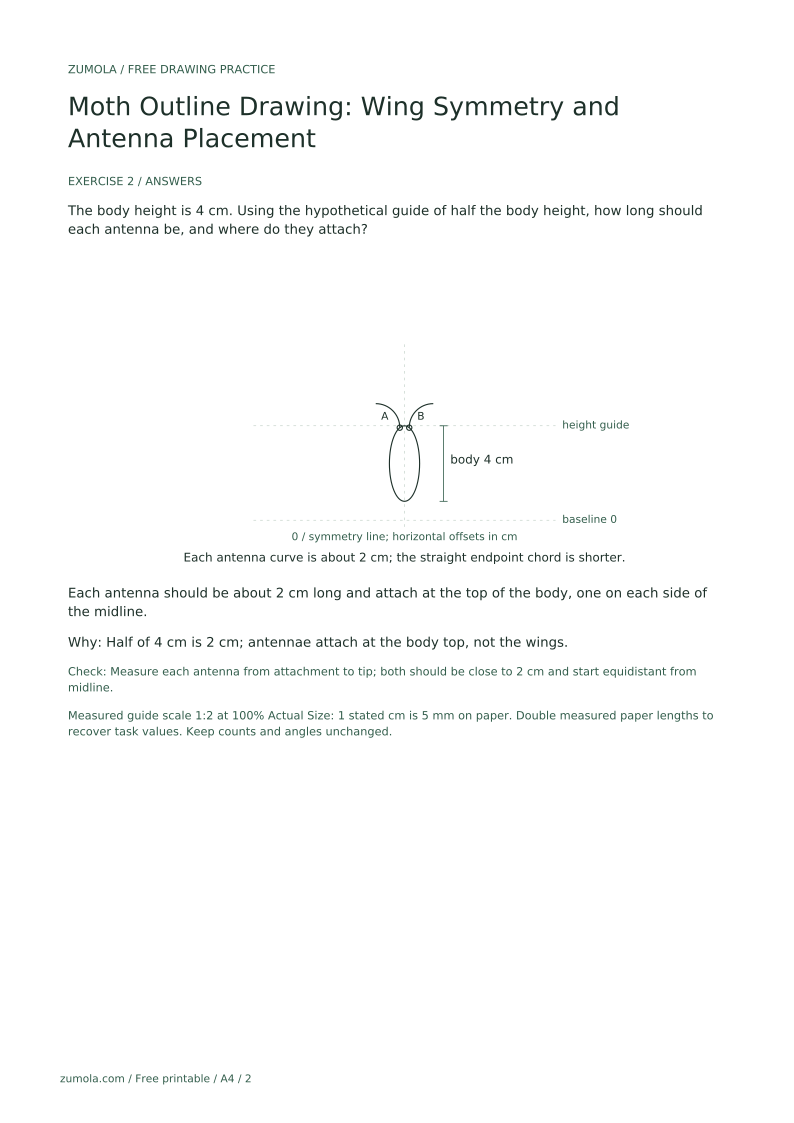
The body height is 4 cm. Using the hypothetical guide of half the body height, how long should each antenna be, and where do they attach?
Each antenna should be about 2 cm long and attach at the top of the body, one on each side of the midline.
Half of 4 cm is 2 cm; antennae attach at the body top, not the wings.
Check: Measure each antenna from attachment to tip; both should be close to 2 cm and start equidistant from midline.
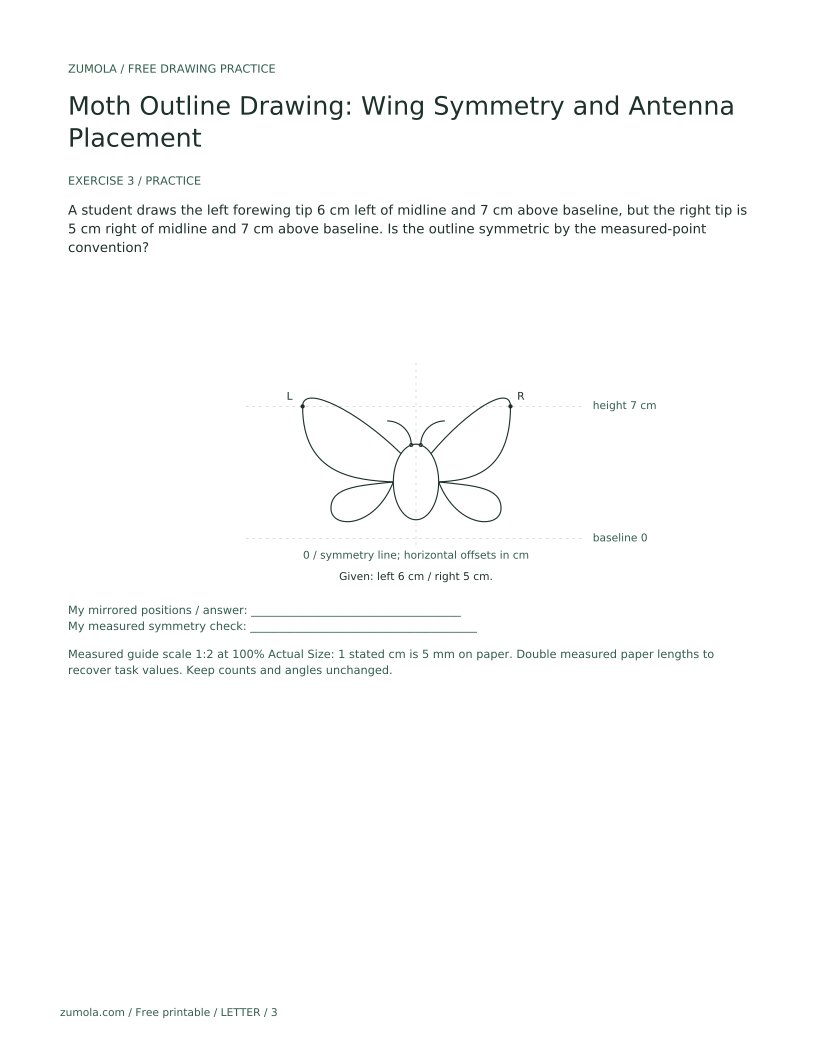
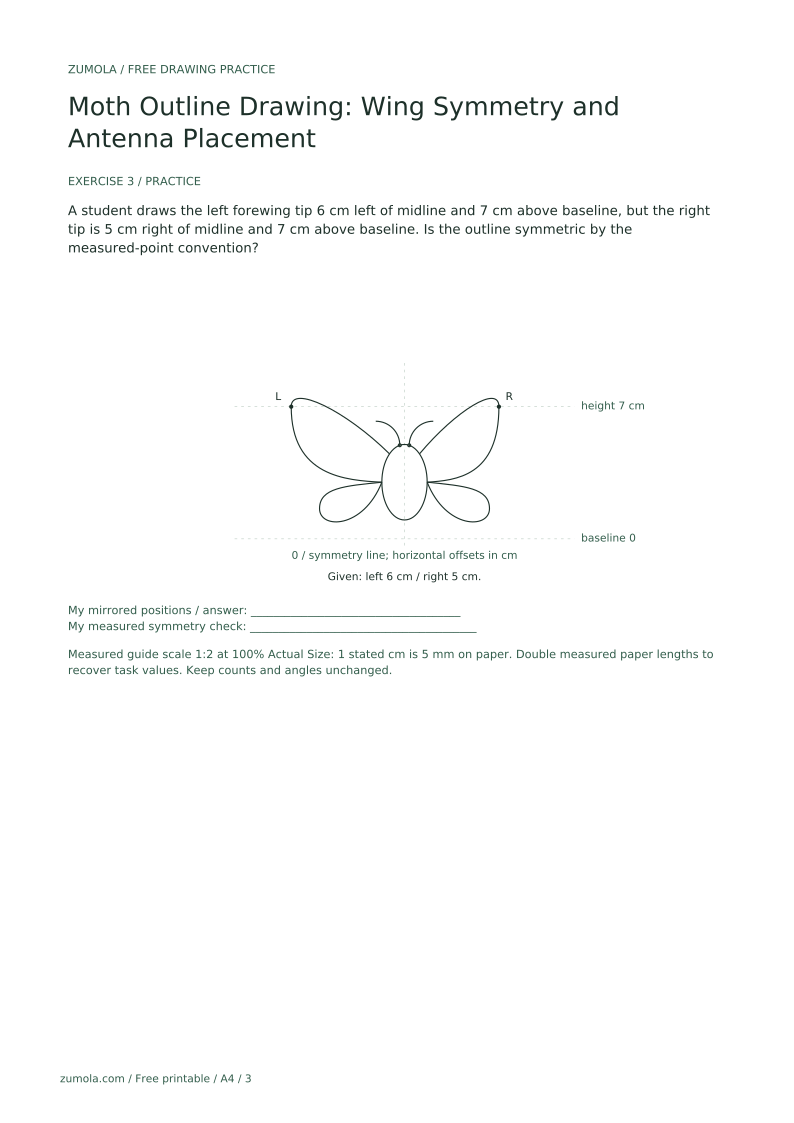
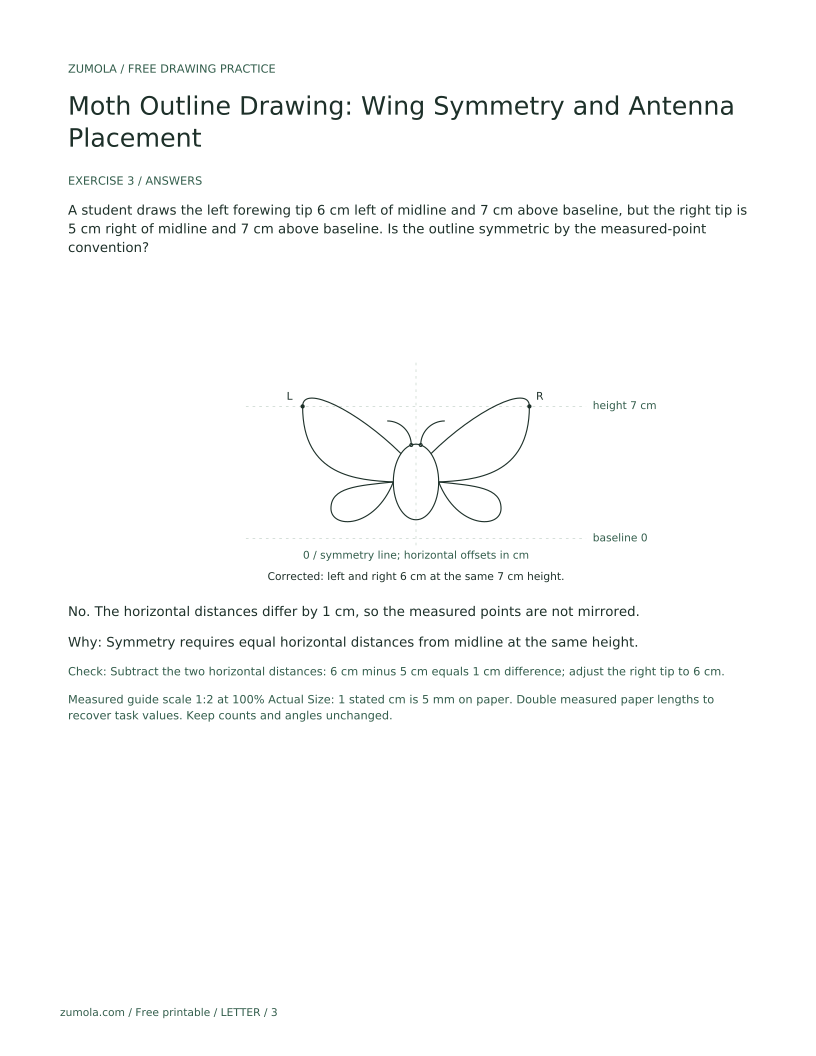
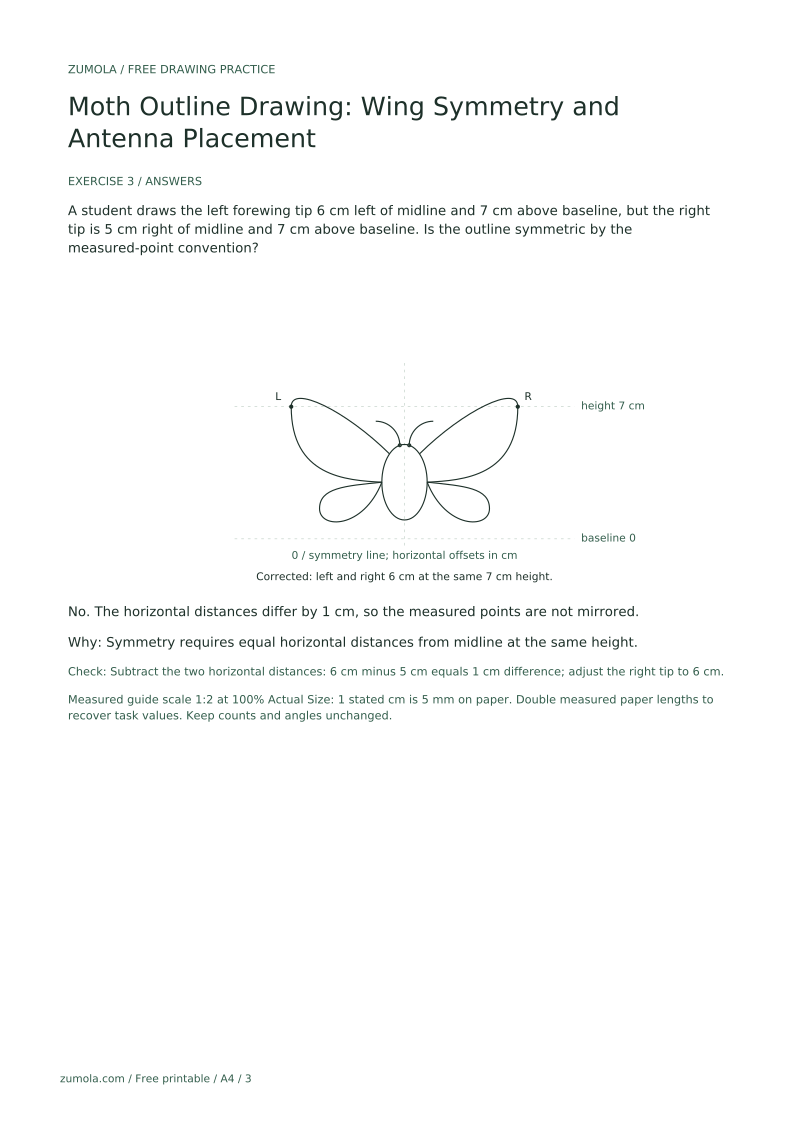
A student draws the left forewing tip 6 cm left of midline and 7 cm above baseline, but the right tip is 5 cm right of midline and 7 cm above baseline. Is the outline symmetric by the measured-point convention?
No. The horizontal distances differ by 1 cm, so the measured points are not mirrored.
Symmetry requires equal horizontal distances from midline at the same height.
Check: Subtract the two horizontal distances: 6 cm minus 5 cm equals 1 cm difference; adjust the right tip to 6 cm.
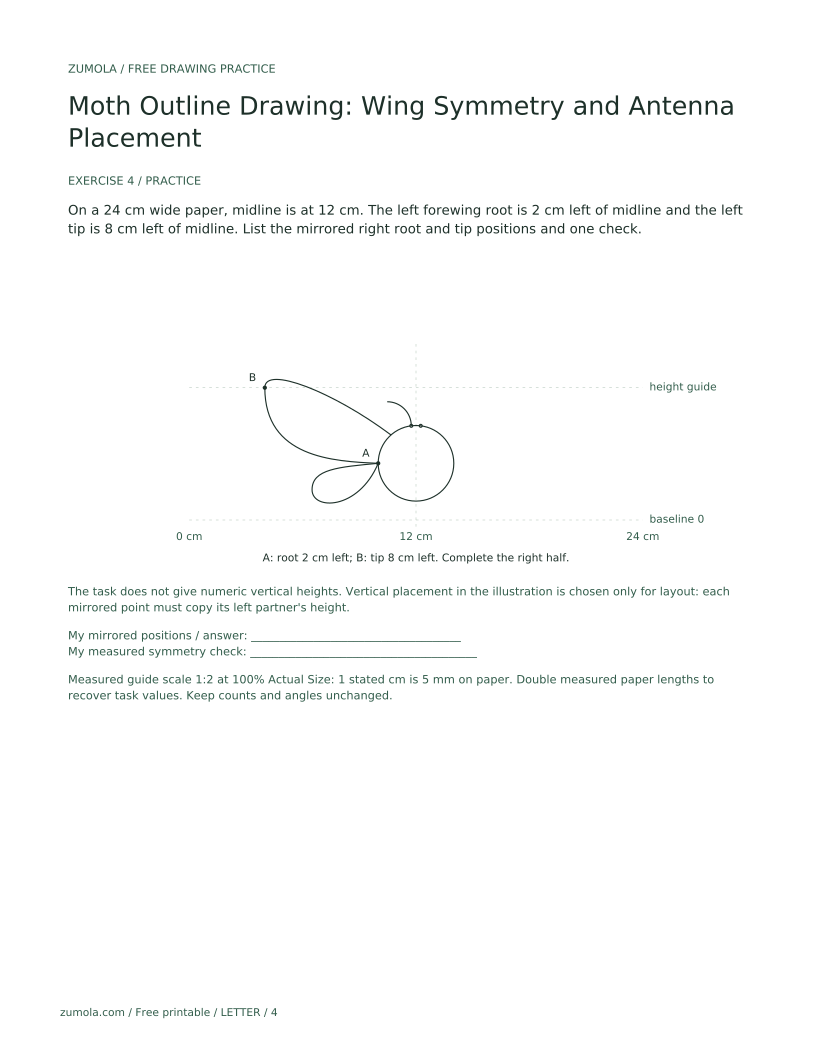
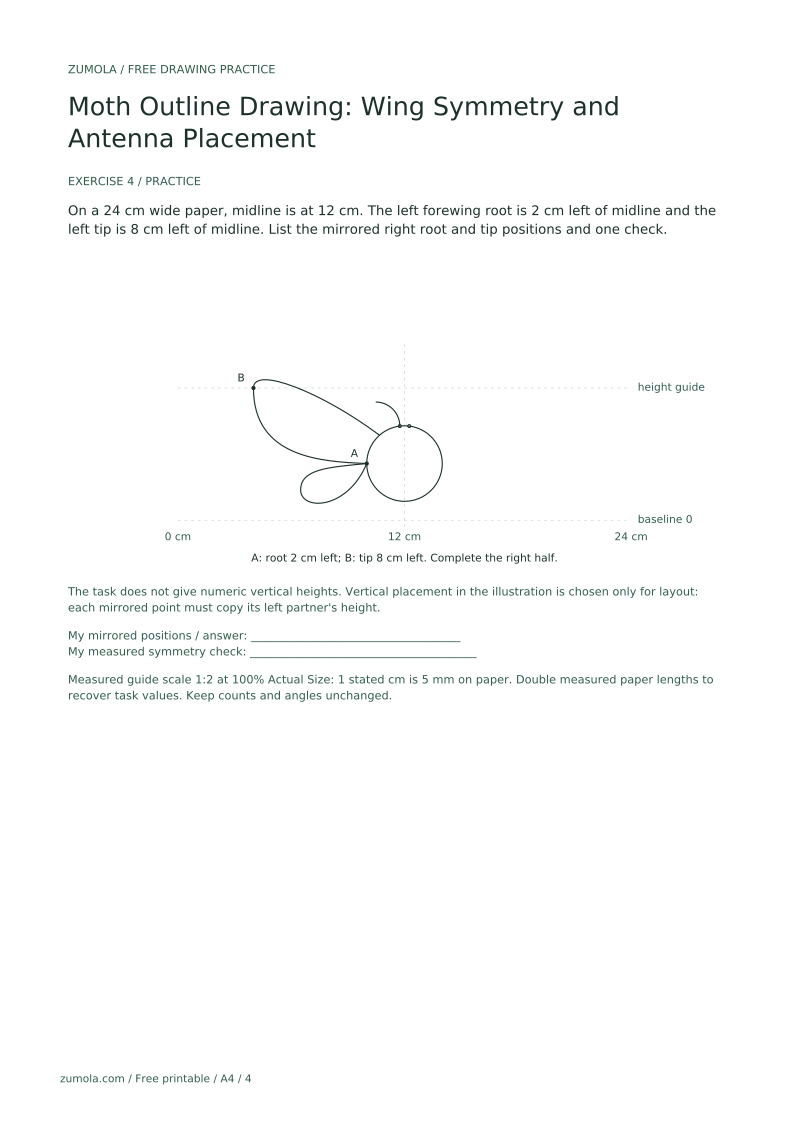
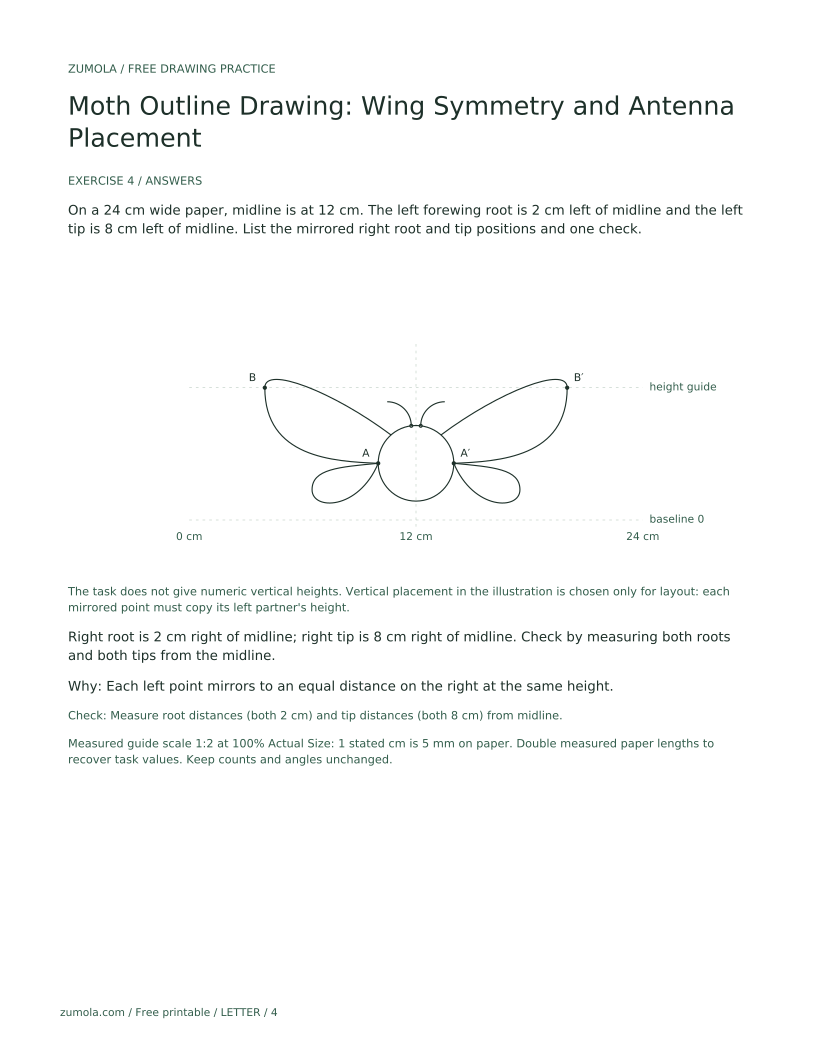
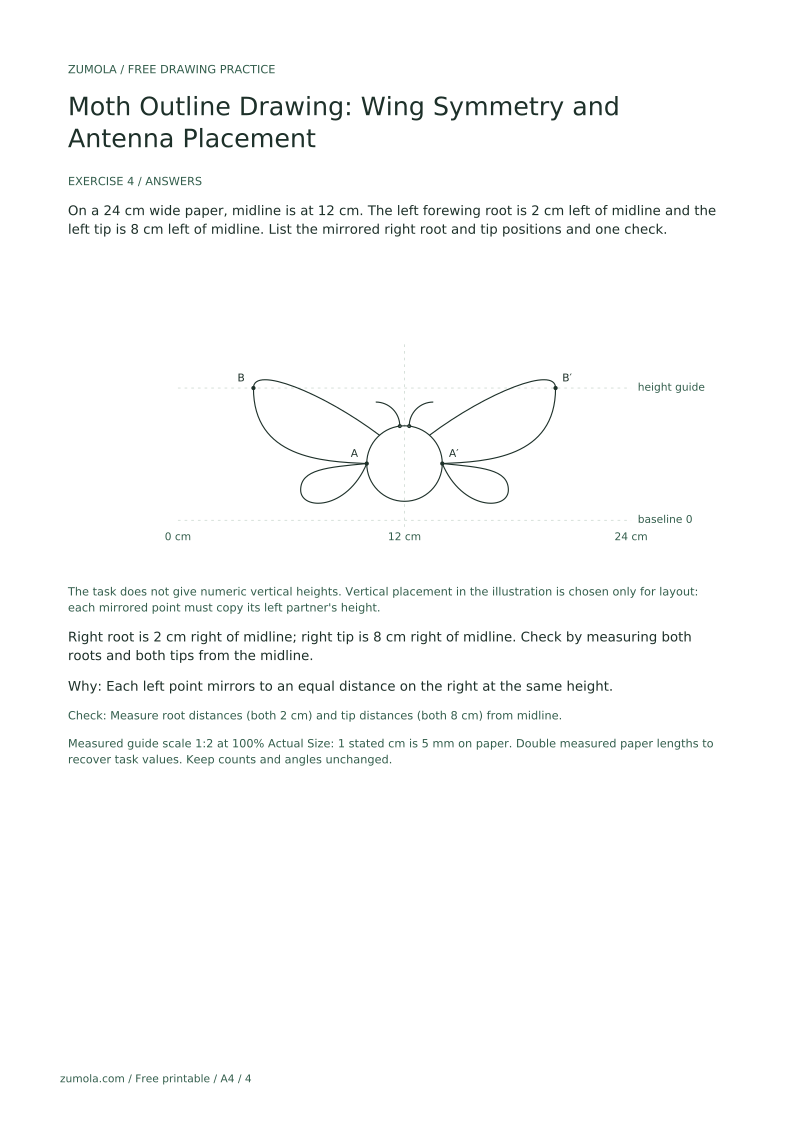
On a 24 cm wide paper, midline is at 12 cm. The left forewing root is 2 cm left of midline and the left tip is 8 cm left of midline. List the mirrored right root and tip positions and one check.
Right root is 2 cm right of midline; right tip is 8 cm right of midline. Check by measuring both roots and both tips from the midline.
Each left point mirrors to an equal distance on the right at the same height.
Check: Measure root distances (both 2 cm) and tip distances (both 8 cm) from midline.
Mark three distinct contour checkpoints, measure each horizontal distance from the vertical midline, and copy each at the same height on the right.
Attach antennae at the body top, equidistant from midline, and check length against the body height.
Keep the study to outline only; omit internal pattern repetition.
Use a simple narrow oval body and focus on wing symmetry and antennae.
No. The convention requires balanced mirroring, but small contour differences are acceptable if measured points match and the outline reads as symmetric.
The optional guide used in exercise 2 is half the body height: a 4 cm body gives an antenna curve about 2 cm long. This is a hypothetical drawing example. Measure along each curve with a thread or paper strip and keep the pair similar.
The symmetry midline is vertical and divides left from right. The baseline and height guide are horizontal. Label zero at the baseline and record the height of each horizontal guide; do not use a horizontal guide as the left-right symmetry axis.
Measure your actual paper and scale the frame. All numerical values here are hypothetical examples, not fixed standards.