Free original lessons
Pastel Sunset Sky: Gradient and Horizon Blending
Learn to build a smooth warm-to-cool pastel sky and soften the horizon edge using simple layering, blending, and checkable color steps.
Free lesson
Four exercises
Worked answers
Object Drawing Lessons
This lesson teaches a focused pastel technique: creating a sunset sky gradient that transitions from warm colors near the horizon to cooler colors above, then blending that horizon edge so sky and ground meet softly. You will work on a single sheet with a marked horizon line and a practice band for blending. The method uses three color zones, controlled pressure, and a clean blending tool. All color choices are examples; adjust them to your pastel set. Measure your own paper and tools, and treat any numbers here as hypothetical starting points. The goal is a believable sky transition, not a full landscape with foreground detail.
Practice materials: Printable downloads are not available for this lesson yet. Use the instructions and four exercises below.
Reference illustration
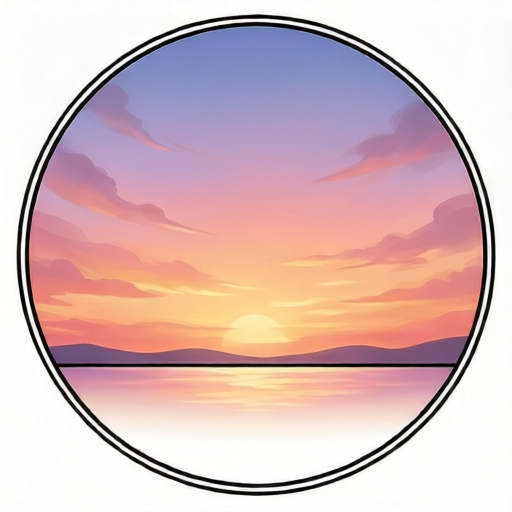
Use the stated measurements and conventions for each exercise.
Set up the horizon and color zones
Draw a light horizontal horizon line across the middle of your paper using a hard pastel or pencil. Above it, mentally divide the sky into three horizontal bands: a warm lower band just above the horizon, a middle transition band, and a cooler upper band. The bands do not need equal heights; a common starting point is roughly one-third each, but measure your paper and choose values that fit. Label the bands lightly on the back of the sheet if helpful.
Choose three pastel colors as examples: a warm yellow-orange for the lower band, a soft coral or pink for the middle, and a pale violet-blue for the upper band. These are hypothetical choices; any warm-to-cool sequence works if the colors sit near each other on your palette. Keep the same three colors throughout so the gradient stays coherent.
- Measure your paper and mark a horizon line at about half the height; record the actual measurement.
- Lightly mark two guide lines above the horizon to divide the sky into three bands.
- Test each pastel on a scrap corner to see its actual color and softness.
- Lay the warm color in the lowest band using light pressure and short strokes.
Build the gradient with light layers
Apply the warm color first, covering the lowest band evenly. Use light pressure and keep strokes close together. Then apply the middle color in the transition band, overlapping slightly into the warm band. Finally apply the cool color in the upper band, overlapping slightly into the middle band. Overlap is what allows blending later; do not leave hard gaps between bands.
Work from light to dark or dark to light consistently. If your pastels are soft, a light touch prevents clogging the paper. If they are hard, build two thin layers rather than one heavy layer. The gradient should look stepped at this stage; blending will smooth it.
- Fill the lower band with the warm color, keeping edges soft.
- Fill the middle band with the transition color, overlapping the lower band by about a finger width.
- Fill the upper band with the cool color, overlapping the middle band similarly.
- Check that each band is covered evenly with no bare paper showing.
Blend the sky and soften the horizon
Use a clean blending tool such as a soft brush, a blending stump, or a clean finger. Blend in small circles at the boundary between the warm and middle bands, then between the middle and cool bands. Move the tool gently across the overlap so colors mix gradually. Wipe or clean the tool between bands to avoid dragging dark color into light areas.
For the horizon, blend downward from the sky into the ground area just below the line. Use light strokes parallel to the horizon, then small circles. The horizon should become a soft transition rather than a sharp line. If the ground area is bare paper, blend a small amount of the warm sky color into it to create a haze. Stop when the edge looks soft but the horizon is still readable.
- Blend the warm-to-middle boundary with small circles, cleaning the tool first.
- Blend the middle-to-cool boundary the same way.
- Blend along the horizon line with light horizontal strokes, then circles.
- Step back and check that no hard band edges remain.
Refine and check the result
Look at the sky from a short distance. The gradient should move smoothly from warm near the horizon to cool above. If a band edge is still visible, add a thin layer of the adjacent color and blend again. If the sky looks muddy, remove excess pastel with a clean brush or tap the paper gently, then reapply a light layer of the intended color.
Check the horizon: it should be soft but present. If it has disappeared, re-establish a faint line with a light touch of the warm color and blend only slightly. Record any measurements you used, such as band heights or overlap widths, so the process is repeatable.
- View the drawing from about arm's length and note any hard edges.
- Add thin layers and blend only where needed.
- Confirm the horizon is soft but still visible.
- Write down the colors and measurements used for future reference.
Worked example
A student marks a horizon at 10 cm from the top on a 20 cm tall sheet. They plan three sky bands of 3 cm, 3 cm, and 4 cm from the horizon upward. They overlap each band by 1 cm. What total height of sky do the three bands cover, and how much overlap is counted twice?
Worked answer
The three bands total 3 + 3 + 4 = 10 cm. There are two overlaps of 1 cm each, so 2 cm is counted twice. The unique sky height covered is 10 - 2 = 8 cm. Since the horizon is at 10 cm from the top, the sky occupies the upper 10 cm; the bands cover 8 cm of unique height, leaving 2 cm of sky unbanded at the top unless adjusted.
Four practice exercises
Exercise 1
On a 16 cm tall sheet, a horizon is marked 8 cm from the top. Three sky bands above the horizon are planned at 2 cm, 3 cm, and 3 cm, with 0.5 cm overlaps between adjacent bands. What unique sky height do the bands cover?
Show answer and check
The bands total 2 + 3 + 3 = 8 cm. Two overlaps of 0.5 cm each count 1 cm twice, so unique coverage is 8 - 1 = 7 cm. The sky area is 8 cm tall, so 1 cm at the top is not covered by the planned bands.
Why: Add the band heights, subtract the double-counted overlap, and compare with the sky height above the horizon.
Check: Re-add the bands and overlaps on paper: 2 + 3 + 3 - 0.5 - 0.5 = 7. Confirm that 7 cm is less than the 8 cm sky height.
Exercise 2
A student blends a horizon on a 12 cm wide sheet. They blend 3 cm from the left, then 4 cm from the right, with a 1 cm overlap in the middle. How much of the horizon width is blended, and how much is left unblended?
Show answer and check
The blended lengths total 3 + 4 = 7 cm. The 1 cm overlap is counted twice, so unique blended width is 7 - 1 = 6 cm. The sheet is 12 cm wide, so 12 - 6 = 6 cm remains unblended.
Why: Combine the two blended lengths, subtract the overlap once, then subtract from the total width.
Check: Draw a 12 cm line and mark 3 cm from the left and 4 cm from the right. The overlap is 1 cm; count the unique covered length and the remainder.
Exercise 3
A pastel sky uses three bands with heights 4 cm, 2 cm, and 5 cm. The overlaps are 1 cm and 0.5 cm. The sky area above the horizon is 10 cm tall. Does the planned banding cover the full sky height without exceeding it? Show the arithmetic.
Show answer and check
Band total is 4 + 2 + 5 = 11 cm. Overlaps total 1 + 0.5 = 1.5 cm, counted twice, so unique coverage is 11 - 1.5 = 9.5 cm. The sky is 10 cm tall, so the bands cover 9.5 cm and leave 0.5 cm uncovered; they do not exceed the sky height.
Why: Subtract the sum of overlaps from the sum of band heights, then compare with the sky height.
Check: Compute 11 - 1.5 = 9.5 and compare with 10. The result is less than 10, so no excess; the difference is 0.5 cm.
Exercise 4
A student wants a horizon blend that is soft but readable. They plan to blend 2 cm above the horizon and 2 cm below it, with a 0.5 cm overlap across the line. The paper is 14 cm tall with the horizon at 7 cm from the top. What vertical distance is affected by blending, and how much of the paper above the horizon remains unblended?
Show answer and check
The blended distances total 2 + 2 = 4 cm. The 0.5 cm overlap is counted twice, so the unique blended height is 4 - 0.5 = 3.5 cm. This 3.5 cm is the vertical distance affected by blending. Above the horizon, 2 cm is blended, so the remaining sky above that blended zone is 7 - 2 = 5 cm unblended.
Why: Find the unique blended height, then subtract the above-horizon blend from the sky height.
Check: Mark the horizon at 7 cm on a 14 cm sheet. Mark 2 cm above and 2 cm below, note the 0.5 cm overlap, and measure the remaining distances with a ruler.
Common mistakes
- Pressing too hard in the first layer, which clogs the paper and makes blending streaky. Use light pressure and build two thin layers instead of one heavy layer.
- Leaving hard gaps between color bands so the gradient looks striped. Overlap each band into the next by about a finger width before blending.
- Using a dirty blending tool and dragging dark color into the light horizon. Clean or wipe the tool between bands and blend from light to dark where possible.
- Blending the horizon so much that the ground and sky become one undifferentiated area. Blend only along the horizon with light strokes, then stop when the edge is soft but readable.
Self-check rubric
- The sky shows a clear warm-to-cool progression from near the horizon to the top.
- No hard band edges remain; transitions are gradual and intentional.
- The horizon edge is soft but still readable as a transition between sky and ground.
- Colors are applied with light, even layers and no bare paper gaps in the sky.
- The blending tool was kept clean enough that colors are not muddy.
- Valid alternatives are accepted: different warm-to-cool color sequences, unequal band heights, and varied blending tools, as long as the gradient and soft horizon are achieved.
Questions and answers
Do I need special pastels for this sunset sky?
No. Any pastel set with a warm color, a middle transition color, and a cool color works. Test each pastel on scrap paper first because soft and hard pastels behave differently.
How do I know how wide the color bands should be?
There is no universal rule. A starting example is three roughly equal bands, but measure your paper and adjust. The lower warm band can be narrower if you want a higher sun glow.
Can I use my finger to blend?
Yes, if your hands are clean and dry. A soft brush or blending stump may give more control. Clean or wipe the tool between bands to avoid muddying colors.
What if my horizon line is too sharp after blending?
Add a small amount of the warm sky color just below the line and blend with light horizontal strokes. Stop as soon as the edge softens; over-blending removes the horizon.