Free original lessons
Redwood Forest Negative Space Drawing: Gaps and Canopy Shapes
Learn to draw a redwood forest by shaping the negative space between trunks and canopy. Block gaps, refine edges, and check proportions with simple measurements.
Free lesson
Four exercises
Worked answers
Object Drawing Lessons
Negative space is the area around and between objects. In a redwood forest, the gaps between trunks and the openings in the canopy are as important as the trees themselves. This lesson teaches a repeatable method: establish a boundary, block the negative shapes, refine edges, and verify with simple checks. You will use a defined convention for art and handwriting so valid alternatives are accepted, and you will measure your actual equipment rather than assume standards.
Practice materials: Printable downloads are not available for this lesson yet. Use the instructions and four exercises below.
Reference illustration
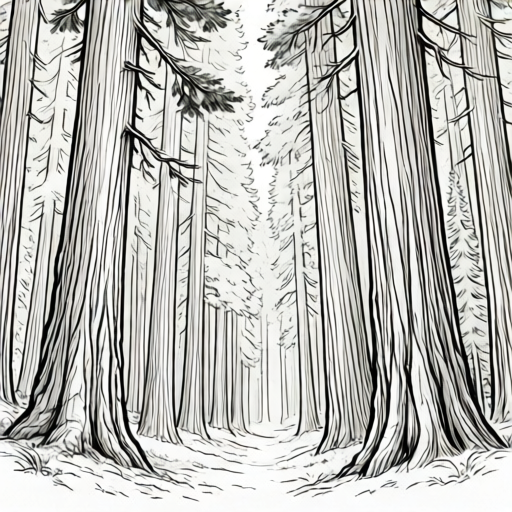
Use the stated measurements and conventions for each exercise.
Define the negative-space convention
Use this convention throughout: negative space is any area not occupied by trunk, branch, or foliage mass. Mark negative shapes with light hatching or a single tone, and keep positive forms unshaded until the final pass. For handwriting labels, x-height is measured from baseline to midline; letter styles may vary, so accept any legible style that meets the rubric.
Choose a drawing surface and measure it with a ruler. Record the actual width and height in centimetres. All numerical examples in this lesson are hypothetical; replace them with your measured values.
- Measure your paper width and height; write the values in centimetres.
- Draw a border 2 cm from each edge (hypothetical example; adjust to your paper).
- Label the border 'negative-space boundary' and date it.
- Decide a shading direction for negative space and keep it consistent.
Block the gaps between trunks
Begin with the largest gaps. Treat each gap as a shape with its own outline. Block these shapes with light hatching before drawing any trunk detail. This prevents the common error of drawing trunks first and forcing gaps to fit.
Work from the centre outward. Keep gap widths proportional: if one gap is twice as wide as another in your reference, preserve that ratio. Use a simple ratio check rather than absolute numbers.
- Sketch the outer boundary of the forest view.
- Identify three to five major gaps between trunks.
- Block each gap with light hatching, keeping edges crisp.
- Check that no gap touches the border unless intended.
- Leave positive trunk areas unshaded for now.
Shape the canopy openings
Canopy openings are negative shapes too. Look for irregular polygons or curved windows between foliage masses. Block these openings with the same hatching direction used for trunk gaps so the negative space reads as one system.
Avoid outlining every leaf. Instead, define the outer edge of each foliage mass and let the opening shape do the work. Valid alternatives include stippling or cross-hatching, provided the negative shapes remain distinguishable.
- Locate two or three canopy openings in your reference.
- Block each opening with your chosen negative-space texture.
- Refine the edge where foliage meets opening.
- Compare opening sizes using a ratio check.
- Erase stray marks inside positive foliage areas.
Refine and verify
In the final pass, darken negative-space edges slightly and add minimal trunk texture. Then verify with arithmetic: measure the widest gap and the narrowest gap on your drawing. If the ratio is close to your reference ratio, the blocking is consistent.
Use the rubric to self-check. Accept any lettering style that is legible and meets the x-height convention. Do not claim or assume printer tolerances; measure your own equipment if you print a reference.
- Measure widest and narrowest gap widths in centimetres.
- Compute the ratio widest divided by narrowest.
- Compare with the same ratio from your reference.
- Adjust one gap if the ratio differs by more than 0.5.
- Sign and date the work.
Worked example
A reference shows a widest trunk gap of 6 cm and a narrowest gap of 2 cm. Your drawing has a widest gap of 9 cm. What narrowest gap preserves the reference ratio?
Worked answer
3 cm. Reference ratio is 6 divided by 2 equals 3. Your widest gap is 9 cm, so narrowest equals 9 divided by 3 equals 3 cm.
Four practice exercises
Exercise 1
A reference has a widest canopy opening of 8 cm and a narrowest opening of 4 cm. Your drawing has a narrowest opening of 5 cm. What widest opening preserves the ratio?
Show answer and check
10 cm.
Why: Reference ratio is 8 divided by 4 equals 2. Multiply your narrowest 5 cm by 2 to get 10 cm.
Check: Divide 10 by 5 to confirm the ratio equals 2.
Exercise 2
Your paper is 30 cm wide. You draw a border 3 cm from each side. What is the width inside the border?
Show answer and check
24 cm.
Why: Subtract 3 cm from each side: 30 minus 3 minus 3 equals 24 cm.
Check: Add 3 plus 24 plus 3 to confirm 30 cm.
Exercise 3
You measure three trunk gaps as 2 cm, 4 cm, and 6 cm. What is the ratio of the widest to the narrowest gap?
Show answer and check
3.
Why: Widest is 6 cm, narrowest is 2 cm; 6 divided by 2 equals 3.
Check: Multiply 2 by 3 to confirm 6 cm.
Exercise 4
A canopy opening is 7 cm wide. You reduce it by 2 cm. What is the new width, and what is the ratio of new width to original width?
Show answer and check
5 cm; ratio 5 to 7.
Why: 7 minus 2 equals 5 cm. Ratio is 5 divided by 7, written 5 to 7.
Check: Add 2 to 5 to confirm 7 cm; compare 5 to 7 directly.
Common mistakes
- Drawing trunks first and squeezing gaps afterward. Block negative shapes first, then place trunk edges against them.
- Shading positive foliage instead of negative openings. Keep positive forms unshaded until the final pass; hatch only negative space.
- Using inconsistent hatching directions for gaps and canopy. Choose one negative-space texture and apply it to both gap types.
- Ignoring proportional ratios between gaps. Measure widest and narrowest gaps and compare ratios to the reference.
Self-check rubric
- Negative-space convention is stated and applied consistently.
- At least three trunk gaps are blocked before trunk detail.
- At least two canopy openings are shaped as negative space.
- Widest-to-narrowest gap ratio is computed and compared.
- Labels are legible and follow the baseline-to-midline x-height convention.
- Valid alternative textures are accepted if negative shapes remain clear.
Questions and answers
Must I use hatching for negative space?
No. Stippling or cross-hatching are valid if negative shapes remain distinguishable and the rubric is met.
How do I measure x-height for labels?
Measure from baseline to midline of your lowercase letters. Any legible style is acceptable.
What if my paper size differs from the example?
Measure your actual paper and replace the hypothetical 2 cm border with your own value.
Can I use a digital drawing tool?
Yes, provided you can measure gap widths in consistent units and apply the same convention.