Free original lessons
Owl Tattoo Design: Bold Outline and Stencil Variant
Learn to draw an owl tattoo design with a bold outline and a stencil-ready variant using simplified feather blocks and a clear line-weight convention.
Free lesson
Four exercises
Worked answers
Object Drawing Lessons
This lesson teaches a repeatable method for drawing an owl tattoo design that reads clearly at small scale and can be converted into a stencil-ready variant. You will work with a bold outline, simplified feather blocks, and a defined line-weight convention. The approach excludes realistic rendering, color, and body placement. All measurements are hypothetical examples; measure your own paper and tools before drawing. The goal is a design you can redraw consistently and check with simple arithmetic.
Practice materials: Printable downloads are not available for this lesson yet. Use the instructions and four exercises below.
Reference illustration
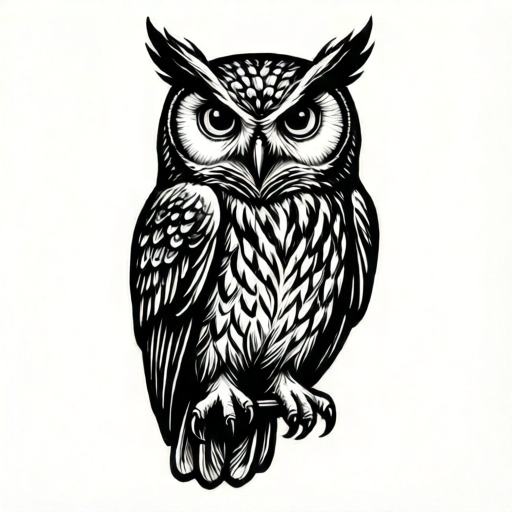
Use the stated measurements and conventions for each exercise.
Set the bold-line convention
Choose two line weights: a bold outline weight and a detail weight. For this lesson, assume a hypothetical bold weight of 3 mm and a detail weight of 1 mm. These are examples only; measure your actual pen or marker tip and record the true width. The bold outline defines the outer silhouette and major internal divisions. Detail lines describe feather blocks and facial features but must not compete with the outline.
Work on a frame that fits your paper. A hypothetical 120 mm by 150 mm frame is used in the worked example. Mark the frame lightly, then draw the owl silhouette inside it with the bold weight. Keep the silhouette simple: a rounded head, a body that tapers slightly, and two feet. Avoid thin spikes or isolated dots that a stencil cannot support.
- Measure your bold and detail tools and write the actual widths on a scrap sheet.
- Draw a light frame using a hypothetical 120 mm by 150 mm size, then adjust to your paper.
- Sketch the owl silhouette with the bold tool, keeping curves smooth and continuous.
- Check that the silhouette has no line thinner than your bold weight.
Build simplified feather blocks
Divide the body into three feather blocks: a chest block, a wing block on each side, and a tail block. Each block is a closed shape bounded by bold lines. Inside each block, add detail lines at the detail weight to suggest feather groups. Use no more than three detail lines per block in the first pass. This keeps the design readable and stencil-friendly.
The face uses two large eye circles, a small beak triangle, and two ear tufts. The eye circles are bold outlines; the pupils are detail lines or small filled shapes. Keep the beak simple and centered. Ear tufts should connect to the head outline rather than float separately.
- Draw the chest block as a rounded shield shape inside the body outline.
- Draw one wing block on each side, mirroring the shapes approximately.
- Draw the tail block below the body, using a simple fan shape.
- Add up to three detail lines inside each block at the detail weight.
- Draw the eyes, beak, and ear tufts using the bold outline for major shapes.
Convert to a stencil variant
A stencil variant separates the design into cut areas and bridge areas. Bridges are narrow connections that keep the stencil intact. In this lesson, use a hypothetical bridge width of 2 mm. Measure your actual stencil material and adjust. The stencil variant should show the same owl silhouette, but detail lines become cut lines or bridges depending on their function.
Redraw the design in a blank frame of the same size. Keep the bold outline as the outer cut boundary. Convert each detail line into either a cut line or a bridge, and label the bridges with a small mark. Do not add new shapes in the stencil variant; simplify instead. The stencil must remain connected and readable when cut.
- Draw the same frame and silhouette in a blank area.
- Mark the outer boundary as the cut line.
- Convert each detail line to a cut line or a bridge, using the hypothetical 2 mm bridge width.
- Check that every bridge connects two parts of the stencil and that no island is isolated.
- Compare the stencil variant to the bold outline for shape consistency.
Check consistency and readability
Compare the bold outline and the stencil variant side by side. The silhouette should match within a few millimeters. Count the feather blocks: there should be one chest block, two wing blocks, and one tail block. Count the bridges in the stencil variant and record the number. A simple check is to trace the outline with your finger and confirm there are no gaps or thin spikes.
Use arithmetic to check proportions. If the frame is 120 mm wide and the owl body is 60 mm wide, the body occupies half the frame width. If the head is 40 mm wide, the head-to-body ratio is 40 to 60, or 2 to 3. These hypothetical values help you verify balance. Adjust your drawing if the ratios feel off, but keep the units consistent.
- Measure the silhouette width and height in both versions and compare.
- Count feather blocks and bridges, and write the numbers down.
- Check the head-to-body ratio using simple arithmetic.
- Confirm that no line is thinner than the bold weight in the outline version.
Worked example
Draw an owl tattoo design in a hypothetical 120 mm by 150 mm frame using a 3 mm bold outline and a 1 mm detail line. Include one chest block, two wing blocks, and one tail block. Then draw a stencil variant with a hypothetical 2 mm bridge width and label three bridges.
Worked answer
The bold outline shows a rounded head 40 mm wide, a body 60 mm wide, two wing blocks, a chest block, and a tail block. The head-to-body ratio is 40 to 60, or 2 to 3. The stencil variant uses the same silhouette, converts detail lines to cut lines, and adds three labeled bridges of 2 mm each. The bridge count is three, and the silhouette width matches the outline version within 2 mm.
Four practice exercises
Exercise 1
In a hypothetical 100 mm by 120 mm frame, draw an owl silhouette 50 mm wide and 70 mm tall. Use a bold outline of 3 mm and a detail line of 1 mm. Add one chest block and two wing blocks. State the body-width-to-frame-width ratio.
Show answer and check
The body width is 50 mm and the frame width is 100 mm, so the ratio is 50 to 100, or 1 to 2. The silhouette is 70 mm tall inside a 120 mm frame. The bold outline is 3 mm and the detail line is 1 mm.
Why: The ratio compares body width to frame width using the same unit. The height check confirms the silhouette fits inside the frame with margins.
Check: Measure the drawn body width and frame width with a ruler. Divide both by 10 to confirm the 1 to 2 ratio. Check that no outline line is thinner than 3 mm.
Exercise 2
Draw a stencil variant of an owl with a hypothetical 2 mm bridge width. The design has four cut areas. Add bridges so that every cut area connects to at least one other. Count the bridges and state whether any island remains.
Show answer and check
Three bridges connect the four cut areas in a chain. No island remains because each cut area connects through at least one bridge. The bridge count is three.
Why: Four connected areas need at least three connections to form a single connected stencil. Each bridge is 2 mm wide in this hypothetical example.
Check: Trace each cut area with your finger and follow a bridge to another area. Confirm that all four areas are reachable and that the bridge count is three.
Exercise 3
An owl design has a head 30 mm wide and a body 45 mm wide. Calculate the head-to-body ratio in simplest form. Then state whether a 3 mm bold outline and a 1 mm detail line meet the convention.
Show answer and check
The ratio is 30 to 45, which simplifies to 2 to 3. The 3 mm bold outline and 1 mm detail line meet the convention because the detail line is thinner than the bold outline.
Why: Both widths are divided by 15 to simplify the ratio. The convention requires the detail weight to be visibly thinner than the bold weight.
Check: Divide 30 and 45 by 15 to confirm 2 to 3. Measure the two line widths and confirm the detail line is thinner.
Exercise 4
In a hypothetical 120 mm by 150 mm frame, an owl silhouette is 60 mm wide and 90 mm tall. The stencil variant is 58 mm wide and 88 mm tall. Calculate the width difference and height difference. State whether the variant is consistent within a 3 mm tolerance.
Show answer and check
The width difference is 60 minus 58, or 2 mm. The height difference is 90 minus 88, or 2 mm. Both differences are within the hypothetical 3 mm tolerance, so the variant is consistent.
Why: Subtract the smaller measurement from the larger one for each dimension. Compare each difference to the stated tolerance.
Check: Measure both versions with a ruler and subtract. Confirm that each difference is 3 mm or less.
Common mistakes
- Using detail lines as thick as the bold outline. Measure both tools and keep the detail weight visibly thinner, such as a hypothetical 1 mm versus 3 mm.
- Creating isolated feather shapes that float inside the body. Connect each feather block to the outline or to a bridge so the stencil remains intact.
- Adding many small feather lines that disappear at small scale. Limit detail lines to three per block and simplify the shapes.
- Changing the silhouette between the bold outline and the stencil variant. Redraw from the same frame and compare widths and heights with a ruler.
Self-check rubric
- Bold outline is continuous and visibly thicker than detail lines, using measured tool widths.
- Feather blocks are simplified into one chest block, two wing blocks, and one tail block.
- Stencil variant matches the bold outline silhouette and includes labeled bridges.
- All bridges connect cut areas and no isolated island remains.
- Measurements and ratios are recorded with consistent units and simple arithmetic.
- Valid alternative owl shapes are accepted if the convention and checks are followed.
Questions and answers
Do I need special tattoo equipment?
No. This lesson uses ordinary drawing tools. Measure your own pen or marker and record the actual line widths.
Are the numerical values fixed rules?
No. The 3 mm, 1 mm, 2 mm, and 120 mm by 150 mm values are hypothetical examples. Measure your actual materials and adjust.
Can I use a different owl shape?
Yes. The method works for any simplified owl silhouette as long as you keep the bold outline, feather blocks, and stencil bridges consistent.
How do I know the stencil is connected?
Trace every part with your finger. Each cut area should connect to the rest through at least one bridge. Count the bridges and record the number.