Free original lessons
Draw a Bell Cluster: Body, Clapper, and Handle Construction
Learn to draw a cluster of bells with clear body shapes, correct clapper placement, and sturdy handles. Includes a convention, rubric, and four practice tasks.
Free lesson
Four exercises
Worked answers
Object Drawing Lessons
This lesson teaches a reliable way to draw a cluster of bells. You will build each bell from three parts: the body outline, the clapper, and the handle. A cluster means several bells of different sizes placed close together, often overlapping. The goal is not a single correct picture but a clear construction you can repeat and check. We use a simple drawing convention: the bell body is a rounded trapezoid that narrows at the top; the clapper is a small circle or oval hanging inside the lower opening; the handle is a loop or bar attached at the top center. X-height means the distance from the baseline to the midline of lowercase letters; letter styles vary, so use it only as a size guide, not a strict rule. All measurements below are hypothetical examples. Measure your own paper and tools before drawing.
Practice materials: Printable downloads are not available for this lesson yet. Use the instructions and four exercises below.
Reference illustration
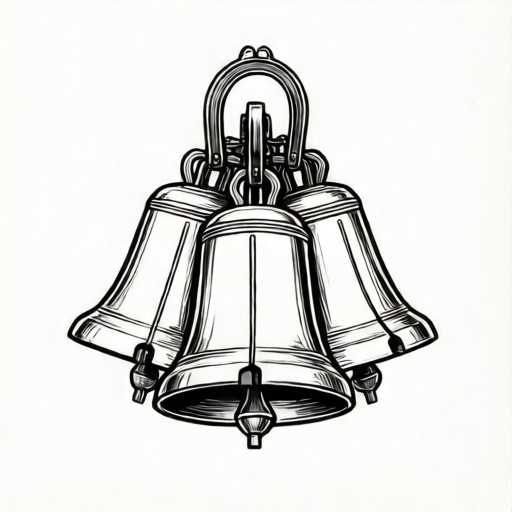
Use the stated measurements and conventions for each exercise.
Bell Body Shape and Size Variation
Start each bell with a body outline. Draw a vertical center line. Mark a top width and a bottom width. The bottom width is wider than the top width. Connect the sides with gentle curves that flare outward near the bottom. Close the bottom with a slight curve, not a straight line, so the bell looks open. The top closes with a small flat or curved cap where the handle will attach.
In a cluster, vary the size of the bells. Use a small, medium, and large bell. Keep the same proportions but change the overall height. For example, if the large bell is 8 cm tall, the medium bell could be 6 cm and the small bell 4 cm. These are hypothetical values; measure your own space. Place the largest bell at the back or center, and smaller bells in front or to the sides. Overlap is allowed, but each bell should still show its top, handle, and lower opening.
- Draw a vertical center line for the first bell.
- Mark the top width and the wider bottom width.
- Connect the sides with outward-flaring curves.
- Close the bottom with a slight curve and the top with a small cap.
- Repeat for two more bells at different sizes, keeping the same proportions.
Clapper Placement
The clapper is the small hanging part inside the bell. Place it so that it is visible below the bottom curve of the body. Draw a short vertical line from the inside top of the bell down to the clapper. The clapper itself can be a small circle or oval. Its center should sit slightly below the bottom edge of the bell body, so it reads as hanging inside the opening.
For a cluster, place each clapper consistently. If a bell is partly hidden, still show the clapper if the lower opening is visible. Do not place the clapper outside the bell body or floating away from it. A simple check: the clapper should be centered on the bell's vertical center line, and its top should connect to the inside of the bell with a short line.
- Find the center line of the bell body.
- Draw a short line from the inside top down toward the opening.
- Draw a small circle or oval for the clapper.
- Position the clapper center slightly below the bottom edge.
- Repeat for each visible bell in the cluster.
Handle Construction
The handle sits at the top center of the bell. Build it as a loop or a bar. A loop handle is drawn as a curved arch that starts and ends on the top cap. A bar handle is a short horizontal line with two small uprights. Choose one style and keep it consistent across the cluster, or vary it only if you state your convention.
The handle should be proportional to the bell. For a large bell, the handle can be about one quarter of the bell's height. For a small bell, make it slightly smaller. These are hypothetical proportions; adjust to your drawing. The handle must attach to the top cap, not float above it. Check that both ends of the handle touch the bell body.
- Mark the top center of the bell body.
- Draw a curved arch or a short bar with uprights.
- Make both ends touch the top cap.
- Keep the handle size proportional to the bell.
- Repeat for each bell, using the same style.
Arranging the Cluster
Arrange the bells so they read as a group. Start with the largest bell. Place the medium bell to one side, slightly overlapping. Place the small bell in front or on the other side. Leave a small gap between bells so each outline is clear. If bells overlap, draw the front bell completely and let the back bell's outline stop at the front bell's edge.
Use a blank frame to redraw the cluster. A frame helps you plan the space. Measure your paper and mark a frame that fits your cluster. For example, a 12 cm by 12 cm frame is a hypothetical example. Check that all handles and clappers are visible and that no bell is cut off by the frame edge.
- Draw the largest bell first.
- Add the medium bell to one side with slight overlap.
- Add the small bell in front or on the other side.
- Keep small gaps so outlines stay clear.
- Check that all parts fit inside your frame.
Worked example
Draw a cluster of three bells: one large, one medium, one small. Use loop handles and show each clapper. Describe the construction in words.
Worked answer
Draw a vertical center line for the large bell. Mark a top width of 3 cm and a bottom width of 5 cm, with a height of 8 cm. Connect the sides with outward curves and close the bottom with a slight curve. Add a loop handle at the top center, about 2 cm tall, with both ends touching the top cap. Draw a short line from the inside top down and place a small circle clapper centered slightly below the bottom edge. Repeat for the medium bell at 6 cm tall and the small bell at 4 cm tall, keeping the same proportions. Place the large bell at the back, the medium bell to the left with slight overlap, and the small bell in front. Check that all handles touch the top caps and all clappers are centered and visible.
Four practice exercises
Exercise 1
Draw one bell with a bar handle and a clapper. The bell is 6 cm tall, top width 2 cm, bottom width 4 cm. Describe where the clapper goes.
Show answer and check
A bell body 6 cm tall, narrowing from 4 cm at the bottom to 2 cm at the top, with a slight curve at the bottom. A bar handle at the top center with two uprights touching the top cap. The clapper is a small circle centered on the vertical line, with its center about 0.5 cm below the bottom edge.
Why: The body proportions follow the narrowing rule. The bar handle attaches at the top cap. The clapper is centered and slightly below the opening so it reads as hanging inside.
Check: Measure the height and widths with a ruler. Check that both handle uprights touch the top cap. Check that the clapper center is on the vertical line and below the bottom edge.
Exercise 2
Draw a cluster of two bells: a large bell 8 cm tall and a small bell 4 cm tall. Use loop handles. The small bell overlaps the large bell slightly. Describe how you keep both clappers visible.
Show answer and check
Draw the large bell first with an 8 cm height and proportional widths. Add a loop handle at the top. Draw the small bell in front, overlapping the lower side of the large bell. Place the small bell's clapper centered below its own bottom edge. Keep the large bell's clapper visible by not covering its lower opening with the small bell.
Why: Overlap is allowed, but each visible opening must show its clapper. Placing the small bell to the side of the large bell's opening keeps both clappers visible.
Check: Check that both loop handles touch their top caps. Check that each clapper is centered on its bell's vertical line and below its bottom edge. Confirm that neither clapper is hidden by the overlap.
Exercise 3
A student draws three bells but all handles float above the bodies. Describe the fix and redraw one bell correctly in words.
Show answer and check
The fix is to extend each handle downward until both ends touch the top cap of the bell body. For one bell, draw the body, then draw a loop handle whose two ends meet the top cap. Check that no gap remains between the handle and the body.
Why: A floating handle breaks the construction because the handle must attach to the bell. Touching the top cap makes the connection clear.
Check: Look for a gap between the handle ends and the top cap. Run a finger along the top cap to confirm both ends meet the body.
Exercise 4
Draw a cluster of three bells with mixed handle styles: one loop, one bar, one loop. State your convention and check that all clappers are centered.
Show answer and check
State the convention: loop handles for the large and small bells, bar handle for the medium bell. Draw the large bell with a loop handle, the medium bell with a bar handle, and the small bell with a loop handle. Center each clapper on its bell's vertical line and place it slightly below the bottom edge. Check that each handle attaches to its top cap.
Why: Mixed handle styles are allowed if stated as a convention. Centering clappers and attaching handles keeps the construction consistent.
Check: Confirm the stated convention matches the drawing. Check each clapper against its bell's vertical center line. Check each handle's ends touch the top cap.
Common mistakes
- Drawing the bell body as a perfect rectangle. Flare the sides outward near the bottom and use a slight curve for the bottom opening.
- Placing the clapper outside the bell or too high inside. Center the clapper on the vertical line and set its center slightly below the bottom edge.
- Letting the handle float above the bell. Make both ends of the handle touch the top cap of the bell body.
- Making all bells the same size in a cluster. Use small, medium, and large bells with the same proportions but different heights.
- Overlapping bells so much that handles or clappers disappear. Leave small gaps or draw the front bell completely so each bell's key parts remain visible.
Self-check rubric
- Bell body narrows at the top and flares at the bottom with a curved opening.
- Clapper is centered on the vertical line and hangs slightly below the bottom edge.
- Handle attaches to the top cap with both ends touching the bell body.
- Cluster shows at least three bells with different sizes and consistent proportions.
- Overlaps do not hide handles or clappers that should be visible.
- Drawing follows a stated convention for handle style and clapper shape.
- Valid alternatives are accepted if the construction is clear and consistent.
Questions and answers
Do I have to use the same handle style for every bell?
No. You may use loops, bars, or a mix, but state your convention. The rubric accepts any consistent handle style that attaches to the top cap.
How large should the clapper be?
A small circle or oval that fits inside the lower opening. There is no single correct size; check that it is centered and hangs slightly below the bottom edge.
Can bells overlap in the cluster?
Yes. Overlap is allowed if each bell still shows its handle, body, and clapper where visible. Draw the front bell completely and stop the back bell at the front edge.
What does x-height mean here?
X-height is the distance from the baseline to the midline of lowercase letters. Letter styles vary, so use it only as a rough size guide, not a strict measurement.