Free original lessons
Draw Celtic Interlace Bands and Spiral Motifs: Over-Under Construction
Learn to build over-under interlace bands and simple spiral motifs with clear construction steps, a worked example, and four self-contained practice tasks.
Free lesson
Four exercises
Worked answers
Object Drawing Lessons
Celtic interlace looks complex, but it is built from a few repeatable decisions: where a band crosses, which band goes over, and how a spiral turns from center to edge. This lesson teaches a construction method rather than a single finished design. You will use a simple convention: draw each band as a pair of parallel edges, mark every crossing with a short over-under tick, and keep the over-under pattern alternating along each band. For spirals, you will place a center point, step outward in consistent increments, and connect the turns with a smooth curve. All numerical values here are hypothetical examples; measure your own paper and tools. The goal is a clean, readable drawing you can check by tracing each band with your finger.
Practice materials: Printable downloads are not available for this lesson yet. Use the instructions and four exercises below.
Reference illustration
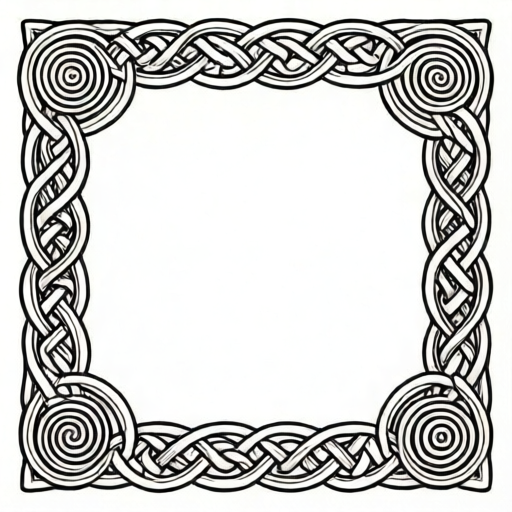
Use the stated measurements and conventions for each exercise.
Band-crossing convention and over-under marks
A band is a strip with two parallel edges. At a crossing, one band passes over the other. Use a simple mark: draw a short tick on the band that goes over, and leave the under-band edge continuous. This tick is your over-under mark. Keep the same tick style throughout so the drawing reads consistently.
Alternation is the key check. Follow one band from start to finish: its crossings should alternate over, under, over, under. If two adjacent crossings on the same band are both over, the interlace will look flat or wrong. You can fix this by swapping the tick at one crossing and redrawing the under-band edge.
Work lightly first. Draw the band centerlines, mark crossings, then add parallel edges. Erase and adjust before darkening. A clean over-under pattern is more important than decorative detail.
- Draw two band centerlines that cross at a clear angle.
- At the crossing, choose which band goes over and draw a short tick on it.
- Add parallel edges to both bands, keeping the under-band edge continuous.
- Trace each band with your finger and confirm the over-under marks alternate.
Spiral motif from center to edge
A simple spiral motif starts at a center point and turns outward. Use a consistent step: for example, a hypothetical step of 5 mm between turns. Mark the center, then place points at 5 mm, 10 mm, and 15 mm along a slowly rotating direction. Connect the points with a smooth curve that does not cross itself.
The spiral should look even. Check by measuring the gap between turns at two or three places; the gaps should be close to your chosen step. If a gap is much wider or narrower, adjust the point before darkening the curve.
You can repeat the spiral along a practice strip. Keep the center points in a straight line and use the same step for each spiral. This builds control and makes the motif readable.
- Mark a center point and a starting direction.
- Place outward points at consistent increments, such as 5 mm, 10 mm, and 15 mm.
- Connect the points with a smooth curve, checking that turns do not touch.
- Measure two gaps between turns and compare them to your chosen step.
Composing an original interlace in a blank band frame
A blank band frame is a rectangle with a border. Inside, draw two or three bands that cross at least twice. Use the over-under tick convention from the first section. Keep the bands inside the border and leave a small margin so the edges stay visible.
Plan the crossings before adding edges. Mark each crossing with a tick, then check alternation along every band. If a band has three crossings, the pattern should read over, under, over or under, over, under. Adjust ticks until every band alternates.
Finally, add parallel edges and erase construction marks. The drawing should be readable without color: the over-under ticks and continuous under-band edges carry the structure.
- Draw a rectangle border and a small inner margin.
- Draw two or three band centerlines that cross at least twice.
- Mark each crossing with an over-under tick and check alternation on every band.
- Add parallel edges, erase construction marks, and trace each band to verify.
Worked example
Draw two bands that cross twice. Band A runs left to right; Band B runs top to bottom. At the first crossing, Band A goes over. At the second crossing, Band B goes over. Mark the ticks and describe the alternation on each band.
Worked answer
At crossing 1, tick Band A (over) and keep Band B's edge continuous. At crossing 2, tick Band B (over) and keep Band A's edge continuous. Band A reads over then under, so it alternates. Band B reads under then over, so it alternates. Both bands pass the alternation check.
Four practice exercises
Exercise 1
Draw one band that crosses another band three times. Mark the first crossing as over on the left-to-right band. Continue alternating along that band and state the pattern.
Show answer and check
The left-to-right band reads over, under, over across the three crossings. The other band reads under, over, under.
Why: Alternation means each band switches at every crossing. Starting with over gives over, under, over for three crossings.
Check: Trace the left-to-right band with your finger and confirm the ticks alternate. Then trace the other band and confirm it also alternates.
Exercise 2
Construct a spiral with a hypothetical step of 4 mm. Place center and outward points at 4 mm, 8 mm, and 12 mm. After drawing, measure two gaps between turns. What should you expect, and what would you adjust if one gap is 6 mm?
Show answer and check
Expect both measured gaps to be close to 4 mm. If one gap is 6 mm, move the outward point at that turn inward and redraw the curve so the gap returns near 4 mm.
Why: A consistent step keeps the spiral even. A 6 mm gap is 2 mm wider than the chosen step, so the point is too far out.
Check: Measure the gap at two different turns with a ruler. Compare each to 4 mm; adjust any point that is off by more than a small drawing margin.
Exercise 3
In a blank band frame, plan two bands that cross twice. At the first crossing the top-to-bottom band goes over. At the second crossing the left-to-right band goes over. Describe the ticks and the alternation on each band.
Show answer and check
Tick the top-to-bottom band at crossing 1 and the left-to-right band at crossing 2. The top-to-bottom band reads over then under; the left-to-right band reads under then over. Both alternate.
Why: Each band has two crossings, so alternation means one over and one under per band. The chosen ticks give exactly that.
Check: Trace each band and list its crossings in order. Confirm one over and one under on each band.
Exercise 4
A student draws a band with four crossings and marks them over, over, under, under along the same band. Identify the error and give a corrected pattern that still starts with over.
Show answer and check
The error is that the first two crossings are both over, so the band does not alternate. A corrected pattern starting with over is over, under, over, under.
Why: Alternation requires a switch at every crossing. Over, over breaks the switch; over, under, over, under restores it.
Check: List the four ticks in order and confirm each adjacent pair is different. Then trace the band to ensure the under-band edges are continuous.
Common mistakes
- Marking every crossing on the same band as over. Trace the band and alternate the ticks: over, under, over, under. Swap one tick and redraw the under-band edge.
- Letting the under-band edge stop at the crossing. Keep the under-band edge continuous through the crossing; only the over-band edge is interrupted by the tick.
- Using uneven spiral steps. Measure the gap between turns at two places and adjust the outward points to match your chosen step.
- Drawing too dark too early. Work lightly with construction lines, check alternation and spiral gaps, then darken the final edges.
Self-check rubric
- Every crossing has a clear over-under tick, and each band alternates over and under along its length.
- Under-band edges remain continuous through crossings; over-band edges are interrupted at the tick.
- Spiral turns use a consistent step, and two measured gaps between turns are close to the chosen value.
- Construction marks are erased or light, and the final drawing is readable without color.
- Valid alternatives are accepted: different band routes, crossing angles, and spiral steps are allowed if the checks pass.
Questions and answers
Do I need a special grid or tool?
No. A ruler, pencil, and eraser are enough. Measure your own paper and choose a step that fits; any numerical value in this lesson is a hypothetical example.
How do I know the over-under pattern is correct?
Trace each band from start to finish. The crossings on that band should alternate over and under. If they do not, swap a tick and redraw the under-band edge.
Can I use a different spiral step?
Yes. Choose a step that fits your paper and keep it consistent. Check two gaps between turns to confirm the spiral is even.
Is there one correct finished design?
No. The convention and rubric allow valid alternatives. What matters is consistent over-under alternation, continuous under-band edges, and even spiral steps.