Free original lessons
Drawing Clay Objects: Form and Texture
Learn to draw a clay object with believable form and surface texture using construction lines, contour, and stroke patterns.
Free lesson
Four exercises
Worked answers
Object Drawing Lessons
Clay objects have soft, rounded forms and tactile surfaces. This lesson teaches a repeatable method: build the form with simple volumes, refine the contour, then add texture strokes that follow the surface. You will use a defined convention for stroke direction and a rubric that accepts valid alternatives. All measurements are hypothetical examples; measure your own paper and tools.
Practice materials: Printable downloads are not available for this lesson yet. Use the instructions and four exercises below.
Reference illustration
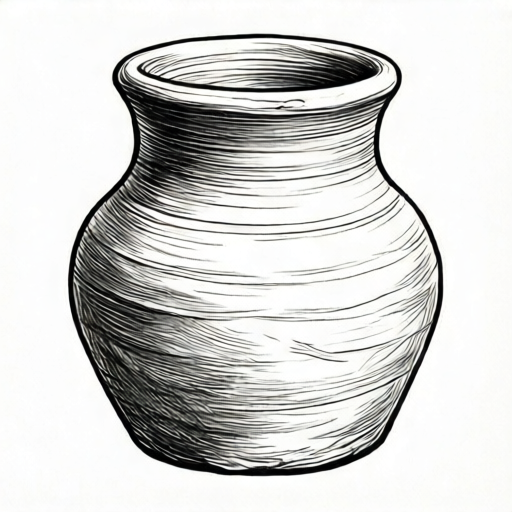
Use the stated measurements and conventions for each exercise.
Building the Clay Form
Start by observing the clay object as a set of simple volumes: a main body, any neck or rim, and attached details. Lightly block these volumes with straight or curved construction lines, keeping pressure low. Check proportions by comparing width to height and the size of details relative to the main body.
Refine the silhouette with a contour line that describes the outer edge. Clay forms often have soft transitions, so avoid sharp corners unless the object truly has them. Add a few interior contour lines where surfaces turn away from you, such as the curve under a rim or the crease where a handle meets the body.
- Draw a light bounding box for the overall height and width.
- Block the main body as an oval or rounded rectangle.
- Add attached parts as simple shapes, checking their position against the main body.
- Refine the outer contour with a single confident line.
- Add interior contour lines at major surface changes.
Texture Stroke Convention
Use this convention: texture strokes run parallel to the direction the surface would move if you dragged a finger across it. On a rounded clay pot, strokes curve around the form horizontally; on a vertical neck, they run vertically. Vary stroke length and spacing to suggest roughness or smoothness, but keep the direction consistent with the form.
Valid alternatives exist. You may use short dashes, wavy lines, or small dots, as long as the pattern follows the surface direction and does not flatten the form. Avoid cross-hatching that ignores the object's curvature. The rubric rewards directional consistency and restraint over density.
- Identify the main surface directions on your object.
- Choose one stroke type for each surface region.
- Draw strokes following the surface direction, starting sparse.
- Add density only where texture is visibly rougher.
- Leave smooth areas with few or no strokes.
Integrating Form and Texture
Texture should support form, not obscure it. Keep texture strokes lighter near the outer contour so the silhouette remains readable. Where a surface turns away, shorten strokes and increase spacing to suggest foreshortening. Use a slightly darker stroke near creases and a lighter stroke on raised areas.
Check your drawing by stepping back. The object should still read as a solid volume when texture is ignored. If the texture makes the object look flat, reduce stroke density and re-check direction against the form.
- Review the contour without texture.
- Add texture in the largest surface area first.
- Reduce stroke length near edges that turn away.
- Compare texture density across regions for consistency.
Worked example
Draw a rounded clay pot with a short neck and a horizontal texture band around the body. Use a bounding box 10 cm wide and 12 cm tall (hypothetical example).
Worked answer
Block a 10 by 12 cm box. Draw an oval body about 8 cm wide and 8 cm tall centered low in the box. Add a neck 4 cm wide and 3 cm tall above the body. Refine the contour with soft curves. Add horizontal texture strokes around the body, spaced about 5 mm apart, and vertical strokes on the neck. Keep strokes lighter near the outer edges.
Four practice exercises
Exercise 1
Draw a clay cup 8 cm wide and 9 cm tall (hypothetical example) with a vertical texture pattern on the body. Describe your construction and texture choices.
Show answer and check
Block an 8 by 9 cm box. Draw a rounded body about 7 cm wide and 7 cm tall, add a rim 1 cm tall. Use vertical strokes spaced 4 mm apart on the body, lighter near the sides.
Why: The bounding box controls proportion; vertical strokes follow the surface direction of a tall cup.
Check: Measure the drawn width and height against the box. Confirm strokes run vertically and remain lighter near the contour.
Exercise 2
Draw a clay bowl 12 cm wide and 6 cm tall (hypothetical example) with a rough interior and smooth exterior. Use dots for interior texture.
Show answer and check
Block a 12 by 6 cm box. Draw a shallow oval body 11 cm wide and 5 cm tall. Add sparse dots inside the bowl following the interior curve; leave the exterior mostly smooth with a few horizontal strokes.
Why: Dots are a valid texture alternative; sparse placement keeps the form readable.
Check: Check that dots follow the interior curve and that the exterior remains smooth. Verify width and height against the box.
Exercise 3
Draw a clay jar with a handle, 10 cm wide and 14 cm tall (hypothetical example). Texture the body horizontally and the handle vertically.
Show answer and check
Block a 10 by 14 cm box. Draw an oval body 8 cm wide and 10 cm tall, add a neck 3 cm tall, and a handle as a curved shape on one side. Use horizontal strokes on the body and vertical strokes along the handle.
Why: Different surface directions require different stroke directions; the handle follows its length.
Check: Confirm the handle attaches at plausible points and that stroke directions match each surface. Measure overall height against the box.
Exercise 4
Draw a clay plate 15 cm wide and 3 cm tall (hypothetical example) with concentric texture rings. Explain how you keep the form from looking flat.
Show answer and check
Block a 15 by 3 cm box. Draw a shallow oval 14 cm wide and 2.5 cm tall. Add concentric curved strokes following the plate surface, shorter near the rim. Keep strokes light at the outer edge.
Why: Concentric strokes follow the plate's surface; shortening near the rim suggests foreshortening.
Check: Check that rings follow the oval shape and that the silhouette remains clear. Measure width and height against the box.
Common mistakes
- Drawing texture strokes in random directions. Choose a surface direction for each region and keep strokes parallel to it.
- Making the contour too sharp for soft clay. Round transitions between volumes and check the silhouette against the object.
- Covering the whole object with dense texture. Leave smooth areas sparse and reserve dense strokes for rougher regions.
- Ignoring proportion while adding details. Re-measure width and height against your bounding box before refining details.
Self-check rubric
- Form reads as a solid clay object with soft transitions.
- Proportions match the observed object within reasonable tolerance.
- Contour is clear and not obscured by texture.
- Texture strokes follow surface direction consistently.
- Texture density varies to suggest rough and smooth areas.
- Valid alternative stroke types are accepted if directional and supportive of form.
Questions and answers
Do I need special clay to practice this drawing?
No. You can draw any clay-like object with soft rounded forms. The method focuses on form and texture, not the material itself.
How do I know if my texture direction is correct?
Check whether strokes follow the surface as if dragged by a finger. If strokes cross the form in conflicting directions, revise them.
Can I use dots instead of lines for texture?
Yes. Dots are a valid alternative if their placement follows the surface direction and density supports the form.
What if my object has a handle?
Block the handle as a simple curved shape, then add contour lines where it meets the body. Texture on the handle should follow its length.