Free original lessons
Practice Drawing Comic Book Characters: Proportion, Gesture, and Expression
Learn to draw original comic characters by practicing proportion, gesture lines, and expressive faces with clear guides, checks, and self-made practice panels.
Free lesson
Four exercises
Worked answers
Object Drawing Lessons
Comic characters read clearly when proportion, gesture, and expression work together. This lesson gives you a repeatable practice routine: set a simple proportion guide, capture the pose with a few gesture lines, then push the face to show emotion. You will use a defined convention for x-height (baseline to midline) and accept valid style variations rather than chasing one universal look. All practice resources described here are planned and free; they are not yet built, so you will create your own panels from the instructions. Work in pencil on plain paper, keep units consistent (use centimeters or inches, not both), and measure your actual paper and tools before labeling any guide values. Numerical examples below are hypothetical and should be adjusted to your equipment.
Practice materials: Printable downloads are not available for this lesson yet. Use the instructions and four exercises below.
Reference illustration
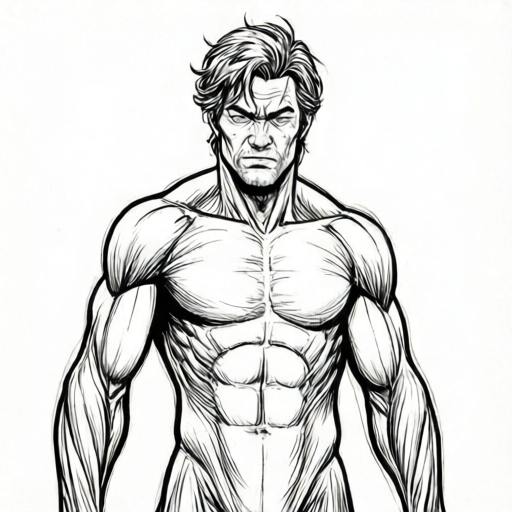
Use the stated measurements and conventions for each exercise.
Set a proportion guide you can check
Start with a head unit: the vertical distance from the top of the skull to the chin. For a stylized comic adult, a common practice range is 6 to 8 head units tall; for a child character, 4 to 5. These are hypothetical examples, not standards. Measure your paper first, then choose a head unit that fits your panel with room for the body and feet.
Build the figure on a vertical center line. Mark the head unit, then stack equal units down the page. Place shoulders about 1.5 to 2 head units wide, hips slightly narrower, and knees near the midpoint of the leg. Keep the guide light so gesture lines can override it later.
- Measure your paper and note the usable height in centimeters or inches.
- Choose a head unit that divides evenly into your panel height; label it as a hypothetical value.
- Draw a vertical center line and mark head units from top to bottom.
- Sketch shoulder, hip, knee, and ankle markers using simple arithmetic (for example, knees at half the leg length).
- Check that the total height equals your chosen number of head units before adding details.
Capture gesture with three lines
Gesture is the action line that runs through the body. Use no more than three sweeping lines: one for the spine and head direction, one for the leading arm or leg, and one for the opposing limb. Draw them quickly and loosely; they are not final contours.
Test the gesture by covering the proportion guide and asking whether the pose still reads. If the action line is unclear, redraw it with a stronger curve or tilt. Valid alternatives include a straight, tense gesture for a rigid character and a curved, relaxed gesture for a casual one.
- Draw the main action line from the top of the head through the torso to the supporting foot.
- Add one line for the limb that leads the action and one for the limb that balances it.
- Check the pose by viewing the three lines alone; adjust tilt or curve until the action is obvious.
- Place simple body shapes over the lines without erasing the gesture.
Push expression with a defined face convention
Use this convention: x-height is the distance from the baseline to the midline of lowercase letters in your own handwriting. It is a personal reference, not a universal measure. Draw a face box and divide it horizontally at the midline; place eyes near that line, then vary brows, eyelids, and mouth to change emotion.
Letter styles vary, so your x-height will differ from another student's. That is acceptable. The rubric rewards clear, consistent choices: for example, angry brows angled down toward the nose, surprised brows raised with wide eyes, and sad brows tilted up at the inner corners. Keep the mouth and eyes working together rather than contradicting each other.
- Write a lowercase word on scrap paper and measure your baseline-to-midline distance; record it as your x-height.
- Draw a face box and mark the midline at roughly half the box height.
- Place eyes on or near the midline and sketch brows above them.
- Draw three expression variations: angry, surprised, and sad, changing brows, eyelids, and mouth together.
- Check that each expression is readable when the face is viewed from a short distance.
Combine proportion, gesture, and expression in a blank panel
Now build an original character in a blank panel. Choose a proportion (for example, 7 head units), a gesture (leaning forward), and an expression (determined). Draw the guide, then the gesture lines, then the body shapes, then the face. Keep the panel border clear so the figure does not crowd the edge.
Review with simple checks: count head units, confirm the gesture reads without details, and verify the expression matches the pose. If any check fails, adjust one element at a time rather than redrawing everything.
- Draw a blank panel and measure its usable area.
- Set a head unit and mark the proportion guide.
- Add three gesture lines and confirm the pose reads.
- Build body shapes over the guide and gesture.
- Draw the face using your x-height convention and one clear expression.
- Run the three checks: head-unit count, gesture readability, expression consistency.
Worked example
A student has a panel 18 cm tall and wants a 6-head-unit character. Set the head unit, mark the guide, and describe a determined pose with an angry expression using the x-height convention.
Worked answer
Divide 18 cm by 6 to get a 3 cm head unit (hypothetical example). Mark six equal 3 cm units down the center line. Draw a forward-leaning action line from the head through the torso to the front foot, one line for the leading arm, and one for the balancing arm. Place shoulders about 1.5 head units wide (4.5 cm) and knees near half the leg length. For the face, measure your own x-height, mark the midline of the face box, place eyes near it, angle brows down toward the nose, and set the mouth in a firm line. Check: six units total 18 cm; the gesture reads without details; the angry face matches the forward, determined pose.
Four practice exercises
Exercise 1
A panel is 20 cm tall. You choose a 5-head-unit character. Calculate the head unit and state where the knee markers go if knees are at half the leg length.
Show answer and check
Head unit = 20 cm divided by 5 = 4 cm. Knees at half the leg length: if legs occupy the lower 3 head units (12 cm), knees are 6 cm below the hip line.
Why: Divide panel height by head-unit count to get a checkable unit; then apply simple arithmetic to place markers consistently.
Check: Multiply the head unit by 5 to confirm 20 cm, and measure the knee marker distance to confirm 6 cm.
Exercise 2
Describe three gesture lines for a character reaching upward with one arm while standing on one leg. Explain how you would test that the gesture reads.
Show answer and check
Line one runs from the head through the torso to the supporting foot; line two follows the reaching arm upward; line three follows the lifted leg or balancing arm. Test by covering the proportion guide and checking whether the reach and single-leg balance are still obvious.
Why: Gesture lines capture action direction; limiting them to three keeps the pose readable and prevents clutter.
Check: View the three lines alone at a short distance; if the action is unclear, adjust tilt or curve and retest.
Exercise 3
Using the x-height convention, describe how to draw a surprised face and a sad face in two face boxes. State one check for each.
Show answer and check
Measure your own x-height and mark the midline in each box. Surprised: raise brows, widen eyes, open mouth; check that brows and mouth both signal surprise. Sad: tilt inner brows up, lower eyelids, turn mouth down; check that the expression reads without labels.
Why: Expression clarity comes from coordinated changes across brows, eyelids, and mouth, not from one feature alone.
Check: Ask a peer to name the emotion from a short distance; if they hesitate, adjust one feature and retest.
Exercise 4
Plan an original character in a blank panel: choose a head-unit count that fits a 16 cm panel, name a gesture, and name an expression. Show the arithmetic and one consistency check.
Show answer and check
Example: 16 cm panel with 4 head units gives a 4 cm unit. Gesture: crouching to leap; expression: determined. Consistency check: confirm the forward-leaning gesture matches the focused brows and firm mouth, and confirm 4 units times 4 cm equals 16 cm.
Why: Choosing a unit that divides evenly prevents cutoff, and matching gesture to expression keeps the character readable.
Check: Recount head units against the panel height and verify the expression and pose describe the same emotion.
Common mistakes
- Choosing a head unit that does not fit the panel, so the feet are cut off. Measure the panel first and divide its height by your intended number of head units; adjust the unit before drawing.
- Drawing many gesture lines until the pose becomes cluttered. Limit gesture to three lines and test readability by covering the proportion guide.
- Making the face expression contradict the body pose. Decide the emotion first, then align brows, eyes, mouth, and gesture to that single emotion.
- Treating one x-height or letter style as the only correct measure. Measure your own handwriting and accept valid style variations; use consistency, not a universal number, as the check.
Self-check rubric
- Proportion guide is measured and labeled with a consistent unit; total height equals the chosen head-unit count.
- Gesture uses no more than three clear lines and the pose reads when details are covered.
- Expression changes brows, eyelids, and mouth together and matches the body pose.
- X-height convention is defined from the student's own handwriting and used consistently.
- Valid style alternatives are accepted; the work is checked for clarity and consistency rather than a single universal look.
Questions and answers
Do I need special comic paper or tools?
No. Plain paper and a pencil are enough. Measure your actual paper and pencil before labeling any guide values; numerical examples in this lesson are hypothetical.
How many head units should my character be?
Choose a practice range that fits your panel, such as 6 to 8 for a stylized adult or 4 to 5 for a child. These are examples, not standards; the check is that the total height equals your chosen count.
What exactly is x-height here?
It is the distance from the baseline to the midline of lowercase letters in your own handwriting. Letter styles vary, so your measurement is personal and valid as long as you use it consistently.
Can I use a straight gesture line instead of a curve?
Yes. A straight, tense gesture can suit a rigid character, while a curved gesture suits a relaxed one. Both are valid if the pose reads clearly.