Free original lessons
How to Draw Glowing Dragon Scales with Highlight Gradients
Learn a repeatable method for glowing dragon scales using layered highlights, gradient bands, and a simple value check that keeps the effect readable.
Free lesson
Four exercises
Worked answers
Object Drawing Lessons
Glowing dragon scales read as luminous because the brightest area sits inside each scale and fades toward its rim, not because the whole plate is light. This lesson teaches a controlled sequence: establish a scale grid, choose a light direction, build a gradient inside each scale, then add a small specular highlight and a darker separation line. The convention used here is that each scale is a rounded plate with a baseline at its lower edge and a midline through its widest point; the glow gradient runs from a bright core near the upper third down to a darker rim. Letter styles and scale shapes vary, so the rubric rewards consistent light logic rather than one exact drawing. All measurements below are hypothetical examples chosen for practice; measure your own paper and tools before scaling them.
Practice materials: Printable downloads are not available for this lesson yet. Use the instructions and four exercises below.
Reference illustration
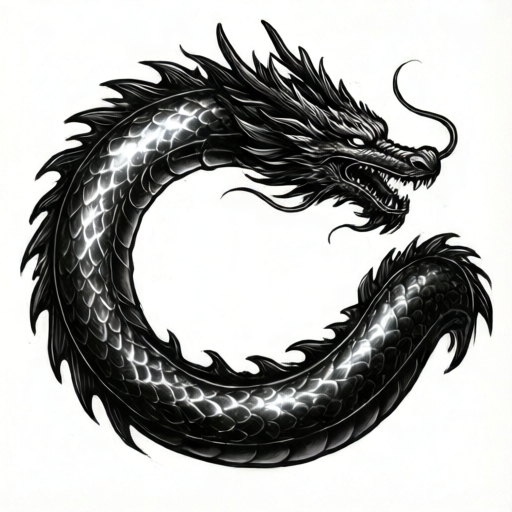
Use the stated measurements and conventions for each exercise.
Set up the scale plate and light direction
Begin with a rectangular plate about 12 cm by 8 cm on ordinary drawing paper. Draw three staggered rows of overlapping scales, each scale roughly 2 cm wide and 1.5 cm tall. Overlap each scale over the one below by about one third of its height so the plate reads as layered armor.
Choose one light direction and mark it with a small arrow outside the plate. For this lesson the hypothetical example is light from the upper left. Every scale will then have its bright core toward the upper left and its darker rim toward the lower right. Keeping one direction is what makes the glow look intentional rather than patchy.
- Draw the plate border lightly in pencil.
- Mark the light-direction arrow outside the plate.
- Draw the bottom row of scales first, then stagger the next rows upward.
- Check that each scale overlaps the one below by about one third of its height.
Build the glow gradient inside each scale
Inside each scale, divide the surface into three soft bands: a bright core, a middle band, and a rim band. The bright core occupies roughly the upper third of the scale near the light side. The middle band covers the central area, and the rim band follows the lower and far edge. These proportions are hypothetical starting values; adjust them if your scale shape is wider or narrower.
Apply the brightest tone first with light pressure, then blend outward with a slightly darker tone. Keep the transition soft by overlapping strokes rather than drawing a hard line. The rim band should be the darkest area inside the scale, but it must stay lighter than the separation line between scales so the plate does not turn into a flat dark grid.
- Lightly mark the bright core near the upper third of the scale.
- Fill the core with the lightest tone using small circular strokes.
- Blend a middle tone outward from the core toward the rim.
- Darken only the rim band, keeping the transition soft.
- Repeat on every scale, following the same light direction.
Add the specular highlight and separation line
A glow effect needs one small, sharp bright spot per scale, not a large white patch. Place a tiny highlight inside the bright core, slightly toward the light side. Keep it smaller than one fifth of the scale width; this is a hypothetical proportion for practice. The highlight should sit on top of the gradient, not replace it.
Finish with a thin darker line along the lower edge of each scale where it overlaps the scale beneath. This separation line gives the plate depth and makes the glow appear to sit on a raised surface. Keep the line consistent in thickness and do not outline the entire scale, because a full outline flattens the glow.
- Place a small highlight inside the bright core of each scale.
- Check that the highlight is smaller than one fifth of the scale width.
- Draw a thin separation line only along the lower overlapping edge.
- Compare the plate from a short distance to confirm the glow reads as a pattern.
Worked example
A student draws a single scale 2 cm wide and 1.5 cm tall with light from the upper left. The bright core covers the upper third, the middle band covers the center, and the rim band covers the lower right edge. The highlight is 3 mm wide. Explain whether the glow logic is consistent and what to check.
Worked answer
The logic is consistent because the bright core sits toward the upper left, matching the stated light direction, and the rim band is on the opposite lower right edge. The highlight at 3 mm is smaller than one fifth of the 2 cm scale width, which is 4 mm, so it stays small enough to read as a specular spot. Check that the rim band is darker than the middle band but lighter than the separation line, and confirm the transition between bands is soft rather than a hard stripe.
Four practice exercises
Exercise 1
A scale is 2.5 cm wide. Using the hypothetical rule that the highlight must be smaller than one fifth of the scale width, what is the largest allowed highlight width in millimetres?
Show answer and check
5 mm.
Why: One fifth of 2.5 cm is 0.5 cm. Since 1 cm equals 10 mm, 0.5 cm equals 5 mm. A highlight narrower than 5 mm satisfies the rule.
Check: Multiply the scale width by 0.2, then convert centimetres to millimetres by multiplying by 10. Confirm the result is less than the scale width.
Exercise 2
A plate has three rows of five scales. The bottom row is drawn first, and each upper row overlaps the row below by one third of the scale height. If each scale is 1.5 cm tall, how much vertical overlap occurs between two adjacent rows in millimetres?
Show answer and check
5 mm.
Why: One third of 1.5 cm is 0.5 cm. Converting to millimetres gives 5 mm of overlap between adjacent rows.
Check: Divide the scale height by 3, then multiply by 10 to convert to millimetres. Verify the overlap is less than the full scale height.
Exercise 3
A student places the bright core on the lower right of every scale but marks the light arrow at the upper left. Describe the inconsistency and state one correction that keeps the chosen light direction.
Show answer and check
The bright core is on the opposite side from the marked light direction. Move the bright core to the upper left of each scale and shift the darker rim band to the lower right.
Why: The glow logic requires the brightest area to face the light source. If the arrow points upper left, the core must sit toward the upper left and the rim must darken away from it.
Check: Compare the arrow position with the core position on at least three scales. If they disagree, relocate the core and rim band rather than changing the arrow.
Exercise 4
A scale uses three tones: light, middle, and dark. The rim band is drawn with the light tone and the core with the dark tone. Explain why the glow fails and give the corrected tone order from core to rim.
Show answer and check
The glow fails because the darkest tone sits in the core and the lightest tone sits at the rim, reversing the gradient. The corrected order from core to rim is light, middle, dark.
Why: A glow gradient fades from bright at the core to darker at the rim. Reversing the order makes the scale look recessed rather than luminous.
Check: List the tones in order from the core outward. Confirm the sequence goes from lightest to darkest and that the rim is darker than the middle band.
Common mistakes
- Making the entire scale bright so the glow looks washed out. Keep the rim band darker than the core and reserve the brightest tone for the upper third only.
- Changing the light direction from scale to scale. Mark one light-direction arrow outside the plate and place every bright core on the same side.
- Drawing a hard outline around every scale. Use a thin separation line only along the lower overlapping edge and leave the upper edge soft.
- Making the specular highlight too large. Shrink the highlight to less than one fifth of the scale width and keep it inside the bright core.
Self-check rubric
- One light direction is marked and followed on every scale.
- Each scale shows a bright core, a middle band, and a darker rim band.
- The brightest tone is confined to the upper third near the light side.
- A small specular highlight sits inside the bright core and is smaller than one fifth of the scale width.
- A thin separation line appears only along the lower overlapping edge.
- The plate reads as a consistent glowing pattern from a short distance.
- Valid alternatives in scale shape or light direction are accepted if the gradient logic stays consistent.
Questions and answers
Do I need special glowing ink or a digital tool?
No. The effect comes from value contrast and gradient placement. Ordinary pencil, colored pencil, or marker works if you can produce at least three distinct tones.
How many scales should the practice plate contain?
Three staggered rows of about five scales each is enough to test consistency. A 12 cm by 8 cm plate with 2 cm wide scales is a hypothetical example; adjust to your paper size.
Can the light come from a different direction?
Yes. Choose any single direction and keep it consistent. The rubric checks consistency and gradient logic, not a fixed light side.
What if my scale shapes are not rounded plates?
The convention allows variation. Keep a baseline at the lower edge and a midline through the widest point, then apply the same three-band gradient and small highlight.