Free original lessons
Ink Animal Textures: Fur Strokes and Scale Patterns
Learn to draw animal fur and scales in ink using stroke direction, density, and pattern. Includes a convention, rubric, worked example, and four practice tasks.
Free lesson
Four exercises
Worked answers
Object Drawing Lessons
Ink textures for animal fur and scales depend on controlled stroke direction, spacing, and pattern repetition. This lesson defines a simple convention for evaluating texture quality, then guides you through fur strokes, scale patterns, and a combined panel. All exercises are self-contained; any needed diagram is described in text. Numerical values are hypothetical examples for practice, not manufacturing standards.
Practice materials: Printable downloads are not available for this lesson yet. Use the instructions and four exercises below.
Reference illustration
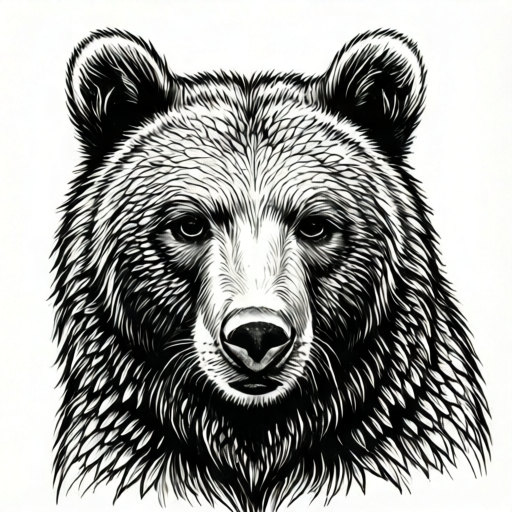
Use the stated measurements and conventions for each exercise.
Fur Strokes: Direction, Taper, and Density
Fur in ink is built from short tapered strokes that follow the animal's body flow. Each stroke starts with slight pressure and lifts at the end, creating a pointed tip. Direction should follow the contour of the form: strokes curve around legs, flow down the back, and fan outward at the chest.
Density controls value. Sparse strokes read as light fur; overlapping strokes read as dark fur. Keep stroke length consistent within a region unless depicting longer guard hairs. A useful convention: define a 'stroke unit' as a single tapered line about 4 mm long on a 10 cm panel (hypothetical example). Count strokes per square centimetre to compare density between regions.
- Draw a light guide line showing fur flow direction across the panel.
- Practice 20 tapered strokes along the guide, lifting the pen at each tip.
- Create a light patch with 5 strokes per square centimetre and a dark patch with 15 strokes per square centimetre (hypothetical values).
- Compare patches: the dark patch should show overlapping strokes without muddy blobs.
Scale Patterns: Grid, Overlap, and Edge Definition
Scales are drawn as repeating shapes that overlap like roof tiles. A simple convention is a staggered grid: rows of rounded rectangles offset by half a unit. Each scale has a defined top edge and a softer lower edge where the next scale overlaps.
Pattern regularity matters more than perfect geometry. Vary scale size slightly to suggest natural growth, but keep row spacing consistent. Ink scales by drawing the outline first, then adding a short shadow stroke under each scale's lower edge to create depth.
- Draw a staggered grid of 6 rows by 8 columns on a 10 cm square (hypothetical example).
- Outline each scale with a rounded rectangle, leaving a small gap at the bottom edge.
- Add a short horizontal shadow stroke beneath each scale's lower edge.
- Check that rows remain aligned and that no scale floats without overlap.
Combining Fur and Scales in One Panel
A combined panel tests transition control. Choose a boundary line where fur meets scales, such as a leg joint or snout. Fur strokes should stop cleanly at the boundary; scales should begin with a defined edge. Avoid mixing stroke types in the same region.
Use density contrast to separate textures: fur regions can use tapered strokes at 8 per square centimetre, while scale regions use outlined shapes at 4 per square centimetre (hypothetical values). The transition should read as a change in pattern, not a blur.
- Draw a boundary line across the panel.
- Fill the left side with fur strokes following a downward flow.
- Fill the right side with staggered scales.
- Inspect the boundary: fur tips should not cross into scale rows, and scale outlines should not intrude into fur.
Worked example
On a 10 cm square panel, draw a fur region on the left and a scale region on the right, separated by a vertical boundary. Use tapered fur strokes at 8 per square centimetre and staggered scales at 4 per square centimetre (hypothetical values).
Worked answer
The left half shows short tapered strokes flowing downward, spaced evenly. The right half shows a staggered grid of rounded rectangles sized so that approximately 4 scales occupy each square centimetre (hypothetical value), with a shadow stroke under each lower edge. The boundary is clean: no fur stroke crosses into the scale region, and no scale outline enters the fur region. Density contrast is visible: fur reads darker due to overlapping strokes, scales read lighter due to open outlines.
Four practice exercises
Exercise 1
Draw a 5 cm square fur patch using 10 tapered strokes that all flow from top to bottom. Count your strokes.
Show answer and check
A 5 cm square with 10 tapered strokes flowing downward, each lifting at the tip.
Why: Ten strokes in a small square create a light fur texture. Tapering and consistent direction are the key criteria.
Check: Count the strokes (should be 10) and inspect each tip for a taper. Check that all strokes flow downward.
Exercise 2
Draw a staggered scale pattern with 4 rows and 5 columns on a 5 cm square. Add a shadow stroke under each scale's lower edge.
Show answer and check
Four rows of five rounded rectangles, offset by half a scale width, with a short horizontal shadow under each lower edge.
Why: Staggering creates overlap. Shadow strokes add depth without filling the scale.
Check: Count rows (4) and columns (5). Verify each row is offset from the one above and that every scale has a shadow stroke.
Exercise 3
Create a combined panel: left half fur with 6 strokes per square centimetre, right half scales with 3 scales per square centimetre (hypothetical values). Draw a clean boundary.
Show answer and check
Left half shows sparse tapered fur strokes; right half shows larger staggered scales. The boundary line is clear with no crossing strokes.
Why: Density contrast separates the textures. A clean boundary tests transition control.
Check: Compare stroke and scale counts in each half. Inspect the boundary for any fur stroke crossing into the scale region.
Exercise 4
Draw a fur patch where strokes curve around a semicircular form, then add a scale patch below it with a horizontal boundary. Use at least 8 fur strokes and 6 scales.
Show answer and check
Fur strokes curve along the semicircle's contour, tapering at the ends. Below the boundary, 6 staggered scales with shadow strokes sit in two rows.
Why: Curved fur tests direction control. The horizontal boundary tests clean separation between textures.
Check: Check that fur strokes follow the curve and taper. Count at least 8 fur strokes and 6 scales. Verify no stroke crosses the boundary.
Common mistakes
- Drawing fur strokes with uniform pressure, creating thick worm-like lines. Practice lifting the pen at the end of each stroke to form a tapered tip.
- Making scales perfectly identical, which looks mechanical. Vary scale width by about 10 percent while keeping row spacing consistent.
- Letting fur strokes cross the scale boundary. Stop each fur stroke 1-2 mm before the boundary line and start scales with a clean outline.
- Overlapping too many strokes in one area, causing ink blobs. Space strokes evenly and wait for ink to dry before adding a second layer.
Self-check rubric
- Fur strokes taper at the tip and follow a consistent flow direction.
- Fur density is controlled and comparable between regions.
- Scale rows are staggered and evenly spaced.
- Each scale has a defined outline and a shadow stroke under the lower edge.
- The fur-scale boundary is clean with no crossing strokes.
- Valid alternatives: cross-hatched fur or varied scale shapes are acceptable if direction, taper, and overlap are maintained.
Questions and answers
How long should each fur stroke be?
Use a consistent length within a region. A hypothetical practice length is 4 mm on a 10 cm panel; adjust to the animal's scale.
Can I use cross-hatching for fur?
Cross-hatching is allowed if strokes still follow fur flow and taper at the ends. The rubric rewards direction and taper, not a single stroke style.
What defines a good scale pattern?
Consistent row spacing, staggered overlap, and a clear shadow stroke under each scale's lower edge.
How do I check my texture without a ruler?
Count strokes or scales in a small square and compare regions. Consistency matters more than exact numbers.