Free original lessons
Negative Space Leaf Drawing: See the Gaps, Draw the Leaf
Learn to draw leaves by observing and rendering the negative spaces around them, including vein gaps, with a clear convention, rubric, and four practice tasks.
Free lesson
Four exercises
Worked answers
Object Drawing Lessons
Negative space drawing flips your attention from the leaf itself to the shapes of empty space that surround and interrupt it. For leaves, this means noticing the pockets of background between lobes, the slivers beside the stem, and the narrow gaps where veins separate from the blade. By drawing those gaps accurately, the leaf emerges as a by-product of correct observation. This lesson defines a simple convention for representing negative space, walks through a worked example, and gives four self-contained exercises with reasoning and check methods. All measurements are hypothetical examples; measure your own paper and tools before relying on any number.
Practice materials: Printable downloads are not available for this lesson yet. Use the instructions and four exercises below.
Reference illustration
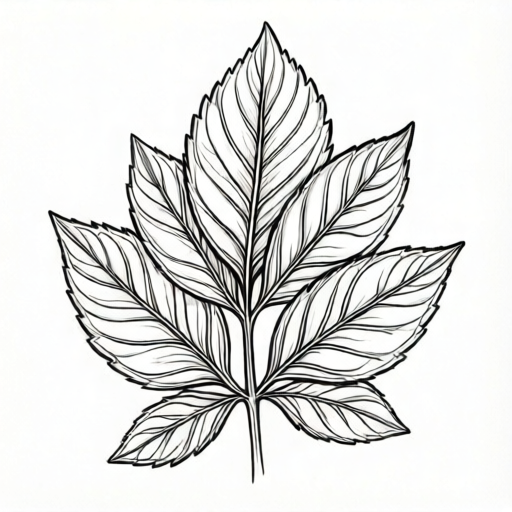
Use the stated measurements and conventions for each exercise.
What counts as negative space around a leaf
Negative space is the area not occupied by the leaf. Around a leaf, it includes the open background outside the outline, the enclosed pockets between lobes or teeth, and the thin channels that run beside veins where the blade surface is interrupted. The boundary of this lesson is observation and drawing of those gaps; it does not teach how to construct the positive leaf shape from scratch, nor tree canopies or flower negative space.
A useful convention: represent negative space with light, even hatching or a single flat tone, and leave the leaf itself as blank paper. This is a convention, not a universal rule. You may instead shade the leaf and leave gaps blank, provided you state your convention before starting and apply it consistently. The rubric rewards consistent, checkable choices rather than one correct style.
- Place a real leaf on paper and trace only its outer boundary lightly, or draw a simple leaf outline from the description in the exercises.
- Mark three to five vein gaps: narrow spaces where a vein meets the edge or where two veins leave a sliver of background.
- Choose your convention: shade gaps and leave the leaf blank, or shade the leaf and leave gaps blank. Write it in one line at the top of the page.
- Fill each negative-space region with even hatching, keeping the leaf area untouched according to your convention.
- Check that every gap you marked is either filled or deliberately left open, and that no gap shape has been merged with a neighbouring gap.
Measuring gaps and keeping units consistent
Before drawing, measure the actual leaf and paper with a ruler. Record lengths in millimetres and keep the same unit throughout. For example, a hypothetical leaf might be 80 mm long and 35 mm wide, with a vein gap about 4 mm across at its widest point. These numbers are examples only; your leaf will differ.
When checking a drawing, compare gap widths rather than overall leaf size. A gap that is 4 mm on the reference should be about 4 mm on the drawing if you are working at the same scale. If you enlarge the leaf, multiply every gap measurement by the same factor and state the factor.
- Measure leaf length, leaf width, and the widest and narrowest vein gaps in millimetres.
- Write the scale factor if you are enlarging or reducing; for example, scale 2 means every measured gap doubles.
- Draw the gaps first, using the measured widths as targets.
- Re-measure three gaps on your drawing and compare with the scaled targets.
- Adjust hatching density only after the gap shapes match the targets.
Using a reference leaf and a blank panel
A planned resource is a negative-space leaf plate: a reference leaf drawing with labelled vein-gap examples beside a blank panel for independent drawing. The plate is not yet built; this section describes how it would be used once available. Until then, you can make an equivalent reference by tracing a real leaf and labelling three gaps yourself.
On the reference side, label each gap with a letter and a measured width. On the blank panel, draw only the gaps, not the leaf outline, then compare your gap shapes with the labelled reference. This separates observation from construction and makes errors easy to locate.
- Label three gaps A, B, and C on your reference, each with a measured width in millimetres.
- On the blank panel, draw gap A first, then B, then C, without drawing the leaf outline.
- Compare each drawn gap with its reference label; note width and curvature differences.
- Draw the leaf outline last, using the gaps as anchors.
- Check that the outline passes between the gaps without crossing a filled gap region.
Common confusions between leaf and gap
The most frequent error is treating a vein as a gap. A vein is part of the leaf; the gap is the narrow background beside it. Another error is merging two separate gaps into one large shaded area, which loses the leaf's structure. A third is changing convention halfway through, so some gaps are shaded and others are not.
To avoid these, mark every gap with a small dot before shading, and keep a written convention line at the top of the page. If you shade the leaf instead of the gaps, the same dot marks still apply; only the fill target changes.
- Dot every gap before any shading.
- Keep the convention line visible while working.
- After shading, count the dots and confirm each one sits inside a filled or deliberately open region.
- Check that no vein has been shaded as if it were background.
Worked example
A hypothetical leaf is 80 mm long and 35 mm wide. Three vein gaps measure 4 mm, 2 mm, and 3 mm at their widest points. Using the convention shade gaps and leave the leaf blank, describe how to lay out the drawing at scale 1 and what to check.
Worked answer
Write the convention line at the top. Dot gap A at 4 mm, gap B at 2 mm, and gap C at 3 mm, placing each dot where the gap is widest. Shade each dotted region with even hatching, leaving the leaf area blank. Check that the three shaded widths measure about 4 mm, 2 mm, and 3 mm, that no vein line lies inside a shaded region, and that the three gaps remain separate. The leaf outline is drawn last and passes between the shaded gaps without crossing them.
Four practice exercises
Exercise 1
A simple leaf outline has two side lobes. Between the lobes and the stem are two gaps: gap A is 5 mm wide and gap B is 3 mm wide. Using the convention shade gaps and leave the leaf blank, describe where to place dots and how to check the result.
Show answer and check
Place a dot at the widest point of gap A and another at the widest point of gap B. Shade each dotted region evenly, leaving the leaf blank. Check that the shaded widths are about 5 mm and 3 mm, that the two gaps are separate, and that no vein line lies inside either shaded region.
Why: The dots fix the gap locations before shading, and the measured widths give checkable targets. Keeping the gaps separate preserves the leaf structure.
Check: Measure the two shaded widths with a ruler in millimetres and compare with 5 mm and 3 mm. Count the dots and confirm each sits inside a shaded region.
Exercise 2
A leaf is drawn at scale 2. Its narrowest vein gap measures 1.5 mm on the reference. Using the convention shade the leaf and leave gaps blank, state the target gap width on the drawing and describe one check.
Show answer and check
The target gap width is 1.5 mm multiplied by 2, which equals 3 mm. Leave that 3 mm gap blank and shade the leaf around it. Check by measuring the blank gap width on the drawing and comparing with 3 mm.
Why: Scaling multiplies every measurement by the same factor, so the gap width doubles. The convention is stated and applied to the gap only.
Check: Measure the blank gap in millimetres and confirm it is about 3 mm. Confirm the convention line says shade the leaf and leave gaps blank.
Exercise 3
A leaf has three gaps measuring 4 mm, 2 mm, and 6 mm. A student shades one large region covering all three. Describe the error and give a corrected procedure using the convention shade gaps and leave the leaf blank.
Show answer and check
The error is merging three separate gaps into one region, which loses the leaf structure. Correct by dotting each gap separately at 4 mm, 2 mm, and 6 mm, then shading each dotted region while keeping a thin unshaded strip of leaf between them. Check that three separate shaded widths remain.
Why: Separate dots preserve the boundaries between gaps, and the measured widths give checkable targets for each region.
Check: Count three distinct shaded regions and measure each width against 4 mm, 2 mm, and 6 mm. Confirm no shaded region touches another.
Exercise 4
A leaf outline is 60 mm long. Two vein gaps are 3 mm and 2 mm wide. Using the convention shade gaps and leave the leaf blank, describe the order of work and two checks that confirm the leaf outline was placed correctly.
Show answer and check
Write the convention line, dot the 3 mm and 2 mm gaps, shade each dotted region, then draw the leaf outline last. Check one: the outline passes between the two shaded gaps without crossing either. Check two: the two shaded widths measure about 3 mm and 2 mm and remain separate.
Why: Drawing gaps first anchors the outline, and the two checks test both placement and measurement.
Check: Trace the outline with a finger and confirm it does not enter a shaded region. Measure both shaded widths in millimetres and confirm they are separate.
Common mistakes
- Shading the leaf instead of the gaps without stating a convention. Write one convention line at the top: either shade gaps and leave the leaf blank, or shade the leaf and leave gaps blank. Apply it to every region.
- Merging two separate vein gaps into one shaded patch. Dot each gap separately before shading and keep a thin unshaded strip of leaf between them.
- Treating a vein as negative space. Mark veins with a short line and check that no vein line falls inside a shaded gap region.
- Changing scale without adjusting gap widths. Record the scale factor and multiply every measured gap width by it before drawing.
Self-check rubric
- Convention stated in one line at the top of the page.
- At least three vein gaps marked with dots before shading.
- Each gap filled or left open consistently according to the stated convention.
- Gap widths match measured or scaled targets within a stated tolerance, for example plus or minus 1 mm.
- No vein treated as negative space.
- Separate gaps remain separate; no merging.
- Leaf outline passes between gaps without crossing filled regions.
- Valid alternative conventions accepted if stated and applied consistently.
Questions and answers
Do I have to shade the gaps rather than the leaf?
No. Shading gaps is one convention. Shading the leaf and leaving gaps blank is equally valid if you state it and apply it consistently. The rubric checks consistency, not a single style.
How wide should a vein gap be?
Measure your own leaf. A hypothetical example is 4 mm at the widest point, but your leaf may be narrower or wider. Keep all measurements in millimetres and scale them together.
Can I draw the leaf outline first?
You can, but the lesson recommends drawing gaps first so the leaf emerges from correct negative-space observation. If you draw the outline first, still dot and check every gap.
What if my leaf has no clear vein gaps?
Choose a leaf with visible gaps, or mark the narrowest background slivers beside the midrib as your gaps. The convention still applies.