Free original lessons
Drawing a Mirror Reflection: Placing the Reflected Object Correctly
Learn to draw a convincing mirror reflection by locating the reflected object, matching edges and highlights, and checking symmetry with simple measurements.
Free lesson
Four exercises
Worked answers
Object Drawing Lessons
A mirror reflection is not a copy pasted beside an object; it is a reversed image that sits behind the mirror surface at a distance equal to the object's distance in front. This lesson teaches a reliable placement method: mark the mirror plane, measure the object's key points from that plane, project them straight back, and reverse left-right features. You will use a simple convention for judging letter height and shape so that valid stylistic differences are accepted. All measurements are hypothetical examples; measure your own paper and tools.
Practice materials: Printable downloads are not available for this lesson yet. Use the instructions and four exercises below.
Reference illustration
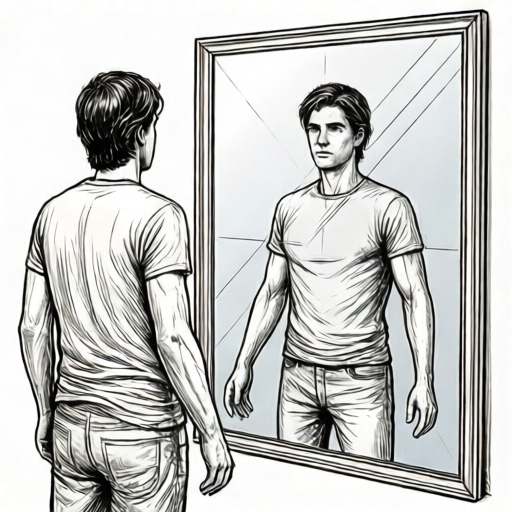
Use the stated measurements and conventions for each exercise.
Set the mirror plane and measure object points
Draw a vertical line to represent the mirror surface. Choose a scale, for example 1 cm on paper equals 10 cm in the scene, and state it. Pick three to five key points on the object: top, bottom, left edge, right edge, and a highlight. Measure each point's perpendicular distance from the mirror line. The reflected point lies on the same perpendicular line, on the opposite side of the mirror, at the same distance.
Use a ruler and light construction lines. Label distances in the same unit, such as centimetres. If a point is 4 cm in front of the mirror, its reflection is 4 cm behind the mirror line. Keep the mirror line fixed; do not shift it between measurements.
- Draw the mirror line and mark a scale.
- Mark key object points and measure perpendicular distances to the mirror line.
- Project each point straight through the mirror line by the same distance.
- Connect reflected points to form the reflected outline.
- Reverse left-right details such as asymmetric handles or lettering.
Reverse features and place highlights
Reflection reverses the direction perpendicular to the mirror, not top-bottom. A handle on the object's left appears on the reflected object's right when the mirror is vertical. Highlights follow the same rule: a highlight near the object's upper-left edge appears near the reflected object's upper-right edge if the light source is in front of the mirror.
For lettering or handwriting, use an explicit convention: x-height is measured from baseline to midline, and letter styles may vary. Do not force one universal letter shape. Instead, check that the reflected letter's baseline-to-midline height matches the original and that its left-right orientation is reversed.
- Identify asymmetric features and reverse their left-right position.
- Place reflected highlights by reversing the horizontal offset from the object's centre.
- Check that vertical positions such as top and bottom remain at the same height.
- Compare reflected and original x-height using baseline and midline marks.
Check symmetry with simple arithmetic
A symmetry check catches placement errors. Measure the distance from the mirror line to an original edge and to the matching reflected edge. They should be equal within your drawing tolerance, for example 0.2 cm as a hypothetical example. Also check that the sum of the two distances equals the total gap between original and reflected edges.
If the original top edge is 3 cm from the mirror and the reflected top edge is 5 cm from the mirror, the reflection is misplaced by 2 cm. Move the reflected point 2 cm toward the mirror line. Repeat for left, right, and highlight points.
- Measure original and reflected distances from the mirror line.
- Subtract the smaller from the larger to find the placement error.
- Adjust the reflected point by the full error toward the mirror line (or away from it, as needed) so the reflected distance equals the original distance.
- Re-measure until paired distances match within the chosen tolerance.
Finish edges and avoid common traps
Reflected edges should align with the mirror surface where the object touches it. If the object is not touching the mirror, leave a gap behind the mirror equal to the front gap. Do not draw the reflection as a flat copy with identical left-right features; reverse asymmetric details. Keep the mirror surface plate visible as a boundary, and do not add refraction or water effects because this lesson excludes them.
Use consistent units throughout. Label any numerical value as a hypothetical example and measure your actual equipment before relying on it.
- Align touching edges with the mirror surface.
- Keep non-touching gaps equal front and back.
- Reverse asymmetric details and recheck highlights.
- Erase construction lines only after the symmetry check passes.
Worked example
A vertical mirror line is drawn. A small box has its left edge 2 cm in front of the mirror and its right edge 6 cm in front. The box top is 4 cm above the baseline. Place the reflected box edges and state the distances behind the mirror.
Worked answer
The reflected left edge is 2 cm behind the mirror, and the reflected right edge is 6 cm behind the mirror. The reflected top stays 4 cm above the baseline. The reflected box is reversed left-right: the original left edge becomes the reflected right edge at 2 cm behind, and the original right edge becomes the reflected left edge at 6 cm behind.
Why: Each point projects straight through the mirror line at the same perpendicular distance. Left-right order reverses, but vertical height does not change.
Check: Measure from the mirror line to each reflected edge. The reflected left edge should be 2 cm behind and the reflected right edge 6 cm behind. The sum of original and reflected distances for the left edge is 2 + 2 = 4 cm, and for the right edge is 6 + 6 = 12 cm. Re-measure with one unit.
Four practice exercises
Exercise 1
A vertical mirror line is drawn. A cup's left edge is 3 cm in front of the mirror and its right edge is 7 cm in front. The cup top is 5 cm above the baseline. State the reflected edge distances behind the mirror and the reflected top height.
Show answer and check
Reflected left edge: 3 cm behind the mirror. Reflected right edge: 7 cm behind the mirror. Reflected top: 5 cm above the baseline.
Why: Each point projects straight through the mirror line at equal distance. Left-right order reverses, but vertical height stays the same.
Check: Measure from the mirror line to each reflected edge. Confirm 3 cm and 7 cm behind, and confirm the reflected top is 5 cm above the baseline using the same unit.
Exercise 2
A vertical mirror line is drawn. An object has a handle on its left side, 2 cm from the object's centre, and a highlight 1 cm to the right of centre. The object centre is 4 cm in front of the mirror. Describe where the reflected handle and reflected highlight appear relative to the reflected centre.
Show answer and check
The reflected handle appears 2 cm to the right of the reflected centre. The reflected highlight appears 1 cm to the left of the reflected centre. The reflected centre is 4 cm behind the mirror.
Why: Left-right offsets reverse. The handle's left offset becomes a right offset, and the highlight's right offset becomes a left offset. The centre's distance behind the mirror equals its distance in front.
Check: Measure the reflected centre at 4 cm behind the mirror. Measure the reflected handle 2 cm to the right of that centre and the reflected highlight 1 cm to the left. Confirm the original and reflected offsets have equal magnitudes.
Exercise 3
A vertical mirror line is drawn. An original edge is 5 cm in front of the mirror. The drawn reflected edge is 8 cm behind the mirror. Find the placement error and state how to correct it.
Show answer and check
The placement error is 3 cm. Move the reflected edge 3 cm toward the mirror line so it sits 5 cm behind.
Why: The reflected distance should equal the original distance. Subtracting the smaller distance from the larger gives 8 - 5 = 3 cm.
Check: After moving the reflected edge, measure again. The reflected distance should be 5 cm behind the mirror, matching the original 5 cm in front. Use one unit throughout.
Exercise 4
A vertical mirror line is drawn. A label on the object reads with its first letter on the left. The label's x-height is 1.5 cm from baseline to midline. Describe the reflected label's left-right order and x-height, allowing for valid letter-style differences.
Show answer and check
The reflected label's first letter appears on the right, and the x-height remains 1.5 cm from baseline to midline. Letter shapes may differ stylistically as long as the height and reversed order are correct.
Why: Reflection reverses left-right order. The baseline-to-midline convention fixes x-height, so the reflected x-height should match the original.
Check: Measure the reflected label's baseline-to-midline height and confirm 1.5 cm. Check that the first letter is on the right. Accept valid stylistic differences in letter shape.
Common mistakes
- Placing the reflected object at the same distance as the object but on the wrong perpendicular line. Project each key point straight through the mirror line at 90 degrees, then measure the equal distance on that same line.
- Copying asymmetric features without reversing left and right. List asymmetric features before drawing and reverse their horizontal position relative to the object centre.
- Changing the mirror line between measurements. Fix the mirror line first and use it for every distance measurement.
- Mixing units such as centimetres and millimetres in the symmetry check. Convert all measurements to one unit before comparing distances.
Self-check rubric
- Mirror line is fixed and clearly labelled.
- At least three key object points are projected perpendicularly through the mirror line.
- Reflected distances behind the mirror equal original distances in front within the stated tolerance.
- Asymmetric features and highlights are reversed left-right.
- Vertical positions such as top and bottom are preserved.
- X-height convention is applied from baseline to midline, and valid letter-style alternatives are accepted.
- Symmetry check uses consistent units and simple arithmetic.
- No refraction, water reflection, or general perspective effects are included.
Questions and answers
Does a mirror reflection reverse top and bottom?
No. For a vertical mirror, the reversal is left-right relative to the mirror surface. Top and bottom positions stay at the same height.
How do I place a reflected highlight?
Measure the highlight's horizontal offset from the object centre, reverse that offset, and keep the same vertical height. Then check the distance from the mirror line matches the original highlight's distance.
What if the object does not touch the mirror?
Leave a gap behind the mirror equal to the gap in front. The reflected object still sits at the same perpendicular distance behind the mirror as the object sits in front.
Can letter shapes differ in the reflection?
Yes, valid stylistic differences are allowed. Use the baseline-to-midline x-height convention and check that the reflected letter's height matches and its left-right orientation is reversed.