Free original lessons
Small Stars Drawing: Point-Spacing Construction
Learn to draw small five-point stars by spacing points evenly, then connecting them in a consistent order. Includes a worked example, practice tasks, and a simple rubric.
Free lesson
Four exercises
Worked answers
Object Drawing Lessons
Small stars are easier to draw when you build them from points instead of trying to sketch the outline in one motion. This lesson teaches a point-spacing construction: choose a center, mark five points around it at equal angular spacing, then connect them in a fixed order. The method works at any small size and helps you keep the star balanced. You will use a simple convention for point placement and a rubric that allows valid stylistic variation. All measurements are hypothetical examples; measure your own paper and tools if you adapt the method.
Practice materials: Printable downloads are not available for this lesson yet. Use the instructions and four exercises below.
Reference illustration
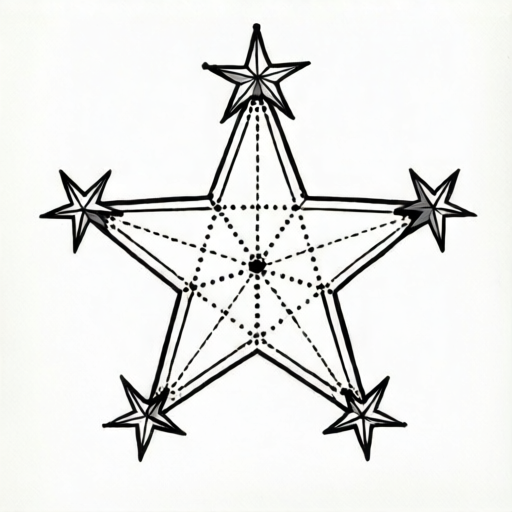
Use the stated measurements and conventions for each exercise.
Why point spacing matters
A five-point star looks balanced when its outer points are spaced evenly around a center. If you place points by eye without a spacing rule, the star often leans or has one long arm. Point-spacing construction gives you a repeatable sequence: mark a center, choose a radius, place five outer points at equal angular intervals, then connect them in a skip-one order.
For small stars, precision matters more than for large ones because small errors are proportionally bigger. A spacing guide helps you keep the arms similar in length and the angles similar in size. The goal is not a perfect geometric star every time; the goal is a controlled construction you can repeat and adjust.
- Mark a center point lightly.
- Choose a small radius, for example 1.5 cm, and label it as a hypothetical value.
- Place five outer points around the center at equal angular spacing.
- Connect the points in a skip-one order to form the star outline.
- Check symmetry and adjust lightly before finalizing.
The five-point spacing sequence
Use a consistent convention: number the outer points 1 through 5 in order around the center. To draw the star outline, connect 1 to 3, 3 to 5, 5 to 2, 2 to 4, and 4 to 1. This skip-one order creates the familiar five-point star shape. The inner intersections form automatically; you do not need to mark them first.
Angular spacing is the key. If you imagine a clock face, five points at equal spacing are 72 degrees apart. You can use a simple paper guide or a protractor to mark the angles. For small stars, a light pencil mark at each point is enough. Keep the marks small so they do not clutter the drawing.
- Label the five outer points 1 to 5 clockwise.
- Connect 1 to 3 with a light line.
- Connect 3 to 5.
- Connect 5 to 2.
- Connect 2 to 4.
- Connect 4 to 1 and check the shape.
Sizing and practice grids
Small stars can range from about 1 cm to 3 cm across. Choose a radius that fits your practice grid. A grid with 1 cm squares helps you compare sizes. For example, a star with a 1.5 cm radius fits inside a 3 cm by 3 cm square, which is a hypothetical example you can adjust.
Practice at three sizes: small, medium, and slightly larger within the small-star range. Keep the same point-spacing sequence at each size. The construction should feel similar even when the radius changes. Use light lines first, then darken the final outline.
- Draw a 1 cm grid on practice paper.
- Mark a center in one square.
- Use a 1 cm radius for the smallest star.
- Repeat with a 1.5 cm radius.
- Repeat with a 2 cm radius and compare spacing.
Checking and correcting
After drawing, check that the five outer points are roughly the same distance from the center. Check that the angles between neighboring points are similar. If one arm looks longer, adjust the point slightly rather than redrawing the whole star. Small corrections are normal.
Use a simple rubric: equal spacing, consistent arm length, clean connections, and a recognizable five-point shape. Valid alternatives include slightly rounded points or uneven line weight, as long as the spacing construction is clear. The rubric does not require a single universal style.
- Measure the distance from center to each outer point.
- Compare the five distances; they should be close.
- Check the skip-one connection order.
- Adjust the least consistent point.
- Finalize with a darker line if desired.
Worked example
Draw a small five-point star with a 1.5 cm radius using the point-spacing method. Describe each step and the final check.
Worked answer
Mark a center. Place five outer points at equal spacing around the center, each 1.5 cm away. Label them 1 to 5 clockwise. Connect 1 to 3, 3 to 5, 5 to 2, 2 to 4, and 4 to 1. Check that all five outer points are about 1.5 cm from the center and that the connections follow the skip-one order. The star should fit inside a 3 cm by 3 cm square, which is a hypothetical example.
Four practice exercises
Exercise 1
Draw a small star with a 1 cm radius. List the connection order you used.
Show answer and check
Connection order: 1-3, 3-5, 5-2, 2-4, 4-1.
Why: The skip-one order creates the five-point outline. A 1 cm radius keeps the star small.
Check: Measure the five center-to-point distances; they should be close to 1 cm. Confirm the connection order.
Exercise 2
A student places five points at equal spacing but connects 1-2, 2-3, 3-4, 4-5, 5-1. What shape results, and how should they fix it?
Show answer and check
The result is a pentagon. Fix by reconnecting in the skip-one order: 1-3, 3-5, 5-2, 2-4, 4-1.
Why: Connecting neighboring points makes a closed five-sided polygon without star arms.
Check: Look for five outer points and five inner intersections; a pentagon has no inner intersections.
Exercise 3
Draw two small stars: one with a 1.5 cm radius and one with a 2 cm radius. Compare their spacing.
Show answer and check
Both should use the same skip-one connection order. The larger star has longer arms but similar angular spacing.
Why: Changing the radius changes size, not the spacing rule.
Check: Check that both stars have five outer points and the same connection order. Measure radii to confirm the size difference.
Exercise 4
You draw a small star and one arm looks longer. Describe a correction that does not redraw the whole star.
Show answer and check
Lightly erase or adjust the outer point of the long arm toward the correct radius, then reconnect the affected lines.
Why: Small spacing errors are easier to fix at the point than by redrawing everything.
Check: Measure the adjusted point's distance from center and compare it with the other four points.
Common mistakes
- Placing points by eye without a spacing rule. Use equal angular spacing, such as 72 degrees, or a paper guide with five marks.
- Connecting points in the wrong order. Follow the skip-one sequence: 1-3, 3-5, 5-2, 2-4, 4-1.
- Making the radius too large for a small star. Keep the radius within the small-star range, for example 1 to 2 cm as a hypothetical guide.
- Darkening lines before checking symmetry. Draw lightly first, check spacing, then darken the final outline.
Self-check rubric
- Five outer points are placed with roughly equal angular spacing.
- Distances from center to outer points are similar.
- Connections follow the skip-one order.
- The star is recognizable and fits the small-star size range.
- Valid stylistic alternatives are accepted if the spacing construction is clear.
Questions and answers
Do I need a protractor?
Not necessarily. You can use a paper guide with five evenly spaced marks. A protractor helps if you want to check the 72-degree spacing.
Can I draw stars without measuring?
Yes, but the point-spacing method is more consistent. You can estimate spacing by eye after practicing the sequence.
What size counts as a small star?
For this lesson, small stars are roughly 1 cm to 3 cm across. Adjust based on your paper and purpose.
Why skip one point when connecting?
The skip-one order creates the five-point star outline. Connecting neighbors would make a pentagon instead.