Free original lessons
Draw a Snow Globe: Base, Dome, and Interior Scene
Learn to construct a snow globe with a stable base, clear glass dome, and a small interior scene using simple guides and checkable steps.
Free lesson
Four exercises
Worked answers
Object Drawing Lessons
A snow globe is a compact object with three clear parts: a base that sits on the table, a glass dome that rises from the base, and a small scene inside the dome. This lesson shows how to place those parts in proportion, how to draw the dome so it reads as glass, and how to fit a simple interior scene without crowding. You will use a convention for line weight and a rubric that allows different lettering and scene styles. All measurements are hypothetical examples; measure your own paper and tools before drawing.
Practice materials: Printable downloads are not available for this lesson yet. Use the instructions and four exercises below.
Reference illustration
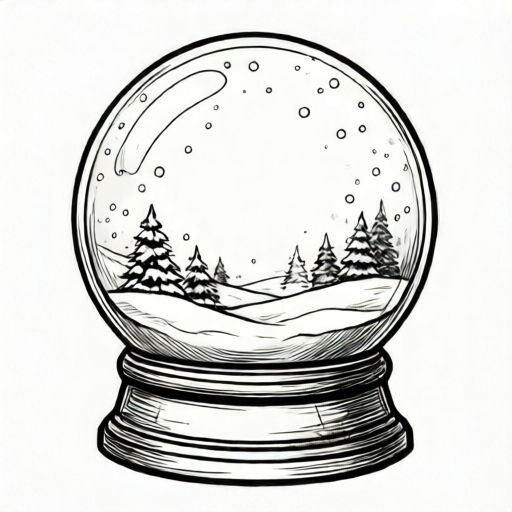
Use the stated measurements and conventions for each exercise.
Set the base and dome proportions
Start by deciding the overall height of the snow globe on your page. A common proportion is a base about one third of the total height and a dome about two thirds, but you can adjust this. Draw a light vertical center line. Mark the bottom of the base and the top of the dome. Then mark the line where the base meets the dome. Use a horizontal ellipse for the base top and a curved arc for the dome. Keep the ellipse shallow so the base looks like a solid object, not a flat circle.
The dome should spring from the widest part of the base. If the base top ellipse is too narrow, the dome will look pinched. If it is too wide, the dome will look like a balloon. A practical check is to compare the dome width at its widest point with the base width: they can be equal or the dome can be slightly narrower. For the base top ellipse, use a simple shallow-ellipse check: the ellipse depth (front-to-back distance on the page) should be less than one quarter of its width. For example, if the base width is 8 cm, keep the ellipse depth below 2 cm, such as 1.5 cm. For example, you might choose a base width of 8 cm and a dome width of 7 cm on a 15 cm tall drawing; treat these as hypothetical examples and measure your own paper.
- Draw a light vertical center line and mark the total height.
- Mark the base height and the dome height along the center line.
- Draw a shallow ellipse for the top of the base.
- Draw a curved arc from the left and right edges of the ellipse to the top of the dome.
- Check that the dome curve is smooth and that the base ellipse is not too deep.
Build the base as a solid form
The base is usually a cylinder or a truncated cone. Draw the front curve of the base bottom as a shallow arc that mirrors the top ellipse. Connect the sides with straight or slightly tapered lines. Add a thin rim where the base meets the dome; this rim helps separate glass from solid. Keep the rim line consistent in thickness. If you want a decorative band, place it between the bottom and the rim, but keep it simple so it does not compete with the interior scene.
Use a convention for line weight: structural lines such as the base outline and dome edge are medium weight; interior scene details are light; the final contour can be slightly darker. This convention is not a universal rule, but it makes the drawing readable. Check the base by imagining it from the side: the bottom arc should curve downward at the front, and the top ellipse should curve upward at the back. If both curves look the same, the base will look flat.
- Draw the bottom front arc of the base, matching the top ellipse width.
- Connect the left and right sides from the bottom arc to the top ellipse.
- Add a thin rim line at the top of the base.
- Optional: add one simple decorative band, keeping it parallel to the rim.
- Check that the base looks solid by comparing the top and bottom curves.
Place the interior scene inside the dome
The interior scene sits on the base top and must fit inside the dome curve. First, draw a light horizontal line just above the base rim to represent the floor of the scene. Then choose one main object, such as a small house, a tree, or a figure, and place it near the center. Keep the object smaller than the dome width at that height. A useful guide is to leave at least one finger-width of empty space between the scene and the dome edge on both sides. This empty space helps the glass read as transparent.
Add one or two supporting shapes, such as a small mound of snow or a second tree, but avoid filling every gap. The scene should look like a small world, not a crowded shelf. Use light lines for scene details so the dome edge remains the strongest contour. If you draw a house, make its roof slope follow the dome curve loosely; do not force it. Check the scene by covering the dome with your hand: the scene should still make sense as a small object sitting on a base.
- Draw a light floor line just above the base rim.
- Place one main scene object near the center, leaving space on both sides.
- Add one or two small supporting shapes, keeping them low.
- Use light lines for scene details and medium lines for the dome edge.
- Check that the scene fits inside the dome curve without touching it.
Make the dome read as glass
Glass is shown by a clear outline, a few highlight lines, and a sense of transparency. Draw the dome outline as a smooth arc from the base rim to the top. Add a thin highlight line along one side, following the dome curve, and a small curved highlight near the top. Do not shade the whole dome; instead, leave most of it empty so the interior scene remains visible. A second faint arc inside the dome can suggest thickness, but keep it subtle.
Check the dome by looking at the scene through it: the scene lines should not be interrupted by heavy shading. If the dome looks like a solid ball, erase some shading or reduce the number of highlight lines. The dome top should be a smooth rounded arc, not a sharp point; if you add a finial, draw it as a small separate shape on top of the dome and keep it simple. As a convention, keep the total length of all highlight lines under one third of the dome height; this is a chosen guideline, not a universal rule, and it helps keep most of the dome clear so the scene shows through.
- Draw the dome outline as a smooth arc from the base rim to the top.
- Add one side highlight and one small top highlight, following the curve.
- Keep most of the dome unshaded so the scene shows through.
- Optional: add a faint inner arc for glass thickness.
- Check that the dome does not look solid and that the scene remains visible.
Worked example
Draw a snow globe on a 15 cm tall page area. Use a base height of 5 cm and a dome height of 10 cm. The base width is 8 cm and the dome width at the rim is 7 cm. Place a small house inside with a roof peak 3 cm above the base rim. Describe the steps and checks.
Worked answer
Draw a vertical center line 15 cm tall. Mark the bottom at 0 cm, the base rim at 5 cm, and the dome top at 15 cm. Draw a shallow ellipse at 5 cm with width 8 cm. Draw the base sides down to a bottom arc at 0 cm. Draw the dome arc from the rim edges (7 cm apart) to the top at 15 cm. Draw a light floor line at 5.5 cm. Place the house center at the middle, with its base on the floor line and roof peak at 8.5 cm (3 cm above the rim). Check that the house width is less than the dome width at 8.5 cm; if the dome width there is about 6 cm, keep the house under 4 cm wide. Add one small tree to the side, leaving at least 1 cm gap to the dome edge. Add one side highlight and one top highlight on the dome. Check that the base top ellipse is shallow and that the dome is not shaded solid.
Four practice exercises
Exercise 1
A snow globe drawing has a total height of 12 cm. The base is 4 cm tall and the dome is 8 cm tall. The base width is 6 cm and the dome width at the rim is 5 cm. Where should the base rim line be placed, and what is the dome height above the rim?
Show answer and check
The base rim line is at 4 cm from the bottom. The dome height above the rim is 8 cm, reaching 12 cm total.
Why: Total height equals base height plus dome height: 4 + 8 = 12 cm. The rim is at the top of the base, so it is 4 cm above the bottom. The dome extends from 4 cm to 12 cm, which is 8 cm.
Check: Add the base and dome heights and compare with the total. Mark the rim at 4 cm on a vertical line and confirm the dome top is 8 cm above it.
Exercise 2
Inside a dome, the floor line is 1 cm above the base rim. The dome width at 4 cm above the floor line is 6 cm. You want to place a house whose width is 3 cm. Will the house fit with at least 1 cm empty space on each side at that height?
Show answer and check
Yes. The house is 3 cm wide, leaving 1.5 cm on each side if centered, which is at least 1 cm.
Why: Available width is 6 cm. Subtract the house width: 6 - 3 = 3 cm total empty space. Split equally, each side gets 1.5 cm. Since 1.5 cm is greater than 1 cm, the house fits with the required gap.
Check: Center the house and measure the gap on each side. Confirm each gap is at least 1 cm. If the house is not centered, check the smaller gap.
Exercise 3
A base top ellipse is drawn 8 cm wide and 2 cm deep. The dome rim is also 8 cm wide. Using the shallow-ellipse check from the lesson (depth must be less than one quarter of the width), is this ellipse shallow enough? If not, suggest a depth that passes.
Show answer and check
No, it is not shallow enough under the check. One quarter of 8 cm is 2 cm, and the depth equals 2 cm, so it does not satisfy the requirement that depth be less than one quarter of width. A depth below 2 cm, such as 1.5 cm, passes.
Why: The check compares depth to width. 8 divided by 4 is 2. A depth of 2 cm equals one quarter of the width, which fails the strict 'less than one quarter' condition. Equality is not enough; the depth must be smaller than 2 cm to pass. A depth such as 1.5 cm makes the base look more solid and clearly shallow.
Check: Measure the ellipse width and depth. Divide the width by 4. If the depth is greater than or equal to that value, flatten the ellipse until the depth is strictly less than one quarter of the width.
Exercise 4
You draw a dome with a side highlight and a top highlight. The side highlight is 2 cm long and the top highlight is 1 cm long. The dome outline is 10 cm tall. Is the total highlight length less than one third of the dome height?
Show answer and check
Yes. Total highlight length is 3 cm. One third of 10 cm is about 3.33 cm. Since 3 cm is less than 3.33 cm, the highlights are within the limit.
Why: Add the highlight lengths: 2 + 1 = 3 cm. Divide the dome height by 3: 10 / 3 is about 3.33 cm. Compare 3 cm with 3.33 cm. The highlights are short enough to keep the dome mostly clear.
Check: Measure the highlight lines and add them. Measure the dome height and divide by 3. Confirm the total highlight length is less than that value.
Common mistakes
- Drawing the base top as a deep ellipse, making the base look like a bowl. Flatten the ellipse until it looks like a shallow plate. Compare the top and bottom curves of the base; they should curve in opposite directions.
- Making the dome too narrow at the base, so it looks pinched. Widen the dome where it meets the base rim. The dome width at the rim can equal or be slightly less than the base width.
- Filling the dome with too many scene objects, so the glass is not readable. Keep one main object and one or two small supports. Leave empty space between the scene and the dome edge.
- Shading the entire dome, making it look like a solid ball. Use only a few highlight lines and leave most of the dome clear. Erase heavy shading if the scene becomes hidden.
Self-check rubric
- Base is drawn as a solid form with a shallow top ellipse (depth less than one quarter of its width) and a bottom arc that curves oppositely.
- Dome springs from the base rim, is smooth, and is not pinched or balloon-like.
- Interior scene has one main object and fits inside the dome with visible empty space.
- Dome reads as glass: clear outline, few highlights, most of the dome unshaded.
- Line weight convention is used consistently: medium for structure, light for scene details.
- Valid alternatives are accepted: different scene objects, different base shapes, and different highlight placements are allowed if the checks pass.
Questions and answers
Do I need to use exact measurements?
No. The numbers in this lesson are hypothetical examples. Measure your own paper and choose proportions that fit. The checks are about relationships, such as the dome being narrower than the base, not about fixed centimeters.
Can the interior scene be something other than a house or tree?
Yes. Any small object that fits inside the dome works, such as a figure, an animal, or an abstract shape. Keep one main object and leave space around it so the glass reads clearly.
How do I know if my dome looks like glass?
Cover the dome area with your hand and look at the scene. If the scene is still visible and the dome outline is clear but not heavy, it likely reads as glass. If the dome looks solid, reduce shading and add only one or two highlights.
What line weight convention should I use?
Use medium lines for the base outline and dome edge, light lines for interior scene details, and slightly darker lines for the final contour if you want. This is a convention, not a universal rule; you can adjust it as long as the drawing stays readable.