Free original lessons
Spiral Swirl Line Drawing: Direction Arrows and Control Practice
Learn to draw controlled spiral swirls with clear direction arrows. Practice tight, loose, and alternating spirals using simple guides and self-checks.
Free lesson
Four exercises
Worked answers
Object Drawing Lessons
Spiral swirls build steady hand control and spatial awareness. This lesson teaches you to draw spirals with intentional direction, using arrows to mark the path. You will compare tight and loose spacing, alternate directions, and check your line quality. All practice uses a simple convention: gap width is the distance between successive turns of the spiral, measured from the center of one line to the center of the next. No special tools are required beyond paper, pencil, and a ruler. The goal is not a perfect single answer but consistent, readable line control.
Practice materials: Printable downloads are not available for this lesson yet. Use the instructions and four exercises below.
Reference illustration
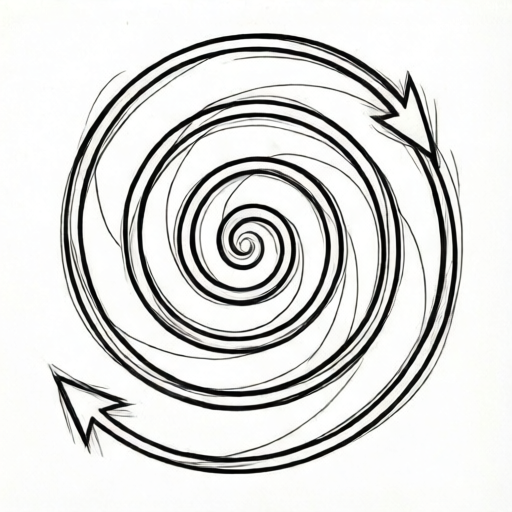
Use the stated measurements and conventions for each exercise.
Understanding Spiral Direction and Spacing
A spiral is a curve that winds around a center point, either inward or outward. Direction arrows show whether the line travels clockwise or counterclockwise. Before drawing, decide the starting point and the intended rotation. Keep your pencil moving smoothly; speed is less important than even pressure.
Spacing between loops controls the spiral's character. Tight spirals have small gaps between successive turns, while loose spirals have wider gaps. Alternating spirals switch direction after each full turn, which tests your ability to reverse smoothly without lifting the pencil.
- Mark a center dot and choose clockwise or counterclockwise.
- Draw the first loop slowly, keeping the gap even.
- Add a small arrow at the end of each loop to show direction.
- Compare your gap width to a reference gap you drew earlier.
Using Direction Arrows as Guides
Direction arrows are short line segments with arrowheads placed along the spiral path. They do not need to be large; a 1 cm arrow is enough. Place arrows at the start, middle, and end of the spiral to confirm the rotation stays consistent.
If an arrow points the wrong way, correct the next loop rather than erasing the whole spiral. This builds recovery skills. Arrows also help a reader follow your spiral without guessing the intended direction.
- Draw the spiral first, then add arrows at three points.
- Check that every arrowhead points along the curve, not across it.
- If arrows conflict, redraw only the affected loop.
- Label the spiral as tight, loose, or alternating.
Practicing Tight, Loose, and Alternating Spirals
Tight spirals use gaps about the width of your pencil lead. Loose spirals use gaps about two to three times that width. Alternating spirals change rotation after each complete turn, so the arrow direction flips at each turn.
Use a blank spiral guide: a faint circle or square with a center dot. Draw inside the guide to keep the spiral contained. After each spiral, measure the largest gap and the smallest gap with a ruler; note the difference. A smaller difference means more even control.
- Draw one tight spiral with clockwise direction and three arrows.
- Draw one loose spiral with counterclockwise direction and three arrows.
- Draw one alternating spiral that switches direction after each turn.
- Measure gap differences and record them for comparison.
Self-Checking Line Quality and Direction
Check three things: direction consistency, gap evenness, and line continuity. Direction consistency means all arrows agree. Gap evenness means the largest gap is less than twice the smallest gap. Line continuity means the pencil did not lift unintentionally.
Measure gaps along a straight line through the center dot, from the center of one line to the center of the next. Record the largest and smallest gaps. If the largest gap is less than twice the smallest gap, the spacing passes. If not, note which loop drifted and redraw only that loop.
- Place a ruler across the spiral to compare gaps.
- Trace each arrow with your finger to confirm direction.
- Look for sudden jumps or lifts in the line.
- Score using the rubric and note one improvement for the next attempt.
Worked example
Draw a clockwise tight spiral with three direction arrows. The center dot is at the middle of a 6 cm square guide. Use gaps about 0.5 cm wide. After drawing, measure the largest and smallest gaps.
Worked answer
A clockwise spiral starting at the center and winding outward. Arrows at the first loop, middle loop, and outer end all point clockwise. The largest gap is 0.7 cm and the smallest is 0.5 cm. The difference is 0.2 cm, which is less than twice the smallest gap, so gap evenness passes. All arrows agree, so direction consistency passes. The line is continuous, so continuity passes. Label: tight, clockwise.
Four practice exercises
Exercise 1
Draw a counterclockwise loose spiral inside a 5 cm circle guide. Use gaps about 1 cm wide. Add three arrows. Measure the largest and smallest gaps and state whether gap evenness passes.
Show answer and check
A counterclockwise spiral with gaps near 1 cm. Example measurement: largest gap 1.3 cm, smallest gap 0.9 cm. Twice the smallest gap is 1.8 cm, and 1.3 cm is less than 1.8 cm, so gap evenness passes. All arrows point counterclockwise.
Why: Loose spacing means wider gaps. The check compares the largest gap to twice the smallest gap. If the largest is less than twice the smallest, the spacing is acceptably even.
Check: Measure three gaps with a ruler. Confirm every arrowhead follows the counterclockwise curve. Compare the largest gap to twice the smallest gap; the spiral passes if the largest is less than twice the smallest.
Exercise 2
Draw an alternating spiral that starts clockwise for one full turn, then switches to counterclockwise for one full turn, then back to clockwise. Place an arrow at each turn. Label the spiral.
Show answer and check
A spiral with three marked turns. First turn arrows point clockwise, second turn arrows point counterclockwise, third turn arrows point clockwise. Label: alternating. Direction consistency passes because each arrow matches its turn.
Why: Alternating spirals require a direction change at each full turn. Arrows must flip at the turn points, not mid-loop. The label confirms the intended pattern.
Check: Trace each turn with a finger. Confirm the arrow direction flips exactly at each turn point. Check that the label says alternating.
Exercise 3
Draw two tight spirals side by side: one clockwise and one counterclockwise. Use the same center dot spacing and gap width. Add two arrows to each. Compare the gap evenness of both.
Show answer and check
Two tight spirals with matching gap widths. Example: clockwise spiral largest gap 0.6 cm, smallest 0.4 cm; counterclockwise spiral largest 0.7 cm, smallest 0.5 cm. Both pass because each largest gap is less than twice its smallest gap. Arrows match each rotation.
Why: Drawing both directions tests symmetry of control. The check is the same for each spiral: the largest gap must be less than twice the smallest gap. Matching gap widths show consistent pressure.
Check: Measure gaps in both spirals. Confirm arrows point in opposite rotations. Verify each spiral passes the gap evenness rule independently by checking that its largest gap is less than twice its smallest gap.
Exercise 4
Draw a spiral that starts at the outside and winds inward, counterclockwise, with loose spacing. Add three arrows pointing inward along the path. Measure the total number of full turns and the largest gap.
Show answer and check
An inward counterclockwise spiral with three inward-pointing arrows. Example: three full turns and a largest gap of 1.2 cm. Arrows follow the inward path. Direction consistency passes because all arrows point counterclockwise inward.
Why: Starting outside and winding inward is a valid alternative. Arrows must point along the inward path, not outward. Counting full turns confirms the spiral is complete.
Check: Count full turns by tracing from the outer end to the center. Confirm each arrow points inward and counterclockwise. Measure the largest and smallest gaps and confirm the largest is less than twice the smallest.
Common mistakes
- Drawing arrows that point across the spiral instead of along it. Redraw each arrow so its shaft follows the curve and the arrowhead continues the rotation.
- Making gaps that grow suddenly wider after the first loop. Slow down and compare each new gap to the previous one before continuing.
- Switching direction without marking the change with an arrow. Place a clear arrow at the turn point and label the spiral as alternating.
- Lifting the pencil mid-loop and leaving a visible break. Practice short continuous segments first, then join them without lifting.
Self-check rubric
- Direction consistency: all arrows follow the same rotation (3 points).
- Gap evenness: largest gap is less than twice the smallest gap (3 points).
- Line continuity: no unintended lifts or breaks (3 points).
- Labeling: spiral type and direction are clearly marked (1 point).
- Valid alternatives: inward or outward start, clockwise or counterclockwise, and any letter style are accepted if arrows match the chosen path.
Questions and answers
Do I need a compass to draw spirals?
No. A center dot and a steady hand are enough. A compass can help with the first loop but is not required.
How many arrows should each spiral have?
Three arrows are enough: start, middle, and end. More arrows are fine if they stay consistent.
How do I measure gap width between turns?
Measure from the center of one line to the center of the next line along a straight line through the center dot. Record the largest and smallest gaps; if the largest is less than twice the smallest, the spacing is acceptably even.
Can I start from the outside and wind inward?
Yes. Choose one direction and keep all arrows consistent with that choice.