Free original lessons
Draw a Water Bottle: Cap, Body Contour, and Label Placement
Learn to draw a water bottle with a defined cap, neck, tapered body, base, and a label box placed by measured proportions.
Free lesson
Four exercises
Worked answers
Object Drawing Lessons
This lesson teaches a repeatable method for drawing a water bottle: establish a vertical axis, size the cap and neck, taper the body, close the base, then place a label box using simple proportional checks. The convention is that x-height means baseline to midline, and letter styles may vary, so label lettering is judged by placement and legibility rather than one fixed alphabet. All measurements below are hypothetical examples; measure your own paper and tools before drawing.
Practice materials: Printable downloads are not available for this lesson yet. Use the instructions and four exercises below.
Reference illustration
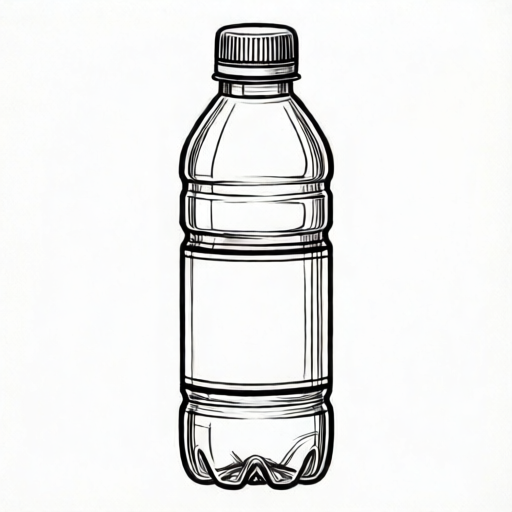
Use the stated measurements and conventions for each exercise.
Set the axis and overall height
Begin with a light vertical axis. Choose a total bottle height in whole units, for example 12 units, and mark the top and bottom. This axis keeps the cap, neck, body, and base aligned.
Divide the height into three zones: cap and neck, main body, and base. A hypothetical split is 2 units for cap and neck, 8 units for body, and 2 units for base. Adjust the split to match your reference bottle, but keep the units consistent.
- Draw a vertical axis and mark top and bottom.
- Mark zone boundaries at 2, 10, and 12 units from the top.
- Label the zones lightly: cap/neck, body, base.
Draw the cap and neck
The cap is a short cylinder. Its width should be slightly wider than the neck. Using the axis, draw two horizontal lines for the cap top and cap bottom, then connect with vertical sides.
The neck sits below the cap and narrows slightly before the body begins. Keep the neck centered on the axis. A common error is making the neck wider than the cap; check that the cap overhangs the neck on both sides.
- Mark cap width symmetrically about the axis.
- Draw cap top and bottom horizontals.
- Draw neck sides tapering inward toward the body.
- Check cap overhang on both sides.
Shape the body contour and base
The body usually bulges slightly and then tapers toward the base. Draw the left and right contours as smooth curves that mirror each other. Use the axis to compare distances at several heights.
Close the base with a shallow curve or flat line, depending on the bottle. Add a base shadow line only if it helps show the bottom edge. Keep the base width narrower than the widest body point.
- Mark the widest body point on both sides.
- Draw matching contours from neck to base.
- Close the base with a shallow curve.
- Compare left and right widths at three heights.
Place the label box
A label box is a rectangle or gentle curve that follows the body contour. Place it in the middle third of the body height. Its width should be less than the body width at that height, leaving a margin on both sides.
Use the x-height convention for any lettering: baseline to midline. Letter styles may vary, so focus on consistent height and spacing. Check that the label box does not cross the neck or base zones.
- Mark the middle third of the body height.
- Draw a label box with equal side margins.
- Add lettering using baseline-to-midline x-height.
- Check that the box stays within the body zone.
Worked example
Draw a water bottle 12 units tall with a 2-unit cap and neck zone, an 8-unit body, and a 2-unit base. Place a label box in the middle third of the body with equal side margins.
Worked answer
Axis drawn; zone marks at 2, 10, and 12 units. Cap width 3 units, neck width 2 units, widest body 5 units, base 3 units. Label box from 5 to 8 units height, width 3 units, centered with 1-unit margins. Lettering uses baseline-to-midline x-height.
Four practice exercises
Exercise 1
A bottle is 10 units tall. The cap and neck zone is 2 units, the body is 6 units, and the base is 2 units. Mark the zone boundaries from the top.
Show answer and check
Boundaries at 2 units and 8 units from the top; base zone runs from 8 to 10 units.
Why: Add the first two zones: 2 + 6 = 8, so the body ends at 8 units. The base occupies the remaining 2 units.
Check: Confirm that 2 + 6 + 2 = 10 units and that each boundary is measured from the same top mark.
Exercise 2
A cap is 4 units wide and the neck is 3 units wide. How much overhang should appear on each side if the cap is centered?
Show answer and check
0.5 units on each side.
Why: The cap is 1 unit wider than the neck. Centering splits the difference equally: 1 ÷ 2 = 0.5 units per side.
Check: Add the two overhangs to the neck width: 0.5 + 3 + 0.5 = 4 units, matching the cap width.
Exercise 3
A body is 8 units tall. You want a label box in the middle third. Give the start and end heights from the top of the body.
Show answer and check
Start at 2.67 units and end at 5.33 units from the top of the body, using rounded values.
Why: One third of 8 is about 2.67. The middle third runs from 2.67 to 5.33 units.
Check: Check that the box height is about 2.67 units and that the top and bottom margins are each about 2.67 units.
Exercise 4
At the label height, the body is 6 units wide. You want 1-unit margins on each side. What label width fits?
Show answer and check
4 units.
Why: Subtract both margins from the body width: 6 − 1 − 1 = 4 units.
Check: Add the margins back: 1 + 4 + 1 = 6 units, matching the body width.
Common mistakes
- Cap narrower than the neck. Widen the cap so it overhangs the neck on both sides.
- Body contours not mirrored. Measure left and right distances from the axis at three heights and adjust.
- Label box crossing the neck or base. Move the box into the middle third of the body and recheck margins.
- Inconsistent units when dividing height. Use one unit for all zone marks and label them lightly.
Self-check rubric
- Vertical axis is present and zones are marked consistently.
- Cap overhangs the neck on both sides.
- Body contours mirror each other at three checked heights.
- Base is closed and narrower than the widest body point.
- Label box sits in the middle third of the body with equal side margins.
- Lettering uses baseline-to-midline x-height and is legible; alternative letter styles are acceptable.
Questions and answers
Do I need a ruler?
A ruler helps with zone marks, but you can use a folded paper strip as a consistent unit.
Can the label be curved?
Yes. A gentle curve that follows the body contour is valid if it stays within the body zone and keeps equal side margins.
What does x-height mean here?
X-height is the distance from baseline to midline for lowercase letters. Letter styles vary, so judge consistency rather than one fixed shape.
How do I check symmetry without erasing?
Compare distances from the axis at the cap, widest body point, and base. Adjust the side that is farther from the axis.