Free original lessons
Star Tattoo Drawing: Point Geometry and Outline Design
Plan a star tattoo using point geometry, then refine a clean outline. Includes conventions, worked example, practice tasks, and a validation plan.
Free lesson
Four exercises
Worked answers
Object Drawing Lessons
This guide teaches a repeatable method for drawing a star tattoo design. You will place points on a circle, connect them in a chosen order, and convert the construction into a tattoo-ready outline. The method is geometric, not stylistic: it helps you control symmetry, proportion, and line weight before committing to a final design. Because tattoo lettering and line conventions vary, this guide defines an explicit convention for point placement and outline weight so that checks are fair and alternatives remain valid. All measurements are hypothetical examples unless you measure your own equipment. The resources described here are planned, not yet built.
Practice materials: Printable downloads are not available for this lesson yet. Use the instructions and four exercises below.
Reference illustration
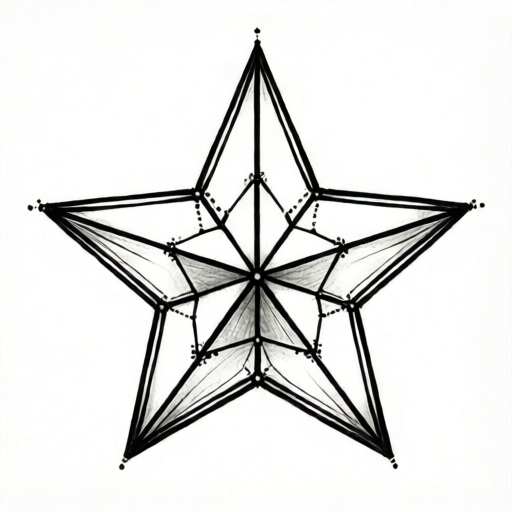
Use the stated measurements and conventions for each exercise.
Define the point-geometry convention
A star tattoo design begins with a center point and a radius. Mark the center, then draw a light circle at the chosen radius. Place equally spaced points around the circle; for a five-point star, use five points separated by 72 degrees. Number them clockwise from the top. The order of connection determines whether the star is a simple pentagram or a filled five-point star outline.
Use a sharp pencil and a separate eraser. Keep construction lines lighter than the final outline. Measure the radius with a ruler and record it in millimeters. If you use a compass, check that the pivot does not drift. The convention for this guide is: center point C, radius r, points P1 through P5 clockwise, with P1 at the top. Any rotation of the whole design is acceptable as long as the relative spacing is preserved.
- Mark center C and draw a light circle of radius r.
- Place P1 at the top of the circle, then P2 through P5 clockwise at 72-degree intervals.
- Connect points in the chosen order with light guide lines.
- Check that all five points lie on the circle and that adjacent angular spacing is equal.
Build the star outline from the points
For a five-point star outline, connect P1 to P3, P3 to P5, P5 to P2, P2 to P4, and P4 to P1. This creates the classic pentagram. To make a filled star silhouette, connect each outer point to the two inner intersection points created by the pentagram, then trace the outer boundary. Keep the outline continuous and avoid double lines.
Outline weight is a design choice. A common tattoo outline uses a consistent line weight around the entire star. Measure your pen or marker line width on scrap paper and label the value as a hypothetical example, such as 0.3 mm. Do not assume a printer tolerance; measure the actual tool. If you plan a double outline, keep the gap even and check it at three locations.
- Draw the pentagram guide using the five points.
- Mark the five inner intersections where guide lines cross.
- Trace the outer silhouette by connecting each outer point to the adjacent inner intersections.
- Erase construction lines only after the outline is consistent.
Adapt the design for tattoo placement
A tattoo design must fit the intended body area. Choose a bounding box and keep the star inside it. For a forearm design, a hypothetical bounding box of 60 mm by 60 mm is a reasonable starting example, but measure the actual placement area. Rotate the star so one point aligns with the body's long axis or a chosen reference line.
Check symmetry by folding a tracing paper copy or by measuring distances from the center to each outer point. Valid alternatives include rotating the star, changing the radius, or using a different connection order, provided the point geometry remains consistent and the outline is clean. The rubric rewards controlled geometry and clear line quality, not a single universal shape.
- Draw a bounding box for the intended placement.
- Center the star and rotate it to the chosen orientation.
- Measure center-to-point distances and record them.
- Confirm the outline stays inside the bounding box with even margins.
Worked example
Draw a five-point star tattoo design with center C, radius 30 mm, P1 at the top, and a single continuous outline. Use the pentagram connection order and keep the design inside a 70 mm by 70 mm bounding box.
Worked answer
Mark C at the box center. Draw a light circle of radius 30 mm. Place P1 at the top, then P2 through P5 clockwise at 72-degree intervals. Connect P1-P3-P5-P2-P4-P1 to form the pentagram. Mark the five inner intersections. Trace the outer silhouette by connecting each outer point to the adjacent inner intersections. Check that all outer points are 30 mm from C and that the outline stays inside the 70 mm box with at least 5 mm margins. Erase guides after the outline is consistent.
Four practice exercises
Exercise 1
A five-point star has center C and radius 20 mm. P1 is at the top. What is the straight-line distance from C to P3 if P3 is placed correctly on the circle?
Show answer and check
20 mm.
Why: Every outer point of the star lies on the circle, so the distance from the center to any outer point equals the radius.
Check: Measure C to P3 with a ruler; it should match the 20 mm radius within 1 mm.
Exercise 2
You place five points on a circle at equal spacing. What is the angle between adjacent points in degrees?
Show answer and check
72 degrees.
Why: A full circle is 360 degrees; dividing by five equal gaps gives 360 divided by 5 equals 72.
Check: Measure two adjacent central angles with a protractor; each should be 72 degrees within 2 degrees.
Exercise 3
A star design must fit inside a 50 mm by 50 mm bounding box. The center is at the box center and the radius is 22 mm. Does the star fit if one point is at the top and the design is not rotated?
Show answer and check
No, it does not fit safely.
Why: The top point reaches 22 mm above the center. The box half-height is 25 mm, leaving only 3 mm margin. The side points also reach 22 mm from center, leaving 3 mm margins. This is too tight for a clean outline and even margins.
Check: Measure from the center to the box edge (25 mm) and subtract the radius (22 mm); the remaining margin is 3 mm, which is less than the planned 5 mm minimum.
Exercise 4
You draw a pentagram guide and then trace the outer silhouette. How many inner intersection points do you mark before tracing the silhouette?
Show answer and check
Five inner intersection points.
Why: The pentagram connection order creates five crossing points inside the star. Each outer point connects to two adjacent inner intersections when tracing the silhouette.
Check: Count the crossings where guide lines intersect inside the star; there should be five distinct points.
Common mistakes
- Placing points by eye without checking angular spacing. Use a compass and a protractor or divide the circle into five equal arcs; verify each gap is 72 degrees.
- Connecting points in an order that creates an unintended shape. Write the connection order before drawing, then trace it lightly and compare with the intended star type.
- Using inconsistent outline weight. Measure your tool's line width on scrap paper and keep one continuous pass per outline segment.
- Erasing construction lines too early. Keep guides until the final outline is checked against the point geometry.
Self-check rubric
- All five outer points lie on the circle within 1 mm of the chosen radius.
- Angular spacing between adjacent points is equal within 2 degrees.
- The connection order matches the stated star type.
- The outline is continuous and has consistent measured line weight.
- The design fits inside the bounding box with even margins.
- Valid alternatives such as rotation or a different radius are accepted if geometry and outline quality are preserved.
Questions and answers
Do I need a compass?
A compass helps, but you can use a ruler and a measured string loop. The key is equal radius and equal angular spacing.
Can I rotate the star?
Yes. Rotation is a valid alternative as long as the relative point spacing and outline quality are preserved.
How do I check symmetry without folding?
Measure the distance from the center to each outer point and compare; equal values indicate consistent radius.
What line width should I use?
Measure your actual tool. A hypothetical example is 0.3 mm, but the correct value is whatever your pen or marker produces on your paper.