Free original lessons
Draw Tribal Tattoo Bands: Curved Taper and Point Construction
Learn to build tribal-style tattoo bands with curved strips, tapered ends, and sharp points using a repeatable geometric method and self-checking practice.
Free lesson
Four exercises
Worked answers
Object Drawing Lessons
Tribal-style tattoo bands look bold because their edges flow and their points are deliberate. This lesson teaches a construction method: define a centerline, build a curved strip of even width, taper one or both ends, and place sharp points where the taper meets the band edge. You will use a simple convention for judging taper and point quality, then practice four self-contained tasks. All measurements are hypothetical examples; measure your own paper and tools before drawing.
Practice materials: Printable downloads are not available for this lesson yet. Use the instructions and four exercises below.
Reference illustration
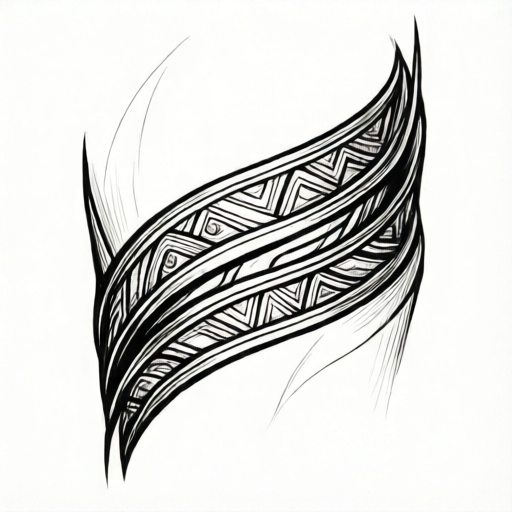
Use the stated measurements and conventions for each exercise.
Set the centerline and strip width
Start with a light centerline curve that represents the middle of the band. Mark the band width as a consistent distance on both sides of the centerline. For a practice band, a hypothetical width of 12 mm is easy to check with a ruler. Keep the centerline smooth; sharp direction changes make taper harder to control.
Use a pencil for construction lines and a darker tool only after the strip edges are consistent. The strip is not a single outline but two parallel curves offset from the centerline. Check width at three points: near the start, at the middle, and near the end.
- Draw a light centerline curve about 10 cm long.
- Mark a hypothetical 12 mm width on both sides at the start, middle, and end.
- Connect the marks with smooth offset curves to form the strip edges.
- Measure the gap between edges at three places; adjust until each is within about 1 mm of 12 mm.
Taper the end without losing the curve
A taper narrows the strip toward an end. Choose a taper length, such as a hypothetical 25 mm, and mark where the full width begins to reduce. Keep the centerline unchanged; move each edge inward by equal amounts so the taper stays centered. The taper should look like a smooth wedge, not a sudden notch.
Check taper symmetry by measuring the distance from the centerline to each edge at the taper midpoint. Those two distances should be equal within about 1 mm. If one side narrows faster, redraw that edge only.
- Mark the taper start and the intended end point on the centerline.
- At the taper midpoint, mark equal distances from the centerline to each edge.
- Draw smooth curves from the full-width edges to the end point.
- Measure left and right taper distances at the midpoint; adjust for symmetry.
Place sharp points with a defined convention
A sharp point is where the two tapered edges meet at the end. Use this convention: the point is valid when the final 5 mm of each edge is straight enough that a ruler laid along it does not show a visible bulge, and the two edges meet without a rounded cap. Letter styles and hand pressure vary, so a slightly blunted point can still be valid if the taper is symmetric and the meeting is clean.
Place points at natural curve endpoints or where the band changes direction. Avoid placing a point in the middle of a smooth arc unless the design calls for a split. If you want a split band, taper each branch separately and keep their centerlines related by mirror symmetry.
- Choose an end point on the centerline.
- Draw the last 5 mm of each edge as a short straight segment aimed at the point.
- Confirm the two segments meet without a loop or rounded cap.
- Check symmetry by folding or mirroring a light guide line.
Use a mirror guide for repeated bands
For mirrored bands, draw one side first, then create a light mirror guide by folding the paper or using a straight vertical reference. Transfer key marks: taper start, taper midpoint, and point location. Redraw the second band from those marks rather than tracing, so you learn the construction.
Compare the pair by measuring three distances: strip width at the middle, taper length, and point offset from the mirror line. Small differences are acceptable if the overall rhythm looks balanced. The rubric below allows valid alternatives because hand-drawn curves are not identical to a single universal answer.
- Draw the first band completely.
- Mark a mirror line and transfer taper and point marks.
- Construct the second band from the transferred marks.
- Measure width, taper length, and point offset; note differences.
Worked example
Construct a single curved band with a hypothetical 12 mm width, a 25 mm taper at one end, and a sharp point. The centerline is a gentle arc about 10 cm long. Describe the construction and the checks.
Worked answer
Draw the centerline arc. Mark 12 mm on both sides at the start, middle, and end, and connect with smooth offset curves. Mark the taper start 25 mm before the end point. At the taper midpoint, mark equal distances from the centerline to each edge, then draw smooth curves to the end point. For the final 5 mm, draw short straight segments that meet at the point. Check: strip width at three places is within about 1 mm of 12 mm; taper midpoint distances are equal within about 1 mm; the point meets cleanly without a rounded cap.
Four practice exercises
Exercise 1
Draw a straight band 8 cm long with a hypothetical 10 mm width and a 20 mm taper at the right end. The centerline is a straight horizontal line. Describe your construction and checks.
Show answer and check
Draw a horizontal centerline. Mark 10 mm above and below at the left, middle, and right. Connect with straight edges. Mark the taper start 20 mm before the right end. At the taper midpoint, mark equal distances from the centerline to each edge, then draw straight tapered edges to the end point. Check width at three points and taper symmetry at the midpoint.
Why: A straight centerline isolates width and taper control. Equal offsets keep the taper centered, and measuring at three points catches drift.
Check: Measure the gap between edges at left, middle, and right; each should be within about 1 mm of 10 mm. Measure left and right taper distances at the midpoint; they should be equal within about 1 mm.
Exercise 2
Draw a curved band with a hypothetical 14 mm width and tapers at both ends, each 30 mm long. The centerline is a shallow S-curve about 12 cm long. Describe how you keep both tapers centered.
Show answer and check
Draw the S-curve centerline. Mark 14 mm on both sides at several points and connect with smooth offset curves. Mark each taper start 30 mm from its end. At each taper midpoint, mark equal distances from the centerline to each edge, then draw smooth curves to each end point. Use short straight final segments to meet the points. Check width at three places and symmetry at both taper midpoints.
Why: Double tapers require two independent symmetry checks. Keeping the centerline unchanged and moving both edges equally prevents lopsided ends.
Check: Measure width at three places; each within about 1 mm of 14 mm. At each taper midpoint, left and right distances should be equal within about 1 mm. Confirm both points meet cleanly.
Exercise 3
Draw two mirrored bands separated by a vertical mirror line. Each band has a hypothetical 12 mm width and one 25 mm taper pointing toward the mirror line. Describe the transfer and comparison steps.
Show answer and check
Draw the first band on one side. Mark the mirror line and transfer the taper start, taper midpoint, and point location to the other side. Construct the second band from those marks. Compare width at the middle, taper length, and point offset from the mirror line. Small differences are acceptable if the pair looks balanced.
Why: Transferring key marks rather than tracing teaches the construction and makes symmetry checkable. The comparison focuses on measurable features.
Check: Measure middle width of each band; both within about 1 mm of 12 mm. Measure taper length of each; both within about 2 mm of 25 mm. Measure point offset from the mirror line; offsets should be equal within about 1 mm.
Exercise 4
Draw a band that splits into two tapered branches at a smooth curve. The main band has a hypothetical 16 mm width; each branch tapers over 20 mm to a point. Describe how you place the split and check both points.
Show answer and check
Draw the main centerline and mark 16 mm width. At the split, create two branch centerlines that diverge smoothly. Mark each branch taper start 20 mm before its point. At each taper midpoint, mark equal distances from the branch centerline to its edges, then draw smooth curves to each point. Check main width at three places and each branch taper symmetry.
Why: Splitting requires separate centerlines so each branch can taper symmetrically. Checking each branch independently prevents one point from dominating.
Check: Measure main band width at three places; each within about 1 mm of 16 mm. For each branch, measure left and right taper distances at the midpoint; equal within about 1 mm. Confirm both points meet cleanly without rounded caps.
Common mistakes
- Making the strip width change along the straight section. Measure the gap between edges at three points and redraw the edge that drifts.
- Tapering only one edge, causing the band to look lopsided. Move both edges inward by equal amounts from the centerline.
- Ending the band with a rounded cap instead of a point. Redraw the last 5 mm of each edge as short straight segments that meet at the end point.
- Placing a point where the centerline changes direction sharply. Move the point to a smoother endpoint or split the band into two tapered branches.
Self-check rubric
- Strip width is consistent within about 1 mm at three measured points.
- Taper is centered: left and right distances at the taper midpoint are equal within about 1 mm.
- Point follows the convention: final 5 mm edges are straight enough to show no bulge under a ruler, and edges meet cleanly.
- Curves are smooth and the centerline is not kinked at the point.
- Mirrored bands, if used, have comparable width, taper length, and point offset; small hand-drawn differences are acceptable.
Questions and answers
Do I need a specific pen or paper?
No. Use what you have. Measure your actual paper and tool; the 12 mm width and 25 mm taper are hypothetical examples, not standards.
How sharp must the point be?
Use the convention: the last 5 mm of each edge is straight enough that a ruler shows no bulge, and the edges meet cleanly. Slightly blunted points can be valid if symmetric.
Can I use a different band width?
Yes. Choose any width and keep it consistent. Check it at three points with a ruler.
What if my mirrored bands are not identical?
Measure width, taper length, and point offset. Small differences are acceptable if the rhythm looks balanced; the rubric allows valid alternatives.