HomeBotanical Drawing Warm-Up: A 30-Minute Timed Drill Routine Free original lessons
Botanical Drawing Warm-Up: A 30-Minute Timed Drill Routine
Use four timed slots to practise leaf outlines, stem curves, bloom shapes and a full sprig. Build control and observation before longer botanical work.
Free lesson
Four exercises
Worked answers
Object Drawing Lessons
This routine uses four short timed slots totalling 20 minutes of drawing, with 10 minutes for setting up, reviewing and resetting between drills. Each slot pairs a botanical subject with a specific line or shape focus. Work at a comfortable pace; the timer is a boundary, not a race. Use a pencil or fine liner on plain paper. Keep all marks deliberate and compare each attempt against the check method given.
Practice materials: Printable downloads are not available for this lesson yet. Use the instructions and four exercises below.
Reference illustration
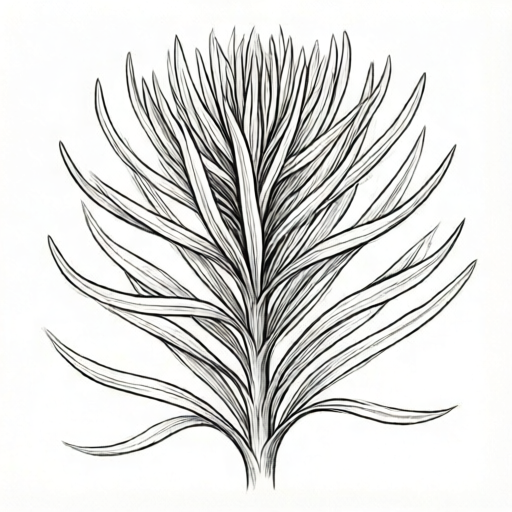
Use the stated measurements and conventions for each exercise.
Setting up the 30-minute session
Divide your paper into four practice boxes, each roughly the size of your palm. Label them 2, 3, 5 and 10 minutes. Place your botanical subject or a clear mental image beside the paper. A real leaf, stem or bloom is ideal, but you can also work from a simple described form. Keep your tools within reach so the timed slots are not interrupted.
The 10 minutes outside the drawing slots are for setup, brief review after each drill and a final look at all four boxes. Do not extend a slot to finish a line; stop when the timer sounds and note what you would change next time.
- Mark four boxes and label the times: 2, 3, 5 and 10 minutes.
- Place your subject and tools so you can see both without moving much.
- Set a timer for each slot and stop drawing when it sounds.
- After each slot, spend up to one minute comparing your marks with the check method.
Drill 1: Leaf outline in 2 minutes
Choose one leaf with a clear overall shape. In two minutes, draw only the outer contour, starting at the base and returning to it. Do not add veins or shading. The aim is to capture the proportion of width to length and the position of the widest point. Work lightly so you can adjust a line without erasing.
If your leaf has a serrated edge, simplify it to a smooth curve for this drill. The 2-minute limit forces you to commit to the big shape before detail. A useful convention is to treat the midrib as an invisible centre line and check that both sides occupy similar space, even when the leaf is asymmetrical.
- Mark the base point and the tip point first.
- Draw one side of the outline from base to tip.
- Return from tip to base on the other side.
- Check the widest point and adjust lightly if needed.
Drill 2: Stem curve in 3 minutes
Draw a single stem with one gentle bend. Use one continuous line if possible, or two overlapping lines that meet cleanly. The focus is the curve's direction and the change in thickness from base to tip. Keep the line confident rather than scratchy. A stem that curves left then right should show a clear change of direction, not a wobble.
Three minutes allows a second attempt on the same box. Compare the first and second curves: the better one usually has fewer direction changes and a smoother transition at the bend. Thickness can be suggested by a slightly heavier line near the base, but do not shade.
- Draw the centre line of the stem as a single curve.
- Add a second line to suggest thickness, keeping the gap even.
- Check that the bend has one clear change of direction.
- If time remains, redraw the curve once beside the first.
Drill 3: Bloom shape in 5 minutes
Draw the overall silhouette of one bloom without individual petals first. Use a simple closed shape that matches the bloom's width and height. Then add three to five petal divisions as lines from the centre outward, stopping at the silhouette. Do not draw every petal. The goal is to show the bloom's character through proportion and a few key divisions.
Five minutes is enough to check symmetry and the position of the centre. If the bloom is a trumpet or bell shape, draw the opening as an ellipse and the body as a tapering curve. Keep the ellipse level with the bloom's facing direction. A bloom seen from the side will show a narrower opening than one seen from the front.
- Draw the outer silhouette as one closed shape.
- Mark the centre point.
- Add three to five petal division lines from centre to edge.
- Check that the silhouette width and height match your subject.
Drill 4: Full sprig in 10 minutes
Combine the previous skills: draw a short stem with two or three leaves and one small bloom. Work from the main stem outward. Spend the first two minutes on the stem curve, the next four on leaf outlines, and the last four on the bloom shape and connecting points. Do not add shading or fine texture.
The 10-minute slot tests whether the parts relate to one another. Leaves should attach at believable points along the stem, and the bloom should sit at the stem's end or a branch point. Keep the drawing within the practice box. If a part is rushed, note it for the next session rather than fixing it after the timer.
- Draw the main stem curve first.
- Add leaf outlines at their attachment points.
- Draw the bloom silhouette at the stem end or branch.
- Check that all parts connect and fit inside the box.
Worked example
A 5-minute bloom drill: draw the silhouette of a bloom that is 6 cm wide and 4 cm tall, with a centre point 2 cm from the top. Add four petal division lines. Describe the steps and a check.
Worked answer
Draw a closed shape 6 cm wide and 4 cm tall. Mark the centre 2 cm below the top edge. Draw four lines from the centre to the silhouette, spaced roughly evenly. Check that the widest point is 6 cm and the height is 4 cm, and that the centre is 2 cm from the top. If the shape is a bell, make the opening an ellipse 6 cm wide and the body taper to the stem.
Four practice exercises
Exercise 1
In a 2-minute leaf drill, you draw a leaf 8 cm long and 4 cm wide. The widest point is 3 cm from the base. Where is the widest point relative to the tip, and what proportion check can you make?
Show answer and check
The widest point is 5 cm from the tip (8 minus 3). The width-to-length ratio is 4 to 8, or 1 to 2. Check that the widest point is closer to the base than the tip, which matches a leaf that tapers toward the tip.
Why: Subtract the base-to-widest distance from the total length to find the tip distance. Compare width and length as a simple ratio. The position of the widest point is a checkable feature of the outline.
Check: Measure the drawn leaf: length 8 cm, width 4 cm, widest point 3 cm from base. Confirm the tip distance is 5 cm and the ratio is 1 to 2.
Exercise 2
A 3-minute stem drill: draw a stem 10 cm long that curves left then right. The bend changes direction at 4 cm from the base. Describe the curve and a check for even thickness.
Show answer and check
Draw a continuous line from base to tip. From 0 to 4 cm, curve gently left; from 4 to 10 cm, curve gently right. Add a second line parallel to the first, keeping a gap of about 2 mm. Check that the gap stays even and that there is one clear change of direction at 4 cm.
Why: The stem has two curve sections meeting at a single direction change. A parallel second line suggests thickness without shading. The check is the even gap and the single bend point.
Check: Measure the change point at 4 cm from the base. Compare the gap between the two lines at three points: near the base, at the bend and near the tip. The gaps should be similar.
Exercise 3
A 5-minute bloom drill: draw a bloom silhouette 5 cm wide and 5 cm tall with the centre at the middle. Add three petal division lines. What shape check confirms the centre is correct?
Show answer and check
Draw a closed shape 5 cm wide and 5 cm tall. Mark the centre at 2.5 cm from the top and 2.5 cm from the side. Add three lines from the centre to the edge. Check that the centre is equidistant from the top and bottom and from the left and right edges.
Why: A centred bloom has a centre point at half the width and half the height. Three division lines are within the stated range. The check uses simple halving of the dimensions.
Check: Measure from the centre to each edge: top 2.5 cm, bottom 2.5 cm, left 2.5 cm, right 2.5 cm. Confirm three division lines reach the silhouette.
Exercise 4
A 10-minute sprig drill: draw a stem 12 cm long with two leaves and one bloom. Leaf A is 4 cm long and attaches 3 cm from the base. Leaf B is 3 cm long and attaches 7 cm from the base. The bloom sits at the tip. Describe the layout and a connection check.
Show answer and check
Draw the stem from base to tip. Mark attachment points at 3 cm and 7 cm. Draw leaf A at 3 cm with a 4 cm outline, and leaf B at 7 cm with a 3 cm outline. Draw the bloom at the 12 cm tip. Check that each leaf meets the stem at its marked point and that the bloom touches the tip.
Why: The attachment distances are measured along the stem. Leaf lengths are separate from attachment positions. The bloom is at the stem end. The check confirms each part connects at the stated point.
Check: Measure along the stem: leaf A at 3 cm, leaf B at 7 cm, bloom at 12 cm. Confirm leaf A is 4 cm long and leaf B is 3 cm long, and that all three parts touch the stem.
Common mistakes
- Starting with small details such as veins or petal edges before the overall shape. Draw the outer contour or silhouette first, then add only the divisions or lines that fit the remaining time.
- Erasing repeatedly and losing the timed slot. Work lightly and leave the first line visible; redraw beside it if needed rather than erasing.
- Making the stem a series of short scratchy strokes. Draw one continuous curve, then add a second line for thickness; keep the gap even.
- Drawing every petal and running out of time. Use a silhouette plus three to five division lines; the bloom's character comes from proportion, not petal count.
Self-check rubric
- The four timed slots are used in order: 2, 3, 5 and 10 minutes.
- Each drill focuses on its stated line or shape goal without shading or extra detail.
- Leaf outlines show a clear width-to-length proportion and a identifiable widest point.
- Stem curves show one clear change of direction and an even suggested thickness.
- Bloom shapes use a silhouette plus three to five division lines, not every petal.
- The full sprig connects stem, leaves and bloom at believable points and fits the box.
- Valid alternatives are accepted: a smooth leaf edge may replace a serrated one, and petal division lines may vary in number within the stated range.
Questions and answers
Do I need a real plant for this warm-up?
A real leaf, stem or bloom is helpful, but you can use a clear mental image or a simple described form. The drills focus on line and shape control, so the subject can be simplified.
What if I finish a drill before the timer sounds?
Stop drawing and use the remaining time to compare your marks with the check method. Do not add shading or extra detail; the slot is for the specified focus only.
Can I use a pen instead of a pencil?
Yes. A pen encourages committed lines, but you cannot adjust lightly. If you use a pen, make one deliberate attempt and note changes for the next session.
How do I know if my leaf outline is accurate?
Check the ratio of width to length and the position of the widest point against your subject. A simple check is to compare the distance from base to widest point with the distance from widest point to tip.