Reference diagram
LETTER · Download PDF (1 page)
Free original resources
Learn to draw the bird dog pose with clear limb-extension guides, body-alignment checklines, and practice boxes for the extended arm and opposite leg.
Original reference diagrams, four practice exercises and separate worked answers. All files are free. No signup required.
LETTER · Download PDF (1 page)
LETTER · Download PDF (4 pages)
LETTER · Download PDF (4 pages)
Choose A4 or US Letter for your printer. The reference and answer illustrations are not physical rulers; follow the scale instruction printed on the practice worksheet.
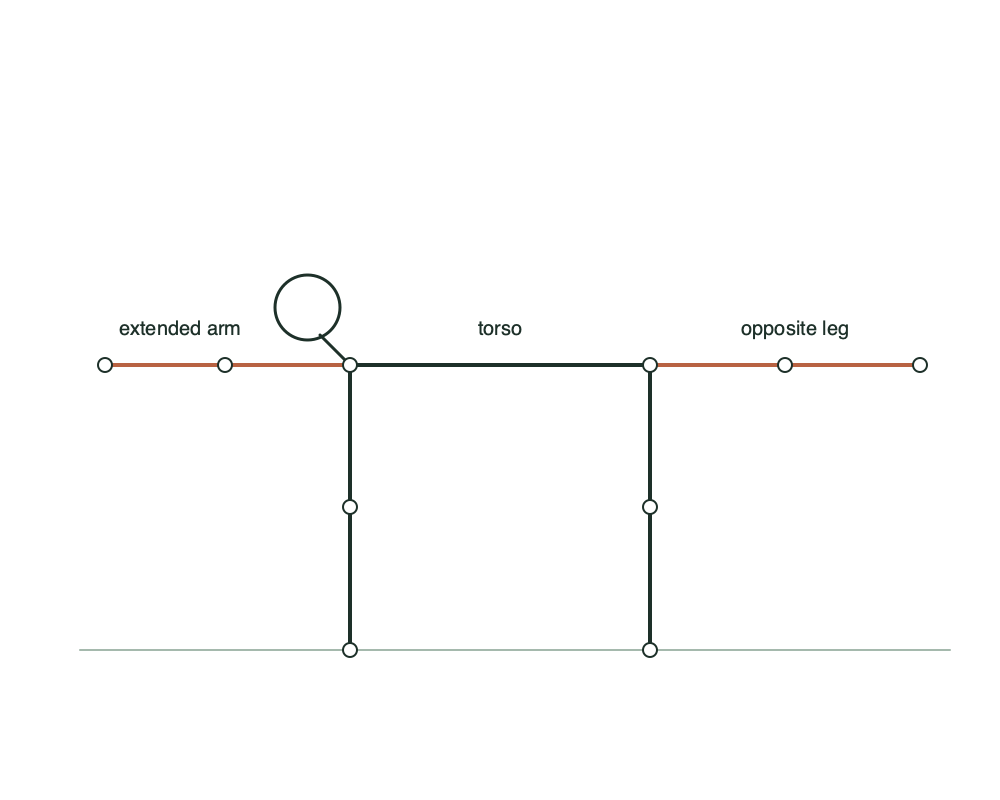
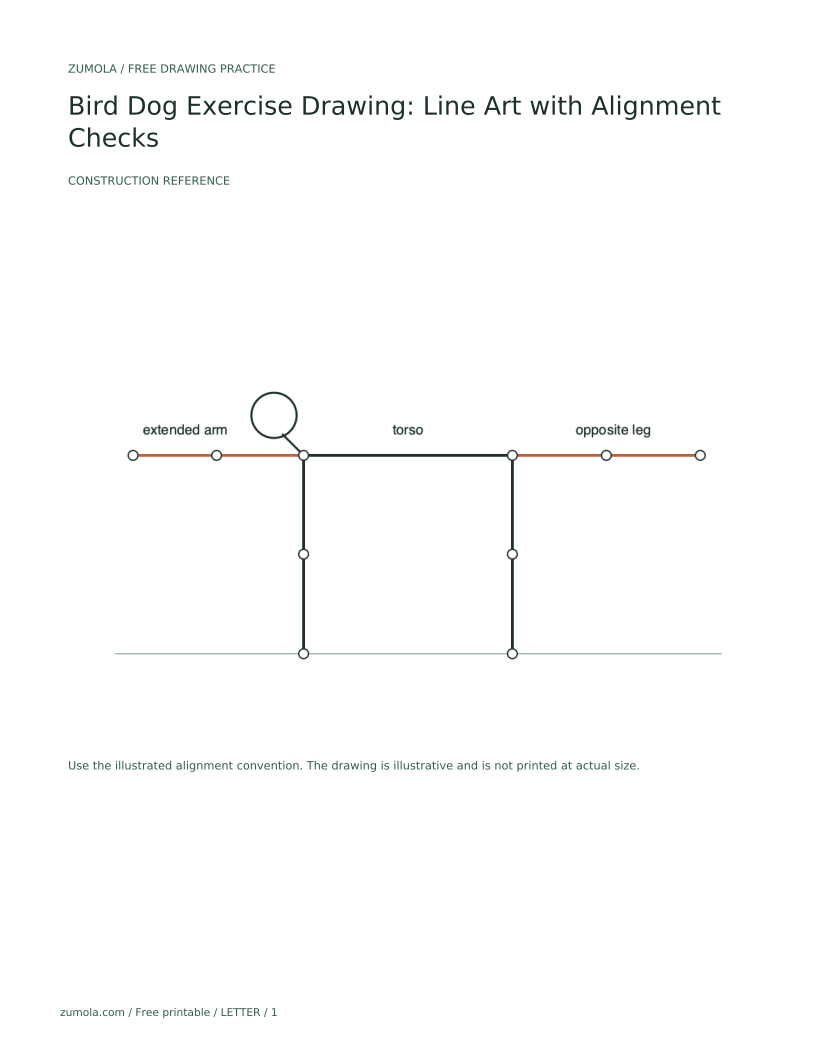
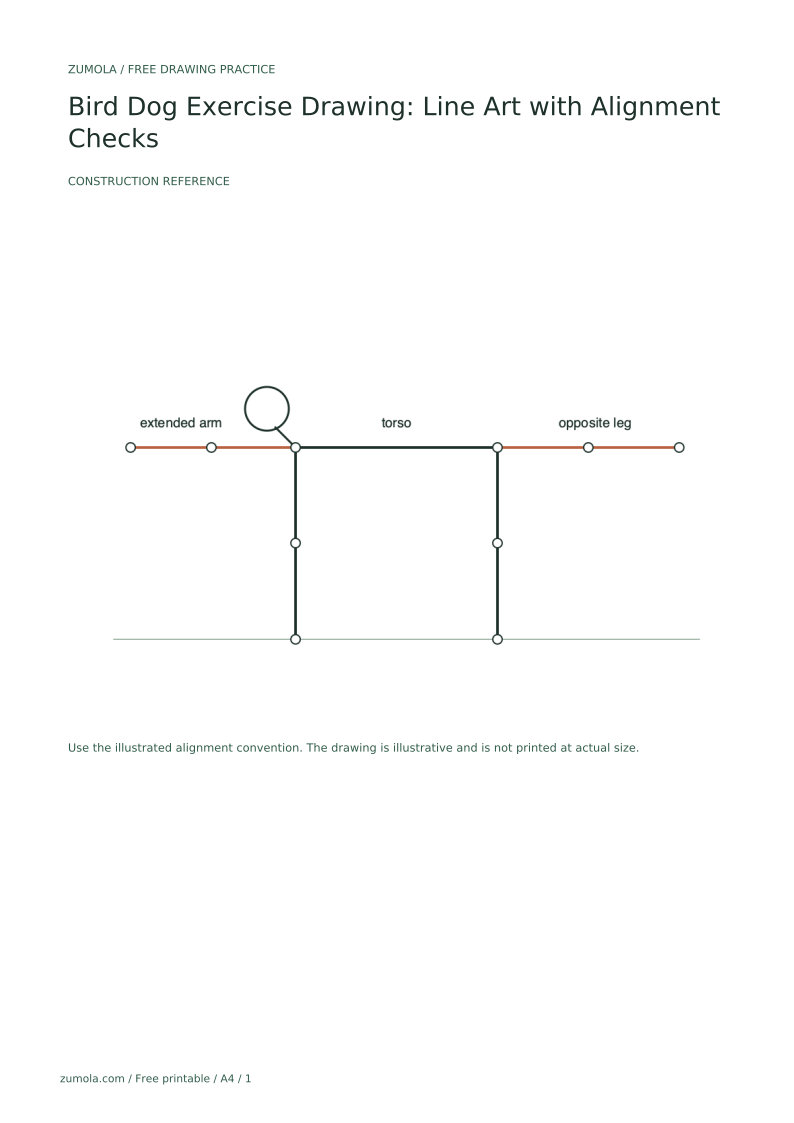
This lesson teaches a line drawing of the bird dog exercise pose, focusing on limb extension and body alignment. You will use a simple convention: the torso is a long horizontal line from shoulder to hip, the head is a small circle at the shoulder end, and limbs are straight lines with small circles for joints. The supporting arm and leg are vertical; the extended arm reaches forward and the opposite leg reaches back, both roughly parallel to the floor. All measurements are hypothetical examples; measure your own paper and tools. The goal is a clear, checkable drawing, not a single universal answer.
Start with a horizontal line for the torso, about 8 cm long on a typical sheet. Mark the shoulder end and the hip end. Add a small circle at the shoulder for the head. The supporting arm drops vertically from the shoulder, and the supporting leg drops vertically from the hip. Keep these two vertical lines parallel; use a ruler or the edge of your paper to check.
The extended arm leaves the shoulder forward, and the opposite leg leaves the hip backward. Both extended limbs should be roughly parallel to the torso line. A common error is letting the extended leg rise above the torso line; check that the leg line stays level with or slightly below the torso line.
Place small circles at the elbow, wrist, knee, and ankle. For the extended arm, the elbow sits midway along the arm line; for the extended leg, the knee sits midway along the leg line. These circles help you check that the limb is straight and that the extension is clear. If a joint circle sits off the line, redraw that segment.
Use light guide lines to compare the extended arm and extended leg. They should point in opposite directions and stay close to the torso line. A valid alternative is to draw the extended arm slightly higher than the torso line, as long as the opposite leg stays level; the key is that the extension is readable and the body alignment is clear.
Check three alignments: the supporting arm and supporting leg are vertical and parallel; the torso line is horizontal; the extended arm and extended leg are roughly parallel to the torso. Use a simple arithmetic check: measure the vertical distance from the shoulder to the floor line and from the hip to the floor line; they should be equal within 1 cm. If they differ, adjust the supporting limbs.
Finish by thickening the main lines and erasing the faint guides. Keep the head circle small and the joints clear. The drawing should read as a bird dog pose without muscle detail or shading.
Draw a bird dog pose with an 8 cm torso line, 6 cm supporting limbs, and 6 cm extended limbs. Check that the supporting arm and leg are parallel and that the extended limbs are level with the torso.
The torso line is horizontal from shoulder to hip. The supporting arm drops 6 cm from the shoulder; the supporting leg drops 6 cm from the hip. The extended arm reaches forward 6 cm from the shoulder, and the extended leg reaches backward 6 cm from the hip. Joint circles mark the elbow, wrist, knee, and ankle. The shoulder-to-floor and hip-to-floor distances are both 6 cm, so the supporting limbs are parallel. The extended arm and leg are level with the torso within 1 cm.
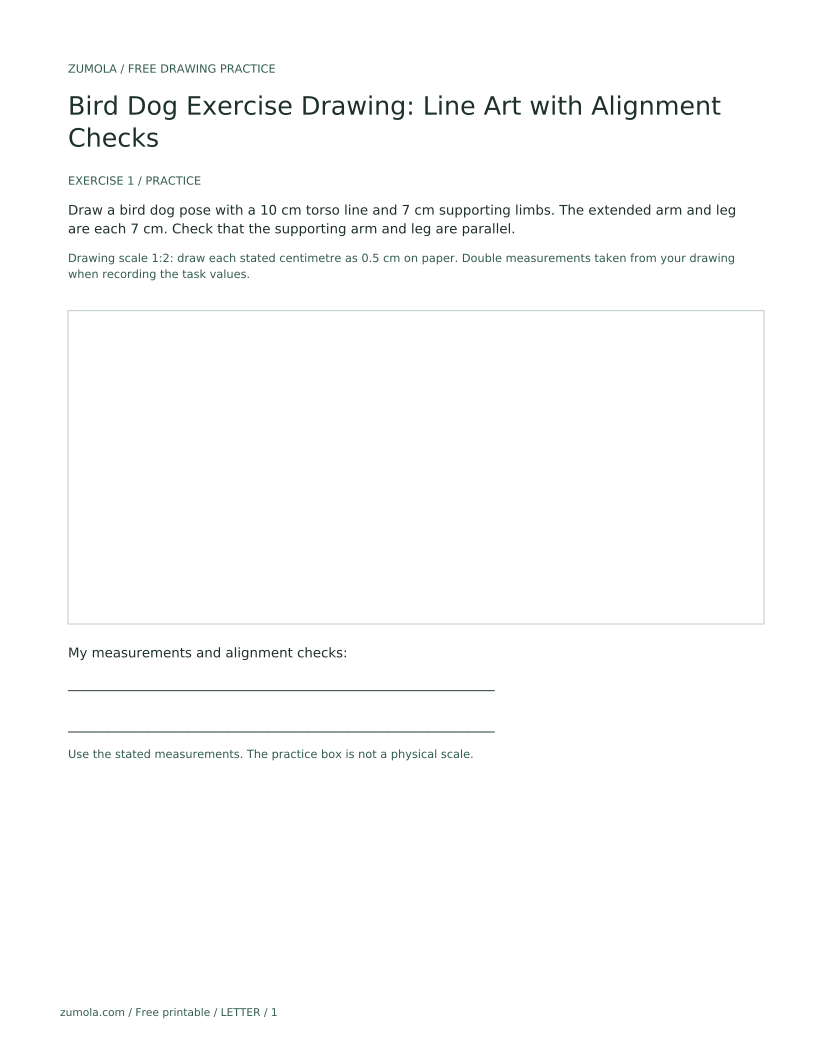
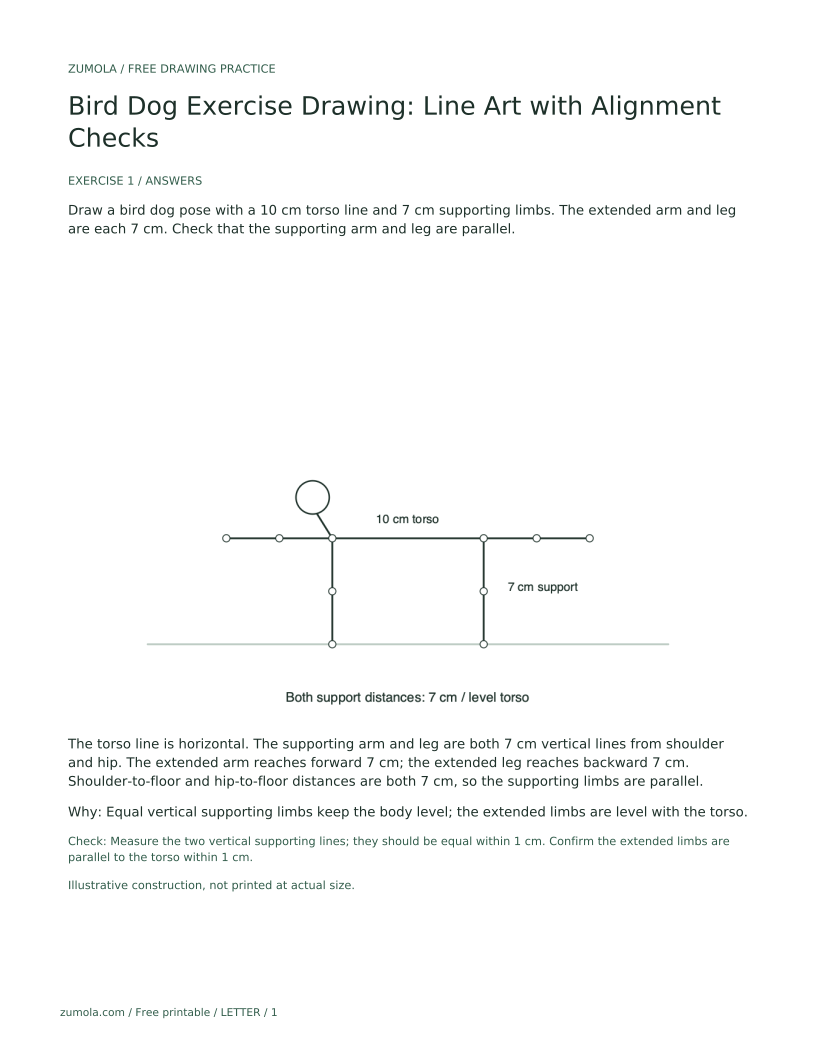
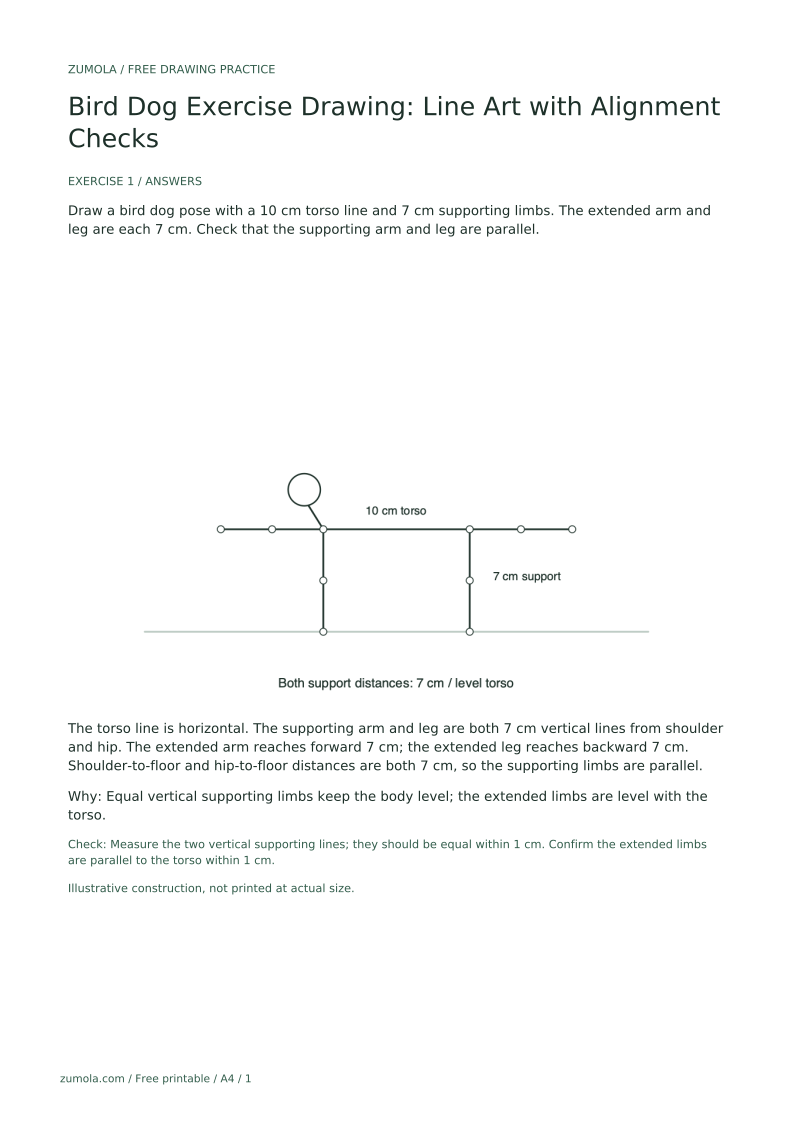
Draw a bird dog pose with a 10 cm torso line and 7 cm supporting limbs. The extended arm and leg are each 7 cm. Check that the supporting arm and leg are parallel.
The torso line is horizontal. The supporting arm and leg are both 7 cm vertical lines from shoulder and hip. The extended arm reaches forward 7 cm; the extended leg reaches backward 7 cm. Shoulder-to-floor and hip-to-floor distances are both 7 cm, so the supporting limbs are parallel.
Equal vertical supporting limbs keep the body level; the extended limbs are level with the torso.
Check: Measure the two vertical supporting lines; they should be equal within 1 cm. Confirm the extended limbs are parallel to the torso within 1 cm.
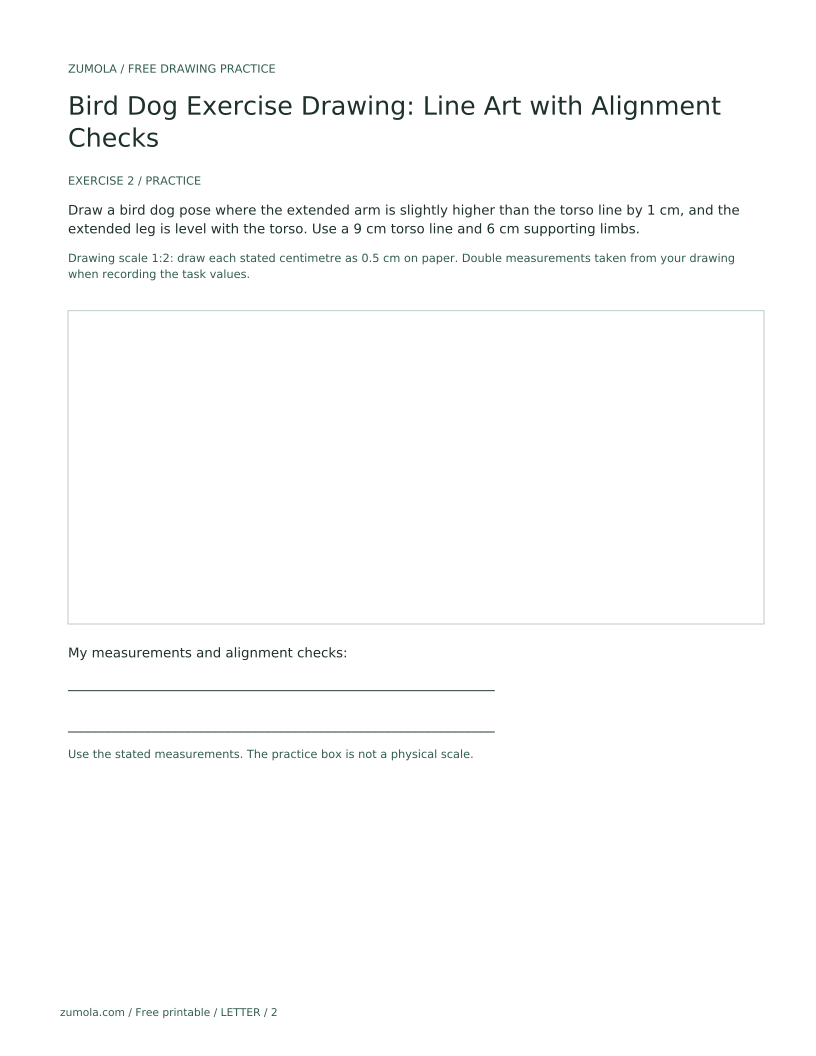
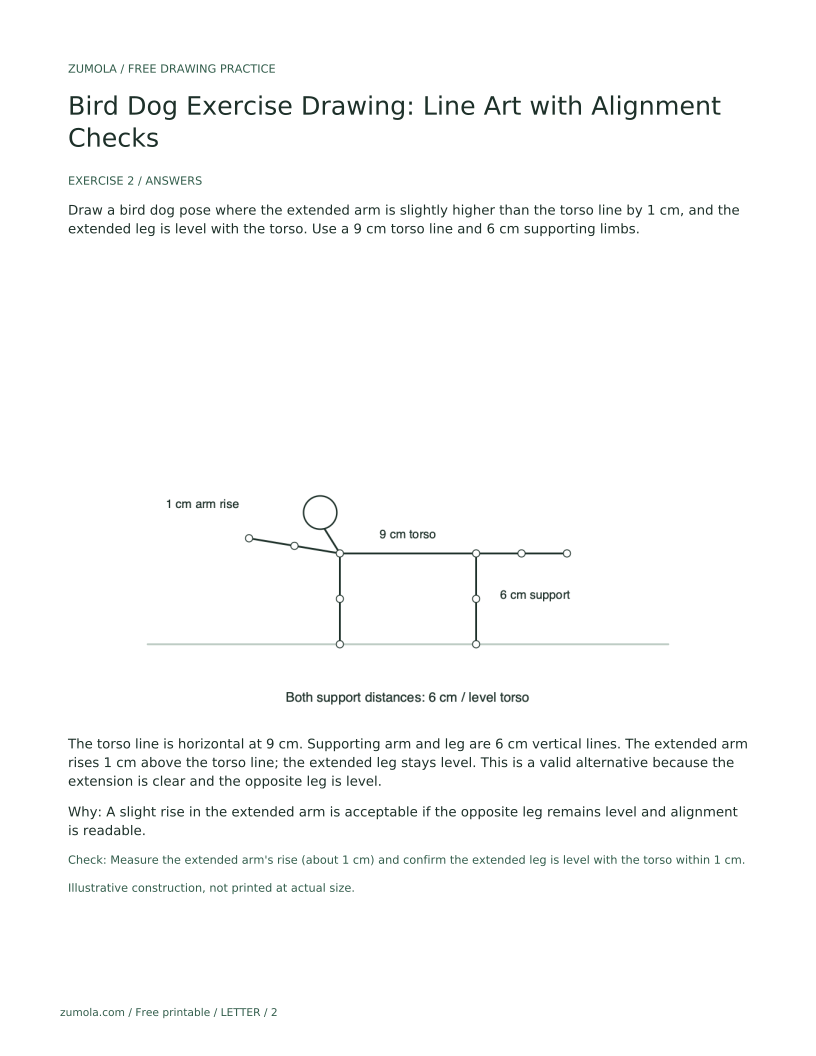
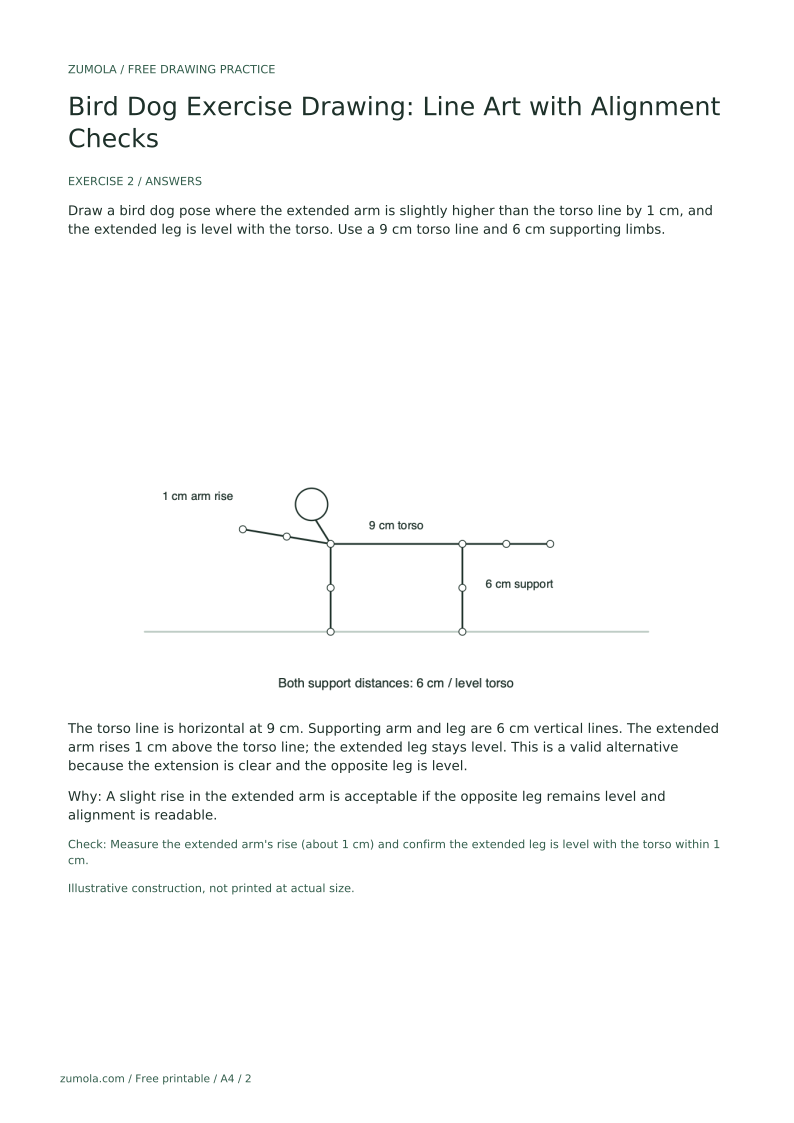
Draw a bird dog pose where the extended arm is slightly higher than the torso line by 1 cm, and the extended leg is level with the torso. Use a 9 cm torso line and 6 cm supporting limbs.
The torso line is horizontal at 9 cm. Supporting arm and leg are 6 cm vertical lines. The extended arm rises 1 cm above the torso line; the extended leg stays level. This is a valid alternative because the extension is clear and the opposite leg is level.
A slight rise in the extended arm is acceptable if the opposite leg remains level and alignment is readable.
Check: Measure the extended arm's rise (about 1 cm) and confirm the extended leg is level with the torso within 1 cm.
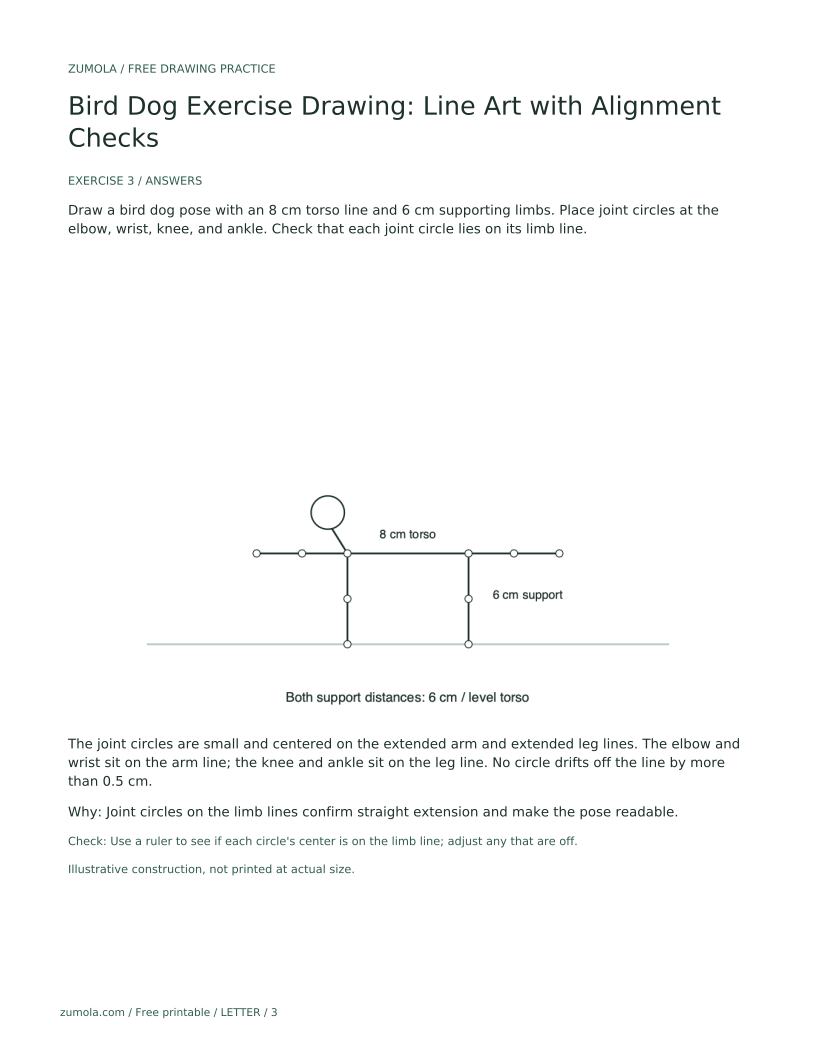
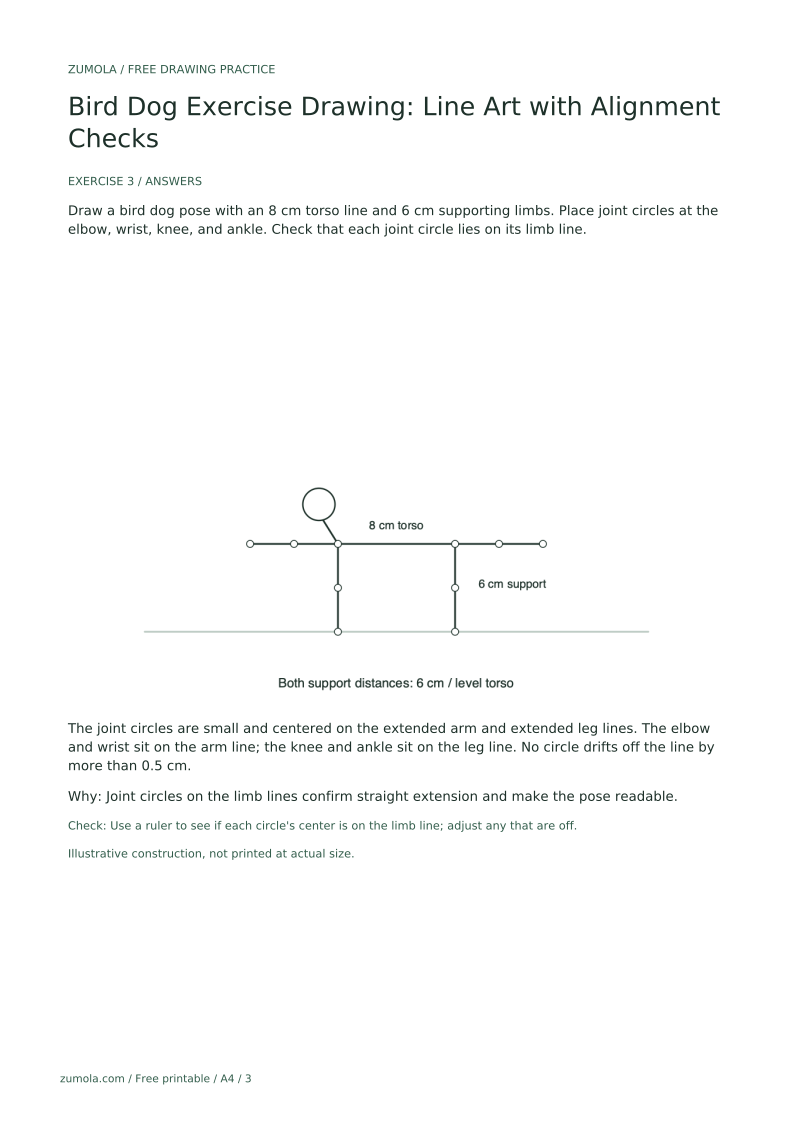
Draw a bird dog pose with an 8 cm torso line and 6 cm supporting limbs. Place joint circles at the elbow, wrist, knee, and ankle. Check that each joint circle lies on its limb line.
The joint circles are small and centered on the extended arm and extended leg lines. The elbow and wrist sit on the arm line; the knee and ankle sit on the leg line. No circle drifts off the line by more than 0.5 cm.
Joint circles on the limb lines confirm straight extension and make the pose readable.
Check: Use a ruler to see if each circle's center is on the limb line; adjust any that are off.
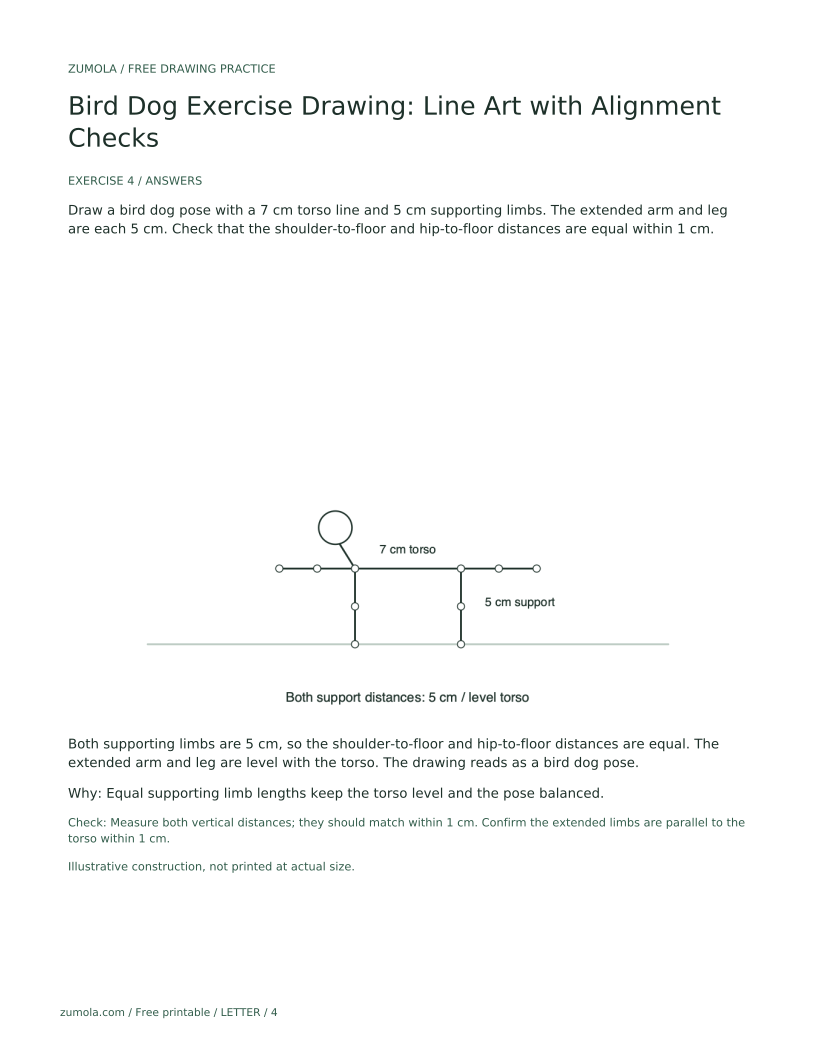
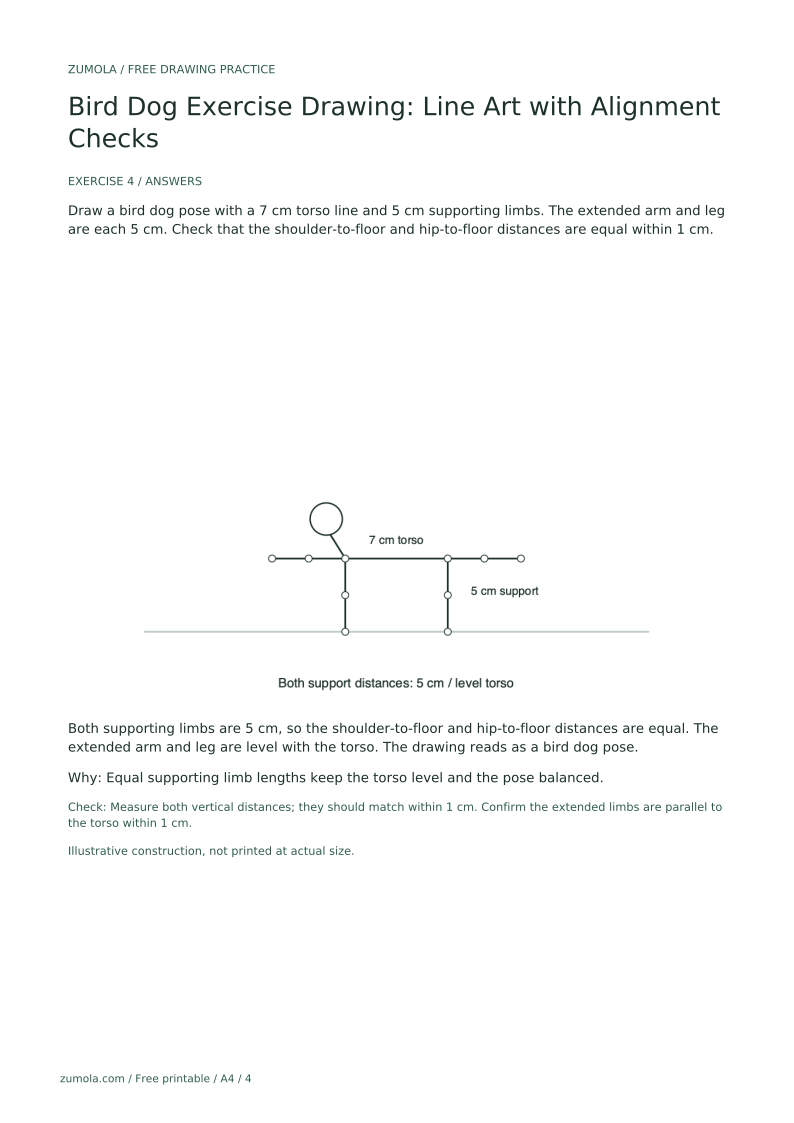
Draw a bird dog pose with a 7 cm torso line and 5 cm supporting limbs. The extended arm and leg are each 5 cm. Check that the shoulder-to-floor and hip-to-floor distances are equal within 1 cm.
Both supporting limbs are 5 cm, so the shoulder-to-floor and hip-to-floor distances are equal. The extended arm and leg are level with the torso. The drawing reads as a bird dog pose.
Equal supporting limb lengths keep the torso level and the pose balanced.
Check: Measure both vertical distances; they should match within 1 cm. Confirm the extended limbs are parallel to the torso within 1 cm.
Lower the extended leg until it is level with or slightly below the torso line; recheck with a guide line.
Use a ruler to redraw both vertical lines; measure the gap at top and bottom and make them equal.
Redraw the limb segment so the joint circle lies on the line; keep the circle small.
Reduce the head circle to about 1 cm and place it at the shoulder end without covering the torso line.
No. This lesson focuses on limb extension and body alignment using simple lines and joint circles.
Yes, a slight rise is a valid alternative if the opposite leg stays level and the extension is clear.
Use centimeters for all measurements; the numbers here are hypothetical examples, so measure your own paper.
Measure shoulder-to-floor and hip-to-floor distances; they should be equal within 1 cm.