Free printable resources · Original practice

One point perspective worksheets.
Let depth converge.

Practice boxes, a corridor and a room using one vanishing point. Each set includes a guided construction, an unfinished worksheet and a reference completion.

3 construction sets.
One horizon & VP.
Reference + worksheet + answer.

Choose your paper and download

Download paper size

Every worksheet and answer is free. No signup.

The complete collection

One pack for each version.

Download the student pack for practice and the separate answer pack to compare. Individual editable sheets appear below. The paper-size choice applies to every download button.

3 pages per file · free · CC BY 4.0

All paper sizes & editable formats
US Letter
A4

Make a back face from the same point

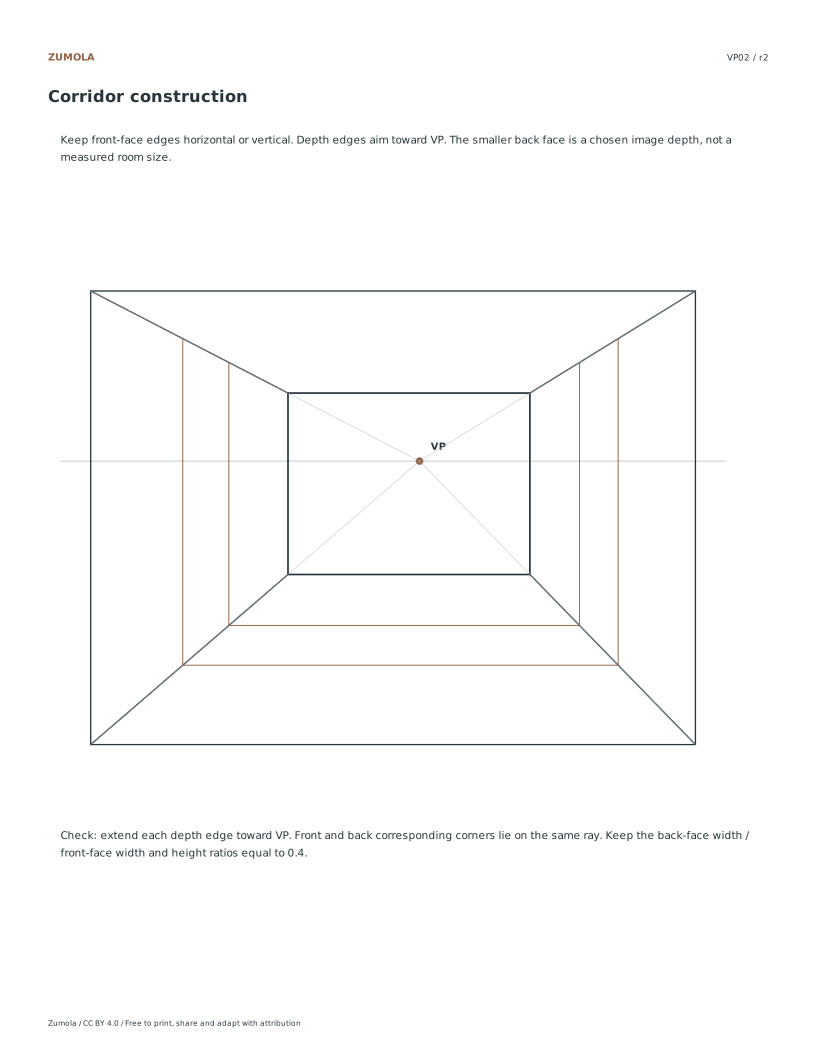
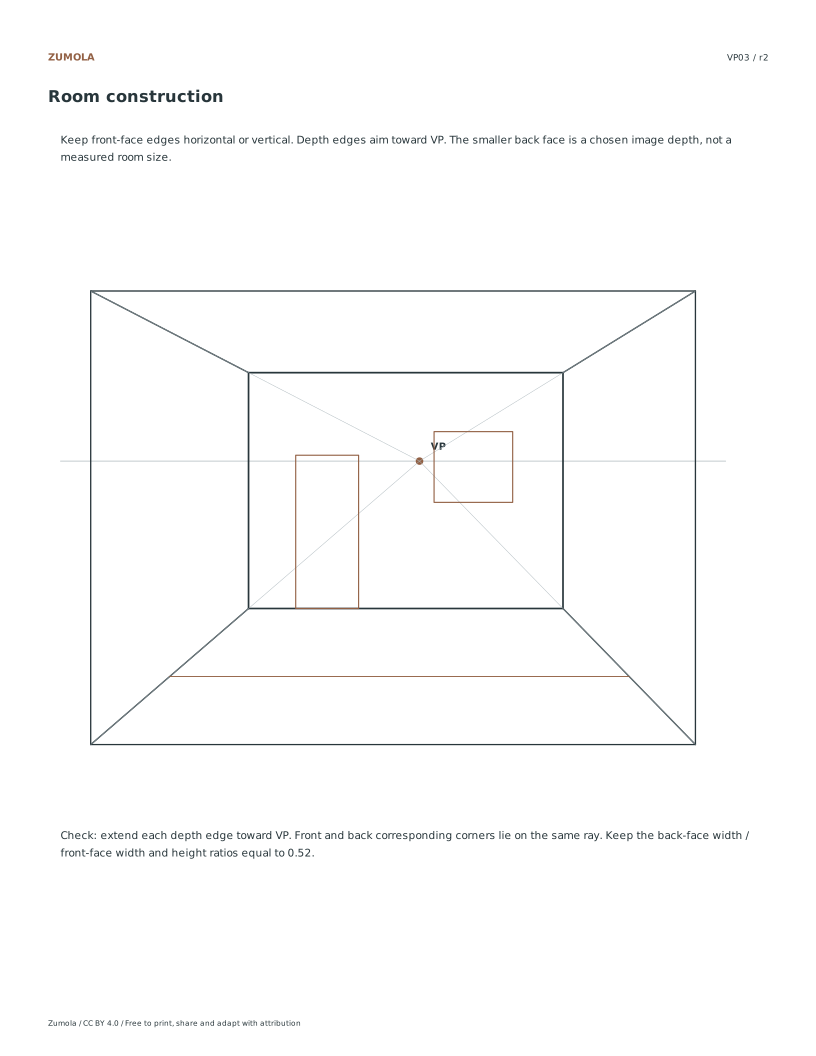
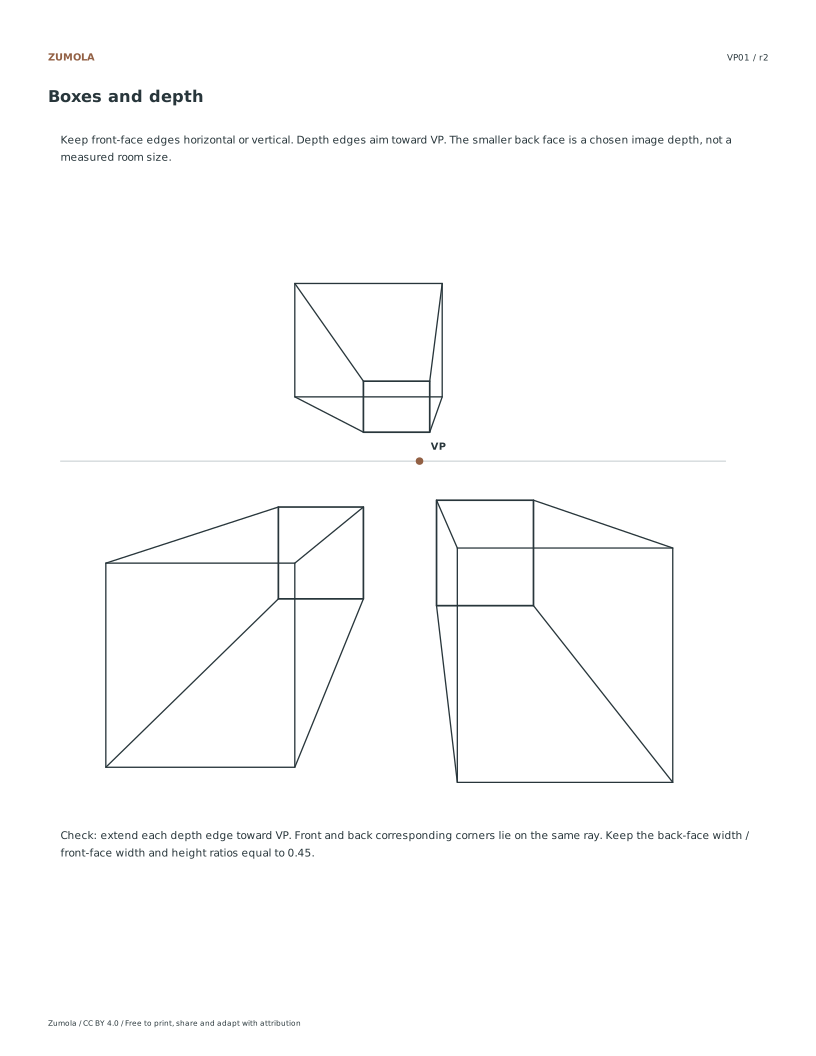
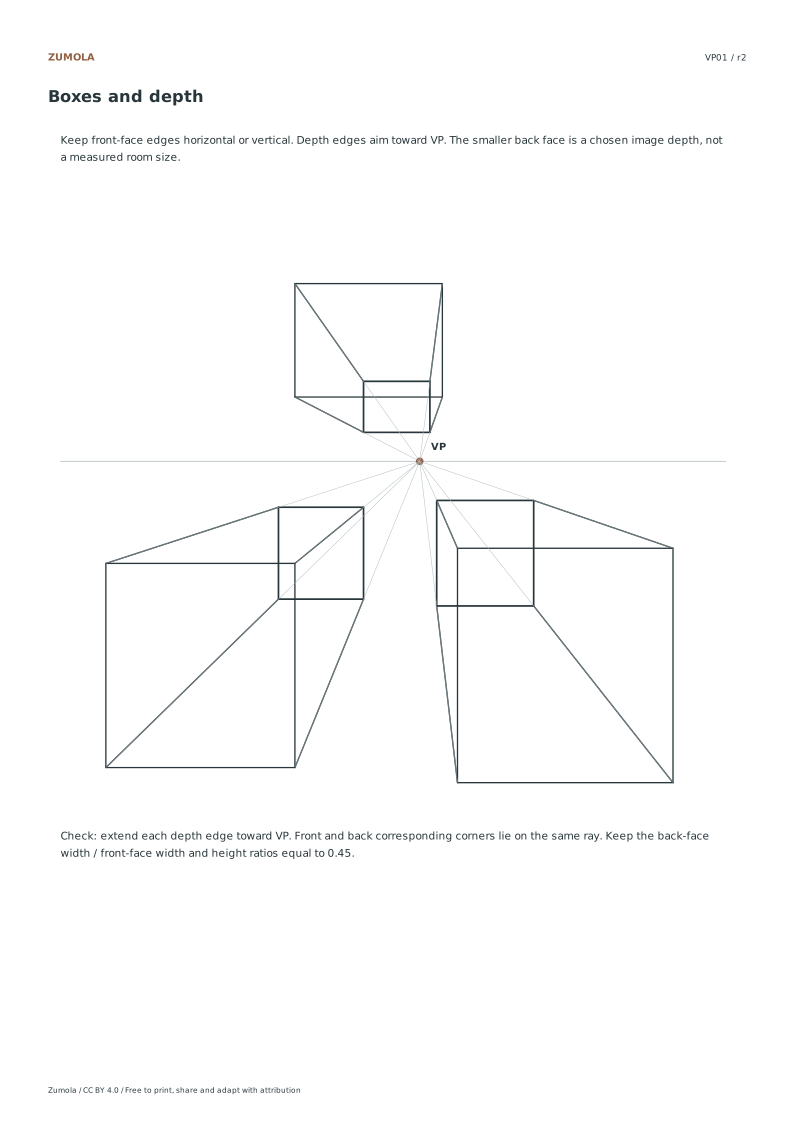
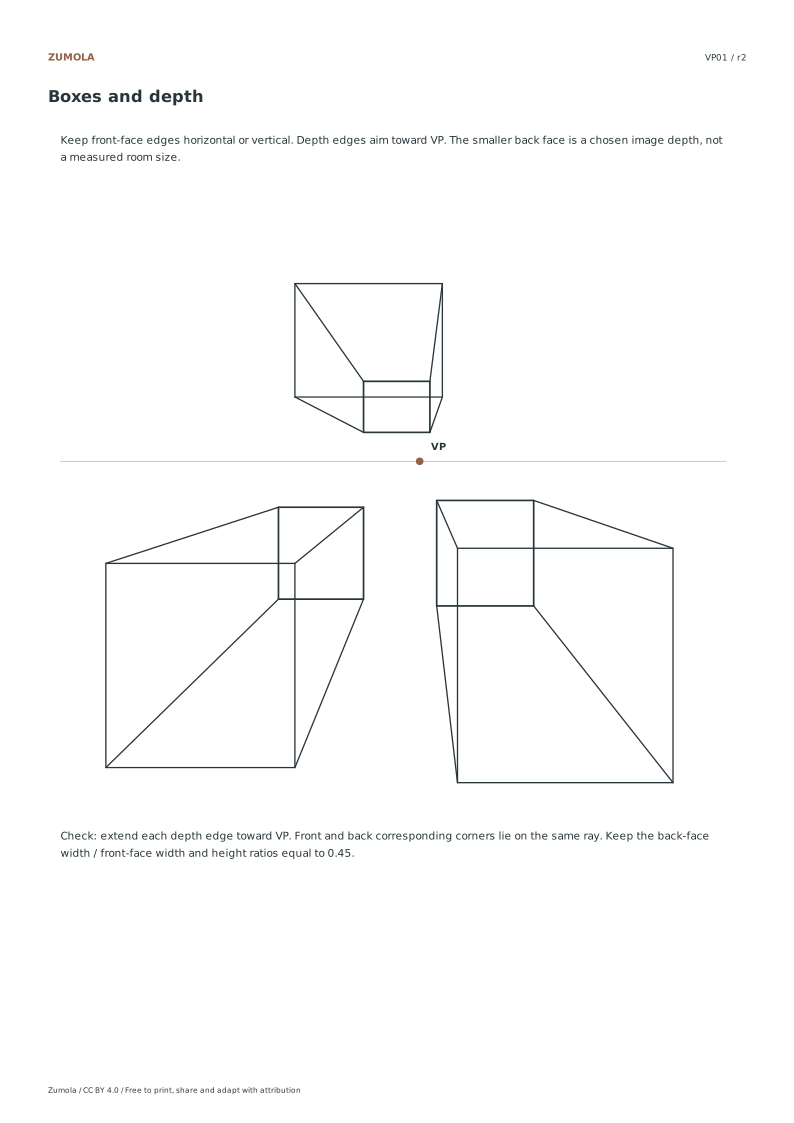
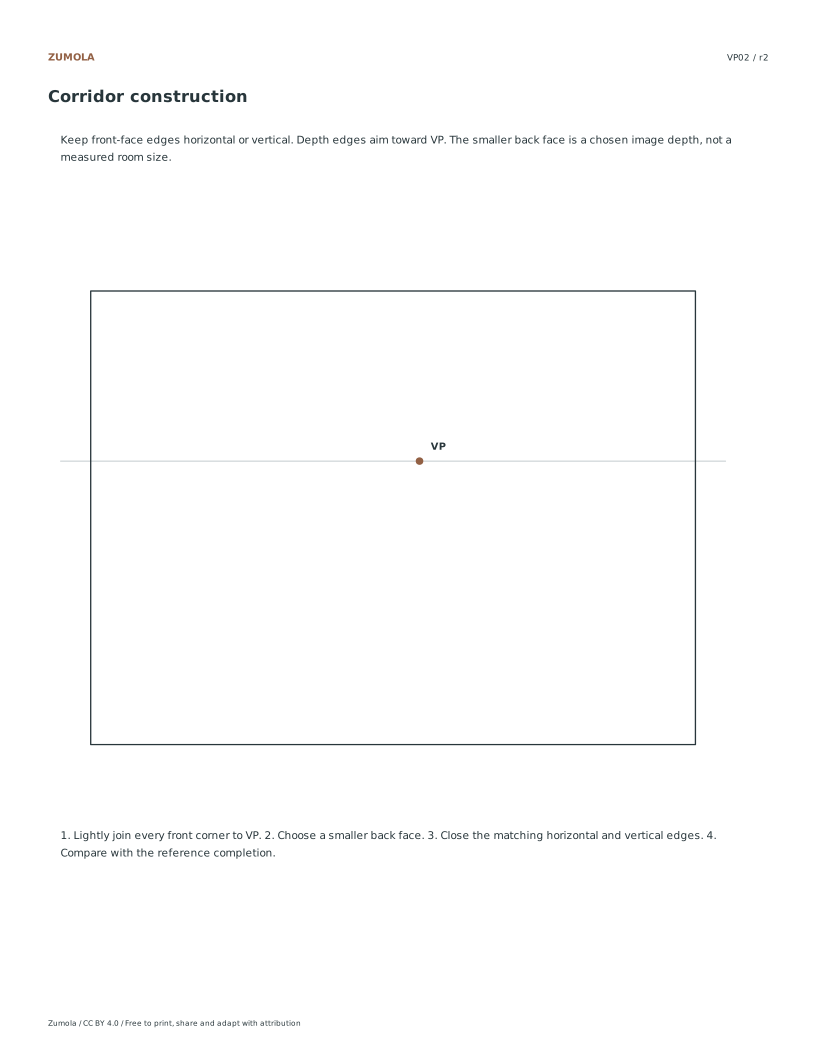
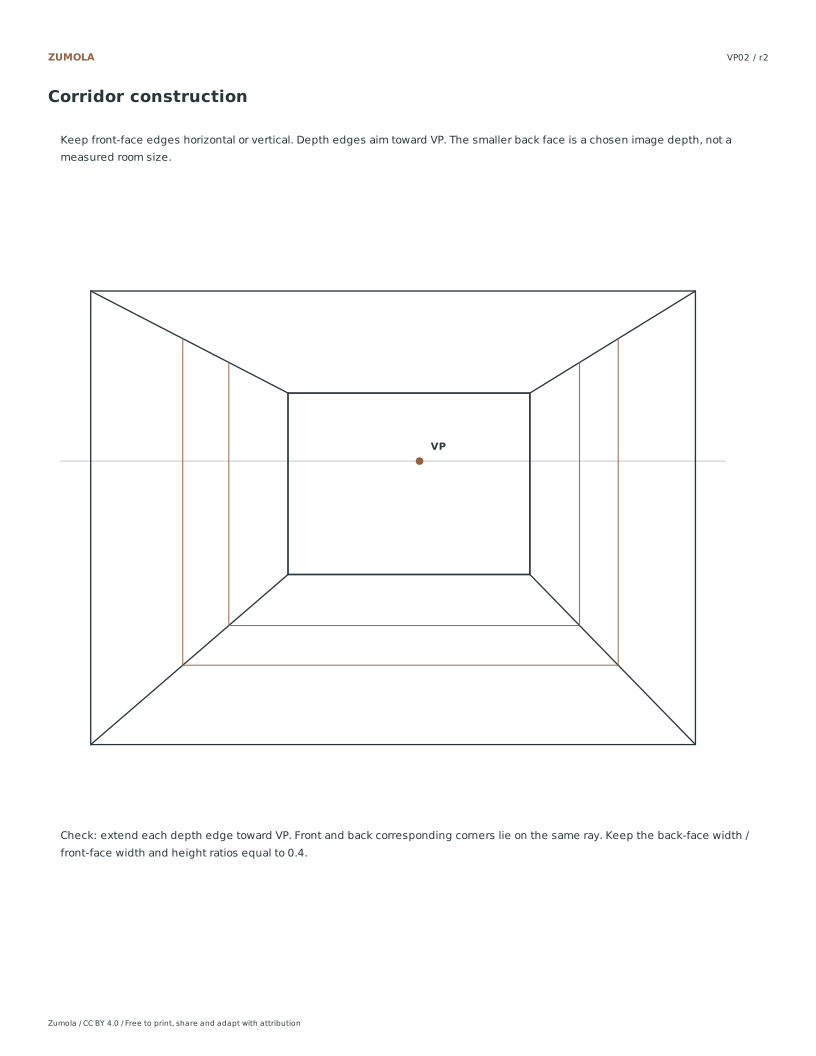
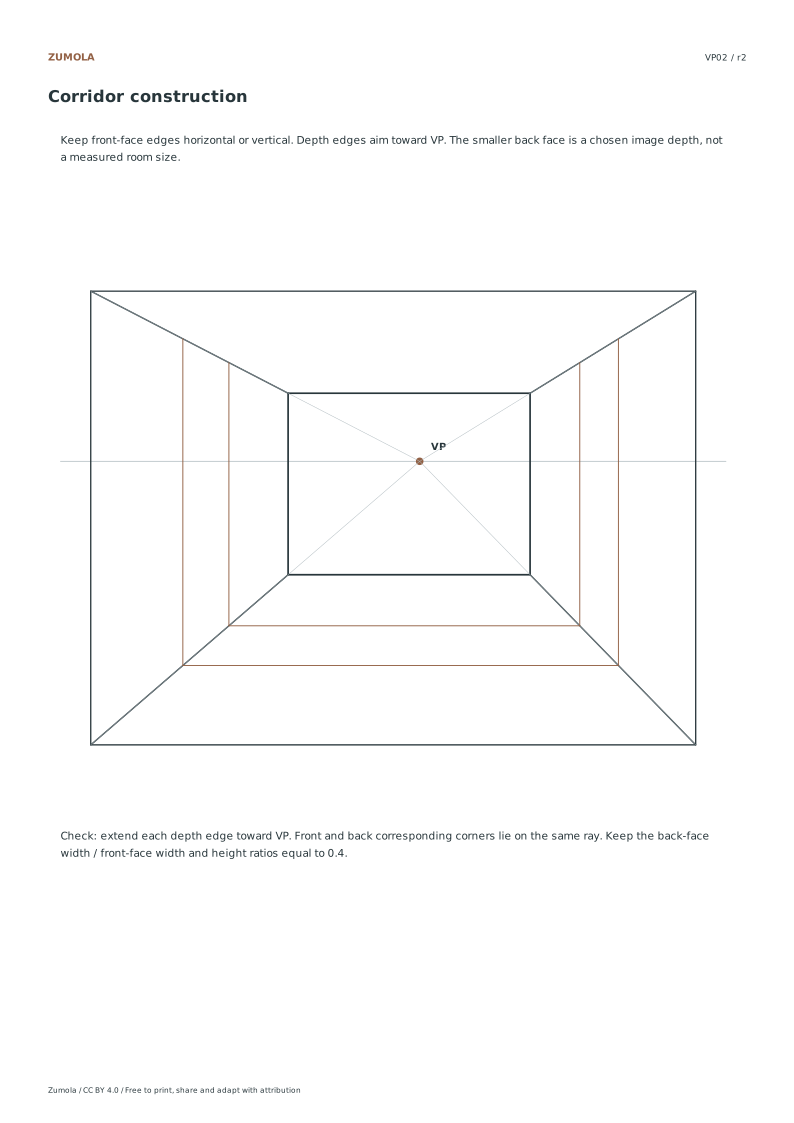
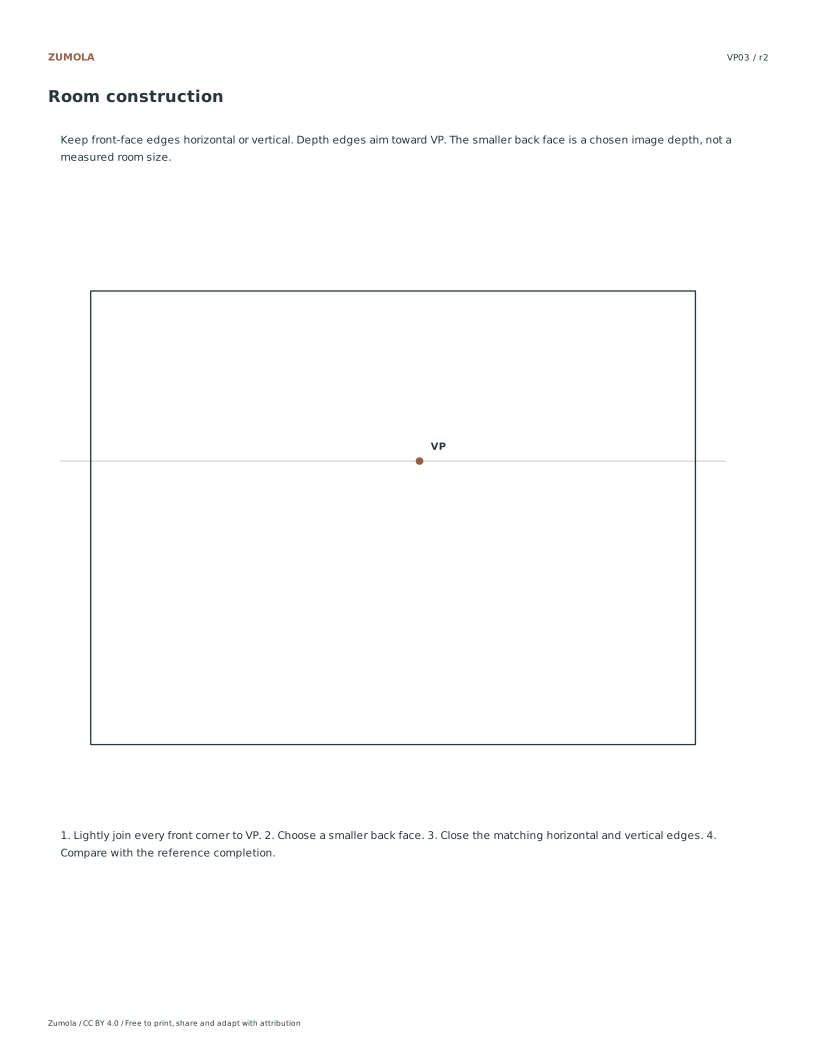
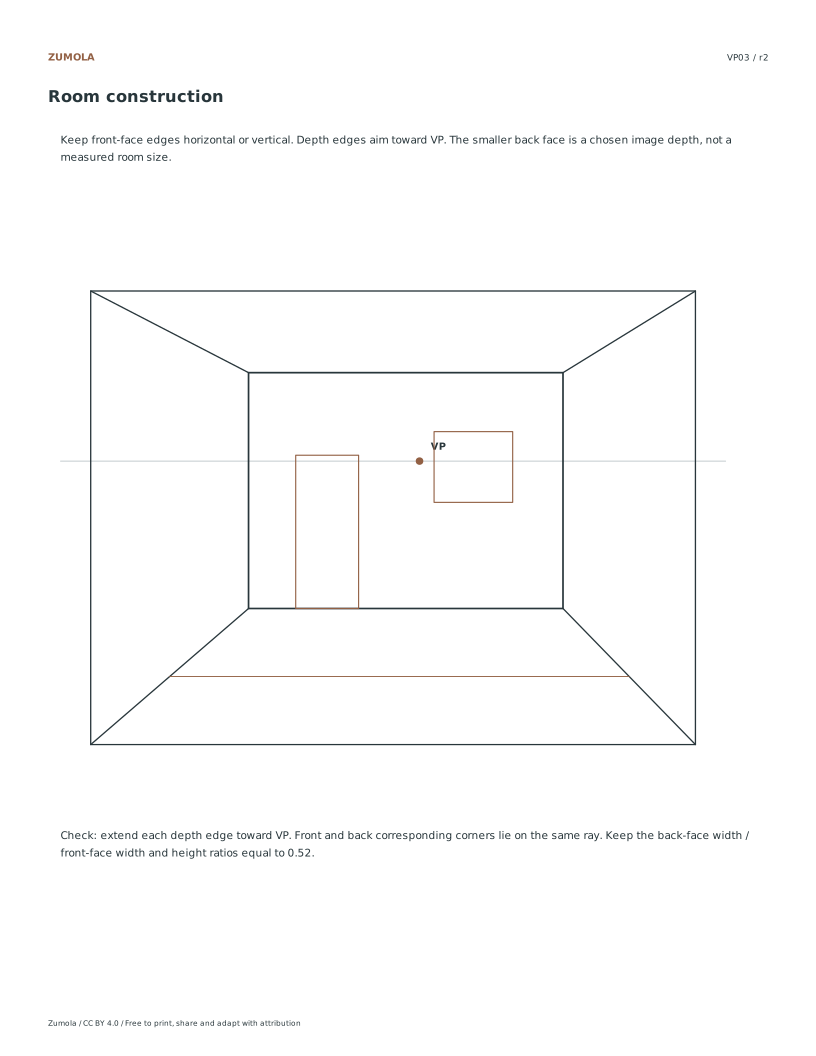
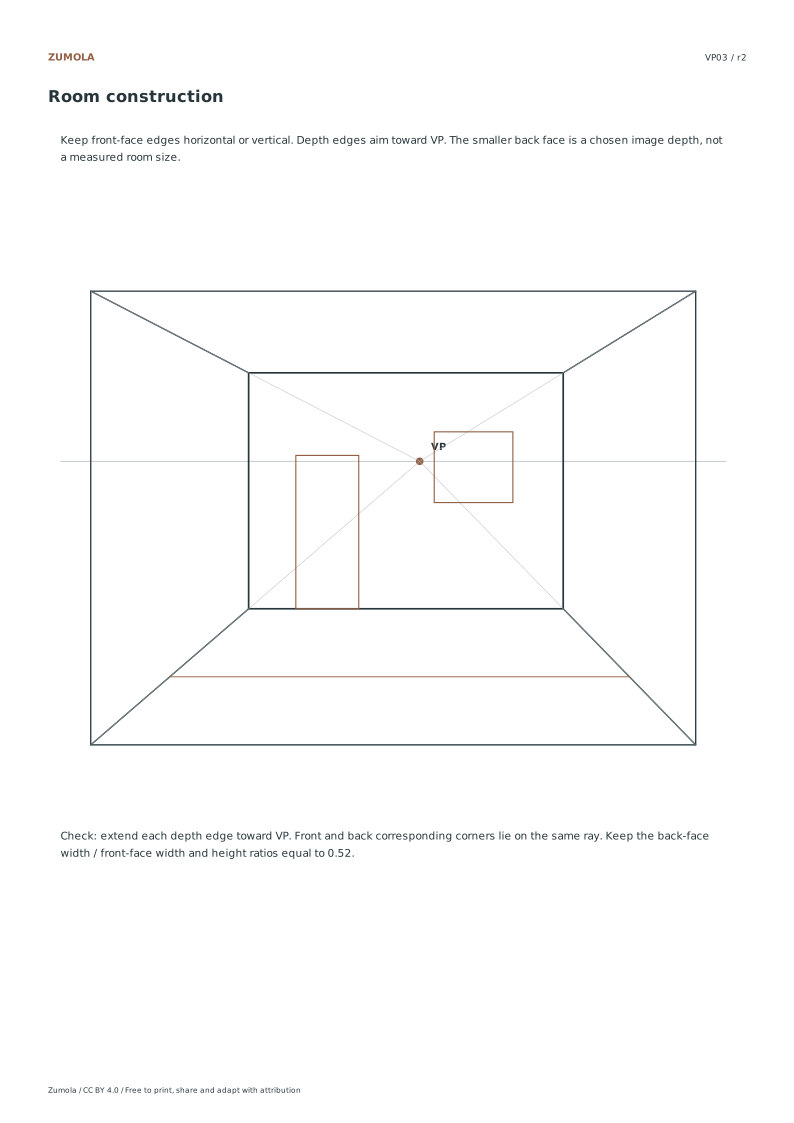
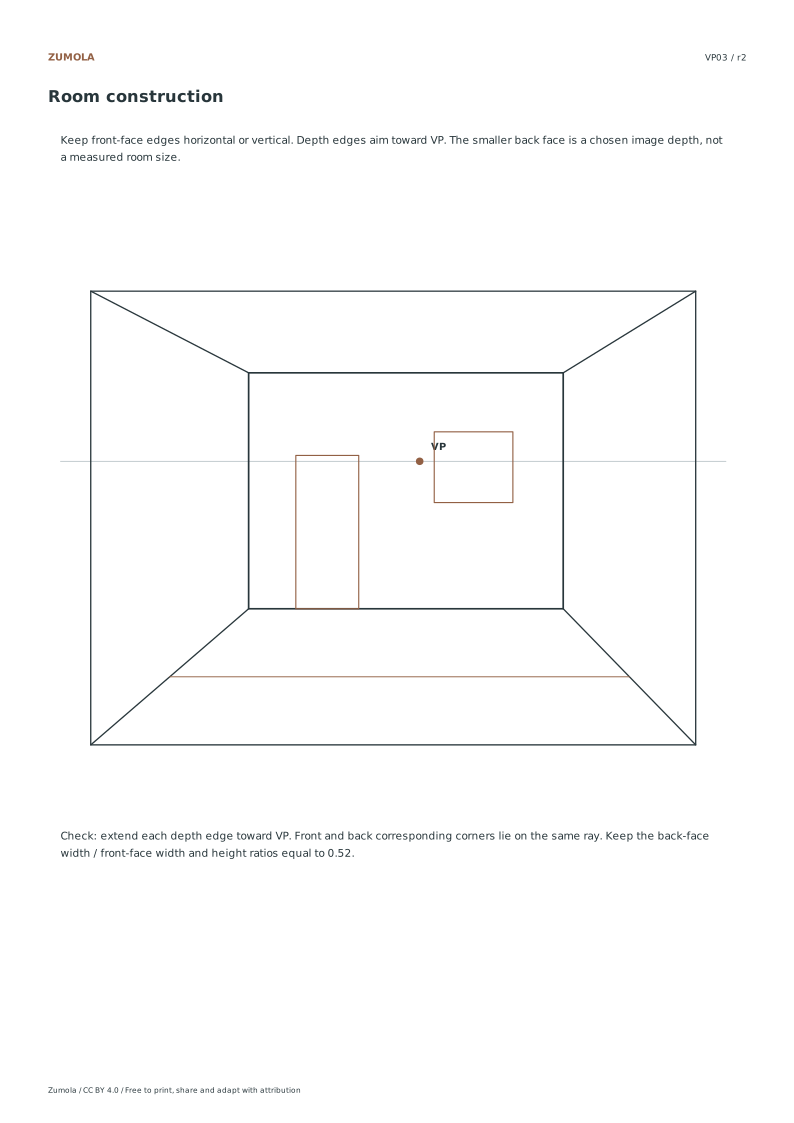
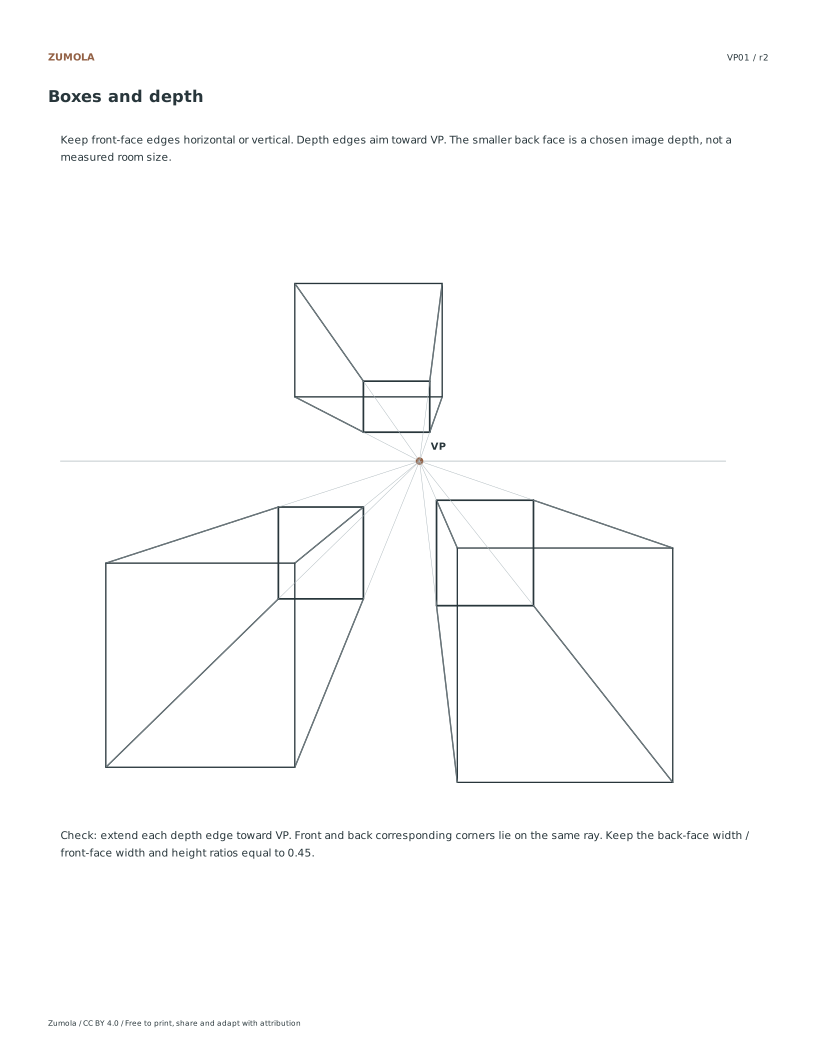
Let V be the vanishing point and F a front-face corner. A matching back corner is B = V + k(F − V). Use the same k for all four corners: 0.45 for the box set, 0.40 for the corridor, and 0.52 for the room. Every F–B edge therefore lies on a ray through V.

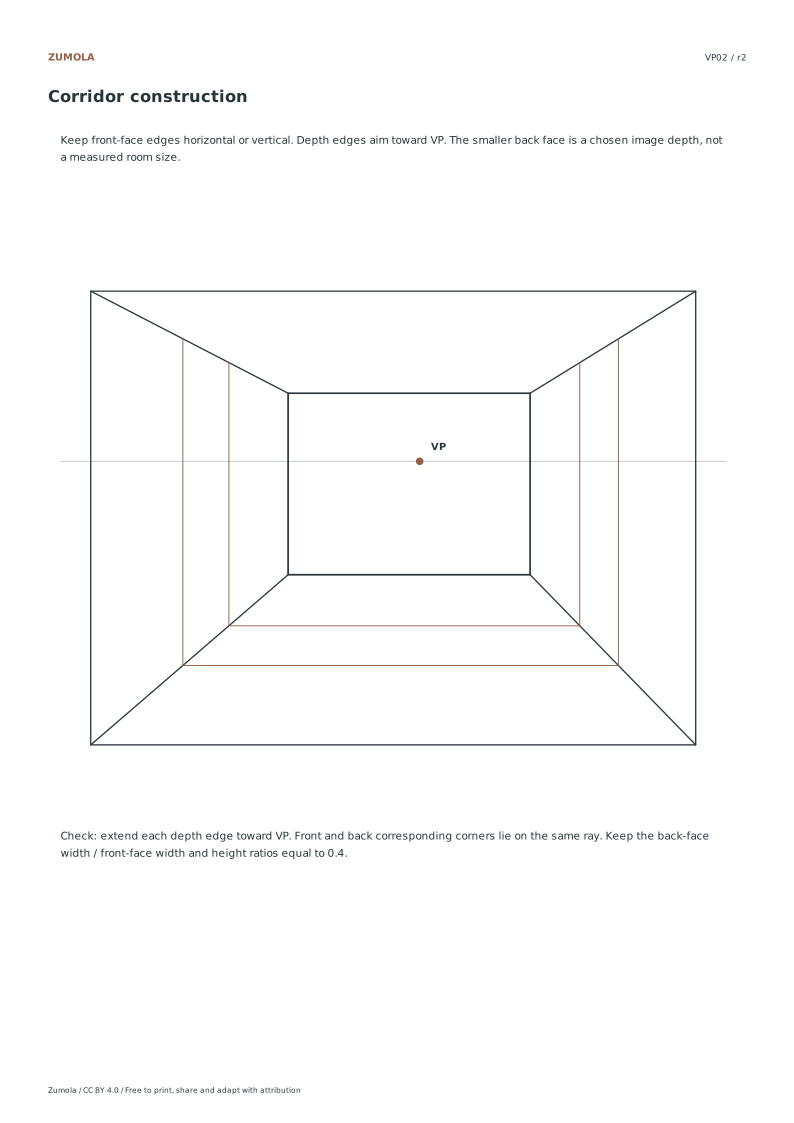
These ratios set an image depth; they do not give meters or feet in a real room. The wireframe deliberately retains construction edges. The corridor adds repeated frames; the room adds a door and window on its back wall.

Keep the two edge families distinct.

Front and back rectangles: horizontal and vertical edges. Connecting depth edges: rays toward VP. The drawing remains consistent when both groups follow their own rule.

Work through the page

  1. Establishing the Horizon and Vanishing Point

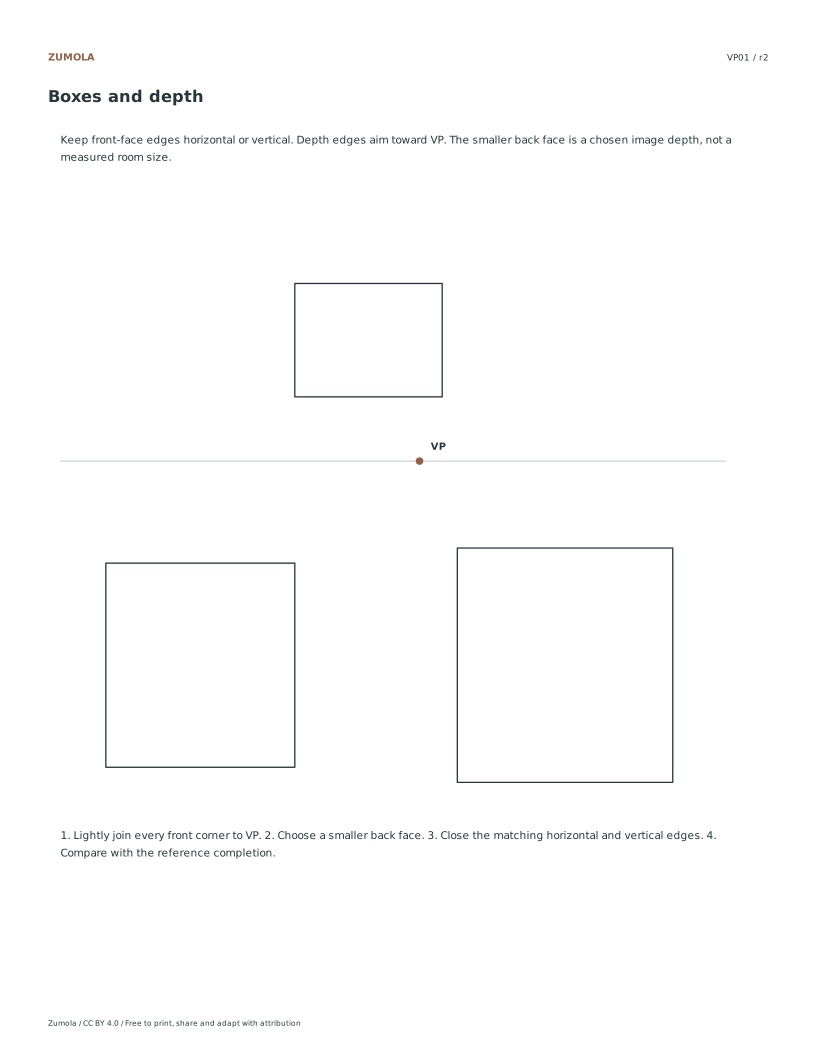
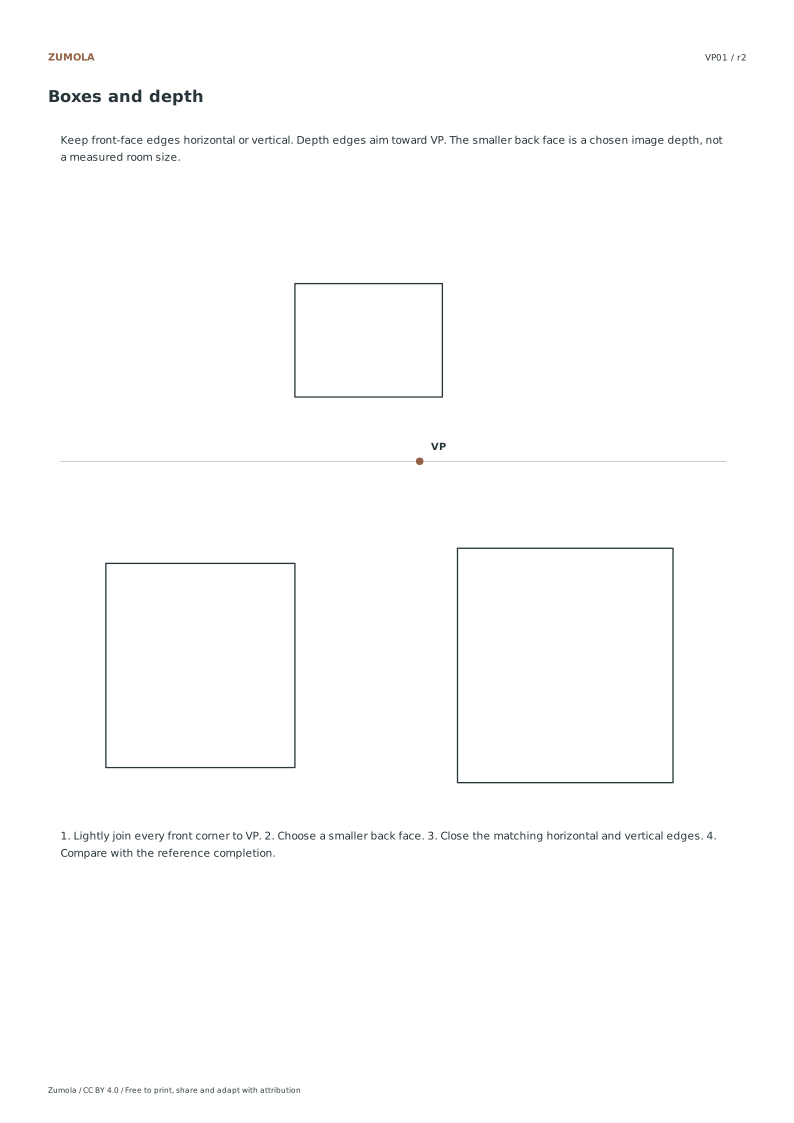
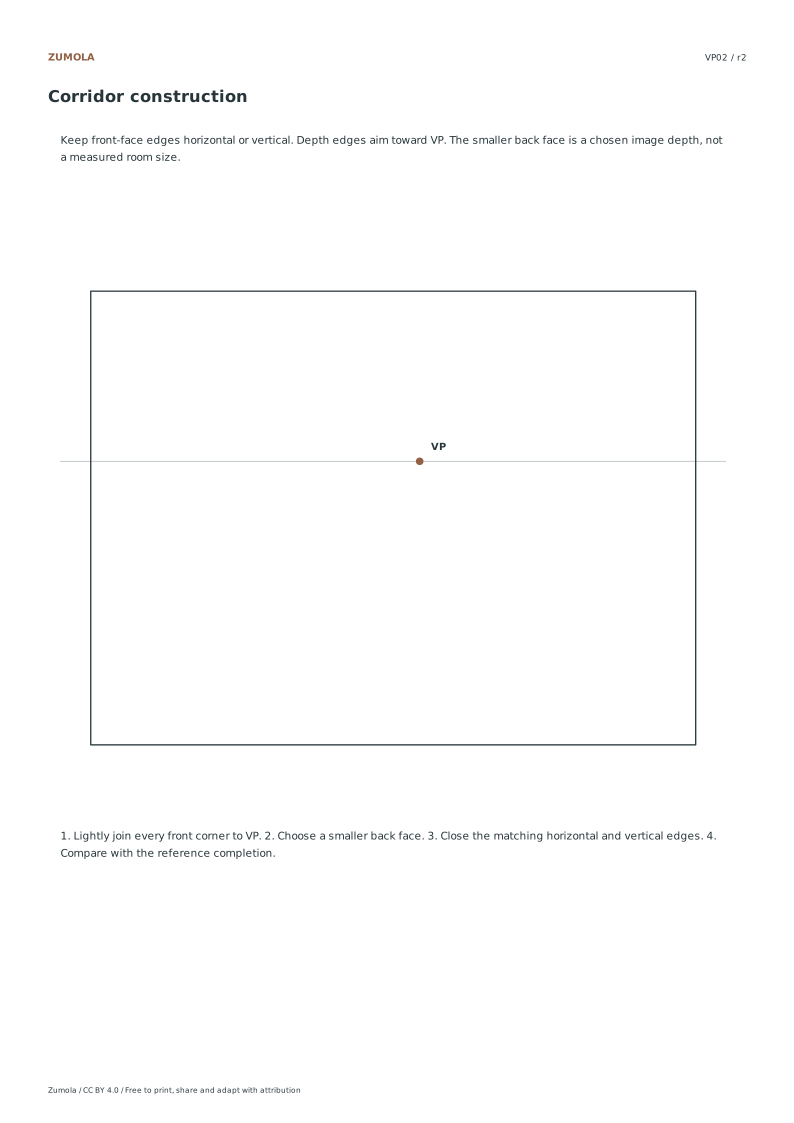
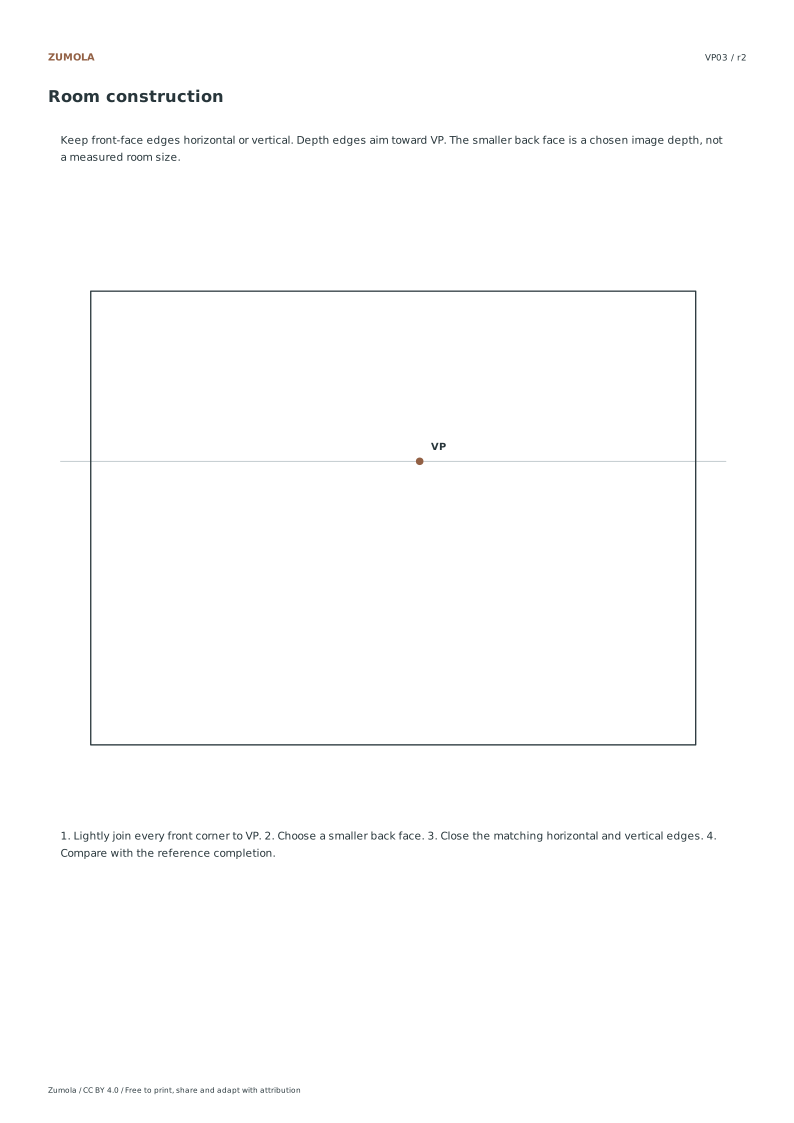
    The worksheet supplies a horizontal horizon line and a marked vanishing point, VP. Keep that framework for the first attempt. The depth edges in these exercises aim toward VP; the front-face vertical and horizontal edges stay parallel to the page sides. Begin with the supplied front rectangle and lightly extend its corner rays. The front/back construction is a wireframe, so some edges are shown for learning even when an opaque object would hide them. Use the guided reference before attempting the same framework without its completed back face.

  2. Constructing the Front and Back Faces

    Draw the front face as a standard rectangle with horizontal and vertical edges that stay parallel to the paper borders. To create the back face, apply a homothetic transformation centered on the vanishing point, resulting in a smaller rectangle that maintains proportional relationships with the front. This geometric scaling ensures the back face appears correctly receded in space without distorting the shape. Use the guided reference sheets to verify the relative size and position of this rear rectangle. The depth spacing between these faces is a chosen image construction rather than a physical room dimension, allowing you to control the perceived distance within your specific drawing composition.

  3. Connecting Depth Edges Correctly

    Connect the corresponding corners of the front and back rectangles using straight lines that converge precisely at the vanishing point. These connecting lines represent the depth edges and must follow the one-point perspective rule strictly. Avoid forcing every line in the drawing toward the vanishing point; only the depth family requires this convergence. The worked reference completion provides a visual guide for this step, showing how the depth edges interact with the horizontal and vertical planes. Since these are one possible completions, you may adjust the depth spacing to suit your artistic intent, provided the geometric logic of convergence remains intact throughout the construction process.

Small checks that catch common errors

Watch forCheck instead
Drawing all lines, including front-face horizontals and verticals, toward the vanishing point.Keep front-face horizontal and vertical edges strictly parallel to the paper axes; only depth edges converge to the vanishing point.
Treating depth spacing as a fixed physical room dimension rather than a variable image construction.Adjust depth spacing as a chosen image construction parameter, independent of real-world measurements, to control perceived distance.
Assuming the worked reference completion is the only correct artistic outcome for the worksheet.Recognize that the provided completion is one possible solution, allowing for variations in depth spacing and artistic interpretation.

Before you begin

Useful answers

Do I need to measure every line in millimeters?

Each paper has coordinates defined in millimeters, but normalized construction is the same, so focus on relative proportions and convergence rather than absolute physical measurements.

Can I change the position of the vanishing point?

Keep the printed VP when checking against the supplied completion. On a fresh sheet you can place a new VP on a new horizon; then rebuild every depth ray consistently.

Are the three sets identical in structure?

Each set includes guided reference, blank worksheet, and worked completion, but they differ in subject matter: boxes, corridor, and room, offering varied applications of the same perspective rules.

Are the answers and editable files free too?

Yes. Every linked PDF, SVG, worksheet and answer is free without signup. The original resources use CC BY 4.0: credit Zumola, link the license and indicate changes. Analytics consent is not required to download or use the resources.

Keep practicing

Further reading: Grinnell College Museum: one-point perspective activity. The downloadable geometry and exercises on this page are original Zumola work.

Worksheet preview

Full printable sheet preview

Fit-to-screen preview. Download the PDF to print at actual size.