Reference diagram
LETTER · Download PDF (1 page)
Free original resources
Learn to draw weighing scales in pure contour line, capturing dial rims and platform edges without shading or mechanics. Includes exercises and a rubric.
Original reference diagrams, four practice exercises and separate worked answers. All files are free. No signup required.
LETTER · Download PDF (1 page)
LETTER · Download PDF (2 pages)
LETTER · Download PDF (5 pages)
Choose A4 or US Letter for your printer. The reference and answer illustrations are not physical rulers; follow the scale instruction printed on the practice worksheet.
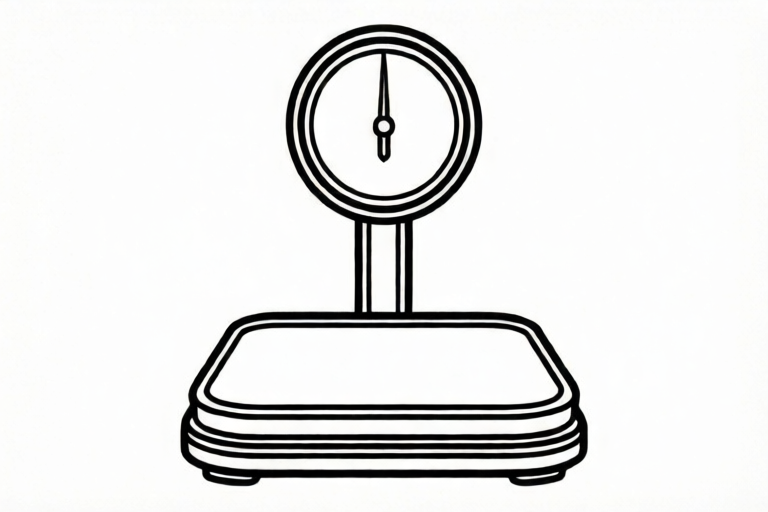
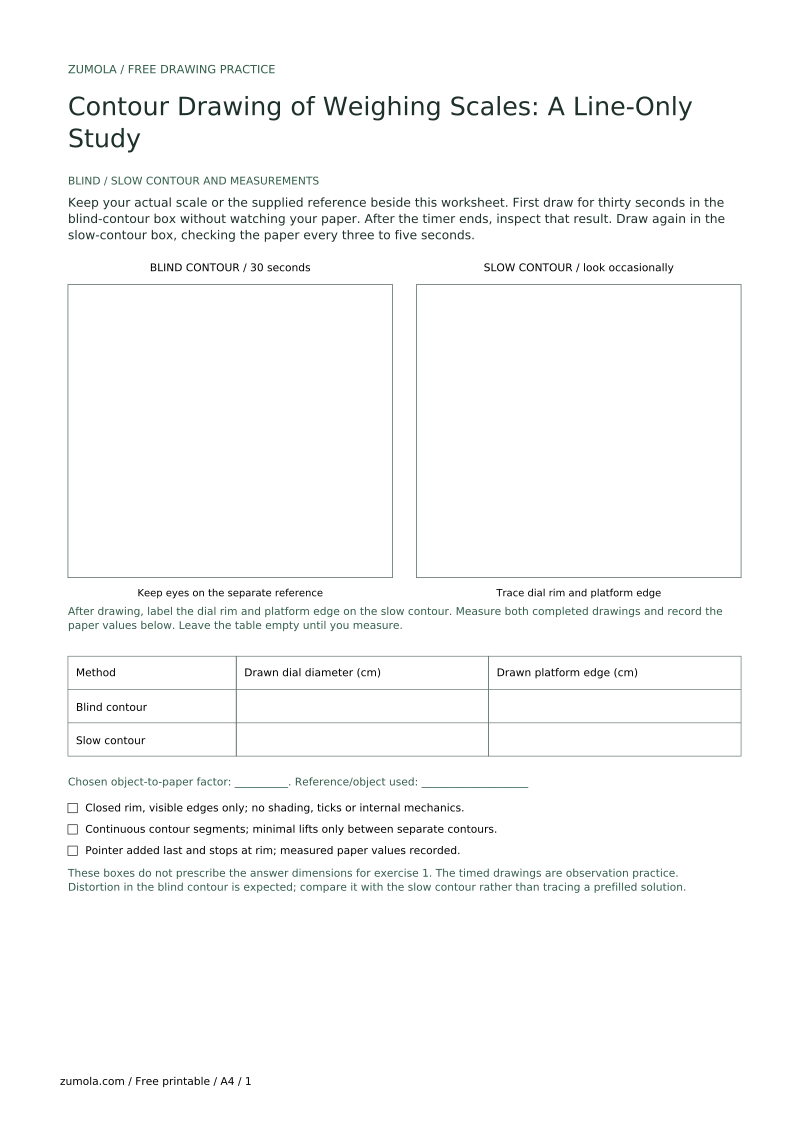
Contour drawing asks you to describe an object's visible edges with continuous segments along visible edges, ignoring shading, texture, and internal mechanics. A weighing scale is an excellent subject because it combines a circular dial, a flat platform, and connecting supports that test your hand-eye coordination. This lesson focuses on the outline and the dial detail only. All numerical values are hypothetical examples for practice, not manufacturing standards. Measure your own equipment if you adapt these tasks.
A contour line traces the boundary where one surface meets another or meets empty space. For a weighing scale, the primary contour is the outer silhouette: the platform edge, the dial housing, and the vertical support. Secondary contours include the dial rim and the needle axis. You do not draw the spring, the internal levers, or any shading. The line should be slow and deliberate, not sketchy.
Keep each contour continuous where possible. Make a minimal pen lift when you move to a separate visible contour, such as the closed dial rim. Restart a broken contour at the point where it stopped, but do not add a connecting line across empty space just to keep the pen down. The goal is observation, not speed. Keep your eye on the object more than on the paper.
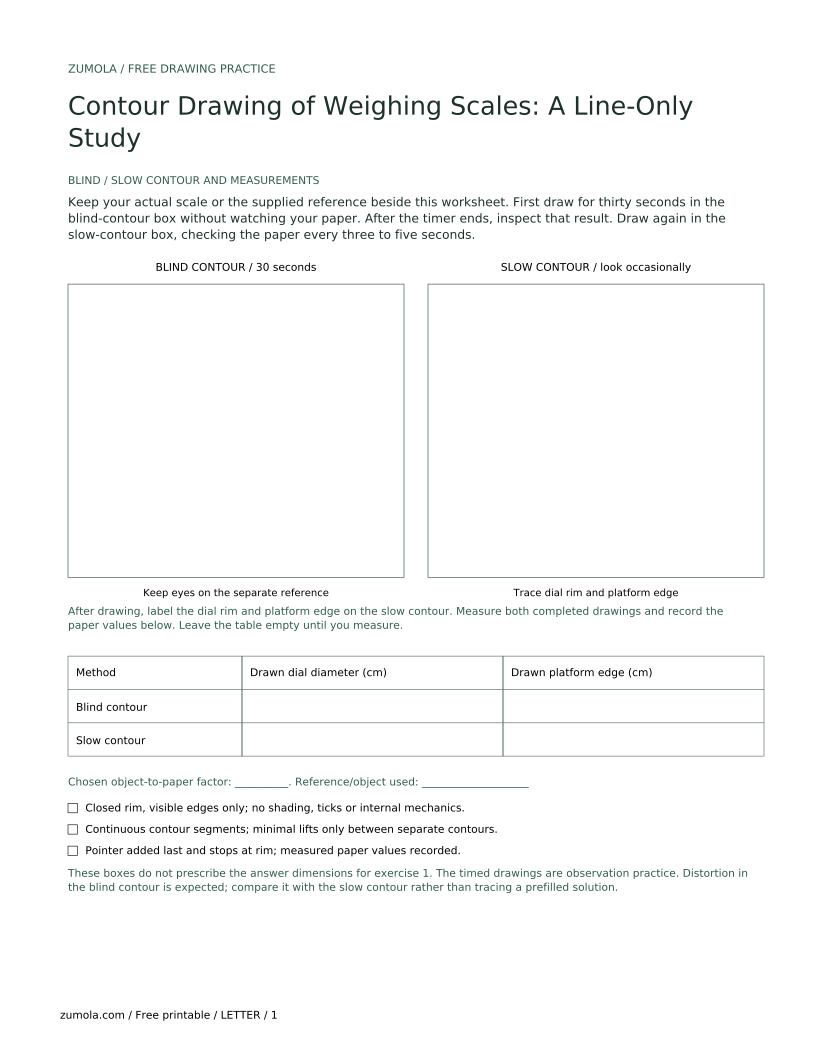
Blind contour means watching the object while drawing without looking at your paper. Follow the visible edge with your eyes as your hand records that route. Slow contour in this lesson means drawing deliberately while looking at the paper occasionally. Compare the two methods to notice where your hand follows or drifts away from the observed edge.
For this exercise, use thirty seconds for the blind-contour box, keeping your eyes on the scale rather than the paper. Distortion is an expected result of this observation exercise. For the slow-contour box, draw the same outline while checking the paper every few seconds. The time limits are chosen practice instructions, not standards. Compare proportions and loop closure without adding shading.
The dial rim is a circle or oval that must close cleanly. Draw it as one continuous loop, starting at the top and moving clockwise. In this lesson, needle axis means the visible pointer line, not an internal mechanism. Draw it as a separate straight stroke from the rim center to the rim edge; its direction is a drawing choice. This chosen full-radius pointer has a length equal to the drawn rim radius. Do not add numbers or tick marks; this lesson excludes dial markings.
The platform edge is often a rounded rectangle. Draw the front edge first, then the side edges, then the back edge if visible. Keep the line weight consistent. If the platform has a lip, draw only the outer lip contour, not the inner surface.
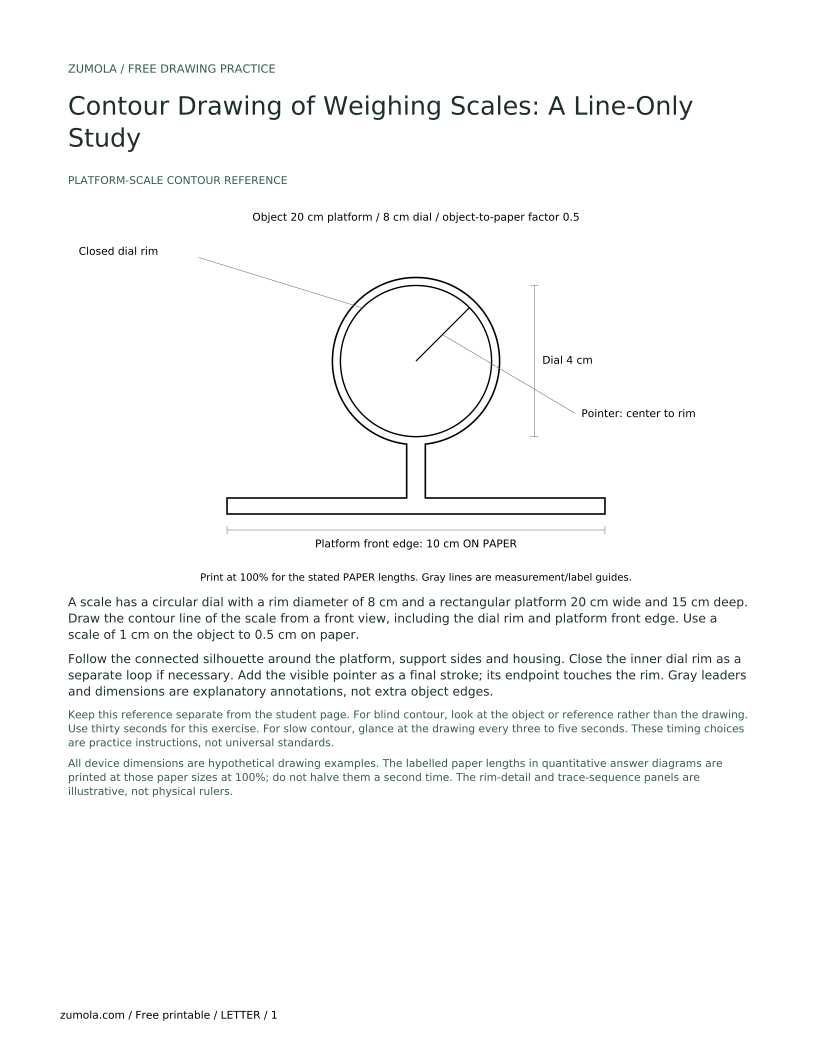
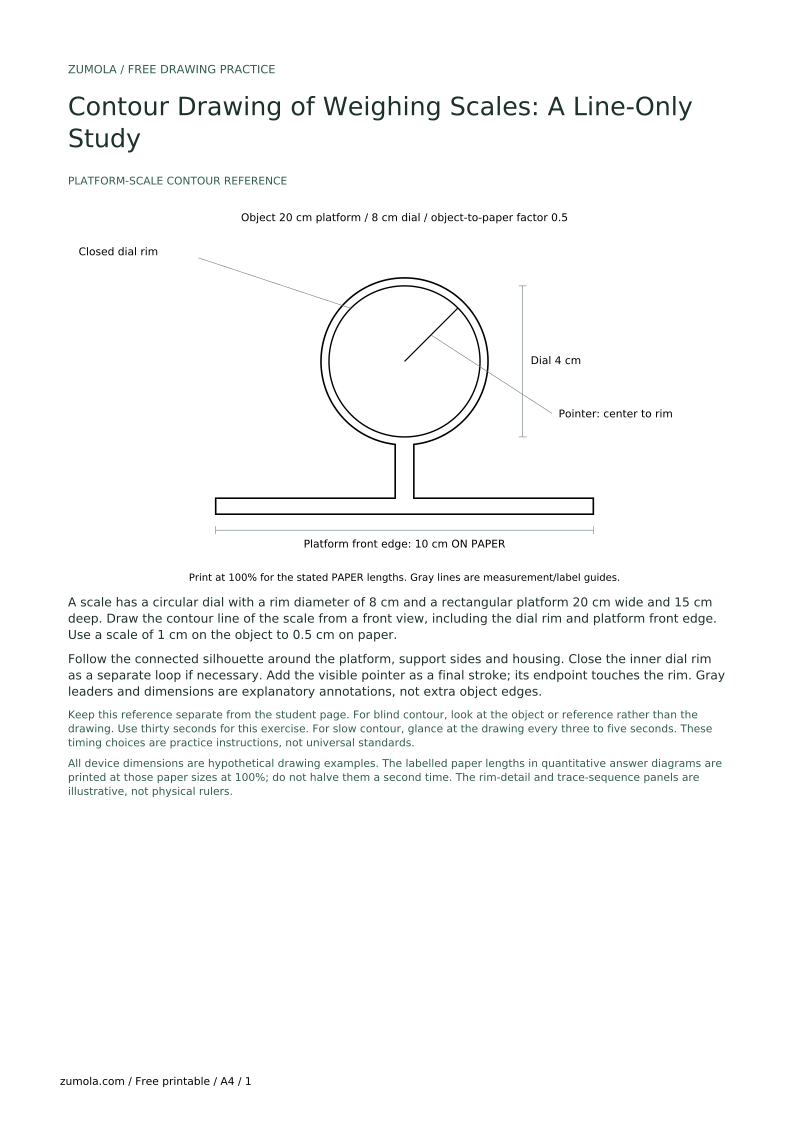
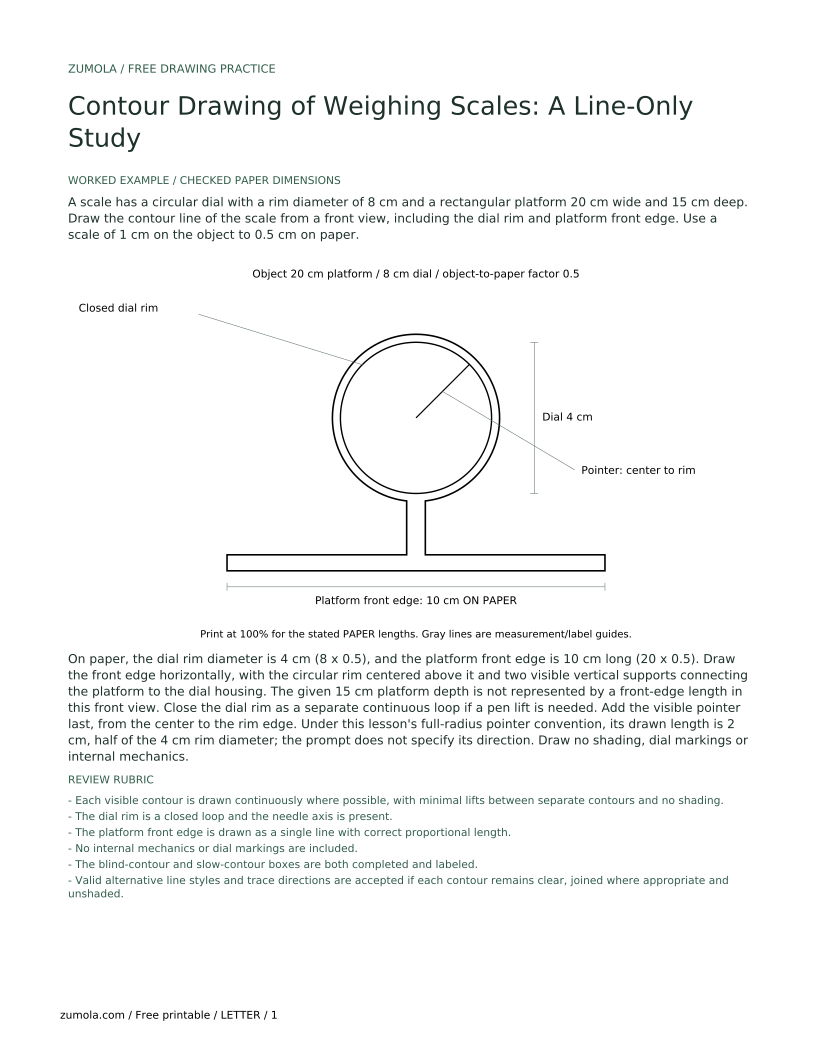
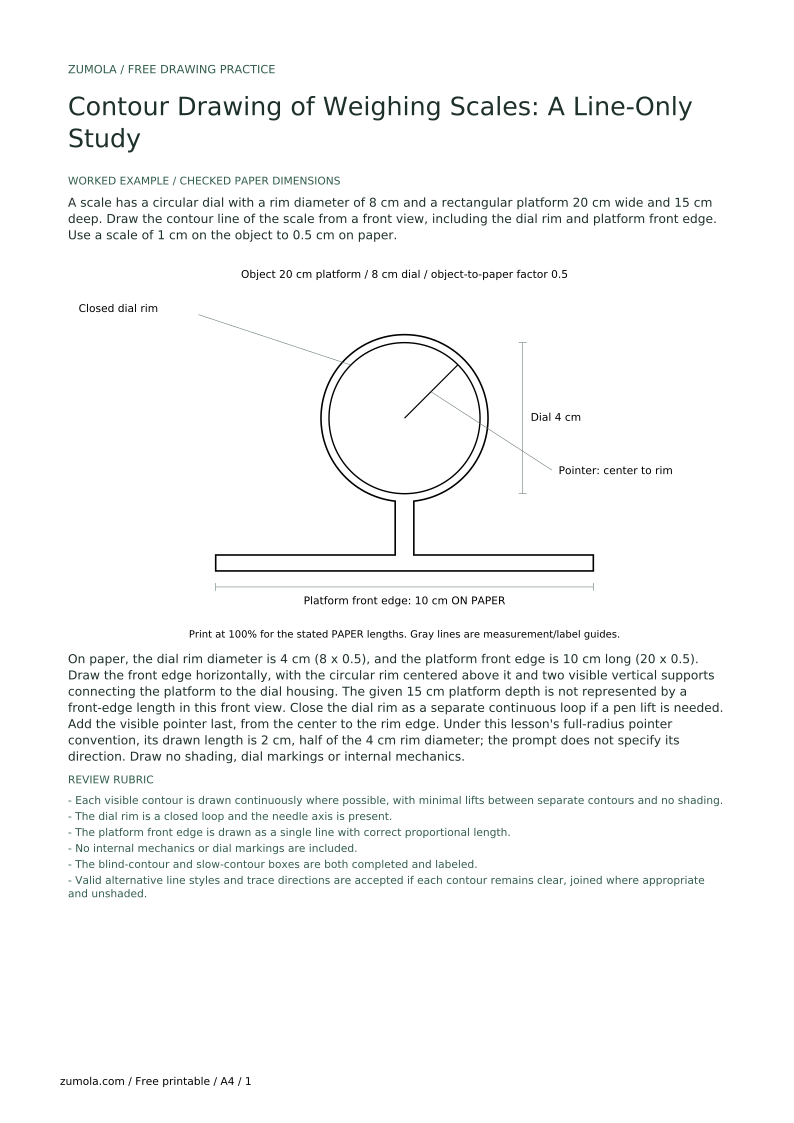
A scale has a circular dial with a rim diameter of 8 cm and a rectangular platform 20 cm wide and 15 cm deep. Draw the contour line of the scale from a front view, including the dial rim and platform front edge. Use a scale of 1 cm on the object to 0.5 cm on paper.
On paper, the dial rim diameter is 4 cm (8 x 0.5), and the platform front edge is 10 cm long (20 x 0.5). Draw the front edge horizontally, with the circular rim centered above it and two visible vertical supports connecting the platform to the dial housing. The given 15 cm platform depth is not represented by a front-edge length in this front view. Close the dial rim as a separate continuous loop if a pen lift is needed. Add the visible pointer last, from the center to the rim edge. Under this lesson's full-radius pointer convention, its drawn length is 2 cm, half of the 4 cm rim diameter; the prompt does not specify its direction. Draw no shading, dial markings or internal mechanics.
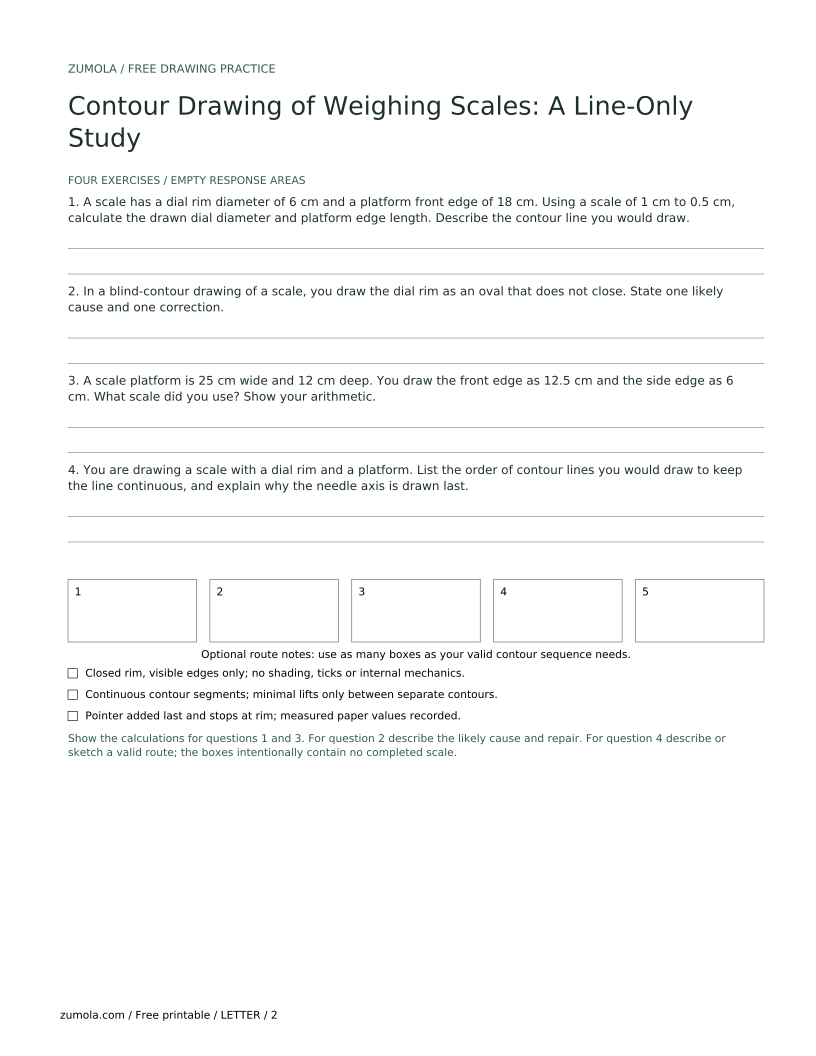
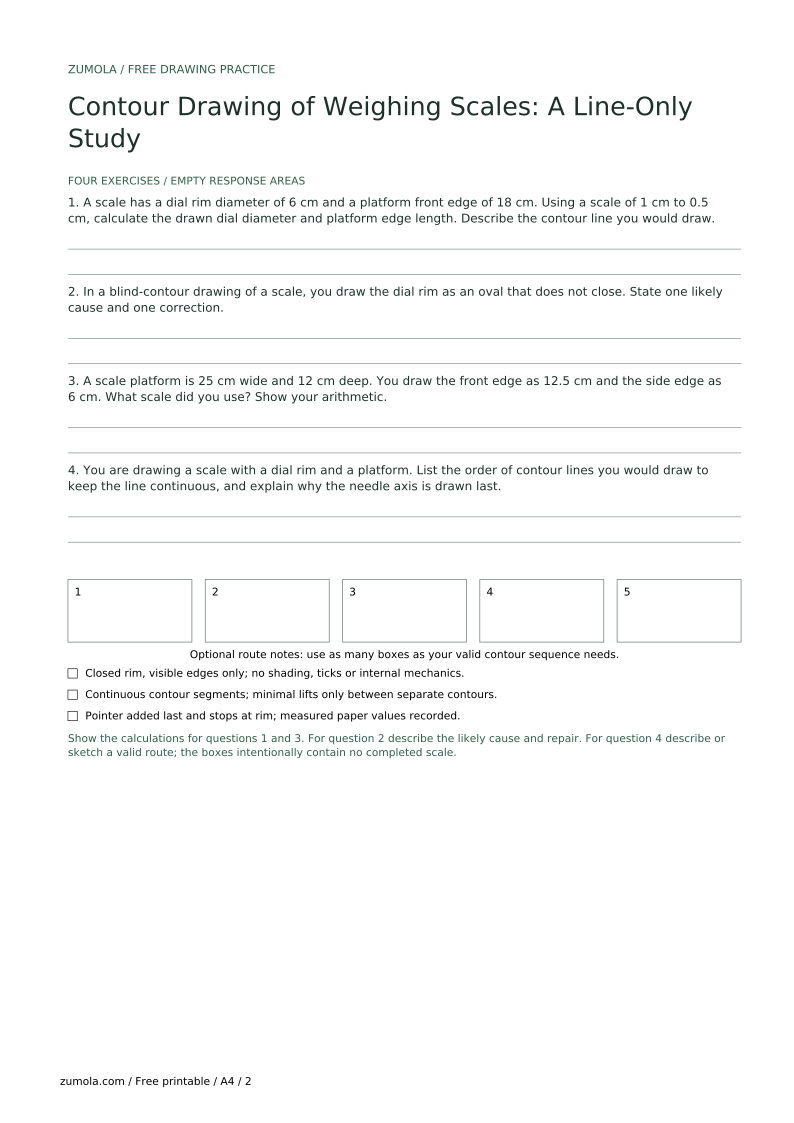
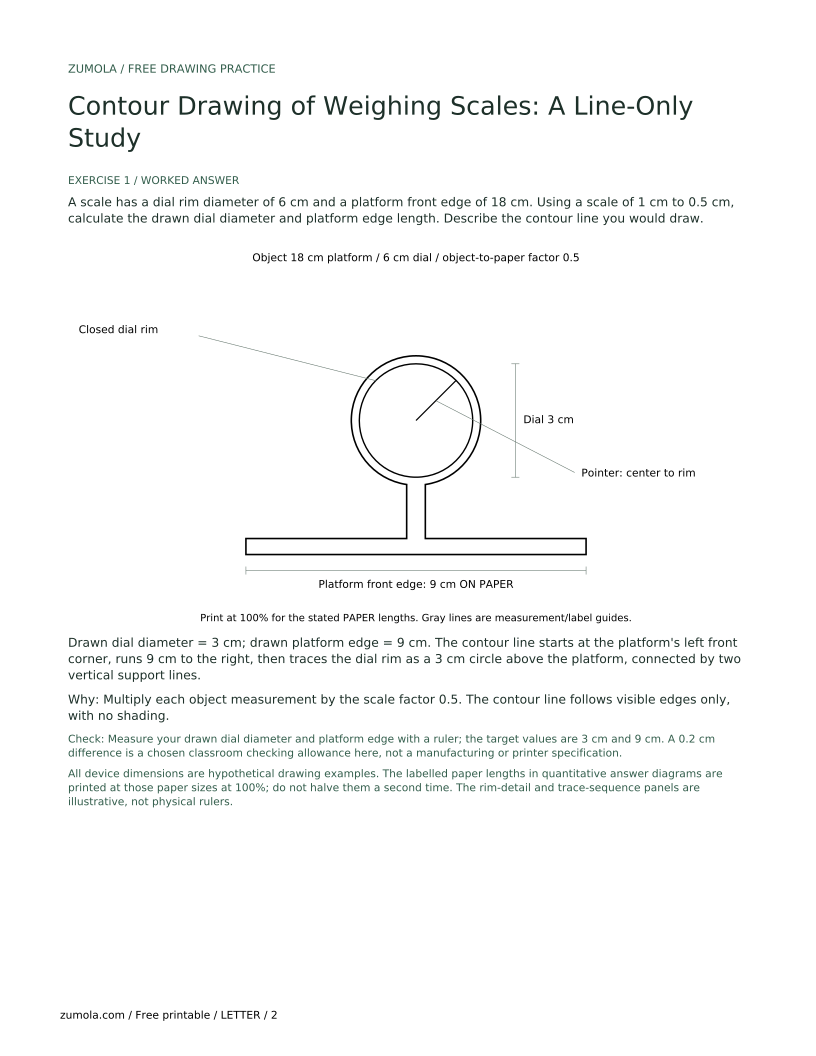
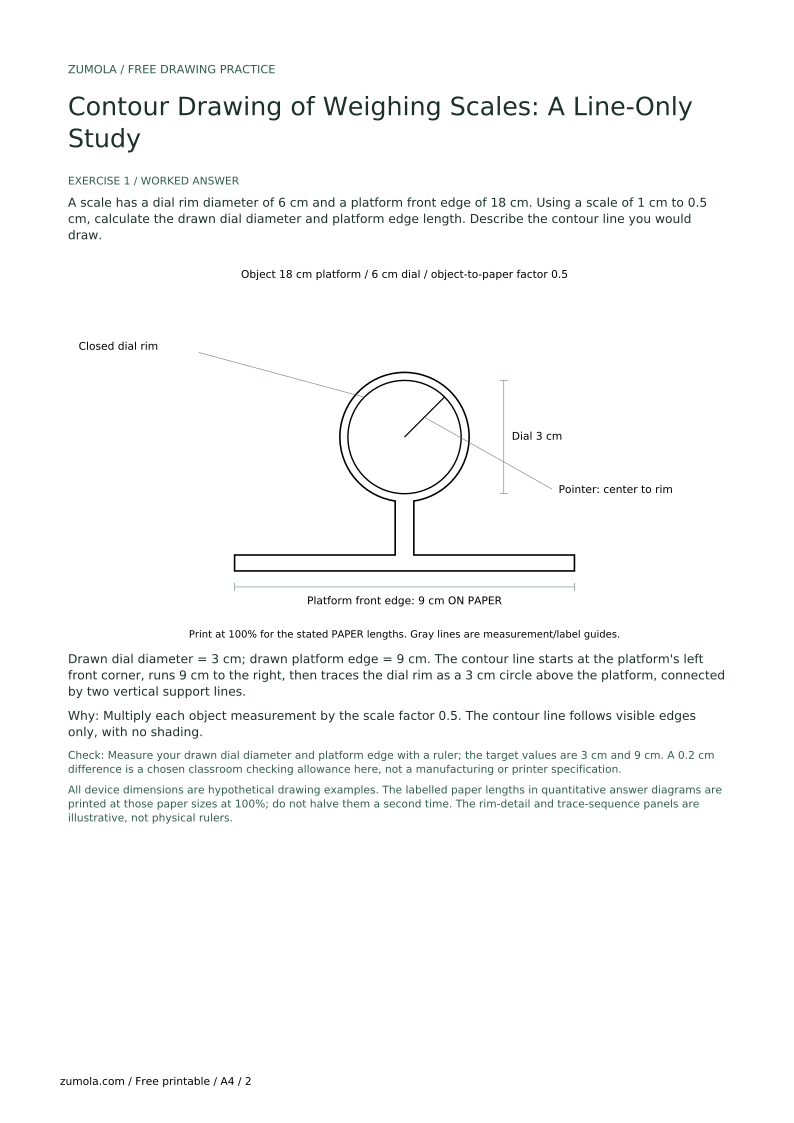
A scale has a dial rim diameter of 6 cm and a platform front edge of 18 cm. Using a scale of 1 cm to 0.5 cm, calculate the drawn dial diameter and platform edge length. Describe the contour line you would draw.
Drawn dial diameter = 3 cm; drawn platform edge = 9 cm. The contour line starts at the platform's left front corner, runs 9 cm to the right, then traces the dial rim as a 3 cm circle above the platform, connected by two vertical support lines.
Multiply each object measurement by the scale factor 0.5. The contour line follows visible edges only, with no shading.
Check: Measure your drawn dial diameter and platform edge with a ruler; the target values are 3 cm and 9 cm. A 0.2 cm difference is a chosen classroom checking allowance here, not a manufacturing or printer specification.
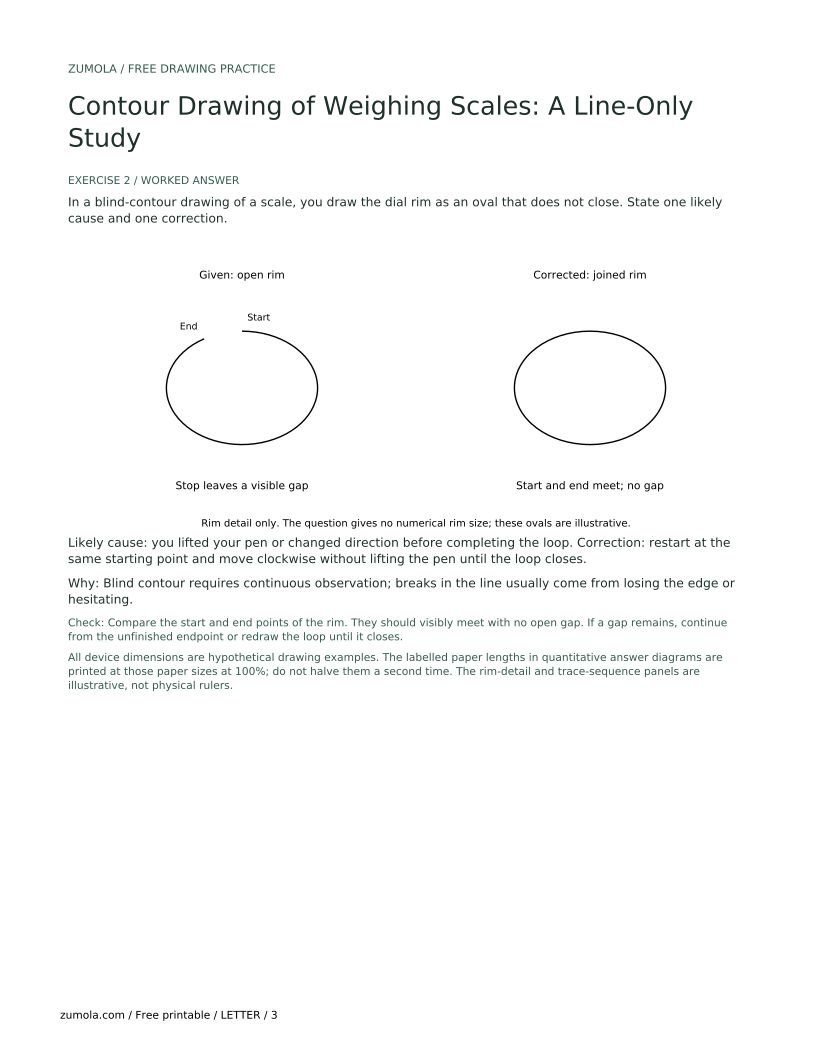
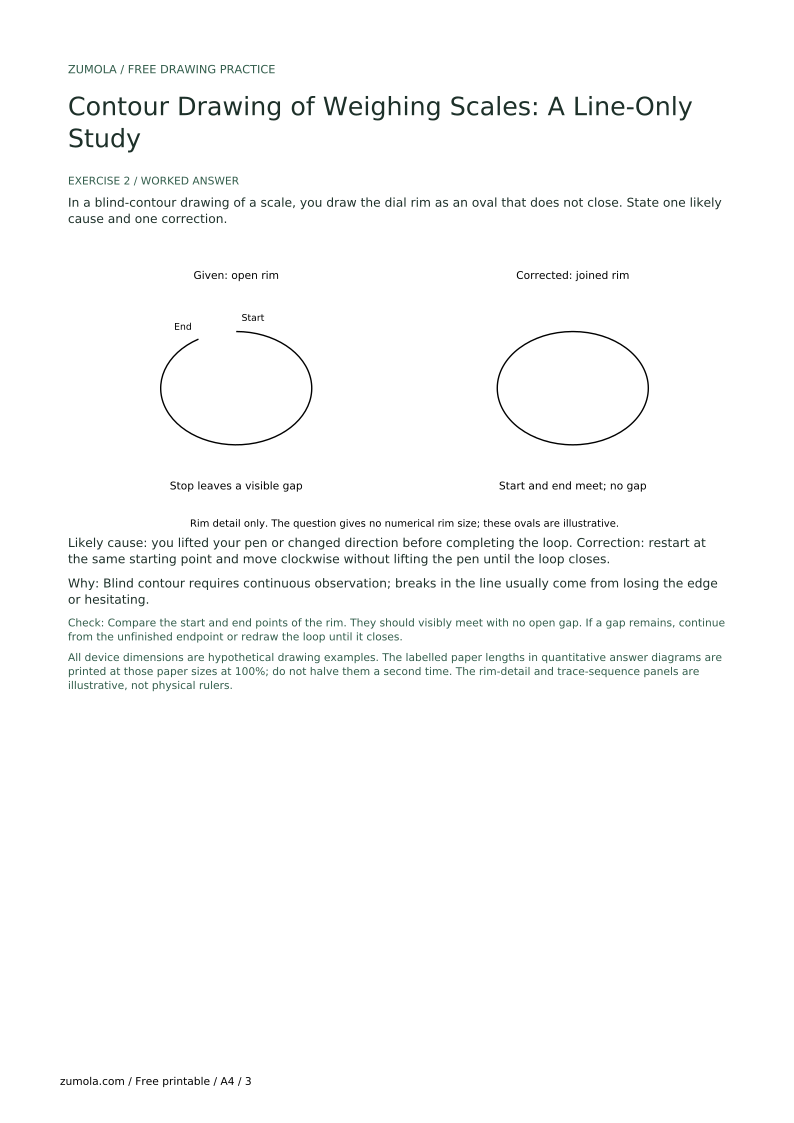
In a blind-contour drawing of a scale, you draw the dial rim as an oval that does not close. State one likely cause and one correction.
Likely cause: you lifted your pen or changed direction before completing the loop. Correction: restart at the same starting point and move clockwise without lifting the pen until the loop closes.
Blind contour requires continuous observation; breaks in the line usually come from losing the edge or hesitating.
Check: Compare the start and end points of the rim. They should visibly meet with no open gap. If a gap remains, continue from the unfinished endpoint or redraw the loop until it closes.
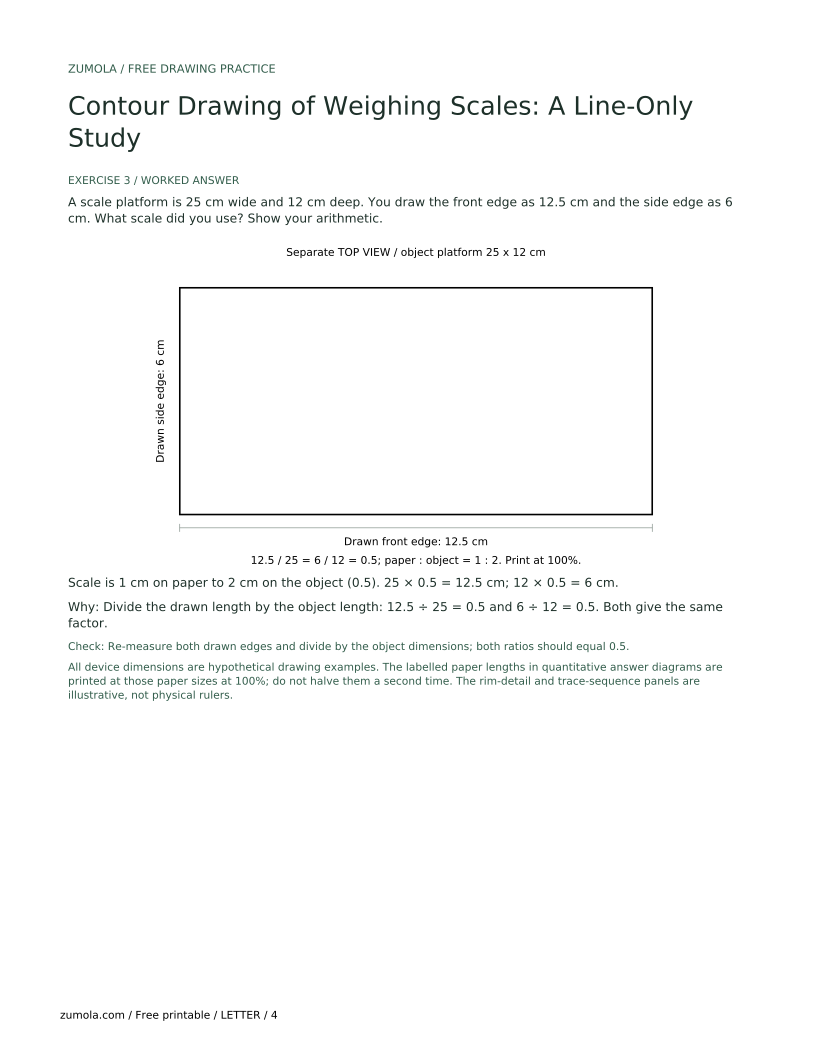
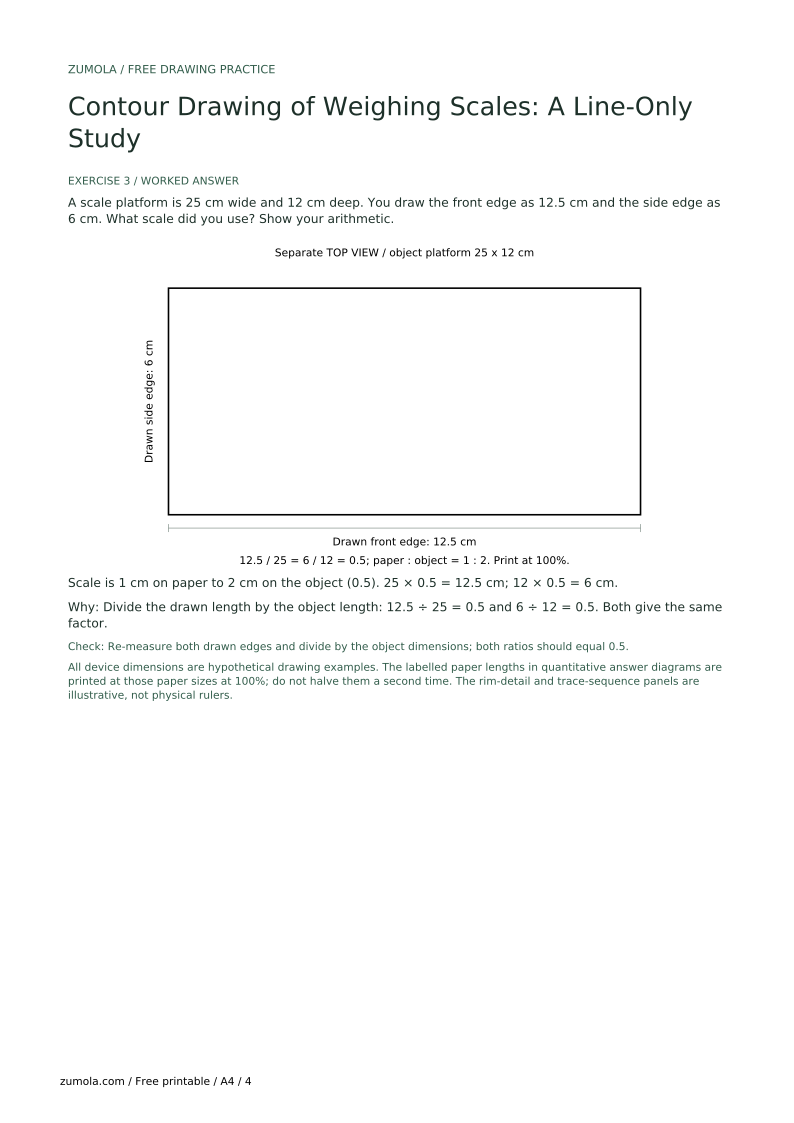
A scale platform is 25 cm wide and 12 cm deep. You draw the front edge as 12.5 cm and the side edge as 6 cm. What scale did you use? Show your arithmetic.
Scale is 1 cm on paper to 2 cm on the object (0.5). 25 × 0.5 = 12.5 cm; 12 × 0.5 = 6 cm.
Divide the drawn length by the object length: 12.5 ÷ 25 = 0.5 and 6 ÷ 12 = 0.5. Both give the same factor.
Check: Re-measure both drawn edges and divide by the object dimensions; both ratios should equal 0.5.
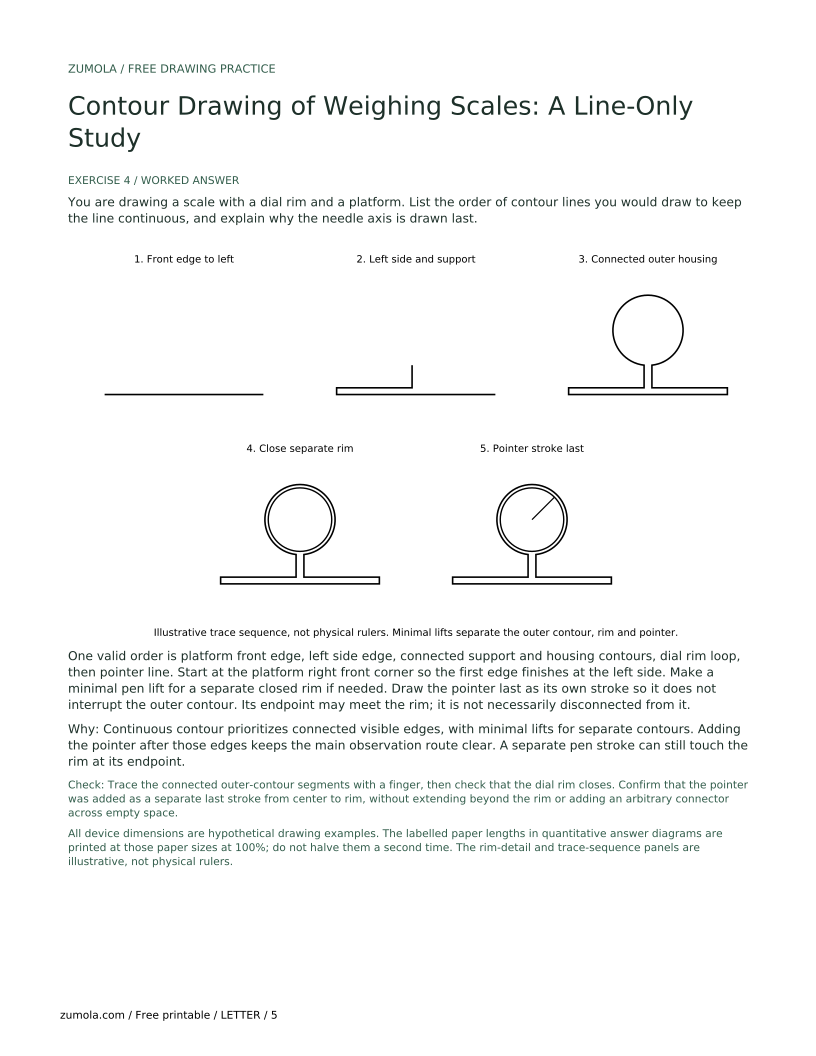
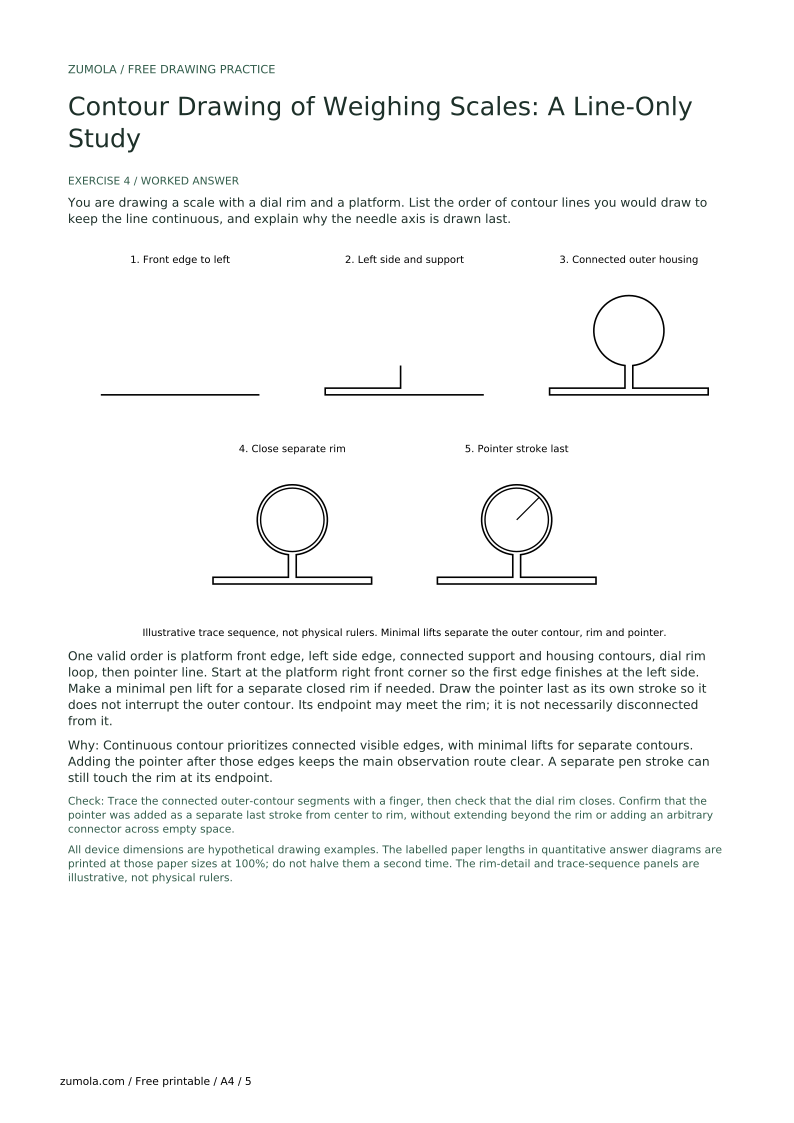
You are drawing a scale with a dial rim and a platform. List the order of contour lines you would draw to keep the line continuous, and explain why the needle axis is drawn last.
One valid order is platform front edge, left side edge, connected support and housing contours, dial rim loop, then pointer line. Start at the platform right front corner so the first edge finishes at the left side. Make a minimal pen lift for a separate closed rim if needed. Draw the pointer last as its own stroke so it does not interrupt the outer contour. Its endpoint may meet the rim; it is not necessarily disconnected from it.
Continuous contour prioritizes connected visible edges, with minimal lifts for separate contours. Adding the pointer after those edges keeps the main observation route clear. A separate pen stroke can still touch the rim at its endpoint.
Check: Trace the connected outer-contour segments with a finger, then check that the dial rim closes. Confirm that the pointer was added as a separate last stroke from center to rim, without extending beyond the rim or adding an arbitrary connector across empty space.
Start at one point and move clockwise without lifting the pen; if the loop overshoots, stop and restart from the same point.
Remove all shading; describe thickness only with a second contour line if the edge is visible.
Cover the paper with a sheet of card and keep your eye on the scale for the full thirty seconds.
Limit your line to visible outer edges and the dial rim; ignore anything inside the housing.
Yes, but only for the straight edges. The dial rim should be freehand to practice continuous line control.
That is normal. Blind contour is an observation exercise, not a finished drawing. Compare it with your slow contour to see where your hand drifted.
Measure across the widest part of the closed rim loop with a ruler, passing through the rim center. Record the result in the same unit as your platform edge measurement, then compare it with the expected drawn diameter from your chosen scale factor.
No. This lesson excludes dial markings. Focus on the rim and needle axis only.
The blind-contour instruction was checked against the Getty Research Institute, Art & Architecture Thesaurus, blind contour drawing, ID 300053174; and the National Gallery of Art, Chris Rusinko, Mindful Drawing: Activities that Embrace Experimentation (June 9, 2023), Blind contour portrait drawing. These sources describe observing the subject without watching the drawing. The thirty-second exercise, full-radius pointer and checking allowance are choices for this worksheet, not museum rules or equipment standards.