Free original lessons
One-Line Contour Face Drawing: No-Lift Practice
Learn to draw a face in one continuous contour line without lifting the pen. Includes a convention, rubric, worked example, and four self-contained exercises.
Free lesson
Four exercises
Worked answers
Object Drawing Lessons
A continuous contour face drawing uses one unbroken line to describe the visible edges of a face. The pen stays on the paper from the first mark to the last. This constraint forces you to plan the route and to accept small drifts in feature placement. Because letter styles and facial features vary, this lesson defines a drawing convention and a rubric that allow valid alternatives. All measurements are hypothetical examples; measure your own paper and pen before starting.
Practice materials: Printable downloads are not available for this lesson yet. Use the instructions and four exercises below.
Reference illustration
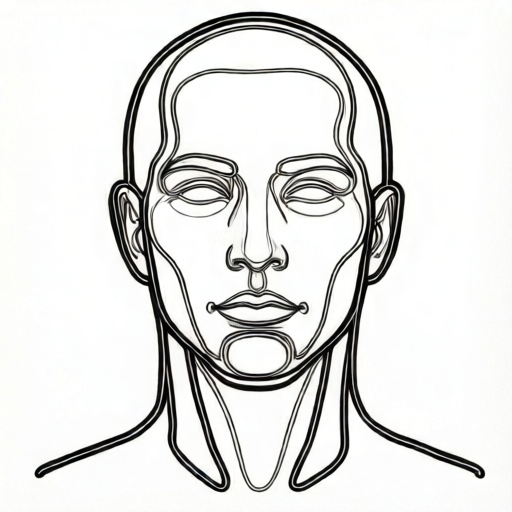
Use the stated measurements and conventions for each exercise.
The no-lift convention
Define the start point as the top of the forehead at the midline. The line travels down the left side of the face, around the chin, up the right side, and back to the start. Facial features are entered as loops or detours from this outer route. A loop is a closed or open curve that returns near its entry point without lifting the pen.
X-height is the distance from the baseline to the midline of a lowercase letter in your normal handwriting. Use your own x-height as a scale unit. For example, if your x-height is 4 mm, a face height of 12 x-heights is 48 mm. These numbers are hypothetical; substitute your measured values.
The line may cross itself. Crossings are allowed and do not break continuity. The only rule is that the pen tip never leaves the paper between the first and last mark.
- Measure your pen line width and your x-height on scrap paper; record both in the same unit.
- Mark a start point at the top midline of the face area.
- Draw the outer contour down the left side, around the chin, and up the right side.
- Enter each feature as a loop from the outer route: eyes, nose, mouth, ears.
- Return to the start point and stop; do not lift the pen before the final mark.
Planning the route
Before drawing, trace the route with your finger above the paper. Decide the order of feature loops. A common order is left eye, nose, mouth, right eye, then ear loops. The order is not fixed; any order that returns to the outer route is valid.
Feature placement drift happens when the line accumulates small offsets. To reduce drift, place a light pencil dot at each feature center before the continuous line. The dots are guides, not part of the contour. The continuous line may pass near or through a dot; exact alignment is not required.
- Place guide dots at eye centers, nose tip, mouth center, and ear positions.
- Choose a feature order and say it aloud once.
- Draw the outer contour first, then the feature loops in your chosen order.
- Keep the pen moving at a slow, steady speed; pause only by holding the pen still on the paper.
Judging continuity and placement
Continuity is checked by tracing the line from start to end with your finger. If your finger can follow one path without jumping, the line is continuous. Placement is checked by comparing feature centers to the guide dots. A drift of one x-height or less is acceptable for this exercise.
The rubric below allows different letter styles and feature shapes. A drawing is not judged against a single universal face. Instead, it is judged against the stated convention and the drawer's own guide dots.
- Trace the line with your finger to confirm no breaks.
- Measure the distance from each feature center to its guide dot.
- Record the largest drift in x-height units.
- Compare the result to the rubric and note one improvement for the next attempt.
Worked example
A drawer measures an x-height of 5 mm and a pen line width of 0.5 mm. They plan a face height of 12 x-heights. Place guide dots at the left eye, nose tip, mouth center, and right eye. Draw one continuous line: start at top midline, go down the left side, around the chin, up the right side, then loop left eye, nose, mouth, right eye, and return to start. After drawing, the largest feature drift is 4 mm. Is the drawing acceptable under the rubric?
Worked answer
Face height is 12 x 5 mm = 60 mm. The largest drift is 4 mm, which is less than one x-height (5 mm). The line is continuous if the finger trace shows no breaks. Under the rubric, continuity passes and drift passes, so the drawing is acceptable. The pen width of 0.5 mm is recorded but does not affect the pass decision.
Four practice exercises
Exercise 1
On a blank sheet, mark a start point at top midline. Draw a continuous contour of an oval face 10 x-heights tall. Enter two eye loops and one mouth loop. Do not lift the pen. After drawing, measure the largest drift from each feature center to a guide dot you placed before drawing. Report the drift in x-height units.
Show answer and check
A continuous line from start to start with two eye loops and one mouth loop, and a reported drift of one x-height or less.
Why: The oval face is a simple outer contour. Two eye loops and one mouth loop test feature entry without complex nose or ear shapes. The drift measurement checks placement control.
Check: Trace the line with your finger to confirm no breaks. Measure each feature center to its guide dot and divide by your x-height. Pass if the largest value is 1.0 or less.
Exercise 2
Draw a continuous contour of a face 12 x-heights tall with a nose loop and two ear loops in addition to two eye loops and one mouth loop. Use a feature order of left eye, nose, mouth, right eye, left ear, right ear. After drawing, count the number of times the line crosses itself. Report the count and the largest drift.
Show answer and check
A continuous line with six feature loops, a reported crossing count, and a largest drift of one x-height or less.
Why: Six loops increase route complexity. The specified order tests planning. Crossing count is a simple checkable number that does not judge style.
Check: Trace continuity with your finger. Count visible crossings and record the number. Measure drift as in exercise 1. Pass if continuity holds and drift is 1.0 x-height or less.
Exercise 3
Draw a continuous contour of a face 8 x-heights tall. Use only three feature loops: left eye, nose, right eye. Do not include a mouth loop. After drawing, measure the face height in millimetres and the largest drift in millimetres. Convert both to x-height units and report the ratio of drift to face height.
Show answer and check
A continuous line with three loops, a face height in x-height units, a drift in x-height units, and a drift-to-height ratio.
Why: Fewer loops test whether the outer contour alone can carry the drawing. The ratio connects drift to overall size and is simple arithmetic.
Check: Confirm continuity by finger trace. Compute drift divided by face height. Pass if drift is 1.0 x-height or less; report the ratio even if it passes.
Exercise 4
Draw a continuous contour of a face 15 x-heights tall with two eye loops, one nose loop, one mouth loop, and one ear loop. Start at top midline and return to start. After drawing, write a two-sentence reflection comparing line continuity and feature placement drift. Include the largest drift in x-height units and one specific change you would make next time.
Show answer and check
A continuous line with five loops, a reflection of two sentences, a reported largest drift, and one specific change.
Why: The largest face height tests scale control. The reflection prompt connects continuity and drift, which are the two judged qualities. The specific change makes the reflection checkable.
Check: Confirm continuity by finger trace. Confirm the reflection has exactly two sentences, includes a drift value in x-height units, and names one change. Pass if drift is 1.0 x-height or less and all reflection elements are present.
Common mistakes
- Lifting the pen to reposition between features. Hold the pen still on the paper while you decide the next loop, then continue from the same point.
- Drawing features as separate closed shapes that do not connect to the outer route. Enter each feature as a loop that starts and ends near the outer contour, leaving a visible connecting segment.
- Ignoring guide dots and drifting more than one x-height. Place guide dots before drawing and check drift after the line is complete; adjust dot placement next time.
- Using a pen that blots or skips, which creates false breaks. Test the pen on scrap paper first; use a pen that makes a consistent line on your paper.
Self-check rubric
- Continuity: the finger trace follows one path from start to end with no breaks.
- No-lift rule: the pen tip stays on the paper between the first and last mark.
- Feature loops: each feature is entered as a loop connected to the outer route.
- Placement drift: the largest distance from a feature center to its guide dot is one x-height or less.
- Convention compliance: the start point is at top midline and the line returns to the start.
- Valid alternatives: different letter styles, feature shapes, and loop orders are accepted if the convention and drift limits are met.
Questions and answers
Can the line cross itself?
Yes. Crossings are allowed and do not break continuity. Only lifting the pen breaks the rule.
Must the face be symmetrical?
No. Real faces are not perfectly symmetrical, and the rubric allows valid alternatives. Use guide dots to control drift rather than forcing symmetry.
How long should the line be?
There is no fixed length. A face height of 10 to 15 x-heights is a practical starting range; measure your own x-height and choose a value.
What if I make a mistake mid-line?
Keep the pen on the paper and continue. A detour or crossing can absorb the mistake. Judge the final line by continuity and drift, not by perfection.